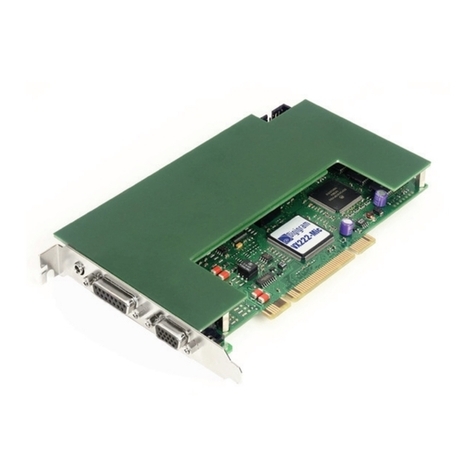
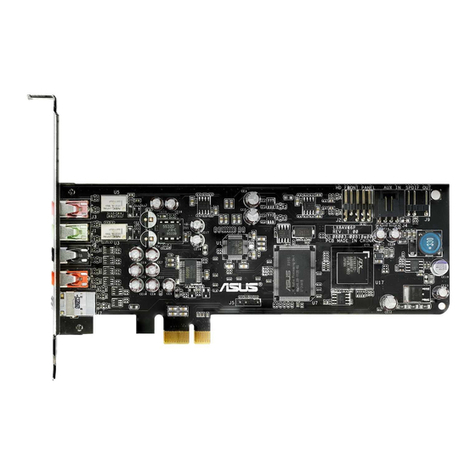
Asus PCI-AS300 User manual

R
PCI-AS300
SCSI/Audio MediaBus Card
USER'S MANUAL

ASUS PCI-AS300 User's Manual
II
USER'S NOTICE
Product Name: PCI-AS300
Manual Rev: 1.01
Release Date: January 1997
No part of this product, including the product and software may be reproduced,
transmitted, transcribed, stored in a retrieval system, or translated into any lan-
guageinanyformbyanymeanswithouttheexpresswrittenpermissionofASUSTeK
COMPUTER INC. (hereinafter referred to as ASUS) except documentation kept
by the purchaser for backup purposes.
ASUS provides this manual "as is" without warranty of any kind, either express or
implied, including but not limited to the implied warranties or conditions of mer-
chantability or fitness for a particular purpose. In no event shallASUS be liable for
any loss or profits, loss of business, loss of use or data, interruption of business, or
for indirect, special, incidental, or consequential damages of any kind, even ifASUS
has been advised of the possibility of such damages arising from any defect or error
in this manual or product. ASUS may revise this manual from time to time without
prior notice.
Products mentioned in this manual are mentioned for identification purposes only.
Product names appearing in this manual may or may not be registered trademarks
or copyrights of their respective companies.
The product name and revision number are both printed on the board itself. Manual
revisions are released for each board design represented by the digit before and
after the period of the manual revision number. Manual updates are represented by
the third digit in the manual revision number. For updated BIOS, drivers, or prod-
uctreleaseinformationyoumay visitASUS' home page at: http://www.asus.com.tw/
© Copyright 1996 ASUSTeK COMPUTER INC. All rights reserved.

ASUS PCI-AS300 User's Manual III
ASUS CONTACT INFORMATION
ASUSTeK COMPUTER INC.
Marketing Info:
Address: 150 Li-Te Road, Peitou, Taipei, Taiwan, ROC
Telephone: 886-2-894-3447
Fax: 886-2-894-3449
Email: [email protected]
Technical Support:
Fax: 886-2-895-9254
BBS: 886-2-896-4667
Email: [email protected]
WWW: http://www.asus.com.tw/
Gopher: gopher.asus.com.tw
FTP: ftp.asus.com.tw/pub/ASUS
ASUS COMPUTER INTERNATIONAL
Marketing Info:
Address: 721 Charcot Avenue, San Jose, CA 95131, USA
Telephone: 1-408-474-0567
Fax: 1-408-474-0568
Email: [email protected]
Technical Support:
BBS: 1-408-474-0555
Email: [email protected]
ASUS COMPUTER GmbH
Marketing Info:
Address: Harkort Str. 25, 40880 Ratingen, BRD, Germany
Telephone: 49-2102-445011
Fax: 49-2102-442066
Email: [email protected]
Technical Support:
BBS: 49-2102-448690
Email: [email protected]

ASUS PCI-AS300 User's Manual
IV
CONTENTS
I. INTRODUCTION..........................................................1
The PCI-AS300 SCSI/Audio MediaBus Card................................. 1
How this manual is organized.......................................................... 1
Item Checklist .................................................................................. 1
II. FEATURES ...................................................................2
PCI-AS300 Features ........................................................................ 2
System Requirements:................................................................ 2
Layout and Connectors of the PCI-AS300 ........................... 2
CD-Audio Connector Pin Definitions .................................. 2
III. INSTALLATION .......................................................3
Installation Steps.............................................................................. 4
1. Jumpers ........................................................................................ 4
Audio Adapter Amplifier ...................................................... 5
Audio Adapter Base I/O Addresses ...................................... 5
2. Install the Expansion Card .................................................... 6
3. Connect Cables...................................................................... 6
Audio Cables ........................................................................ 6
SCSI Cabling ........................................................................ 6
SCSI Cable Limits:............................................................... 6
SCSI Types ........................................................................... 7
Connecting Cables................................................................ 7
4. SCSI ID Numbers & Termination ......................................... 8
SCSI ID Numbers................................................................. 8
SCSI Termination ................................................................. 8
5. Configuring the SCSI Adapter .............................................. 9
The SCSISelect Configuration Utility.................................. 9
Configure/View Host Adapter Settings ................................ 10
SCSI Disk Utilities ............................................................... 10
Operating System Support.................................................... 10
CE Compliancy................................................................................ 11
Troubleshooting ............................................................................... 12
Cannot Boot from your SCSI Disk Drive .................................. 12
Hardware Setup - SCSI/Audio

ASUS PCI-AS300 User's Manual V
CONTENTS
IV.ADAPTEC SCSI SELECT .........................................15
Configuring the SCSI Adapter ......................................................... 15
Configure/View Host Adapter Settings ................................ 15
SCSI Disk Utilities ..................................................................... 15
IV.ADAPTEC EZ-SCSI UTILITY..................................17
Quick Start Instructions ................................................................... 17
Windows95 or WindowsNT....................................................... 17
Windows 3.x............................................................................... 17
DOS............................................................................................ 17
Troubleshooting Tips ....................................................................... 18
SCSI Device Troubleshooting.................................................... 18
Windows95/WindowsNT Troubleshooting................................ 18
Information for DOS/Windows 3.1x Users ..................................... 21
DOS and Windows3.1x Device Drivers..................................... 21
DOS and Windows3.1x ASPI Managers.................................... 21
DOS Formatting Utilities ........................................................... 22
Low-level Formatter (scsifmt).............................................. 22
Formatter and Partitioner (afdisk) ........................................ 23
Creative Labs ViBRA 16C Audio .....................................1
User's Notice.......................................................................2
Manual Information ................................................................... 3
Installation CD ........................................................................... 3
Installation CD Contents ...................................................... 3
VI. Audio Driver Installation............................................3
VII. Win95 Audio Driver ..................................................4
Configuration Manager .............................................................. 5
Creative PnP Configuration Manager (CTCM) ......................... 5
VIII. Win3.1x Audio Driver..............................................5
Audio Drivers............................................................................. 7
Environment Variables ............................................................... 11
SOUND Environment variable............................................. 11
BLASTER Environment Variable ........................................ 11
MIDI Environment Variable................................................. 12
Maximum Recording Rates for the Audio Hardware........... 12
V. Adaptec System Drivers..............................
84 pages
ASUS PCI-AS300 User's Manual
VI
FCC & DOC COMPLIANCE
FederalCommunications CommissionStatement
This device complies with FCC Rules Part 15. Operation is subject to the following
two conditions:
• This device may not cause harmful interference, and
• This device must accept any interference received, including interference that
may cause undesired operation.
This equipment has been tested and found to comply with the limits for a Class B
digital device, pursuant to Part 15 of the FCC Rules. These limits are designed to
provide reasonable protection against harmful interference in a residential installa-
tion. This equipment generates, uses and can radiate radio frequency energy and, if
not installed and used in accordance with manufacturer's instructions, may cause
harmful interference to radio communications. However, there is no guarantee that
interference will not occur in a particular installation. If this equipment does cause
harmful interference to radio or television reception, which can be determined by
turning the equipment off and on, the user is encouraged to try to correct the inter-
ference by one or more of the following measures:
• Re-orient or relocate the receiving antenna.
• Increase the separation between the equipment and receiver.
• Connect the equipment to an outlet on a circuit different from that to which
the receiver is connected.
• Consult the dealer or an experienced radio/TV technician for help.
WARNING: Theuseofshieldedcablesforconnectionofthemonitortothegraphics
card is required to assure compliance with FCC regulations. Changes or modifica-
tions to this unit not expressly approved by the party responsible for compliance
could void the user's authority to operate this equipment.
CanadianDepartment ofCommunications Statement
This digital apparatus does not exceed the Class B limits for radio noise emissions
from digital apparatus set out in the Radio Interference Regulations of the Cana-
dian Department of Communications.

ASUS PCI-AS300 User's Manual
1
I. INTRODUCTION
I. INTRODUCTION
The PCI-AS300 SCSI/Audio MediaBus Card
This is a brief guie on how to configure and install the PCI-AS300 adapter card in
your system. The card is a composite SCSI adapter and 16-bit audio card that uses
the ASUS MediaBus expansion slot. The MediaBus slot is a composite slot com-
prised of a 120-pin 5-volt PCI local bus slot and a 72-pin ISA slot extension. On the
PCI-AS300, the SCSI adapter part of the card connects to the PCI slot and the audio
card portion connects to the ISA slot extension.
How this manual is organized
This manual is divided into the following sections:
I. INTRODUCTION - This opening page.
II. FEATURES - Information and specifications concerning the PCI-AS300.
III.INSTALLATION - Instructions on setting up the PCI-AS300.
IV. AUDIO DRIVERS - Instructions on setting up the audio drivers.
Item Checklist
Please check that your package is complete. If you discover damaged or missing
items, please contact your retailer.
√PCI-AS300 MediaBus adapter
√50 Pin ribbon cable
√68 Pin ribbon cable
√This user's manual
√1 CD containing SCSI & audio drivers and utilities
√1 diskette containing SCSI drivers for WinNT
√1 diskette containing SCSI drivers for SCO Unix, Unix Ware
(About This Manual)

ASUS PCI-AS300 User's Manual
2
II. FEATURES
(Features)
II. FEATURES
PCI-AS300 Features
SCSI:
• PCI Ultra SCSI produced by the Adaptec AHA7880 SCSI Chipset
• Supports 8-bit Fast SCSI with up to seven devices via a 50-pin ribbon cable
connector
• Supports 16-bit Wide SCSI with up to 15 devices via a 68-pin cable connector
• Firmware configuration utility allows easy reconfiguration.
Audio:
• Creative Labs ViBRA 16C PnPAudio Chip
• Full Duplex Supports
• 16-bit or 8-bit PCM 5KHz to 44.1KHz
• Wave Table Upgradeable
• Connections for Sony, Panasonic, and Mitsumi CD-ROM audio.
• Connections for MIDI, audio input/output, microphone input
• Software Includes:
DOS and Window 3.1 Drivers
Windows 95 Driver
Wave Editor
Wave OLE
Quick CD
Mixer Control
System Requirements:
• ASUS motherboard with MediaBus revision 2.0

ASUS PCI-AS300 User's Manual
3
(Precautions)
III. INSTALLATION
1. Speaker out
2. Volume Control
3. Microphone Input
4. Line Input
5. Game Port / MIDI connector
6. Adaptec SCSI 7880 Chipset
7. Creative Labs 16C Chipset
8. Wave Table Upgrade
9. Panasonic CD Audio Input
1
2
3
5
4
67
891011121314151617
10. Mitsumi CD Audio Input
11. Sony CD Audio Input
12. PCSpeaker Input
13. 8-bit Fast SCSI 50 pin connector
14. 16-bit Wide SCSI 68 pin connector
15. Amplifier Enable / Disable Jumper
16. SCSI Activity LED
17. External LED
Layout and Connectors of the PCI-AS300
CD-Audio Connector Pin Definitions
PANASONIC SONY MITSUMI
1 Left Signal 1 Right Signal 1 GND
2 GND 2 GND 2 Left Signal
3 Right Signal 3 GND 3 GND
-------------------- 4 Left Signal 4 Right Signal
PC Speaker In PC Speaker Out
1 Mono Signal 1 Right Signal
2 GND 2 GND
-------------------- 3 Left Signal
-------------------- 4 GND
III. INSTALLATION

ASUS PCI-AS300 User's Manual
4
III. INSTALLATION
III. INSTALLATION
(Layout / Connect.)
Installation Steps
Before using your computer, you must follow the six steps as follows:
1. Set the card's jumpers
2. Install Expansion Card
3. Connect device cables
4. Configure SCSI ID numbers and termination
5. Setup the oncard SCSISelect Utility if you need to change the defaults
6. Setup the BIOS Software.
1. Jumpers
Some hardware settings are made through the use of jumper caps to connect jumper
pins (JP) on the card. The jumper settings will be described numerically such as
[----], [1-2], [2-3] for no connection, connect pins 1&2, and connect pins 2&3 re-
spectively. Pin 1 for our cards is always on top
Pin 1
or on the left
Pin 1
when hold-
ing the connectors to the left. A "1" is written besides pin 1 on jumpers with three
pins. The jumpers will also be shown graphically such as to connect pins
1&2 and to connect pins 2&3. Jumpers with two pins will be shown as
for short (On) and for open (Off). For manufacturing simplicity, the jumpers
may be sharing pins from other groups. Use the diagrams in this manual instead of
following the pin layout on the board. Settings with two jumper numbers require
that both jumpers be moved together. To connect the pins, simply place a plastic
jumper cap over the two pins as diagramed.
WARNING: Computer motheboards and components contain very delicate
Integrated Circuit (IC) chips. To protect the motherboard and other compo-
nents against damage from static electricity, you should follow some precau-
tions whenever you work on your computer.
1. Unplug your computer when working on the inside.
2. Hold components by the edges and try not to touch the IC chips, leads, or
circuitry.
3. Use a grounded wrist strap before handling computer components.
4. Place components on a grounded antistatic pad or on the bag that came with
the component whenever the components are separated from the system.

ASUS PCI-AS300 User's Manual
5
Audio Adapter Amplifier
You can Enable or Disable the audio adapter's amplifier feature using the following
jumpers. If you plan on connecting unamplified speakers to the card, enable the
amplifier. If you will use self-amplified speakers, disabling the amplifier on the
card will improve the sound quality.
Audio AdapterAmplifier Selector (JP4, 5)
(Def)
Amplifier EnableDisable
JP4 [2-3] [1-2]
JP5 [2-3] [1-2]
1
JP5
23JP4
Onboard AudioAmplifier (Enable / Disable)
1
JP5
23JP4
Enable Disable
III. INSTALLATION
(Jumpers)
III. INSTALLATION
Audio Adapter Base I/O Addresses
I/O addresses (or I/O address range) are areas of memory used by your computer's
microprocessor to distinguish among various peripheral devices connected to your
system when sending or receiving data. There are several such devices on your
audio card. These devices are listed with their factory default I/O addresses.
I/O Address occupied by theAudio Card.
I/O Address Range Usage
200H to 207H Game Port
220H to 233H Audio Interface
330H to 331H MPU-401 UART MIDI Interface
388H to 38BH FM Music Synthesizer

ASUS PCI-AS300 User's Manual
6
2. Install the Expansion Card
1. Unplug your computer. Open the system case and remove the slot
cover for the expansion slot you wish to use.
2. Align the connectors and insert the card into the expansion slot
firmly, making sure that the connectors are evenly inserted.
3. Install the card's mounting bracket to the system's case.
4. Attach SCSI cables from your internal SCSI devices and the audio
cable from your CD-ROM.
5. Close your system case and power on your computer in order to setup
the software.
3. Connect Cables
Once the card is installed in your system you should connect the cables for whatever
devices you want to attach to the card. These divide into two types, CD-ROM audio
cables and SCSI bus cables.
Audio Cables
As noted on the card diagram, there are connections for three types of CD-ROM audio
cables. If you have a CD-ROM installed in your system, connect it to the appropriate
connector. Note that many drives manufactured by vendors other than the three noted
have audio cables that are compatible with one of these three connectors. Review the
documentation that came with the drive for further information.
SCSI Cabling
The card has two SCSI cable connectors, one for 8-bit Fast SCSI and the other for
16-bit Wide SCSI. SCSI devices must be connected in a direct line forming a "bus"
with no branching.
SCSI Cable Limits:
SCSI TYPE Cable Length Limit
Single-ended SCSI 6 meters (19.7 feet)
Fast Single-ended SCSI 3 meters (9.8 feet)
WARNING: This adapter is for "Single-Ended" SCSI devices only. Do not
connect "Differential" SCSI devices to this adapter.
III. INSTALLATION
III. INSTALLATION
(Install / Cables)

ASUS PCI-AS300 User's Manual
7
SCSI Types
Type Specifications Ultra
SCSI 5MB/sec (8bit) N/A
Fast SCSI (II) 10MB/sec (8bit) 20MB/sec
Wide SCSI (III) 20MB/sec (16bit) 40MB/sec
Connecting Cables
1. When you connect a SCSI cable to this card, you must align the cable so that
the Pin 1 side of the cable connector is at the Pin 1 side of the cable connector
on the card. The two SCSI connectors use different cables. The Fast SCSI
connector connects to a 50-pin flat ribbon cable. The Pin 1 side of the ribbon
cable is marked with a colored edge and the Pin 1 side of the connector on the
card is labelled on the card. TheWide SCSI connector connects to a cable that
has a connector which can only be attached to the card in one orientation,
making the Pin 1 matchup automatic.
2. After you connect the cables to the host adapter, review the subject of SCSI
identification (ID) numbers and termination covered in Section 4. Make sure
that all devices you connect to the SCSI adapter have different ID numbers and
that only the SCSI adapter and the last SCSI device on each bus is terminated.
3. Connect a cable between the host SCSI adapter and an internal SCSI device
installed in your system. If there is more than one device, connect the addi-
tional devices with additional cables. You can connect up to seven devices to
the Fast SCSI bus and fifteen devices to the Wide SCSI bus.
III. INSTALLATION
(SCSI Cables)
III. INSTALLATION

ASUS PCI-AS300 User's Manual
8
III. INSTALLATION
III. INSTALLATION
(SCSI ID /Terminate)
4. SCSI ID Numbers & Termination
You must set the SCSI identification numbers and properly terminate the SCSI bus
before you can use the adapter and any peripherals connected to it.
SCSI ID Numbers
Each device on a SCSI bus must have a unique identification number. All SCSI
devices have some means of setting the ID number for the device. The SCSI adapter
must also have an ID number. The default number for the PCI-AS300 is 7. You
should use this unless you know there is a specific need to change it. Consult the
documentation for any other SCSI devices to see how to set their ID numbers. The
recommended numbers are:
SCSI Host Adapter: 7 (Default)
SCSI Hard Disk Boot Device: 0
2nd SCSI Hard Disk: 1
Devices connected to the 8-bit Fast SCSI bus can have numbers from 0 to 7. The
16-bit Wide SCSI bus allows numbers from 0 to 15. SCSI devices vary in how they
set the ID number. Some use jumpers, others have some kind of selector switch.
Refer to the documentation for any devices you install for details on how to set the
SCSI ID number.
SCSI Termination
Both ends of the SCSI bus must be terminated in order for the bus to operate prop-
erly. Since this card only supports internal devices, the SCSI adapter must be at one
end of the bus and must be terminated. The device on the other end of the bus daisy
chain must also be terminated.
Since this card supports two SCSI buses, the card termination can be set up to termi-
nate either one or both buses. The WIDE SCSI bus is divided into "Low" and "High"
bytes, the Low part being equivalent to the 8-bit Fast SCSI bus. If you will use both
SCSI connectors, you must change the default setting. The required settings are
shown in the chart below.
Connector/Bus Used Low High
50-pin connector only ON ON (Default)
68-pin connector only ON ON (Default)
50-pin & 68-pin connector OFF ON

ASUS PCI-AS300 User's Manual
9
To terminate the other end of either SCSI bus, you will need to refer to the documen-
tation for the device at the end of the bus for information on how to terminate the
device. Many devices use either jumpers or a switch to set termination. Others use
resistor modules that must be removed to unterminate the device. It is critical that
the last device, and only the last device be terminated in order of all of the devices
on the bus to operate correctly. This card supplies termination power to the SCSI
bus for devices that need it.
5. Configuring the SCSI Adapter
You probably will not need to change the default configuration of the PCI-AS300
SCSI adapter. In the event that you do need to, a configuration utility, SCSISelect, is
stored on the card. This menu driven utility allows you to control the configuration
of both the SCSI adapter and its interaction with devices connected to it.
After you have installed and connected devices to the card, reassemble your system
according to the instructions in your system documentation. Once your system is
assembled, turn on your computer. You should see a SCSI BIOS banner message
listing connected devices and their ID numbers. If everything is working properly,
you can go ahead and use your system. If you need to change the SCSI adapter
configuration on the PCI-AS300, or if you want to customize the control settings for
an individual SCIS device on the bus, you can run the SCSISelect configuration
utility.
The SCSISelect Configuration Utility
To access SCSISelect, press <CTRLA> when you boot the computer, or when you
see the BIOS banner message listing the attached devices. The SCSISelect screen
will come up. Instructions on how to move the cursor and select options are at the
bottom of the program window. You can select either Configure/View HostAdapter
Settings or SCSI Disk Utilities.
III. INSTALLATION
(Configuration)
III. INSTALLATION

ASUS PCI-AS300 User's Manual
10
Configure/View Host Adapter Settings
If you select the first option, the configuration screen will display. Pressing F6 at
this level will load the adapter's default settings. To make a change, select an option
and press Enter to display a list of possible settings for that option. To abandon
changes after you have made them, press <ESC> and then choose No when a mes-
sage appears asking if you will accept the changes made.
SCSI Disk Utilities
The SCSI Disk Utilities option displays information on SCSI IDs 0 through 15,
listing all devices on the bus including non-disk devices. When you select a device
from the list and press the <ENTER> key, another window pops up giving you the
option of selecting one of two sub-utilities, Format Disk or Verify Media. These
utilities are used for hard disk drives only and will have no effect on other non-disk
SCSI devices.
Format Disk is a SCSI low-level format utility. In general, SCSI hard disks have
already been low-level formatted when you get them, so you generally should not
need to use this.
Verify Media scans the selected drive media for defects, notifies you of any found
and gives you the option of reassigning bad blocks so that data will not be written to
them. Doing this before you start using a disk is a good idea.
Operating System Support
The PCI-AS300 supports both DOS/Windows under MS-DOS 5.0 and up, allowing
you to connect up to seven hard disk drives. You can used the suppliedAdapted EZ-
SCSI Windows utility to enable using non-disk SCSI devices such as scanners, tape
drives, or CD-ROM drives. It also allows mounting and removing removable me-
dia such as CD-ROMs and support for more than eight hard disks under MS-DOS
5.0 or later and more than two hard disks under earlier versions.
In addition, this card supports operating systems other than DOS, including Novell
NetWare, OS/2, OS/2 Warp, Windows NT, SCO Unix, and Unix Ware. You can
refer to the card's software documentation for more information on this.
III. INSTALLATION
III. INSTALLATION
(Utilities)

ASUS PCI-AS300 User's Manual
11
III. INSTALLATION
CE Compliancy
In order to comply with CD specifications, a core must be added to any cable that is
connected to the "Game Port."
(CE Compliancy)
III. INSTALLATION
15 Pin Game Port
CE Compliant Ferrite Core
Wind the cable around the
core one time as shown and
press the sides of the core
together until it locks.

ASUS PCI-AS300 User's Manual
12
Troubleshooting
In the event that you have problems getting the PCI-AS300 installed and working
properly, make sure that:
• all the SCSI devices are turned on.
• all the cables connects the SCSI devices in a series.
• all the SCSI devices have a unique ID number on that BUS
• the last SCSI device is terminated.
• the BIOS setup correctly identifies the PCI part of the MediaBus slot
Cannot Boot from your SCSI Disk Drive
If you have any non-SCSI hard disk drives installed in your system, the master non-
SCSI drive will be seen as the boot drive. If there are only SCSI drives installed in
your system and will not boot from the primary drive, check the following:
• Make sure that all hard disk type entries in the BIOS Setup utility's CMOS
setup are set to "None" or "No Drives Installed."
• Make sure the boot drive's SCSI ID is set to 0
• Check that the drive has been properly formatted for the operating system you
are using and that the operating system is installed.
Ifnoneoftheabove solves the problem,back-upthedriveandtryusing the SCSISelect
utility to perform a low-level format and verification and then set an active partition
for the operating system you are using and format the drive using your operating
system's format command.
(Troubleshooting)
III. INSTALLATION
III. INSTALLATION

R
PCI-AS300
SCSI/Audio MediaBus Card
USER'S MANUAL
Adaptec SCSI Drivers & Utilities

14 ASUS PCI-AS300 User's Manual
(This page was intentionally left blank)
Table of contents
Other Asus Sound Card manuals

Asus
Asus Audio Card Xonar D2X User manual

Asus
Asus MIO User manual

Asus
Asus XONAR U7 MKII User manual

Asus
Asus Xonar DSX User manual

Asus
Asus Audio Card Xonar D2X User manual

Asus
Asus Xonar DGX User manual

Asus
Asus Essence STX II User manual

Asus
Asus Xonar U7 User manual

Asus
Asus Audio Card Xonar D2 User manual

Asus
Asus Xonar U7 User manual

Asus
Asus XONAR DX User manual

Asus
Asus XONAR PHOEBUS User manual

Asus
Asus XONAR ESSENCE - Sound Card - 192 kHz User manual

Asus
Asus XONAR ESSENCE ST User manual

Asus
Asus Xonar U5 User manual

Asus
Asus PCI Express Audio Card Xonar DX User manual

Asus
Asus XONAR DG User manual

Asus
Asus Xonar DG SI User manual

Asus
Asus Xonar D-Kara User manual

Asus
Asus Xonar U3 PLUS User manual