manuals.online logo
Brands
  1. Home
  2. •
  3. Brands
  4. •
  5. Atag
  6. •
  7. Ventilation Hood
  8. •
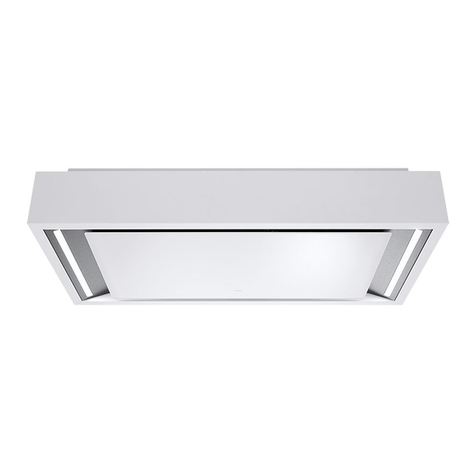
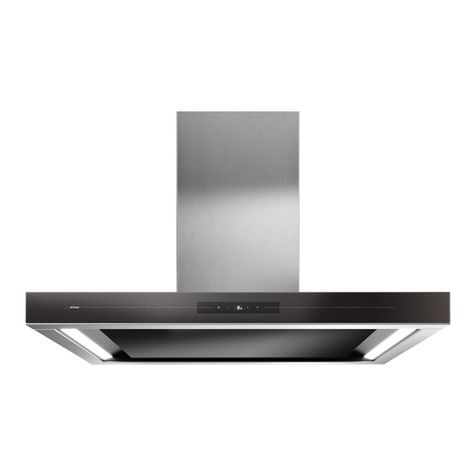
  9. Atag ES1011Z User manual

Atag ES1011Z User manual

Technische Daten
Typennummer: siehe Typenschild in
der Haube
Energieart: 230 V - 50 Hz
Anschlusswert: siehe Typenschild
Abmessungen (BxHxT): 790/1060 x 1200
x 700 mm
Dieses Gerät entspricht den geltenden CE-
Richtlinien.
Externe Motoren
Achtung: Wenn ein Gerät mit externem Motor
benutzt wird, so empfiehlt ATAG, einen der
folgenden externen Motortypen zu benutzen:
WA111B5U WA300B5U
WA111C5U WA300C5U
ASVM0021 AS000387
ASVM0025 ASVM0023
Abluftführung
Die Abluftführung darf keinesfalls an einen Kanal
angeschlossen werden, der auch für andere
Zwecke dient.
Denken Sie an die örtlich geltenden Vorschriften
in Bezug auf die Belüftung von Gasgeräten.
Der Abluftkanal kann direkt durch die Mauer nach
draußen führen, sofern die Maueröffnung durch
eine Mauerblende vor dem Einregnen und dem
Eindringen von Blättern und dgl. geschützt wird.
Der Abluftdurchlass darf durch die Mauerblende
maximal 20% eingeschränkt werden. Wir
empfehlen, für einen möglichst großen
Abluftkanal zu sorgen. Ein geringerer
Durchmesser führt zu geringerer Absaugleistung
und höherem Geräuschpegel.
Ein Bogen sorgt für Widerstand. Sorgen Sie
darum dafür, dass der Kanal möglichst gerade
verlegt ist und möglichst wenig Bogen hat.
Ziehen Sie das Flexrohr soweit wie möglich aus.
Kontrollieren Sie vor dem Bohren, ob nicht
Installationsleitungen vorhanden sind.
Der Abluftstutzen hat einen Durchmesser von
150 mm. Vorzugsweise sollte das Abluftrohr auch
diesen Durchmesser haben. Zum Gerät wird ein
Reduzierstück von 150 mm auf 120 mm zum
Anschluss an ein Abluftrohr von 120 mm
geliefert.
ATAG liefert Zubehör für Abluftkanäle von
Dunstabzugshauben. In der Preisliste finden Sie
eine Übersicht des Sortiments mit den
dazugehörigen Typennummern.
Elektrischer Anschluss
230 V AC – 50 Hz – 130 W
Die Hausanlage, an die das Gerät angeschlossen
ist, muss den örtlichen und den
Landesvorschriften entsprechen.
Nach Montage der Dunstabzugshaube muss der
Stecker erreichbar sein oder muss es möglich
sein, die Dunstabzugshaube mit einem
zweipoligen Schalter mit Kontaktöffnungen von
3mm spannungslos zu machen.
Achten Sie beim Anschluss der elektrischen
Verbindungen darauf, dass die Steckdose geerdet
ist und dass die Spannung und Frequenz mit den
Werten auf dem Typenschild übereinstimmen.
Eine beschädigte Zuleitung muss vom
Kundendienst des Herstellers oder gleichwertig
qualifizierten Personen ausgetauscht werden, um
Gefahren auszuschließen.
Warnung: Dieses Gerät muss geerdet sein.
AllgemeinAllgemein / general
Allgemein
Einbaumaße / building-in dimensions
700
1200
60 250 240
ø150/120
1000
514
790-1060
650
Erforderlicher Freiraum /
clearance required
Der Abstand zwischen der Unterseite der
Dunstabzugshaube und dem Kochfeld muss
mindestens 65 cm betragen.
The distance between the underside of the
extractor hood and the hob should be at
least 65 cm.
Sicherheit / safety
Dieses Gerät darf nur von einem anerkannten
Elektroinstallateur angeschlossen werden.
Achtung: Sorgen Sie für genug Zufuhr von
Frischluft, wenn eine gleichzeitig eingeschaltete
Dunstabzugshaube und eine Heizquelle (z.B.
Gasherd) die Luft aus dem gleichen Raum
beziehen. Der höchstzulässige Unterdruck
beträgt 4 Pa.
This appliance may only be connected by a
registered electrical installer.
Attention: Make sure that there is a sufficient
supply of fresh air if an extractor hood and a heat
source (e.g. gas cooker) that both consume air
from the same room are switched on at the same
time. The maximum permitted underpressure is
4 Pa.
700000256005
Installationsanweisungen
Dunstabzugshaube Inselmodell
installation guide
extractor hood island model
ES1011Z
the discharge
The discharge may under no circumstances be
connected to a duct that is also used for other
purposes.
Bear in mind the local regulations concerning the
ventilation of gas appliances.
The discharge may pass straight through the wall
to the outside, provided that the wall opening is
protected against the entry of rain, leaves and the
like by a grating. The passage of the discharge
may not be restricted by more than 20% by the
wall grating.
We advise the use of as large a discharge duct as
possible. A duct with a smaller diameter will have
a low extraction capacity and produce higher
noise levels.
Bends produce resistance. Make sure that the
duct has a smooth run and has as few bends as
possible. Draw the flexible pipe out as far as
possible. Before starting to drill, check that there
are no installation pipes (for gas, water, etc.)
present.
The discharge stump has a diameter of 150 mm.
It is best if the discharge pipe also has this
diameter.
A reducing piece (150 mm to 120 mm) is supplied
with the appliance for connection to a 120 mm
discharge pipe.
ATAG supplies accessories for the discharge
ducts of extractor hoods. You will find an
overview of the range with the accompanying
type numbers in the price list.
electrical connection
230 V AC – 50 Hz – 130 W
The domestic supply to which you connect the
appliance should conform to national and local
regulations.
The plug should be accessible after the extractor
hood is fitted or it should be possible to
disconnect the extractor hood from the mains by
means of a bipolar switch with a contact gap of
3 mm.
When making the electrical connections, take
care that the socket is earthed and that the
voltage and frequency correspond to the values
given on the data plate.
If the connection cable becomes damaged, it
should be replaced by the manufacturer’s service
department or by a person with equivalent
qualifications, in order to prevent dangerous
situations from arising.
Warning: This appliance should be earthed.
general
technical information
Type number: see data plate in the
hood
Power supply: 230 V - 50 Hz
Connected load: see data plate
Dimensions (hxwxd): 790/1060 x 1200
x 700 mm
This appliance conforms to current CE guidelines.
External motors
Attention: When an appliance with an external
motor is used, ATAG advises that one of the
following types of external motors is used:
WA111B5U WA300B5U
WA111C5U WA300C5U
ASVM0021 AS000387
ASVM0025 ASVM0023
general
disposal of packaging and
appliance
The appliance’s packaging is recyclable.
The following may be used:
– cardboard;
– polyethylene film (PE);
– CFC-free polystyrene (PS rigid foam).
Dispose of these materials responsibly and in
accordance with government regulations.
The government can also provide information
about the responsible disposal of discarded
domestic appliances.
Entsorgung von Verpackung
und Gerät
Die Verpackung des Gerätes ist wiederverwertbar.
Folgendes kann benutzt worden sein:
– Pappe;
– Polyethylenfolie (PE);
– FKW-freies Polystyrol (PS-Hartschaum).
Diese Materialien sind umweltgerecht und nach
den geltenden behördlichen Vorschriften zu
entsorgen.
Die Behörden können Ihnen auch Informationen
über die umweltgerechte Entsorgung Ihrer
ausgedienten Hausgeräte erteilen.
20
650
409
2. Drücken Sie die Dübel in die Befestigungslöcher und
schieben Sie den Abluftkanal in die Öffnung in der
Decke.
2. Push the plugs into the fixing holes and slide the
discharge duct into the hole in the ceiling.
3. Drehen Sie 2 Muttern in entgegengesetzter Richtung
auf die Stiftschrauben. Drehen Sie die Stiftschrauben in
die Dübel in der Decke.
3. Screw 2 nuts onto the threaded ends in the opposite
direction. Screw the threaded ends into the plugs in the
ceiling.
4. Lassen Sie 20 mm der Stiftschrauben aus der Wand
herausragen. Entfernen Sie die Muttern.
4. Leave 20 mm of the threaded ends projecting out of the
ceiling. Remove the nuts.
2. Schieben Sie die Montagehalterung soweit in das obere
Teleskoprohr, bis sich die untere Kante im richtigen
Abstand zur Arbeitsplatte befindet.
2. Slide the mounting socket into the upper telescopic pipe
until the bottom edge is at the correct distance from the
worktop.
3. Befestigen Sie die Montagehalterung mit den Ringen
und Muttern.
3. Fasten the mounting socket using the washers and
nuts.
2. Schieben Sie den Motormodul von unten nach oben in
die Montagehalterung.
2. Slide the motor module upwards into the mounting
socket.
3. Schieben Sie den Motormodul etwas nach hinten, so
dass er in der Montagehalterung hängen bleibt.
3. Slide the motor module backwards a little, so that it
catches in the mounting socket and remains suspended.
4. Montieren Sie die beiden vorderen Schrauben.
4. Fix the front two screws.
1. Markieren Sie die Montagelöcher mit Hilfe der
Schablone an der Decke. Bohren Sie die
Befestigungslöcher (4x10 mm).
1. Mark the mounting holes on the ceiling using the
template. Drill the fixing holes (4x10 mm).
1. Bringen Sie das obere Teleskoprohr über den
Stiftschrauben an. Bringen Sie die Ringe an und ziehen
Sie die Mutter an.
1. Place the upper telescopic pipe over the threaded ends.
Put the washers on and tighten the nuts.
1. Drehen Sie die beiden Schrauben (4,2x9,5) zur Hälfte in
die hinteren Löcher im Motormodul.
1. Screw two screws (4.2x9.5) halfway into the rear holes
in the motor module.
6. Schieben Sie den Abluftkanal auf den Motormodul.
6. Slide the discharge duct onto the motor module.
7. Sorgen Sie für die erforderlichen Steckverbindungen.
7. Make the necessary plug connections.
5.
Sorgen Sie für waagerechte Aufhängung des Motormoduls
und ziehen Sie die beiden hinteren Schrauben fest.
5. Level the motor module and tighten the rear two
screws.
2.
Halten Sie das Rohr hoch, indem Sie vorsichtig einen
Schraubendreher in das hierfür gedachte Loch in der
Vorderseite des Motorgehäuses stecken
.
2.
Hold the pipe up by carefully pushing a screwdriver into
the hole that has been made for this purpose in the front
of the motor housing.
3. Montieren Sie die Haube am Motormodul.
3. Fit the hood to the motor module.
1. Schieben Sie das untere Teleskoprohr über den
Motormodul nach oben.
1. Slide the lower telescopic pipe upwards over the motor
module.
Montage / fitting
Markieren und montieren des Befestigungsmaterials / marking and fitting the fixing materials
Montage von Teleskoprohr und Montagehalterung / fitting telescopic pipe and mounting socket
Unteres Teleskoprohr und Haube aufhängen / lower telescopic pipe and hood
Montage / fitting
Montage / fitting
Montieren des Motormoduls / fitting motor module
Montage / fitting
4. Haken Sie zuerst die Rückseite der Haube von unten her
in den Motormodul.
4. First hook the rear of the hood into the motor module
from underneath.
6.
Sorgen Sie für die Steckverbindungen in der Haube.
6.
Make the plug connections in the hood.
7. Lassen Sie das untere Teleskoprohr in die Haubenkante
gleiten. Befestigen Sie die Filter und testen Sie die
Funktion der Dunstabzugshaube.
7. Allow the lower telescopic pipe to drop, so that it slides
into the edge of the hood. Attach the filters and check that
the extractor hood works.
5. Heben Sie die Vorderseite hoch. Die mitgelieferten Bolzen
(M5x12) können jetzt eingedreht werden. Richten Sie mit
diesen Bolzen die Haube waagerecht aus.
5. Lift the front up. The bolts supplied (M5x12) can now be
screwed in. Level the hood using these bolts.

Other Atag Ventilation Hood manuals

Atag WS90 MM Series Technical manual

Atag

Atag WS90 MM Series Technical manual

Atag WS7011MAM User manual

Atag

Atag WS7011MAM User manual

Atag WV6211NM User manual

Atag

Atag WV6211NM User manual

Atag WS602 JM Series User manual

Atag

Atag WS602 JM Series User manual

Atag LI3HFA Technical manual

Atag

Atag LI3HFA Technical manual

Atag WU90 PMM Series User manual

Atag

Atag WU90 PMM Series User manual

Atag WM311T User manual

Atag

Atag WM311T User manual

Atag WI6255BC User manual

Atag

Atag WI6255BC User manual

Atag cubic User manual

Atag

Atag cubic User manual

Atag WS62 RCL Series User manual

Atag

Atag WS62 RCL Series User manual

Atag WS6111PM Operation manual

Atag

Atag WS6111PM Operation manual

Atag WI6055BM Operation manual

Atag

Atag WI6055BM Operation manual

Atag ES1011SAM User manual

Atag

Atag ES1011SAM User manual

Atag WV6011AM Operation manual

Atag

Atag WV6011AM Operation manual

Atag WU7111HM User manual

Atag

Atag WU7111HM User manual

Atag ES9011QM Technical manual

Atag

Atag ES9011QM Technical manual

Atag WS90211JM/A03 User manual

Atag

Atag WS90211JM/A03 User manual

Atag WH255P/W3.0 User manual

Atag

Atag WH255P/W3.0 User manual

Atag WS9111FM User manual

Atag

Atag WS9111FM User manual

Atag WU70211RM User manual

Atag

Atag WU70211RM User manual

Atag WS9074MG User manual

Atag

Atag WS9074MG User manual

Atag WS9211EM User manual

Atag

Atag WS9211EM User manual

Atag WS9211RCL User manual

Atag

Atag WS9211RCL User manual

Atag EG411X Technical manual

Atag

Atag EG411X Technical manual

Popular Ventilation Hood manuals by other brands

Blaupunkt 5DB66250 Instructions for installation and use

Blaupunkt

Blaupunkt 5DB66250 Instructions for installation and use

Beko CFB 6310 W user manual

Beko

Beko CFB 6310 W user manual

Spagna Vetro Professional 200PS Installation guide and user's manual

Spagna Vetro

Spagna Vetro Professional 200PS Installation guide and user's manual

AEG DD 8696 user manual

AEG

AEG DD 8696 user manual

Hoover HHT6300/2X/1 instruction manual

Hoover

Hoover HHT6300/2X/1 instruction manual

AEG Electrolux DD 8696 OPERATING AND INSTALLATION Manual

AEG Electrolux

AEG Electrolux DD 8696 OPERATING AND INSTALLATION Manual

Bertazzoni Heritage Series installation instructions

Bertazzoni

Bertazzoni Heritage Series installation instructions

Heinner HTCH-F400IX manual

Heinner

Heinner HTCH-F400IX manual

Pelgrim GWA721KOR Instructions for use

Pelgrim

Pelgrim GWA721KOR Instructions for use

Faber SOLARIS EG6 LED X A100 instruction manual

Faber

Faber SOLARIS EG6 LED X A100 instruction manual

Zanussi ZHP615X installation manual

Zanussi

Zanussi ZHP615X installation manual

Belling BEL CHIM 603PYR user manual

Belling

Belling BEL CHIM 603PYR user manual

Tricity Bendix Visor CH 520 Operating and installation instructions

Tricity Bendix

Tricity Bendix Visor CH 520 Operating and installation instructions

Bosch DIA09E751B Installation Instructions Instructions for installation and use

Bosch

Bosch DIA09E751B Installation Instructions Instructions for installation and use

Electrolux EFC 9543 instruction manual

Electrolux

Electrolux EFC 9543 instruction manual

IKEA LUFTIG instruction manual

IKEA

IKEA LUFTIG instruction manual

Fagor L3-MA manual

Fagor

Fagor L3-MA manual

Whirlpool UXT2030AD user manual

Whirlpool

Whirlpool UXT2030AD user manual

manuals.online logo
manuals.online logoBrands
  • About & Mission
  • Contact us
  • Privacy Policy
  • Terms and Conditions

Copyright 2025 Manuals.Online. All Rights Reserved.