manuals.online logo
Brands
  1. Home
  2. •
  3. Brands
  4. •
  5. Atari
  6. •
  7. Desktop
  8. •
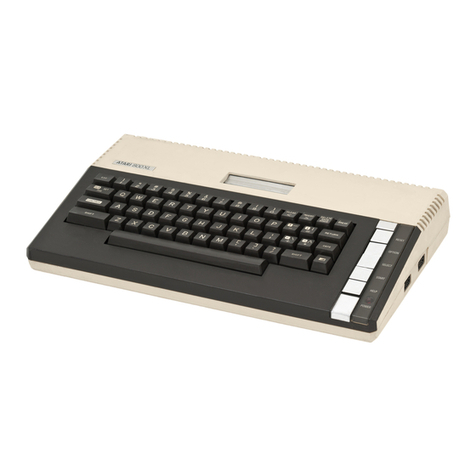
  9. Atari 600XL User manual

Atari 600XL User manual

IN
ATARI$&aaX[M
MGME=COMPtlTER========I
OWtSlERS GOlDE
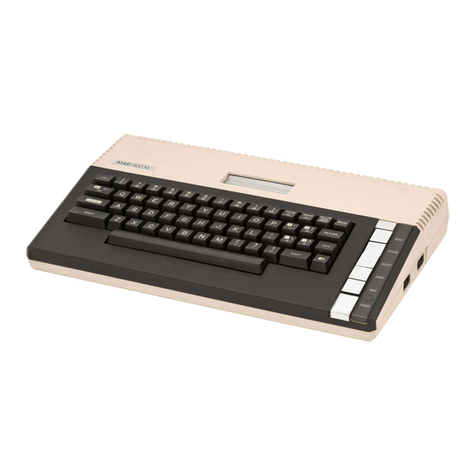
The stylish and functional
ATARI 600XL Home Com-
puter is your entree into
the exciting world of the
information revolution.
Using just the console
and your television, you
can write and edit on the
screen, create art and at-
tractive graphics, and
program with ATARI
BASIC, a built-in com-
puter language. The
practical, low-profile key-
board is easy to master,
because it is set up just
like a typewriter, but with
a few extra features.
Your computer gives
you access to a large,
versatile family of ATARI
products and users.
You'll find a copy of the
latest ATARI catalog
packed with the console.
With the right acces-
sories and programs, you
can compose music, play
video games, communi-
cate with other ATARI
Home Computer owners,
balance your budget, or
keep up with the stock
market. You are limited
only by your needs and
imagination.
On the following
pages, you'll find out how
easy it is to connect the
computer to your televi-
sion, and how simple it is
to operate once it's
turned on.
You're no longer a
spectator in the Com-
puter Age ... you're
about to become part of
the action
MEET THE ATARI 600XL HOME COMPUTER 3
HOOKING IT UP 5
CHECKING IT OUT 7
FINDING THE SOFTWARE THAT'S RIGHT FOR YOU 9
HOW TO TELL YOUR COMPUTER WHAT TO DO 10
KEYBOARD WIZARDRY 10
AT YOUR COMMAND 11
ATARI ART AND GRAPHICS ' 13
A HOST OF CHARACTERS FROM OTHER COUNTRIES 14
EXPLORING ATARIBASIC 15
BUILDING A SYSTEM : 17
A CLEAN, SAFE COMPUTER ENVIRONMENT 19
YOU ARE NOT ALONE 19
. IN CASE OF DIFFICULTY 20
.2
• Cartridge Slot
Plug-in cartridges pro-
vide quick and easy pro-
gram loading
• Expansion
Connection
For adding memory or
plugging future acces-
sories or peripherals into
your computer system
~u~;~~a~~~iut/
,11 1
Connects peripheral ~
equipment such as disk •••
drives, program record-
--------t--
ers and printers to your ""
computer
-
~------ • Power On/Off Switch
• TV Channel Switch
Selects channel 2
or
channel 3 for the clearest
picture
• Controller Ports
For connecting touch
'----'--- tablets, key pads,
joysticks, and paddle
controllers
·5
All you need to set up
your ATARI 600XL Home
Computer is a television
and a screwdriver. Atari
provides the rest: the
console, a TV switch box,
a cable for connecting
the computer and the
television, and an AC
Power Adapter. Set-up
takes just a few minutes.
Remove protective, .
clear plastic covers from
around the keyboard
when you unpack the
computer.
• Installing the TV
Switch Box
1.
Disconnect the VHF
antenna or cable TV line
from your television set
and reconnect it to the
side of the TV Switch box
labeled ANTENNA. If the
antenna has a flat, twin-
lead cable, connect it to
the 300-0HM screw ter-
minals on the switch box.
If it's a round cable-a
coaxial cable from an ex-
ternal antenna or a thin
cable from a built-in
antenna-attach it to the
75 OHM threaded
connector.
2.
Connect the short,
twin-lead cable on the TV
Switch box to the VHF
connection on your TV
set. If the VHF connec-
tion on your set has two
screw-type terminals,
secure the two cable
leads to the terminals. If
the VHF connection on
your TV is a round
threaded terminal, the
TV Switch Box cable
must be attached to the
adapter supplied with
your TV set.
First, connect the twin
leads of the TV Switch
Box cable to the two
screw terminals on the
adapter. Then slip or
screw the adapter onto
the threaded terminal
your TV set, making sure
that the pin in the adapt-
er makes contact. If no
VHF adapter was sup-
plied with your TV set,
you can purchase one at
a video store.
3.
Peel the protective
cover from the self-
adhesive square on the
TV Switch Box and press
the switch box to the
back of your television
set so it sticks to the
cabinet.
If the antenna con-
nected to the TV Switch
box uses a flat, twin-lead
cable, you're now fin-
ished installing the TV
Switch Box; go to step 5.
4.
If your antenna uses a
round (75-0HM) cable
and you did not use the
adapter described in
step 2, you may need to
adjust your TV set so it
can accept the 300-0HM
signal from the TV Switch
Box. Make the necessary
adjustments as shown in
the illustrations.
If the back of your set
looks like this, push the
switch to the 300-0HM
(3000) position.
~H~
DIIill
VHF
If it looks like this,
loosen the screws hold-
ing the U-shaped slider
and move the slider to
the position marked 300
OHM (or 3000).
~H~ ~
VHF
If it looks like this, in-
sert the tiny wire into the
hole in the center of the
antenna terminal.
UHF
~~
VHF
• Connecting Your
Computer Console to the
TV Switch Box
5.
Plug one end of the
connecting cable into the
terminal marked COM-
PUTER on the TV Switch
Box. Plug the other end
into the jack labeled
SWITCH BOX on your
computer.
6. Move the sliding
switch on the TV Switch
Box to the COMPUTER
position. [Don't forget to
slide this switch back to
the TV position when
you're finished using
your computer and want
to watch regular TV.]
7. Connect the two-
pronged plug on the AC
Power Adapter to an
electrical outlet. The
round plug slips into the
POWER IN jack on the
back of your computer.
8. Turn on your TV set
and tune it to Channel 2
or 3-whichever channel
is weaker in your area.
9.
Set the Channel Select
Switch on the back of the
computer (next to the
POWER IN jack) to the
same channel. After you
turn on your computer,
you may need to adjust
the fine-tuning knob on
your TV set to improve
reception.
10.
Your ATARI 600XL
Home Computer is now
ready to use. The main
power switch is located
on the far right side of
the rear of the console.
A few seconds after you
turn your computer on,
you'll be greeted by the
word READY from the
ATARI BASIC language.
If you leave the com-
puter on one display long
enough, the colors on
your TV screen begin
changing periodically.
This is normal and occurs
to protect your TV set.
Please note that when
you turn off the compu-
ter, you must wait 3 to 5
seconds before turning it
back on.
6
When you turn on your
ATARI 600XL, it automati-
cally tests itself. You also
have the option of double
checking the system with
a series of visual and
sound tests.
These tests check the
computer's memory,
sound and colors, and
keyboard to ensure that
they are working proper-
ly. Before you use the
computer the first time,
you should put the com-
puter through the entire
self-test routine.
Thereafter, you'll only
need to run the tests
occasionally, because
each time the computer
is turned on, it runs a test
on its memory circuits. If
the memory circuits ever
fail the automatic test, the
first thing you'll see on
your TV screen are the
words MEMORY TEST
and several red and
green squares and rec-
tangles. The built-in
BASIC and any software
-cartridge, diskette or
cassette-that you try to
use will be ignored by
the computer.
If this happens, your
computer needs service.
Contact your ATARI
Home Computer retailer
or factory authorized
ATARI SERVICE
sM
center.
• The Self Tests
Start the self tests by
either holding down the
OPTION
key while turn-
ing the computer on or
by typing BYE when
BASIC says READY. A
SELF TEST menu will ap-
pear on the screen. Like
a restaurant menu, this
offers you a list ofselec-
tions to choose from: ALL
TESTS, MEMORY TEST,
AUDIO-VISUAL TEST,
and KEYBOARD TEST.
Press
SELECT
to choose
which test you want, then
press
START
to begin.
Press
HELP
to return to
the SELF TEST menu.
When you select ALL
TESTS, the computer first
checks its memory, with
audio-visual and key-
board tests automatically
following. The computer
does everything for you.
The tests are repeated
until you press
HELP
to
return to the menu. Press
RESET
to stop tests and
return to ATARI BASIC.
• Memory Test
Memory makes it possi-
ble for a computer to
store information which
can be recalled when
necessary. When you
select this test, you're
telling the computer to
check both its Read-Only
Memory (ROM) and its
Random-Access Memory
(RAM).
ROM is permanent,
noneraseable memory in
which your computer's
operating system is
stored. If anything is
wrong with it, your corn-
puter may not operate
properly. RAM is the
memory your computer
has available for pro-
grams you load into it or
write yourself.
The memory test
works a little like a stop-
light. Two rectangular
color bars appear on the
screen when the ROM is
tested. If the bars turn
green, the ROM is in
good condition and you
may proceed. A red col-
or bar means STOP: Your
computer's ROM is mal-
functioning, and you
should contact your
ATARI Home Computer
retailer or Factory
Authorized Service
Center. .
During the RAM test,
16
small color squares
appear one by one on
your screen. Each square
represents a portion of
RAM that is being used
by your computer. As
each section of RAM is
tested, the corresponding
square turns white, then
green if the section is
good. If none of the
squares turn red, the
RAM in your computer
is properly functioning.
• Audio- Visual Test
The audio-visual self test
checks your computer's
four programmable
sound voices and its col-
or and graphics
capabili-
ty. A musical staff and
treble clef appear on the
screen above the num-
ber of the voice being
tested. Six notes are
played and displayed on
your TV screen. The six
notes repeat once for
each of the four voices.
If a voice number
appears but you don't
hear music, that voice is
not working properly.
The colors displayed
should be consistent dur-
ing each test.
• The Keyboard Test
You work with two key-
boards when you select
this test, the one under
your fingertips and a fac-
simile that appears on the
screen. When you press
a key on the console, a
corresponding key on the
TV screen flashes in in-
verse video (a blue char-
acter on a white back-
ground) and a note
sounds. The space bar
and certain keys are
already in reverse video,
so pressing one of them
changes the matching
key on the screen to nor-
mal video. If nothing
hap-
pens on the screen when
you press a key, that key
is not working.
The keys in the top
row of the screen key-
board are located on the
far right side of your
computer keyboard. Dis-
regard keys numbered
lA. Reading from left to
right, the keys in the
screen's top row include:
RESET, START, SELECT,
OPTION, four numbered
keys, HELP,REVERSE
VIDEO ( ~ ), and
BREAK. Otherwise, the
two keyboards have the
same arrangement of
keys.
The SHIFT and CON·
TROL keys flash only
when pressed simulta-
neouslywith another key.
There are three keys
that do not flash or sound
that terminate the test
when pressed. HELP
returns you to the SELF
TEST menu. RESET
returns you to BASIC,
and pressing BREAK
evokes no response.
8
Software adapts the com-
puter to a specific job,
whether it's storing
names and addresses,
acting as your personal
bookkeeper, or provid-
ing you with a video ar-
cade in your living room.
It's up to you to select
which ready-to-use soft-
ware you need.
• Thanks for the
Memory
The amount of memory in
a computer determines
how much data it can
store. Your 16KATARI
600XL Home Computer
has plenty of memory for
most purposes, but cer-
tain types of software re-
quire more. For example,
the popular ATARI Book-
keeper" program re-
quir-es 48K RAM. If you
decide to use such soft-
ware, purchase an
expansion Memory
Module"
from your
Atari retailer.
*
• Installing a Cartridge
Many games, computer
applications, and pro-
gramming languages
come in the form of car-
tridges. When you are
ready to start your work
or play, simply insert the
cartridge firmly with the
label facing you into the
cartridge slot on top of
the console. If you have
just been using another
software program on the
computer, press
RESET
to clear the computer's
memory after inserting
the new program
cartridge.
*estimated availability:
second half of 1983.
You communicate with
your computer through
the ATARI600XLHome
Computer's easy-to-use
keyboard, which is set up
like a typewriter. You
can do a lot more, how-
ever, than just type on
this keyboard.
.You can throwaway
your ink eraser and edit-
ing pencils, for you can
now move and transform
text and computer pro-
grams on the screen with
a few keystrokes. To cor-
respond with a pen pal in
his native French or write
a report in Spanish, you
can use an array of inter-
national alphabetic char-
acters. You can use the
ATARI 1O20™40-Column
Color Printer/ Plotter, the
ATARI lO25™80-Column
Printer, and theATARI
lO27™Letter-Quality
Printer to print interna-
tional characters. You
can even display graphic
symbols to create art or
make charts and other
presentations more inter-
esting and appealing.
Refer to the manual that
comes with each printer
for specific instructions.
On the next few pages
you'll find the simple
commands- keystrokes
or keystroke' combina-
tions-that enable you to
tell your computer to per-
form the operations you
wish.
The white square you see
on the screen is the cur-
sor;
it shows you "where
you are" on the display.
You use some keys on
the computer keyboard
the same way you would
on a typewriter. The
SHIFT
key capitalizes let-
ters, and TAB moves the
cursor quickly across
your screen to predeter-
mined stops.
Beyond these basics,
there are a number of
keys that allow you to
reach into a bag of
editing tricks. The
CON-
TROL
and
SHIFT
keys
play important roles in
screen editing and in
generating both graphics
and international char-
acters. They help you
move the cursor, delete
or insert individual
characters or entire
sentences, or change
from uppercase to lower-
case letters. To perform
a function, another key
must be pressed while
holding down
CONTROL
or
SHIFT.
The chart on the fol-
lowing two pages shows
you how to change the
way information is dis-
played on the screen.
A Few Comments About
the Chart:
Since certain key
functions may be rede-
. fined by certain pro-
grams, always consult
your program owner's
guide for further help.
+10
Chooses among variations Usually interrupts whatever
OPTION within a program. function the computer is
performing; refer to in-
dividual program instruc-
Stops the computer in the tions for its exact function.
RESET middle of what it's doing
and returns the program to Varies from program to pro-
its opening screen. It does gram; for example, ESC
not usually erase your work may be used to take you
in RAM memory. RESET from one menu to another.
sometimes has undesirable
side effects, such as interfer- Controls a variety of
ing with the closing of open features when pressed
DOS files. Generally, simultaneously with another
BREAKis the preferred key key.
for stopping a program.
Consult the instructions for Inserts a space where the
the software program you cursor is in some programs
are using. or when you're programm-
ing. Characters may be
Usually tells the computer to entered by typing over the
START begin running a game or inserted space.
program; refer to the indi-
vidual program instructions Moves the cursor back one
for its exact function. space, deleting what was
typed. If held down, it con-
Often used to select one of tinues deleting characters.
SELECT several applications within a
program; its function varies Deletes character at the
from program to program- position of the cursor and
refer to the individual pro- shifts remaining charcters
gram instructions for its ex- on the line so that the space
act use. is filled.
With some software, gives
HELP access to information that
can guide you through a
program when you need
help .
• 11
Stops the TV display when
the computer is writing on
the screen; press CONTROL
1again to continue.
Sounds a buzzer.
Produces end-of-file (EOF) to
a program reading input
from the keyboard. This is
just like the end-of-file which
happens when a disk file is
being read and the end of
the file is reached. End-of-
file produces an error
unless the program is writ-
ten to TRAP and process the
EOF.
Makes space to insert a pro-
gram line or text line.
Deletes the text or program
line the cursor is on.
Types upper-case charac-
ters without getting compu-
terout of the lower-case or
other type of mode.
Shifts computer between
upper-case and lower-case
character modes. Also,
releases computer from the
CONTROL LOCK mode.
Produces the CONTROL
LOCK mode. Useful when
you must enter a number of
commands combining CON-
TROL with other keys, such
as when creating graphic
characters.
Locks computer in the
upper-case mode for alpha-
betic characters. In this
mode, you must still press
SHIFT
to get upper-case
characters on the numeric
and symbol keys.
When used in conjunction
with CONTROL, these keys
move the cursor up, down,
left, and right
Returns cursor to left mar-
gin. Tells computer that
you've finished typing or
editing a line.
Reverse Video turns re-
verse video mode on and
off. In some ATARIpro-
grams, this key is referred
to as the Atari logo ()I\..) key.
Auto Repeat when you
press any key and continue
holding it down, the charac-
ter repeats itself until you
release the key.
There are 29 graphics
characters built into the
computer keyboard for
occasions when you want
to brighten up a dull
chart, design an eye-
catching graph, create a
work of computer art, or
even do a little video
doodling. Advanced
users may find many ap-
plications for the char-
acters while program-
ming.
You can display
graphic characters on the
TV screen by pressing
CONTROL
and the keys
shown below. If you want
to produce a number of
graphics characters, get
into the
CONTROL LOCK·
mode by pressing
CON-
TROL
and
CAPS.
Get out
of the
CONTROL LOCK
mode by pressing
CAPS
only for lower case char-
acters or
SHIFT CAPS
for
upper case characters.
When switching from
the international char-
acter mode, use the fol-
lowing poke in BASIC:
POKE 756, 224 [Press
RETURN.]
Then press
CONTROL
and the keys shown be-
low to display graphic
characters on the TV
screen.
ATARI600XL
.13
Ordinarily, when you
type a draft in a foreign
language that uses the
same alphabet as we do,
you have to go back to
laboriously add accent
marks, cedillas, tildes,
diereses, and other dia-
critical marks by hand.
You are spared that trou-
ble with the ATARI 600XL
Home Computer, which
has an international char-
acter set built into the
keyboard.
International charac-
ters are available from
certain software pro-
grams, or may be obtain-
ed in BASIC using the
following poke command:
POKE 756, 204 [Press
RETURN]
Then press
CONTROL
in combination with the
keys shown below to pro-
duce international char-
acters on your TV
screen.
J.~~~.~~~.••••..•~~•.........•.~.~~•••~.•~~~~
~
.
~ r+:
1 •
~
['
.
~
)
.
~ ATARI600XL
I
+14
·15
Now that you are familiar
with your ATARI600XL
Home Computer, let's try
usmg the built-in ATARI
BASIC Programming
Language, a version of
one of the most popular
programming or com-
puter languages. You can
use ATARIBASIC Pro-
oramminc Language for
wntmg computer pro-
grams in any field from
education to business to
the arts. The language is
easy to learn, and can
make your computer a
more effective tool. For
more information about
programming, refer to
the reference card
packed with your com-
puter and to t11eneek In-
side ATARI BASIC, A
Fast, Fun and Friendly
Approach by William
Carris (available from
many Atari retailers and
bookstores).
The computer pro-
grams on the following
page are taken from this
book. They show some of
the remarkable things
your computer can do.
Program One demon-
strates the computer's
color and graphics capa-
bilities. Program Two
dramatically shows how
sound can add an extra
dimension to a program.
Progam Three is BASIC-
ally just for fun.
Since it's built in
ATARIBASIC is av'ailable
for use as soon as you
turn on the computer.
You may override the
language by either hold-
mg down the
OPTION
key when you turn on the
computer or by plugging
in a program cartridge.
You may also exit BASIC
by typing the letters
BYE
to go to the built-in self
tests, or the letters DOS
to activate the Disk
Operating System (when
you have an optional disk
drive connected to your
system).
If you make a mistake
while typing in a line of
your program, press the
DELETE BACK SPACE
key until you delete the
error, then type the cor-
rection and continue. You
may also go back to an
. error by holding down
the
CONTROL
key while
pressmg the appropriate
arrow keys. Refer to the
"KEYBOARD WIZAR-
DRY" section in this
guide for more informa-
tion about corrections.
If a program statement
has more characters than
will fit on one line of your
TV screen, the statement
will wraparound to the
next line. Press the
RETURN
key only after
typmg the entire program
statement. Type the fol-
lowing BASIC programs
as wntten. Press
BREAK
when you want to stop
the program being run.
Press the
RETURN
key after you type in or
make a correction to
each complete program
statement (one or more
lines of program instruc-
tions beginning with a
line number). Pressing
RETURN
signals the com-
puter that you have fin-
ished typing or editing.
Before you begin each
new program, type NEW
to clear the computer's
memory and then press
RETURN. .
If you don't type the
program exactly as writ-
ten here, after
RUN
is
typed you will get an Er-
ror Message that looks
like this:
The computer is telling
you that there is a mis-
take in program line
number 10.Return the
cursor to that line and
correct it. You may have
to type LIST or LIST 10to '
display the line on the
screen in order to cor-
rect it.
• Program One:
10 GRAPHICS 11
20 LL= 191
30 RL= 79
40 FOR ZEBRA=O to 48
50 REM GTIA HIW Ay* FAST LANE*
60 COLOR ZEBRA
70 PLOT RL,LL
80 DRA WTO 0,
°
90.RL=RL-1
100 NEXT ZEBRA
110 GOTO 110
120 END
Type
RUN,
press RETURN, and watch it go
• Program Two
10 GRAPHICS 7
+
16: SETCOLOl.{ 4, 0, 0: SET COLOR
1, 0, 4 .
20 COLOR 2
30 PLOT 2, 2: DRAWTO 30, 34: DRAWTO 78, 40:
DRAWTO 100,57: DRAWTO 110,50: DRAWTO 140,76
40 FOR LIGSOU = 1 TO 255
50 SOUND 0, LIGSOU, 8, 10
60 IF LIGSOU =8 THEN SETCOLOR 1,0,14
70 NEXT LIGSOU
80 SETCOLOR 1,0,0
90 FOR DE
=
1 TO 200: NEXT DE
100 GOTO 10
• Program Three
To get the arrow) in this program, press ESCAPE
once, then hold down CONTROL and press CLEAR.
Then close the quote.
10 PRINT ")": DIM NAME$ (20) : POSITION 2,7
20 PRINT "TYPE IN YOUR NAME AND PRESS THE
RETURN KEY"
30 POSITION 4, 12: PRINT "NAME";: INPUT NAME$
40 GRAPHICS 2+16
50 POSITION (20-LEN
(NAME ))/2,4:
REM CENTERS
THE NAME
60 PRINT #6; NAME$ .
70 POSITION 1, 7: PRINT #6; "IS A FLASHY PERSON":
REM TYPE "IS A FLASHY PERSON" 1N INVERSE
VIDEO
80 FOR FLIP=O TO 20
90 FOR FLASH=O TO 14
100 SETCOLOR 0, 0, FLASH: SOUND 0, FLASH, 10, 10
110 NEXT FLASH '
120 FOR DELAY
=
1 TO 20: NEXT DELAY
130 NEXT FLIP
140 SETCOLOR 0, 0, 14: SOUND 0, 0, 0,
°
150 FOR DELAY
=
1 TO 1000: NEXT DELAY
160 SETCOLORO, 0, 0: SETCOLOR 2,·0,
°
. 170 FOR DELAY = 1 TO 800: NEXT DELAY
) 180 RUN
190 END
Type RUN again and press RETURN.
.16
The kind of system you
build depends, of course,
on how you want to use
your ATARI600XLHome
Computer. There's an
ATARIaccessory for
every computer appli-
cation, including joystick
controllers for playmg
video games, printers for
writing reports, or
modems for hooking up
to information networks.
• 17
• Where to Store
Your Data
The kind of software you
use determines which
peripheral devices you
need. No extra equip-
ment or "hardware" is
necessary to use some
cartridges, because they
plug directly into the slot
on top of the console.
However, you cannot
store your work on a car-
tridge.
If you want to save
data, or if you decide to
purchase software pro-
grams on cassettes or
diskettes, then you must
buy a program recorder
or a disk drive. Other-
wise, you lose what you
type on your TV screen
when you turn the com-
puter off.
The ATARI lOlOTM
Program Recorder offers
an inexpensive way to
store information. With
this method, data-and
sometimes sounds, music
or words-are recorded
on an ordinary cassette
tape .
After you become an
experienced computer
user, of if you want to
work with diskette-based
programs right from the
start, you may decide
you want an ATARI .'
1O50™Disk Drive, WhICh
retrieves and stores infor-
mation faster and more
efficiently than program
recorders. Before you
use the disk drive for
some applications, how-
ever, you have tc?pur-
chase an expansion
Memory Module from an
Atari retailer. The
module links with the
computer at the Expan-
sion Connection. Refer to
the sales literature or
packaging for the soft-
ware you buy to deter~
mine if more memory IS
needed.
• All the Data That's
Fit to Print
A printer has obvious ad-
vantages for people who
want to send letters
through the mail, who
need a permanent
record of a document on
paper, or who simply get
satisfaction out of seeing
their efforts displayed on
the printed page.
The ATARI Computer
owner may select from a
number of printers. The
ATARI 1O27™Letter
Quality Printer is a low-
cost, easy-to-use device
that prints letter-quality
type on regular typing
paper. It produces fully
formed characters like
the type from an electric
typewriter. The ATARI
1O25™80-Column (dot-
matrix) Printer is more
expensive but faster than
the ATARI 1027, and uses
either typing paper or
computer paper. The
ATARI 1025 makes type-
faces composed of tiny
dots. For artwork or
charts and graphs, the
ATARI 1O20™Color
Printer may be just the
tool you need. You can
draw or "plot" vibrant
color graphics with the
printer's four color pens,
or print text in various
SIzes.
• Telecommunications
Bridges The Information
Gap
Intrigued by the pro-
mises of home informa-
tion services? With an
ATARI MODEM, you can
transmit and receive
information from these
and other sources over
standard telephone lines.
An ATARI MODEM
provides access to com-
puter databases, trans-
portation and entertain-
ment schedules, and a
variety of specialized
information systems such
as the COMPUSERVE IN-
FORMATION SERVICE*
and THE SOURCE,
AMERICA S INFORMA-
TION UTILITY.**
*Registered trademark of
CompuServe, Inc., an
H&R Block company
**THE SOURCE and
AMERICA'S INFORMA-
TION UTILITY are ser-
vice marks of Source
Telecomputing Corpora-
tion, a subsidiary of The
Reader's Digest Associa-
tion, Inc.
.18
• 19
Here are a few sugges-
tions for making the
space where you use
your computer a pleasant
place to work or play:
Do not use household
solvents or cleansers on
the computer.
ATARI Home Computer
users don't have to work
or play in isolation. Most
of the situations and pro-
blems you may en-
counter have already
been met and worked
out by others. Much of
this computer experience
is documented, so there
is plenty of support avail-
able. The sources listed
here are a few of the
many aids which can
help you or guide you to
new, exciting directions
for home computer use.
They are available from
bookstores, Atari
retailers, or by writing to
the addresses provided.
Keep your computer
clear of dust by occa-
sionally wiping it with a
moist, lint-free cloth.
Keep liquids away
from the work area.
• Books
Albrecht, Bob; Finkel,
LeRoy; and Brown, jerald
R. ATARI® BASIC. New
York: john Wiley Sons,
1979.
ATARI BASIC Reference
Manual. Atari, Inc. 1983.
Technical Reference
Notes. ATARI Home Com-
puter System. Atari, Inc.
1983.
Willis, jerry, and Miller,
Merl. Computers for Peo-
ple. Beaverton, Oregon:
dilithium Press, 1982.
Poole, Lon; McNiff, Mar-
tin; and Cook, Steven.
, Your Atari Computer.
Berkeley, Calif.:
Osborne/ McGraw Hill,
1982.
• Magazines
ATARI Connection, The
Home Computer
Magazine. Get a free
copy just by returning
your ATARI Home Com-
puter warranty card. You
then have the option of
becoming a regular
subscriber. You can also
write to: P.O. Box 50047,
San [ose, CA 95150.
An tic- The Atari
Resource. 600 18th St.,
San Francisco, CA 94107.
Analog Computing, The
Magazine for Atari Com-
puter Owners. P.O. Box
23, Worcester, MA 01603.
HI-RESMAGAZINE, The
Complete Magazine for
ATARI Users, 755 West
Sanlando Springs Drive,
Longwood Springs, FL
32750 .

Other manuals for 600XL

4

Other Atari Desktop manuals

Atari 400 Quick start guide

Atari

Atari 400 Quick start guide

Atari 800 XL ROSE Quick start guide

Atari

Atari 800 XL ROSE Quick start guide

Atari 800 User manual

Atari

Atari 800 User manual

Atari 400 User manual

Atari

Atari 400 User manual

Atari Mega 2 User manual

Atari

Atari Mega 2 User manual

Atari 400 Instruction Manual

Atari

Atari 400 Instruction Manual

Atari 800 XL ROSE User manual

Atari

Atari 800 XL ROSE User manual

Atari 800 User manual

Atari

Atari 800 User manual

Atari 600XL Product information sheet

Atari

Atari 600XL Product information sheet

Atari 800 XL ROSE Quick start guide

Atari

Atari 800 XL ROSE Quick start guide

Atari 600XL Instruction manual

Atari

Atari 600XL Instruction manual

Atari 600XL Instruction manual

Atari

Atari 600XL Instruction manual

Atari 130XE User manual

Atari

Atari 130XE User manual

Atari 400 User manual

Atari

Atari 400 User manual

Atari 400 User manual

Atari

Atari 400 User manual

Atari PC3 User manual

Atari

Atari PC3 User manual

Atari 800 XL ROSE User manual

Atari

Atari 800 XL ROSE User manual

Atari 600XL User manual

Atari

Atari 600XL User manual

Atari 800 XL ROSE Quick start guide

Atari

Atari 800 XL ROSE Quick start guide

Atari 400 User manual

Atari

Atari 400 User manual

Atari STACY User manual

Atari

Atari STACY User manual

Atari MEGA STe User manual

Atari

Atari MEGA STe User manual

Atari 850 User manual

Atari

Atari 850 User manual

Atari 130XE User manual

Atari

Atari 130XE User manual

Popular Desktop manuals by other brands

Spectrum Industries 38964 owner's manual

Spectrum Industries

Spectrum Industries 38964 owner's manual

LeapFrog ClickStart instructions

LeapFrog

LeapFrog ClickStart instructions

IBM THINKCENTRE 8141 user guide

IBM

IBM THINKCENTRE 8141 user guide

DIGITAL YACHT Aqua Compact Pro Installation and instruction manual

DIGITAL YACHT

DIGITAL YACHT Aqua Compact Pro Installation and instruction manual

EPOS E-Touch Pro user manual

EPOS

EPOS E-Touch Pro user manual

RIGHT ANGLE NewFixed HEIGHT WORKSTATION Assembly instructions

RIGHT ANGLE

RIGHT ANGLE NewFixed HEIGHT WORKSTATION Assembly instructions

New Star Neomounts NS-WS050BLACK instruction manual

New Star

New Star Neomounts NS-WS050BLACK instruction manual

Pro-face PS-2000B Series user manual

Pro-face

Pro-face PS-2000B Series user manual

protech prox BC-2602 Quick reference guide

protech

protech prox BC-2602 Quick reference guide

parktool THS-1 instructions

parktool

parktool THS-1 instructions

BlueChip Vario L3 user guide

BlueChip

BlueChip Vario L3 user guide

RIGHT ANGLE NewHeights Elegante XT Series Assembly instructions

RIGHT ANGLE

RIGHT ANGLE NewHeights Elegante XT Series Assembly instructions

Contec IPC-PT/L600S(PCW)P user manual

Contec

Contec IPC-PT/L600S(PCW)P user manual

V-tech Creativision instruction manual

V-tech

V-tech Creativision instruction manual

Leading Edge fortiva 5000 user manual

Leading Edge

Leading Edge fortiva 5000 user manual

Jason.L LITEWALL EVOLVE EVD1006PT Assembly

Jason.L

Jason.L LITEWALL EVOLVE EVD1006PT Assembly

EVOC EIC--2201 Series user manual

EVOC

EVOC EIC--2201 Series user manual

Asus ET2702l series user guide

Asus

Asus ET2702l series user guide

manuals.online logo
manuals.online logoBrands
  • About & Mission
  • Contact us
  • Privacy Policy
  • Terms and Conditions

Copyright 2025 Manuals.Online. All Rights Reserved.