ATC ATC-1000WF User manual

1
Quick Start Guide
Wi-Fi TO RS-232/422/485
CONVERTER
MODEL ATC-1000WF
(Version 2.1 Jan 25th, 2022)
1
1
1.Check Package Content
■ATC-1000WF unit 1Pcs
■Mono pole Antenna (2dBi RP-SMA) 1Pcs
■Software CD 1Pcs
■External power adapter 1Pcs
■RS-232 cross cable 1Pcs
■Quick Start Guide_Ver 2.1 1Pcs
2
2. Hardware Installation
■Connect RS-232 DB9 Female Crossing configuration cable
to ATC-1000WF unit on RS-232 side.
■Connecting the Power Adapter to ATC-1000WF power jack.
When the power is properly supplied. The Ready LED will on
Green light and PWR LED will light in red.
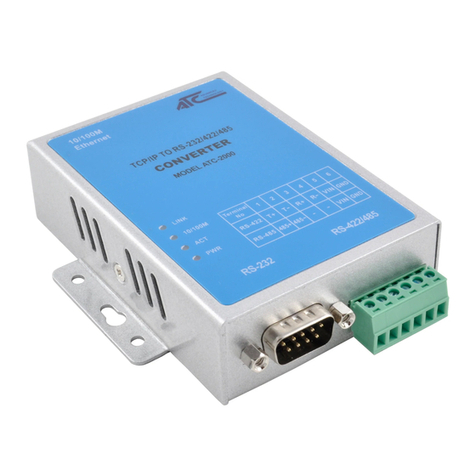
RS-232/422/485 Pinout
RS-232 Pinout(DB9 Male )
PIN
RS-232
Input/Output
2
RXD
I
3
TXD
O
5
GND
-
RS-422/485 Pinout(6Bit-Block Terminal from left)
PIN
RS-422
RS-485
1
T+
485+
2
T-
485-
3
R+
-
4
R-
-
5
VIN+
VIN+
6
VIN-
VIN+
3
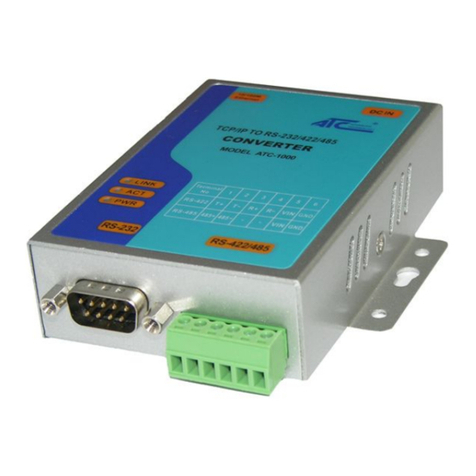
3.LED indication&Factory default button
LINK ---- Indicate WLAN status.Light means ATC-1000WF
(STA mode) collected to AP or laptop &mobile
connect to ATC-1000WF(AP mode)
Ready ---- It show light when ATC-1000WF boot up ready.
Tx/Rx ---- It show data send or receive from serial port.
PWR ---- Indicate the Power supply
Factory Default- To restore ATC-1000WF to factory default.
Step1:Power on ATC-1200 and find the button above photo.
Step2:Press button near the terminal block wait about 5
seconds
Step3:Release the button and ATC-1000WF will be automatic
to restart from factory default setting.
4
4.Software Installation
■Insert the software CD and search for such as
F:/Tool/Tera-Term to install.Note: Be sure you have
administrative rights &disable firewalls in windows XP
5
5.Configure the ATC-1000WF
■ATC-1000WF supports two methods to configuration
parameters:Web Accessing and AT+instruction set.
Web accessing means users can configure parameters
through Web browser. When ATC-1000WF connected to
wireless network. Parameters configuration is done on a PC
connected to the same wireless network.
AT+instruction set configuration means user configure
parameters through serial interface(RS-232/422/485)
command.Refer to ATC-1000WF User's Manual.
“AT+instruction set”chapter for more detail.
Before configuring the ATC-1000WF on AT+instruction mode,
you should turn off the power and use a serial cable connect
the ATC-1000WF to your computer’s serial port(RS-232).
■We suggest using Tera-Term to operate.Firstly you should
configure Tera-Term serial port like below:57600bps for baud
rate ,8bits for data-length,NONE for parity bit ,1bit for stop bits .
■Upon power up.The ATC-1000WF will be in AP mode from
factory producing. To enter command mode, you should send
““+++<CR>”. The device will respond with “a ”.Then input “a”
While it change to command mode.It also show”+OK” and the
ATC-1000WF will accept ASCII bytes as command. You can
using”AT+H” for all the command you need . To exit command
Mode and reset.Please send “AT+Z”.The device will respond
with “OK” restart and return AP mode.
The parameters such as the SSID, channel, IP address, serial
port settings, And all other settings can be viewed and
configured in command mode.
Factory Default Button

2
6
6.Factory Default WLAN &IP Address
UART Parameters
Mode: RS-232 | Baud-rate: 57600
Data-length: 8 | Parity: n (none)
Stop-bits: 1 | Flow : n (none)
IP Parameters
Protocol: TCP Server
Local port:: 8899
DHCP Client: Enabled
Static IP Address: 10.10.100.254
Net Mask: 255.255.255.0
Gateway: 192.168.2.1
DHCP Server: Enabled
IP Address: 0.0.0.0
Net Mask: 0.0.0.0
Default Gateway: 0.0.0.0
DNS: 0.0.0.0
WLAN Parameters
Channel: 11 | Mode:AP
SSID: HF-A21x_AP | Data-rate: Auto
7
7.Quick connection in AP mode
ATC-1000WF AP Mode is the default setting.
Step1: Power on ATC-1000WF.
Step2: Use a device(Laptop or mobile) with a wireless
network card.We suggest using Mobile as well.
Step3: Pleas use iPhone or Android mobile.To use setting
button search for WiFi network AP with SSID name
is:HF-A21x_AP
Step4: Press Connect to connect to
AP:HF-A21x_AP.
Step5: On cellphone browser address input
10.10.100.254 then click you can get below page
show ask you to input User name and Password
Log in IP Address:10.10.100.254
User Name:admin
Password:admin
Step6: You can get main page.The main menu
include five pages: “Mode Selection”,”
AP Interface Setting”,”STA Interface
Setting”,”Application Setting”, and “Device
Management”
On Mode Selection menu.User need to choose STA
mode and then click below button “Apply” to confirm
the modification.
Step7: This step is most important allow ATC-1000WF
to access available Wi-Fi AP.Click STA Interface
Setting.You can see web page on right side there
have STA Interface Parameters list.
On first list we can see AP’S SSID.On right column
there have Search Button.We click it and appear
below SSID AP router list.We choose H3C AP to
show how to setting below step.

3
After you apply to access H3C AP router then need
you input wireless access password and click apply
button.
Now we have finished Wi-Fi setting and we will try to
last step to setting WAN connection setting.We
usually choose STATIC(Fixed IP) for ATC-1000WF.
We need fill these parameters into below options.
(You also need be to know the router assigned IP
address range and Gateway IP address whatever
your want to join it in).Our Wi-Fi router parameter
as following:
IP address range:192.168.1.2-255
Subnet Mask:255.255.255.0
Gateway Address:192.168.1.1
So we input below value into ATC-1000WF and click
Input below value and click apply button again.
Address:192.168.1.125
Subnet Mask:255.255.255.0
Default Gateway:192.168.1.1
After finished above setting we need to make the
ATC-1000WF restart and make it effected.On the
Device Management manual you need to Click
Restart button to make all of setting take effect.
8
8.
.Quick Connection by AT+Command:
User can input AT+ Instruction through hyper terminal
or other serial debug terminal.Also can program the
AT+ Instruction to script. User can also input “AT+H”
to list all AT+ Instruction and description to start. See
No.5 for detail enter AT+Command mode.
For example there have one Wi-Fi network as
following parameter:
SSID:H3C
Encryption method:WPAPSK
Password:12345678
Preset ATC-1000WF Static IP address:192.168.1.125
Subnet Mask:255.255.255.0
Router gateway IP address:192.168.1.1
Step 1:
Setting ATC-1000WF working on Station Mode.
AT+WMODE=STA <CR> (STA/AP )
+ok
Also can use AT+WMODE<CR> to see whether it
effective.
Step 2:
Setting ATC-1000WF wireless encryption method to
according wireless router requirement.
AT+ WSKEY=< auth,encry,key><CR>
◼Parameters:
◆auth: Authentication mode
OPEN
SHARED
WPAPSK
◆encry:Encryption algorithm
NONE: When “auth=OPEN”, effective

4
WEP: When “auth=OPEN”or “SHARED”,
effective
TKIP: When ”auth= WPAPSK”, effective
AES: When “auth= WPAPSK”, effective
◆key: password, ASCII code, shall less than 64 bit
an greater than 8bit.
This Instruction only effective for ATC-1000WF works
as STA. After ATC-1000WF module boots up again,
the setting will be effective.
AT+WSKEY=WPAPSK,AES,12345678<CR>
+ok
Type below command to see ATC-1000WF wireless
parameter of encryption.
AT+WSKEY<CR>
+ok=WPAPSK,AES,12345678
Step 3,Set the SSID parameters of the wireless
network.
AT+WSSSID
◼Function: Set/Query WIFI target AP SSID
parameters as STA.
◼Format:
◆Query Operation AT+WSSSID<CR> +ok=<ap’s
ssid><CR>< LF ><CR>< LF >
◆Set Operation AT+ WSSSID=<ap’s ssid ><CR>
+ok<CR>< LF ><CR>< LF >
◼Parameters:
◆ap’s ssid: AP’s SSID
AT+WSSSID=H3C
+ok
AT+WSSSID
+ok=H3C
Step 4,Query the current module IP address
AT+ WANN
◼Function: Set/Query WAN setting, only effective as
STA mode;
◼Format:
◆Query Operation AT+WANN<CR>
+ok=<mode,address,mask,gateway><CR><
LF ><CR>< LF >
◆Set Operation AT+ WANN=<
mode,address,mask,gateway ><CR> +ok<CR><
LF ><CR>< LF >
◼Parameters:
◆mode: IP setting for WAN port
static: Static IP
DHCP: Dynamic IP
◆address: WAN port IP address;
◆mask: WAN port subnet mask;
◆gateway: WAN port gateway address;
AT+WANN=STATIC,192.168.1.125,255.255.255.0,19
2.168.1.1
+ok
So after setting as above step1-step4.The
ATC-1000WF will automatic to access existing Wi-Fi
wireless network(SSID:H3C).More other detail AT+
Command see ATC-1000WF User’s Manual
(Ver2.1 )as well.Please see below total AT+Command
setting list again.
AT+WMODE=STA <CR>
AT+WSKEY=WPAPSK,AES,12345678<CR>
AT+WSSSID=H3C
AT+WANN=STATIC,192.168.1.125,255.255.255.0,19
2.168.1.1
9
9.General Specification
Class
Item
Parameters
Wireless
Parameters
Certification
FCC/CE
Wireless standard
802.11 b/g/n
Frequency range
2.412GHz-2.484GHz
Transmit Power
802.11b: +20 dBm (Max.)
802.11g: +18 dBm (Max.)
802.11n: +15 dBm (Max.)
Receiver Sensitivity
802.11b: -89 dBm
802.11g: -81dBm
802.11n: -71dBm
Antenna
External Antenna
Software
Parameters
Network Type
STA /AP/AP+STA mode
Security
Mechanisms
WEP/WPA-PSK/WPA2-PSK/WAPI
Encryption
WEP64/WEP128/TKIP/AES
Work Mode
Transparent Transmission
Serial command
AT+instruction set
Network Protocol
TCP/UDP/ARP/ICMP/DHCP/DNS
/HTTP
Max. TCP
Connection
32
User Configuration
Web Server+AT command config.
Hardware
Parameters
Data Interface
Data Rate: 1200bps - 230400bps
RS-232,RS-422,RS-485
Operating Voltage
9-24VDC
Operating Current
Avg:200mA, Peak:400mA
Operating
Temperature
-40℃- 70℃
Storage
Temperature
-45℃- 125℃
Dimensions
100 x 86 x 26 mm
Other ATC Media Converter manuals
