manuals.online logo
Brands
  1. Home
  2. •
  3. Brands
  4. •
  5. Atel
  6. •
  7. Network Router
  8. •
  9. Atel V810VD User manual

Atel V810VD User manual

Meet Your Device
ATEL V810VD
4G LTE Cat-4 Fixed Wireless Access
Router + POTS Replacement
Models Covered:
Version 3.0
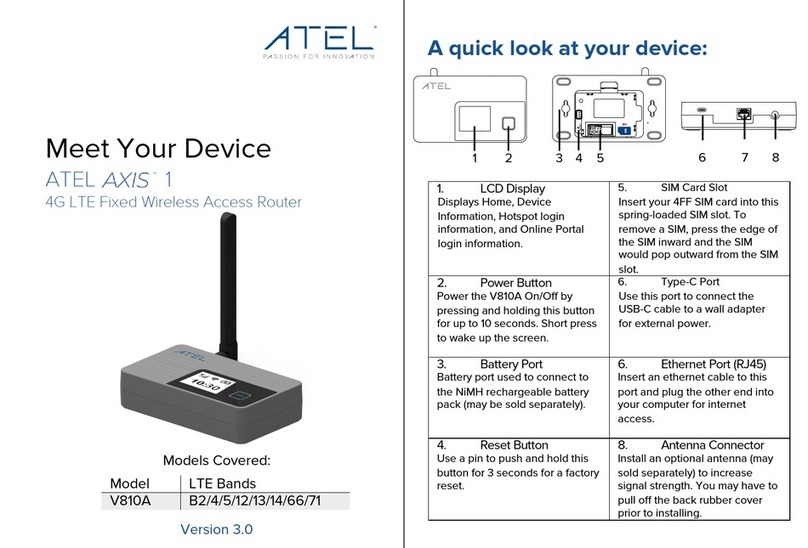
1. LCD Display
Displays Home, Device
Information, WiFi Login
Information (SSID and
Password), and Online Portal
Login Information.
6. Type C Port
Use this port to connect the
USB-
C cable to a wall adapter
for external power.
2. Power Button
Power the V810 On/Off by
pressing and holding this
button for up to 10 seconds.
Short press to wake up the
screen.
7. Phone Port (RJ11)
Use a telephone cord to
connect your telephone base
to this port.
3. Battery Port
Battery port connect to the
AA battery (AA batteries
Included) holder or a Ni-MH
rechargeable battery pack
(may be sold separately).
8. Ethernet Port (RJ45)
Insert an ethernet cable to
this port and plug the other
end into your computer for
internet access.
4. Reset Button
Use a pin to push and hold
this button for 3 seconds for
a factory reset.
9. Antenna Connector
Install an optional antenna
(may be sold separately) to
increase signal strength. You
may have to pull off the back
rubber cover prior to
installing.
5. SIM Card Slot
As needed, insert your 4FF SIM card into this spring-loaded
SIM slot. To remove, press the SIM inward.
A quick look at your device:
Model
LTE
Bands
V
810VD
B
2/4/5/12/13/14/66/71
Setting up your device:
Step 1: Insert a SIM (if applicable)
a) Remove the back cover.
b) Carefully lift the battery holder from the side.
c) Check for a pre-installed SIM card or install a SIM
card provided by your wireless carrier.
d) To install, insert the 4FF Nano SIM card into the
spring-loaded SIM slot as the image shows. To
remove a SIM, press the edge of the SIM inward
and the SIM will pop outward from the slot.
As the device boots up, you will see the Welcome
screen on your V810 LCD display, followed by the
status bar display.
WARNING! Please only use the provided USB
adapter for your V810. The use of other
incompatible adapters may cause damage to your
device and void the warranty.
Step 2: Install the Battery
We recommend installing the 3 AA batteries prior to use,
even if you plan on Powering your device via the USB-C
cable. Checking and changing the 3 AA batteries
regularly is also suggested.
a) Remove the battery cover.
b) Properly align and install 3AA batteries into the
battery holder. AA batteries are included with your
device.
c) Put the battery cover back in place as shown below.
Make sure that the back cover is flush with the
bottom of the device.
Step 3: Power on the Device
To connect your V810 to the power outlet, insert
your USB cable to the device USB-C port and plug
the other end into a wall adapter.
The device will power on.
Step 4: Connecting a Telephone to your
V810
a) Complete Steps 1, 2 and 3 above.
b) Plug one end of the telephone cord to the RJ11
Phone Port of your V810 and plug the other end of
the telephone cord into your telephone base.
Step 6: Initial Activation
Once the above 4 steps are completed, with a
service plan subscription, your V810 will
automatically detect the wireless network and
activate the SIM card services. The wireless
network and signal strength indicator will
appear on the status bar of your Welcome
Home screen. It might take a few minutes for
the initial activation.
If your V810 cannot
detect any network
services or if you have
SIM card issues,
please contact your
wireless service
provider.
Step 7: Making Calls
a) Before making a call, make sure at least
two of the signal strength indicator bars (
) are lit up. If no signal bars are lit, move
the V810 to a location that can receive a
signal.
b) Pick up your telephone and dial the
number to place a call.
Step 5: Connecting a Computer to your V810
using an Ethernet Port for Internet Access
a) Complete Steps 1, 2 and 3 above.
b) Plug an ethernet cable to the RJ45 Ethernet port of
your V810 and plug the other end of the cable to
the Ethernet port of your computer.
Note: The telephone, telephone cord, computer and
ethernet cables are not included.
Step 8: Using your V810 Hotspot Wi-Fi
a) Locate your Network Name (SSID) / Password from
your V810 LCD Display or device label under the
battery holder.
b) Open the Wi-Fi settings of your Wi-Fi capable
devices.
c) Select the SSID of your V810 from the available
network list.
d) When prompted, enter the WiFi password of your
V810.
For more information
Please refer to your V810 User Manual for additional
information or visit the ATEL USA website Device and
Support pages at www.ATEL-USA.com.
@AsiatelcoUSA
@ATEL USA
@atel-asiatelco
@ATEL_USA

Other manuals for V810VD

2

Other Atel Network Router manuals

Atel Apex WB550 User manual

Atel

Atel Apex WB550 User manual

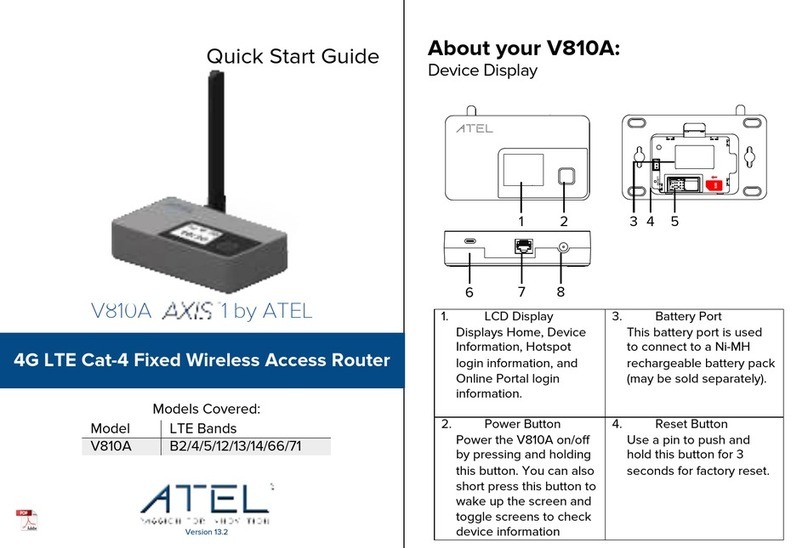
Atel AXIS V810A User manual

Atel

Atel AXIS V810A User manual

Atel W02 Arch+ Dimensions

Atel

Atel W02 Arch+ Dimensions

Atel V810VD User manual

Atel

Atel V810VD User manual

Atel WB550 Series User manual

Atel

Atel WB550 Series User manual

Atel V810VD User manual

Atel

Atel V810VD User manual

Atel Apex WB550 User manual

Atel

Atel Apex WB550 User manual

Atel AXIS V810A User manual

Atel

Atel AXIS V810A User manual

Atel WB550 Series User manual

Atel

Atel WB550 Series User manual

Atel AXIS V810A User manual

Atel

Atel AXIS V810A User manual

Atel AXIS V810A Installation guide

Atel

Atel AXIS V810A Installation guide
Atel AXIS V810A User manual

Atel

Atel AXIS V810A User manual
Popular Network Router manuals by other brands

Asus RT-N66R Dark Knight quick start guide

Asus

Asus RT-N66R Dark Knight quick start guide

SMC Networks 7004VBR installation guide

SMC Networks

SMC Networks 7004VBR installation guide

Cisco ASR 900 Series Configuration guide

Cisco

Cisco ASR 900 Series Configuration guide

EnGenius X-TRA RANGE ESR600H quick start guide

EnGenius

EnGenius X-TRA RANGE ESR600H quick start guide

ZyXEL Communications P-660R Specifications

ZyXEL Communications

ZyXEL Communications P-660R Specifications

ZyXEL Communications Dimension ES-3124 Specifications

ZyXEL Communications

ZyXEL Communications Dimension ES-3124 Specifications

Dynex DX-NRUTER user guide

Dynex

Dynex DX-NRUTER user guide

Cisco 7200 VXR Series Product overview

Cisco

Cisco 7200 VXR Series Product overview

Ubiquiti EdgeRouter ERPro-8 quick start guide

Ubiquiti

Ubiquiti EdgeRouter ERPro-8 quick start guide

Avaya P333R-LB Installation and configuration guide

Avaya

Avaya P333R-LB Installation and configuration guide

PRIZM 201640 series User's manual and troubleshooting guide

PRIZM

PRIZM 201640 series User's manual and troubleshooting guide

NETGEAR WGT624 v3 Reference manual

NETGEAR

NETGEAR WGT624 v3 Reference manual

National Instruments Motion Axis Router MCA-7724 user guide

National Instruments

National Instruments Motion Axis Router MCA-7724 user guide

NETGEAR N600 WNDR3400v2 user manual

NETGEAR

NETGEAR N600 WNDR3400v2 user manual

Allnet ALL0235mini Quick installation guide

Allnet

Allnet ALL0235mini Quick installation guide

Cisco 2612 Hardware installation guide

Cisco

Cisco 2612 Hardware installation guide

H3C MSR Series troubleshooting guide

H3C

H3C MSR Series troubleshooting guide

3Com SuperStack II 32x installation manual

3Com

3Com SuperStack II 32x installation manual

manuals.online logo
manuals.online logoBrands
  • About & Mission
  • Contact us
  • Privacy Policy
  • Terms and Conditions

Copyright 2025 Manuals.Online. All Rights Reserved.