manuals.online logo
Brands
  1. Home
  2. •
  3. Brands
  4. •
  5. ATEN
  6. •
  7. Switch
  8. •
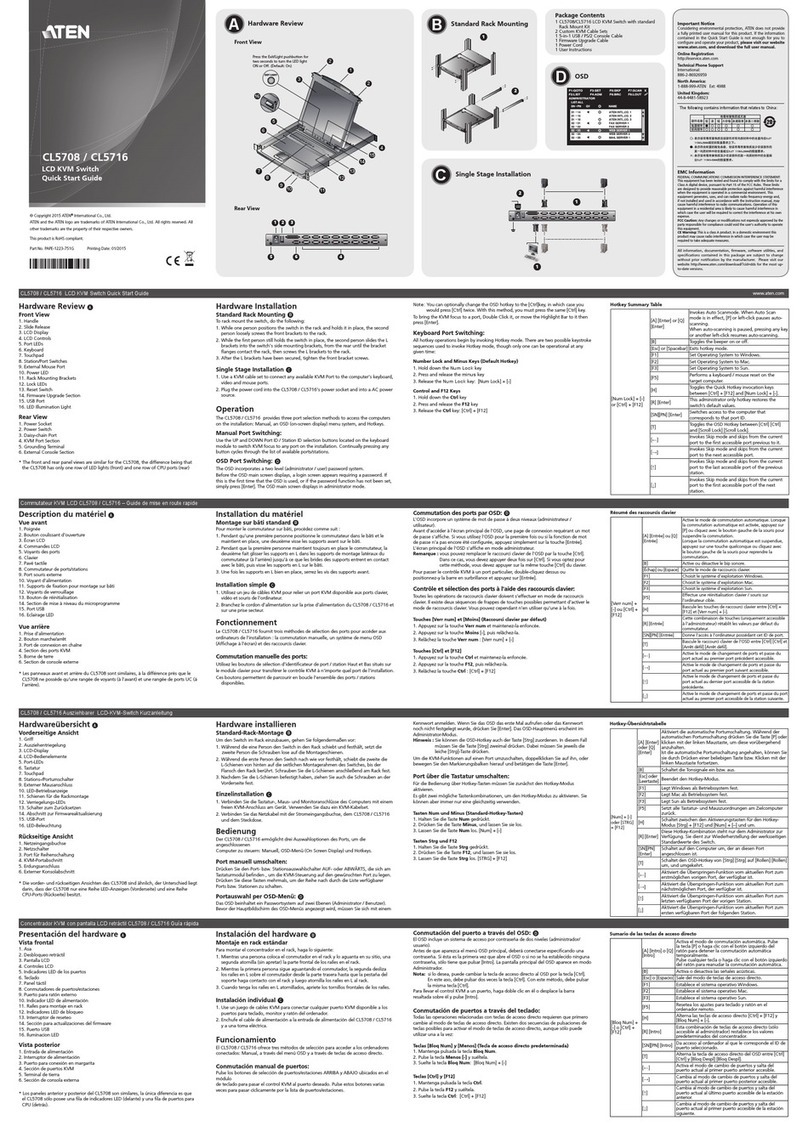
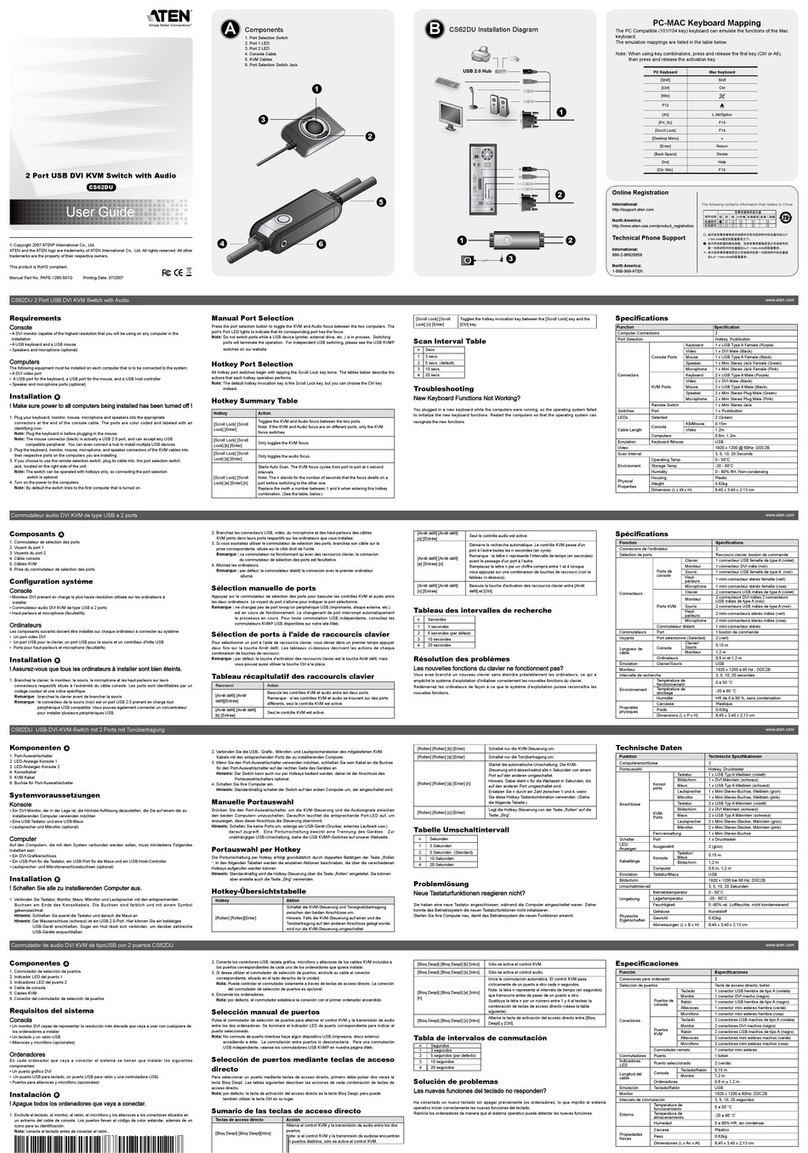
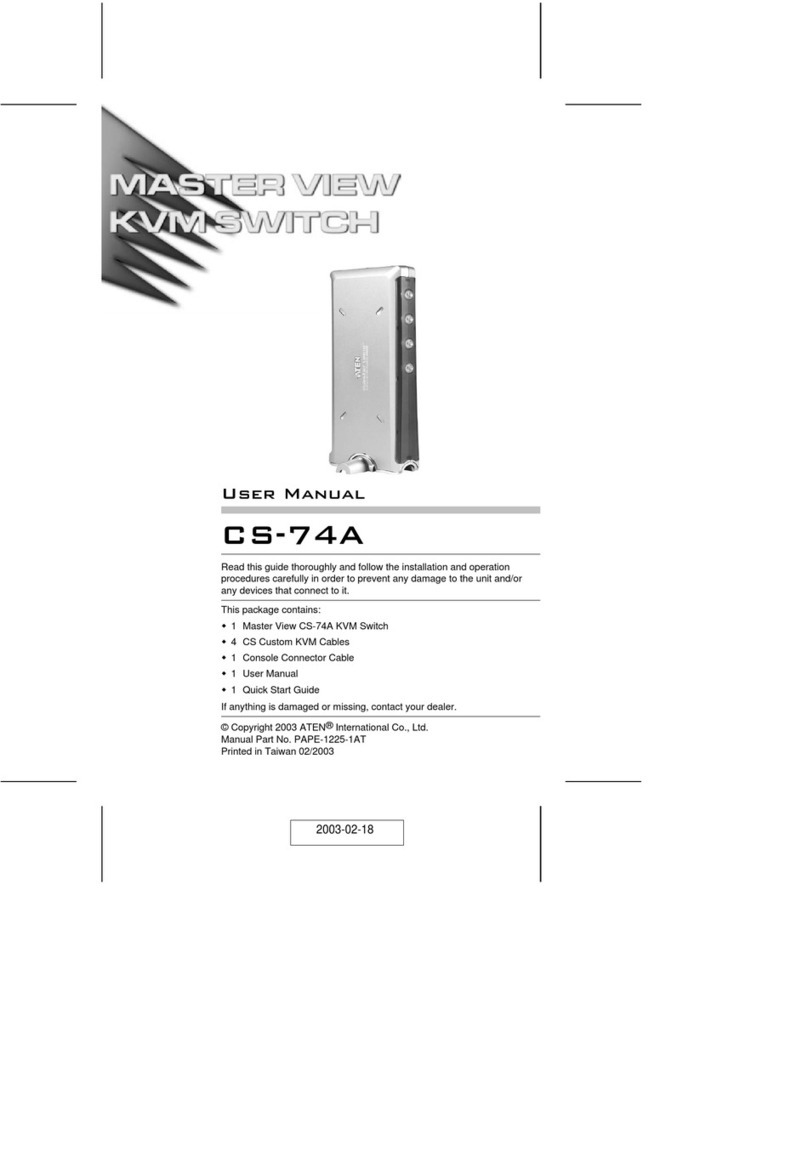
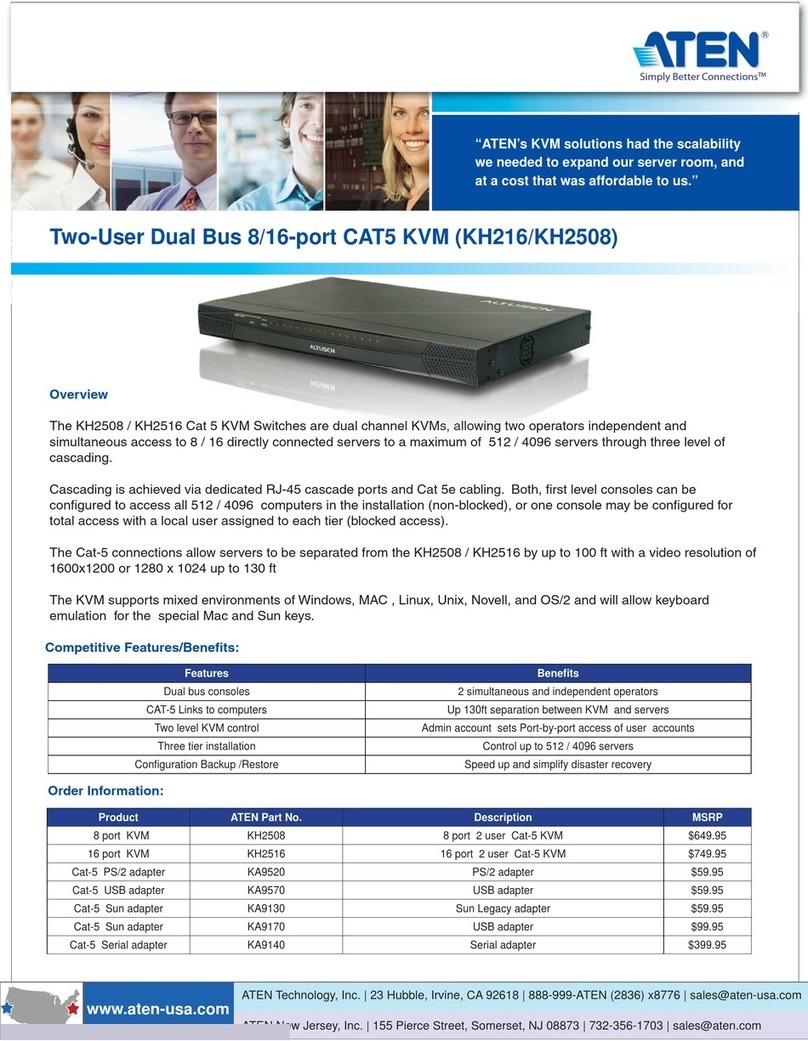
  9. ATEN CS1942ATC User manual

ATEN CS1942ATC User manual

CS1942ATC
2-Port USB 3.0 4K Dual Display
DisplayPort KVMP™ Switch for ATC
User Manual
CS1942ATC User Manual
ii
Compliance Statements
FEDERAL COMMUNICATIONS COMMISSION INTERFERENCE
STATEMENT
This equipment has been tested and found to comply with the limits for a Class
A digital device, pursuant to Part 15 of the FCC ules. These limits are
designed to provide reasonable protection against harmful interference when
the equipment is operated in a commercial environment. This equipment
generates, uses, and can radiate radio frequency energy and, if not installed and
used in accordance with the instruction manual, may cause harmful
interference to radio communications. Operation of this equipment in a
residential area is likely to cause harmful interference in which case the user
will be required to correct the interference at his own expense.
The device complies with Part 15 of the FCC ules. Operation is subject to the
following two conditions: (1) this device may not cause harmful interference,
and (2) this device must accept any interference received, including
interference that may cause undesired operation.
FCC Caution
Any changes or modifications not expressly approved by the party responsible
for compliance could void the user's authority to operate this equipment.
Warning
Operation of this equipment in a residential environment could cause radio
interference.
Achtung
Der Gebrauch dieses Geräts in Wohnumgebung kann Funkstörungen
verursachen.
KCC Statement
CS1942ATC User Manual
iii
Industr Canada Statement
This Class A digital apparatus complies with Canadian ICES-003.
RoHS
This product is oHS compliant.
CS1942ATC User Manual
iv
User Information
Online Registration
Be sure to register your product at our online support center:
Telephone Support
For telephone support, call this number:
User Notice
All information, documentation, and specifications contained in this manual
are subject to change without prior notification by the manufacturer. The
manufacturer makes no representations or warranties, either expressed or
implied, with respect to the contents hereof and specifically disclaims any
warranties as to merchantability or fitness for any particular purpose. Any of
the manufacturer's software described in this manual is sold or licensed as is.
Should the programs prove defective following their purchase, the buyer (and
not the manufacturer, its distributor, or its dealer), assumes the entire cost of all
necessary servicing, repair and any incidental or consequential damages
resulting from any defect in the software.
The manufacturer of this system is not responsible for any radio and/or TV
interference caused by unauthorized modifications to this device. It is the
responsibility of the user to correct such interference.
The manufacturer is not responsible for any damage incurred in the operation
of this system if the correct operational voltage setting was not selected prior
to operation. PLEASE VE IFY THAT THE VOLTAGE SETTING IS
CO ECT BEFO E USE.
International http: eservice.aten.com
International 886-2-8692-6959
China 86-400-810-0-810
Japan 81-3-5615-5811
Korea 82-2-467-6789
North America 1-888-999-ATEN ext 4988
1-949-428-1111
CS1942ATC User Manual
v
Product Information
For information about all ATEN products and how they can help you connect
without limits, visit ATEN on the Web or contact an ATEN Authorized
eseller. Visit ATEN on the Web for a list of locations and telephone numbers:
International http: www.aten.com
North America http: www.aten-usa.com
CS1942ATC User Manual
vi
Package Contents
Check to make sure that all the components are in working order. If you
encounter any problem, please contact your dealer.
The CS1942ATC package consists of:
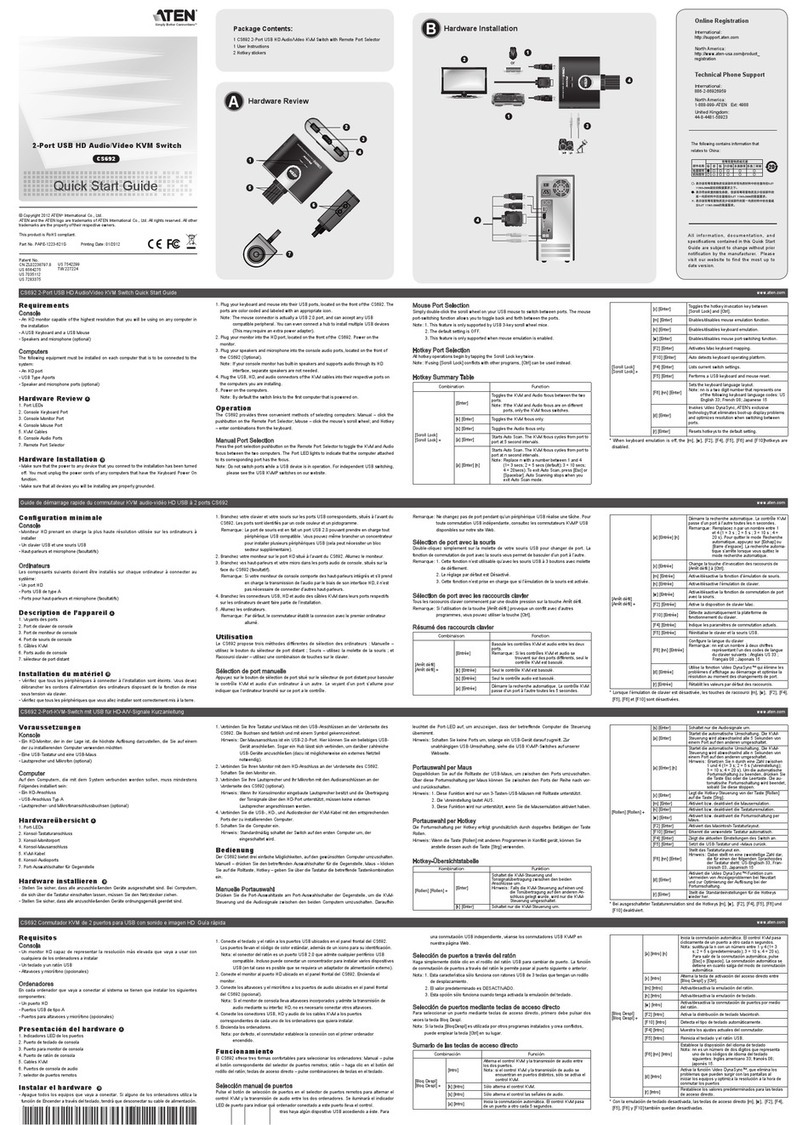
1 CS1942ATC 2-Port USB 3.0 4K Dual Display DisplayPort KVMP™
Switch for ATC
4 DisplayPort 1.2 cables*
2 USB 3.1 Type-A to Type-B cables
2 microphone cables
2 speaker cables
2 power adapters and power cords
1 user instructions
Note: The high quality DisplayPort cables included in this package (or
cable of equal standards) are required to achieve 4K video
resolutions.
CS1942ATC User Manual
vii
Contents
Compliance Statements . . . . . . . . . . . . . . . . . . . . . . . . . . . . . . . . . . . . . . . ii
User Information . . . . . . . . . . . . . . . . . . . . . . . . . . . . . . . . . . . . . . . . . . . . iv
Online Registration . . . . . . . . . . . . . . . . . . . . . . . . . . . . . . . . . . . . . . . iv
Telephone Support . . . . . . . . . . . . . . . . . . . . . . . . . . . . . . . . . . . . . . . iv
User Notice . . . . . . . . . . . . . . . . . . . . . . . . . . . . . . . . . . . . . . . . . . . . . iv
Product Information . . . . . . . . . . . . . . . . . . . . . . . . . . . . . . . . . . . . . . . . . . v
Package Contents . . . . . . . . . . . . . . . . . . . . . . . . . . . . . . . . . . . . . . . . . . vi
Contents . . . . . . . . . . . . . . . . . . . . . . . . . . . . . . . . . . . . . . . . . . . . . . . . . . vii
About this Manual . . . . . . . . . . . . . . . . . . . . . . . . . . . . . . . . . . . . . . . . . . . x
Conventions . . . . . . . . . . . . . . . . . . . . . . . . . . . . . . . . . . . . . . . . . . . . xi
1. Introduction
Overview . . . . . . . . . . . . . . . . . . . . . . . . . . . . . . . . . . . . . . . . . . . . . . . . . . 1
Features . . . . . . . . . . . . . . . . . . . . . . . . . . . . . . . . . . . . . . . . . . . . . . . . . . . 2
Requirements . . . . . . . . . . . . . . . . . . . . . . . . . . . . . . . . . . . . . . . . . . . . . . . 3
Console . . . . . . . . . . . . . . . . . . . . . . . . . . . . . . . . . . . . . . . . . . . . . . . . 3
Computers. . . . . . . . . . . . . . . . . . . . . . . . . . . . . . . . . . . . . . . . . . . . . . . 3
Cables . . . . . . . . . . . . . . . . . . . . . . . . . . . . . . . . . . . . . . . . . . . . . . . . . . 3
Operating Systems . . . . . . . . . . . . . . . . . . . . . . . . . . . . . . . . . . . . . . . . 4
Components . . . . . . . . . . . . . . . . . . . . . . . . . . . . . . . . . . . . . . . . . . . . . . . . 5
CS1942ATC Front View . . . . . . . . . . . . . . . . . . . . . . . . . . . . . . . . . . . . 5
CS1942ATC Rear View . . . . . . . . . . . . . . . . . . . . . . . . . . . . . . . . . . . . 5
2. ardware Setup
Cable Connections . . . . . . . . . . . . . . . . . . . . . . . . . . . . . . . . . . . . . . . . . . . 9
Installation Diagram. . . . . . . . . . . . . . . . . . . . . . . . . . . . . . . . . . . . . . . 11
3. Basic Operation
Port Switching . . . . . . . . . . . . . . . . . . . . . . . . . . . . . . . . . . . . . . . . . . . . . .13
Manual Switching . . . . . . . . . . . . . . . . . . . . . . . . . . . . . . . . . . . . . 13
Mouse Switching . . . . . . . . . . . . . . . . . . . . . . . . . . . . . . . . . . . . . . 14
RS-232 Commands . . . . . . . . . . . . . . . . . . . . . . . . . . . . . . . . . . . . 14
Remote Port Selector (Optional) . . . . . . . . . . . . . . . . . . . . . . . . . . 14
Hot Plugging . . . . . . . . . . . . . . . . . . . . . . . . . . . . . . . . . . . . . . . . . . . . . . . 14
Powering Off and Restarting. . . . . . . . . . . . . . . . . . . . . . . . . . . . . . . . . . . 14
Port ID Numbering . . . . . . . . . . . . . . . . . . . . . . . . . . . . . . . . . . . . . . . . . . 15
Alternative Manual Port Selection Settings. . . . . . . . . . . . . . . . . . . . . . . . 15
4. otkey Operation
Hotkey Port Switching . . . . . . . . . . . . . . . . . . . . . . . . . . . . . . . . . . . . . . . . 17
Cycling Through the Ports. . . . . . . . . . . . . . . . . . . . . . . . . . . . . . . . . . 17
Going Directly to a Port . . . . . . . . . . . . . . . . . . . . . . . . . . . . . . . . . . . . 17
Hotkey Setting Mode . . . . . . . . . . . . . . . . . . . . . . . . . . . . . . . . . . . . . . . . 18
CS1942ATC User Manual
viii
Invoking HSM . . . . . . . . . . . . . . . . . . . . . . . . . . . . . . . . . . . . . . . . . . . 18
Alternate HSM Invocation Keys . . . . . . . . . . . . . . . . . . . . . . . . . . . . . 19
Buzzer Control . . . . . . . . . . . . . . . . . . . . . . . . . . . . . . . . . . . . . . . . . . 19
Power Redundancy Indication . . . . . . . . . . . . . . . . . . . . . . . . . . . . . . 19
Pause Power Redundancy Indication . . . . . . . . . . . . . . . . . . . . . . . . . 20
Keyboard Operating Platform . . . . . . . . . . . . . . . . . . . . . . . . . . . . . . . 20
List Switch Settings . . . . . . . . . . . . . . . . . . . . . . . . . . . . . . . . . . . . . . 21
USB Reset . . . . . . . . . . . . . . . . . . . . . . . . . . . . . . . . . . . . . . . . . . . . . 21
Keyboard Language . . . . . . . . . . . . . . . . . . . . . . . . . . . . . . . . . . . . . . 21
Firmware Upgrade Mode . . . . . . . . . . . . . . . . . . . . . . . . . . . . . . . . . . 21
Restore Default Settings . . . . . . . . . . . . . . . . . . . . . . . . . . . . . . . . . . 22
Alternative Manual Port Selection . . . . . . . . . . . . . . . . . . . . . . . . . . . . 22
Mouse Emulation . . . . . . . . . . . . . . . . . . . . . . . . . . . . . . . . . . . . . . . . 22
Mouse Port Switching . . . . . . . . . . . . . . . . . . . . . . . . . . . . . . . . . . . . . 22
Keyboard Emulation . . . . . . . . . . . . . . . . . . . . . . . . . . . . . . . . . . . . . . 23
Power on Detection . . . . . . . . . . . . . . . . . . . . . . . . . . . . . . . . . . . . . . 23
Monitor Re-detection . . . . . . . . . . . . . . . . . . . . . . . . . . . . . . . . . . . . . 23
N-Key Rollover Keyboard Supporting Function . . . . . . . . . . . . . . . . . 24
HSM Summary Table . . . . . . . . . . . . . . . . . . . . . . . . . . . . . . . . . . . . . . . 25
5. Keyboard Emulation
Mac Keyboard. . . . . . . . . . . . . . . . . . . . . . . . . . . . . . . . . . . . . . . . . . . . . . 27
Sun Keyboard . . . . . . . . . . . . . . . . . . . . . . . . . . . . . . . . . . . . . . . . . . . . . 28
6. RS-232 Operation
Overview. . . . . . . . . . . . . . . . . . . . . . . . . . . . . . . . . . . . . . . . . . . . . . . . . . 29
Setup . . . . . . . . . . . . . . . . . . . . . . . . . . . . . . . . . . . . . . . . . . . . . . . . . . . . 29
Hardware Connection . . . . . . . . . . . . . . . . . . . . . . . . . . . . . . . . . . . . . 29
RS-232 Pin Assignments . . . . . . . . . . . . . . . . . . . . . . . . . . . . . . . . . . 30
Console Login - HyperTerminal . . . . . . . . . . . . . . . . . . . . . . . . . . 31
RS-232 Commands . . . . . . . . . . . . . . . . . . . . . . . . . . . . . . . . . . . . . . . . . 32
Verification . . . . . . . . . . . . . . . . . . . . . . . . . . . . . . . . . . . . . . . . . . . . . 32
Open Close . . . . . . . . . . . . . . . . . . . . . . . . . . . . . . . . . . . . . . . . . . . 33
Formulas: . . . . . . . . . . . . . . . . . . . . . . . . . . . . . . . . . . . . . . . . . . . 33
Parameters: . . . . . . . . . . . . . . . . . . . . . . . . . . . . . . . . . . . . . . . . . 33
Open Close RS-232 Link Command . . . . . . . . . . . . . . . . . . . . . . . 33
Switch Port . . . . . . . . . . . . . . . . . . . . . . . . . . . . . . . . . . . . . . . . . . . . . 34
Formula: . . . . . . . . . . . . . . . . . . . . . . . . . . . . . . . . . . . . . . . . . . . . 34
Parameters: . . . . . . . . . . . . . . . . . . . . . . . . . . . . . . . . . . . . . . . . . 34
Switch Port Commands. . . . . . . . . . . . . . . . . . . . . . . . . . . . . . . . . 34
Set Baud Rate . . . . . . . . . . . . . . . . . . . . . . . . . . . . . . . . . . . . . . . . . . 35
Formula: . . . . . . . . . . . . . . . . . . . . . . . . . . . . . . . . . . . . . . . . . . . . 35
Parameters: . . . . . . . . . . . . . . . . . . . . . . . . . . . . . . . . . . . . . . . . . 35
Set Baud Rate Commands . . . . . . . . . . . . . . . . . . . . . . . . . . . . . . 35
Keyboard Language Layout . . . . . . . . . . . . . . . . . . . . . . . . . . . . . . . . 36
Formula: . . . . . . . . . . . . . . . . . . . . . . . . . . . . . . . . . . . . . . . . . . . . 36
CS1942ATC User Manual
ix
Parameters: . . . . . . . . . . . . . . . . . . . . . . . . . . . . . . . . . . . . . . . . . 36
Keyboard Language Layout Commands . . . . . . . . . . . . . . . . . . . . 36
Hotkey Setting . . . . . . . . . . . . . . . . . . . . . . . . . . . . . . . . . . . . . . . . . . 37
Formulas: . . . . . . . . . . . . . . . . . . . . . . . . . . . . . . . . . . . . . . . . . . . 37
Hotkey Setting Commands . . . . . . . . . . . . . . . . . . . . . . . . . . . . . . 37
USB Reset . . . . . . . . . . . . . . . . . . . . . . . . . . . . . . . . . . . . . . . . . . . . . 38
Formulas: . . . . . . . . . . . . . . . . . . . . . . . . . . . . . . . . . . . . . . . . . . . 38
Parameters: . . . . . . . . . . . . . . . . . . . . . . . . . . . . . . . . . . . . . . . . . 38
USB Reset Command . . . . . . . . . . . . . . . . . . . . . . . . . . . . . . . . . . 38
Restore Default Settings . . . . . . . . . . . . . . . . . . . . . . . . . . . . . . . . . .39
Formulas: . . . . . . . . . . . . . . . . . . . . . . . . . . . . . . . . . . . . . . . . . . . 39
Parameters: . . . . . . . . . . . . . . . . . . . . . . . . . . . . . . . . . . . . . . . . . 39
Restore Default Value Command . . . . . . . . . . . . . . . . . . . . . . . . .39
Firmware Upgrade . . . . . . . . . . . . . . . . . . . . . . . . . . . . . . . . . . . . . . . 40
Formulas: . . . . . . . . . . . . . . . . . . . . . . . . . . . . . . . . . . . . . . . . . . . 40
Parameters: . . . . . . . . . . . . . . . . . . . . . . . . . . . . . . . . . . . . . . . . . 40
Firmware Upgrade Command . . . . . . . . . . . . . . . . . . . . . . . . . . . . 40
KVM Status . . . . . . . . . . . . . . . . . . . . . . . . . . . . . . . . . . . . . . . . . . . .41
Formulas: . . . . . . . . . . . . . . . . . . . . . . . . . . . . . . . . . . . . . . . . . . . 41
Parameters: . . . . . . . . . . . . . . . . . . . . . . . . . . . . . . . . . . . . . . . . . 41
KVM Status Command . . . . . . . . . . . . . . . . . . . . . . . . . . . . . . . . . 41
7. The Firmware Upgrade Utility
Before you Begin . . . . . . . . . . . . . . . . . . . . . . . . . . . . . . . . . . . . . . . . . . . 43
Starting the Upgrade . . . . . . . . . . . . . . . . . . . . . . . . . . . . . . . . . . . . . . . . 45
Upgrade Succeeded . . . . . . . . . . . . . . . . . . . . . . . . . . . . . . . . . . . . . . . . 48
Upgrade Failed . . . . . . . . . . . . . . . . . . . . . . . . . . . . . . . . . . . . . . . . . . . . . 49
Appendix
Safety Instructions. . . . . . . . . . . . . . . . . . . . . . . . . . . . . . . . . . . . . . . . . . . 51
Optional Remote Port Selector . . . . . . . . . . . . . . . . . . . . . . . . . . . . . . . . . 52
Troubleshooting . . . . . . . . . . . . . . . . . . . . . . . . . . . . . . . . . . . . . . . . . . . . 53
Technical Support . . . . . . . . . . . . . . . . . . . . . . . . . . . . . . . . . . . . . . . . . . 54
International . . . . . . . . . . . . . . . . . . . . . . . . . . . . . . . . . . . . . . . . . . . . 54
North America . . . . . . . . . . . . . . . . . . . . . . . . . . . . . . . . . . . . . . . . . . 54
Specifications . . . . . . . . . . . . . . . . . . . . . . . . . . . . . . . . . . . . . . . . . . . . . . 55
Hotkey Default Settings . . . . . . . . . . . . . . . . . . . . . . . . . . . . . . . . . . . . . . 57
ATEN Standard Warranty Policy. . . . . . . . . . . . . . . . . . . . . . . . . . . . . . . . 58
CS1942ATC User Manual
x
About this Manual
This user manual is provided to help you get the most from your CS1942ATC
unit. It covers all aspects of installation, configuration and operation. An
overview of the information found in the manual is provided below.
Chapter 1, Introduction, introduces you to the CS1942ATC. Its purpose,
features and benefits are presented, and its front and back panel components
are described.
Chapter 2, ardware Setup, describes how to set up your installation. The
necessary steps are provided.
Chapter 3, Basic Operation, explains the fundamental concepts involved
in operating the CS1942ATC.
Chapter 4, otkey Operation, details all of the concepts and procedures
involved in the Hotkey operation of your CS1942ATC installation.
Chapter 5, Keyboard Emulation, provides tables that list the PC to Mac
keyboard emulation mappings.
Chapter 7, The Firmware Upgrade Utility, explains how to upgrade the
CS1942ATC's firmware with the latest version available.
Appendix, provides specifications and other technical information regarding
the CS1942ATC.
Note:
ead this manual thoroughly and follow the installation and operation
procedures carefully to prevent any damage to the unit or any connected
devices.
The product may be updated, with features and functions added, improved,
or removed since the release of this manual. For an up-to-date user
manual, visit http://www.aten.com/global/en/
CS1942ATC User Manual
xi
Conventions
This manual uses the following conventions:
Monospaced Indicates text that you should key in.
[ ] Indicates keys you should press. For example, [Enter] means to
press the Enter key. If keys need to be chorded, they appear
together in the same bracket with a plus sign between them:
[Ctrl+Alt].
1. Numbered lists represent procedures with sequential steps.
♦Bullet lists provide information, but do not involve sequential steps.
>Indicates selecting the option (on a menu or dialog box, for
example), that comes next. For example, Start
>
Run means to
open the Start menu, and then select Run.
Indicates critical information.
CS1942ATC User Manual
xii
This Page Intentionally Left Blank
1
Chapter 1
Introduction
Overview
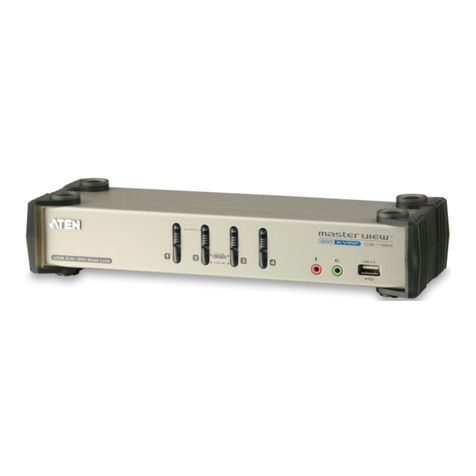
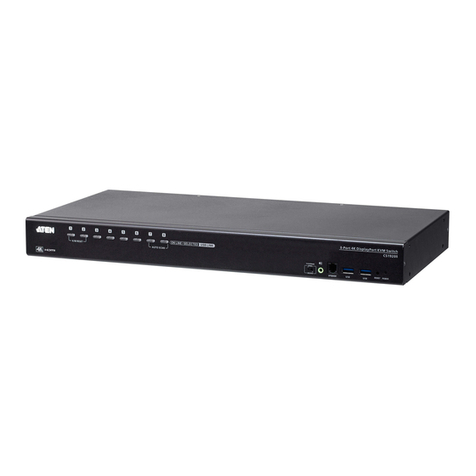
The ATEN CS1942ATC 2-Port USB 3.0 4K DisplayPort Dual Display
KVMP™ Switch for ATC is tailor-made for Air Traffic Control scenarios. It
supports 2Kx2K resolution, making it perfect for radar monitoring, and also
enables constant monitoring of flight information and mission-critical
processes. Incorporating dual display capability, users can enjoy a wider screen
and easy switch between the two DisplayPort systems.
The Zero-Second Switch function ensures nearly real-time switching without
any black screens, providing air traffic controllers instant access to two USB /
DisplayPort-interfaced dual display ATC computers for crucial operations.
Port switching is flexible via pushbuttons, hotkeys, mouse, S-232 commands,
or an optional accessory the remote port selector.
With two lockable DC jacks for power redundancy, the CS1942ATC ensures
uninterrupted operation and constant availability for mission-critical
applications. It aims to greatly minimize or eliminate the risk of downtime.
Patented ATEN technology – Video DynaSync™, and EDID expert™,
combined with DisplayPort 1.2 and video resolutions up to 4K @ 60 Hz, it
delivers optimized display resolution with exceptional detail and clarity in all
conditions.
The CS1942ATC creates a safer environment and enhanced operational
efficiency for Air traffic Control Towers, Approach Control ooms, and Area
Control Centers, specifically tailored the air traffic control industry.
CS1942ATC User Manual
2
Features
One USB / DisplayPort console controls 2 DisplayPort computers and
shares 2 USB peripherals
Supports 2048 x 2048 @ 60 Hz screen resolutions dedicated for radar
monitoring; maximum resolution up to 4096 x 2160 @ 60 Hz
Zero-Second Switch – provides continuous video stream and real-time
switching
Supports power failover – 2 DC jacks for power redundancy to ensure
constant availability for mission-critical applications
Computer Selection via front panel pushbuttons, hotkeys, mouse, S-232
commands, and remote port selector
Video DynaSync™ – exclusive ATEN technology eliminates boot-up
display problems and optimizes resolutions when switching between ports
EDID Expert™ – smooth power- up, high-quality display and use of the
best video resolution across different screens
Supports serial port switching for legacy devices
Built-in 2-port USB 3.1 Gen 1 hub with SuperSpeed 5 Gbps data transfer
rates
DisplayPort 1.2, and HDCP compliant
Supports HD audio*
Console mouse port emulation / bypass feature supports most mouse
drivers and multifunction mice
Console keyboard emulation / bypass feature supports most multimedia
keyboards
Multilingual keyboard mapping – supports English, French, Japanese, and
German keyboards
Power on detection
Auto scan
Firmware upgradable
Note: HD audio through DisplayPort cannot be switched independently.
Chapter 1. Introduction
3
Requirements
Console
Two DisplayPort monitors capable of the highest possible resolution
A USB mouse
A USB keyboard
Microphone and speakers
Computers
The following equipment must be available on each computer:
Two DisplayPort ports
USB Type-A port
Audio ports
Cables
To guarantee video quality we recommend using only ATEN DisplayPort
KVM cables. Four cables are provided with this package.
Note: 1. The video quality displayed is affected by the quality and length of the
cables you use. We recommend the total length from the source to the
monitor not exceed 3 meters. If you need additional cable sets, please
contact your dealer to purchase ATEN approved cables.
2. If you use DisplayPort cables that are DP 1.1 compliant, make sure
the DisplayPort setting on the monitor is set to auto or DP 1.1.
CS1942ATC User Manual
4
Operating Systems
OS Version
Windows 2K XP 2003 2008 Vista (x64 x86) 7 10 or above
Linux RedHat 9.0, Fedora and higher, RHEL AS 4, RHEL 5
SuSE 10 11.1 and higher; OpenSUSE 10.2; SLES 10 SP1
Debian 3.1 4.0
Ubuntu 7.04 7.10 or later
Unix IBM AIX 4.3 5L (V5.2, V5.3) V6 (V6.1)
FreeBSD 5.5 6.1 6.2
Novell Netware 6.0 6.5
Mac OS 10.1 10.2 10.3 10.4 10.5 10.7 10.8 or later
Chapter 1. Introduction
5
Components
CS1942ATC Front View
CS1942ATC Rear View
No. Component Description
Front View
1 port LEDs This panel contains LED icons that light to indicate mode
and port status. The mode and port selection pushbuttons
have three corresponding LED icons that light to indicate
status – KVM, Audio, and USB.
4
1
2
3
5
7
8 9 10 11 16 17
12 13 18 1914
616 17
18 19
15
CS1942ATC User Manual
6
2 mode selection
pushbutton

This pushbutton allows you to cycle through the four
focus modes – complete, KVM, audio, and USB.

Press and hold mode selection pushbutton before pow-
ering on to enter firmware upgrade mode. See The Firm-
ware Upgrade Utility, page 43.
3 port selection
pushbuttons
For manual port selection (see Manual Switching,
page 13):

Press a port selection pushbutton for less than two sec-
onds to bring the KVM, USB hub, and audio focus to the
computer attached to its corresponding port.

Press a port selection pushbutton twice to bring the
audio focus to the computer attached to its correspond-
ing port.

Press a port selection pushbutton for longer than two
seconds to bring only the KVM focus to the computer
attached to its corresponding port.

Press port selection pushbutton 1 and 2 simultaneously
for 2 seconds to start Auto Scan Mode (see Hotkey Set-
ting Mode, page 18).
4 audio jacks Your main console microphone and speakers plug in here.
Note: The microphone and speakers plugged into the front
panel have priority over those plugged into the rear panel.
5 USB 3.1 Gen 1
Type-A port
USB peripherals (printers, scanners, drives etc.) plug into
this port. This USB 3.1 Gen 1 port features 5 Gbps data
transfer rates for compatible USB peripherals.
Rear View
6 grounding
terminal
The grounding wire used to ground the switch attaches
here.
7 power jacks The power adapter cable plugs into this lockable jack.
Rear View (Console Ports Section)
8 USB Micro-B
port (firmware
upgrade)
Use a USB Micro-B to USB Type-A cable connect the
CS1942ATC to a PC for firmware upgrade.
9 RJ-11 port The optional remote port selector plugs in here. To use a
remote port selector for port selection, make sure to slide
the primary secondary switch to the p position. See
page 7.
No. Component Description
Chapter 1. Introduction
7
10 USB 2.0 Type-
A ports
The cables from your keyboard and mouse plug in here.
Each connector is marked with an appropriate icon to
indicate itself.
11 RS-232 serial
port
The RS-232 serial device such as a printer plugs in here.
12 audio jacks The cables from your microphone and speakers plug in
here. Each connector is marked with an appropriate icon to
indicate itself.
13 USB 3.1 Gen 1
Type-A port
USB peripherals (printers, scanners, drives etc.) plug into
this port. This USB 3.1 Gen 1 port features 5 Gbps data
transfer rates for compatible USB peripherals.
14 primary
secondary
switch
Slide the primary secondary switch to the s position to
allow the KVM switch to receive RS-232 commands via an
RJ45-toDB9 cable. Please see RS-232 Operation,
page 29.
Slide the primary secondary switch to the p position if the
remote port selector is connected to RJ-11 port for port
selection.
15 DisplayPort out The cable from your monitor plugs in here. Each connector
is marked with an appropriate icon to indicate itself.
Rear View (KVM Ports Section)
16 DisplayPort in The monitor cables that link the switch to your computers
plug in here. Each KVM port section is comprised of a
microphone jack, speaker jack, USB Type-B port, RS-232
port, and a DisplayPort connector.
17 RS-232 serial
ports
The RS-232 cables that link the switch to your computers
plug in here. Each KVM port section is comprised of a
microphone jack, speaker jack, USB Type-B port, RS-232
port, and a DisplayPort connector.
18 audio jacks The audio cables that link the switch to your computers
plug in here. Each KVM port section is comprised of a
microphone jack, speaker jack, USB Type-B port, RS-232
port, and a DisplayPort connector.
19 USB Type-B
ports
The USB Type-A to USB Type-B cables that link the switch
to your computers plug in here. Each KVM port section is
comprised of a microphone jack, speaker jack, USB Type-B
port, RS-232 port, and a DisplayPort connector.
No. Component Description
CS1942ATC User Manual
8
This Page Intentionally Left Blank

Other ATEN Switch manuals

ATEN Slideaway CL5708 User manual

ATEN

ATEN Slideaway CL5708 User manual

ATEN CS-1742 User manual

ATEN

ATEN CS-1742 User manual

ATEN ACS-1722 User manual

ATEN

ATEN ACS-1722 User manual

ATEN KL1508AM User manual

ATEN

ATEN KL1508AM User manual

ATEN Slideaway CL5708 User manual

ATEN

ATEN Slideaway CL5708 User manual

ATEN MASTER VIEW CS-124U User manual

ATEN

ATEN MASTER VIEW CS-124U User manual

ATEN Master View CS-1762 User manual

ATEN

ATEN Master View CS-1762 User manual

ATEN Petite CS62US User manual

ATEN

ATEN Petite CS62US User manual

ATEN VS481 User manual

ATEN

ATEN VS481 User manual

ATEN VP2730 User manual

ATEN

ATEN VP2730 User manual

ATEN ATEN MasterView KVM CS-62 User manual

ATEN

ATEN ATEN MasterView KVM CS-62 User manual

ATEN CL5708M Guide

ATEN

ATEN CL5708M Guide

ATEN VM7804 User manual

ATEN

ATEN VM7804 User manual

ATEN VP2120 User manual

ATEN

ATEN VP2120 User manual

ATEN RCM Series User manual

ATEN

ATEN RCM Series User manual

ATEN USB421 User manual

ATEN

ATEN USB421 User manual

ATEN VanCryst VS481A User manual

ATEN

ATEN VanCryst VS481A User manual

ATEN CS-64A User manual

ATEN

ATEN CS-64A User manual

ATEN Master View CS-1708 User manual

ATEN

ATEN Master View CS-1708 User manual

ATEN ALTUSEN SN0108 User manual

ATEN

ATEN ALTUSEN SN0108 User manual

ATEN CS-72E User manual

ATEN

ATEN CS-72E User manual

ATEN CS-1262 User manual

ATEN

ATEN CS-1262 User manual

ATEN Master View CS-1754 User manual

ATEN

ATEN Master View CS-1754 User manual

ATEN ALTUSEN KH1508I Operator's manual

ATEN

ATEN ALTUSEN KH1508I Operator's manual

Popular Switch manuals by other brands

Mega Catch Pro 900 PREMIER Replacement instructions

Mega Catch

Mega Catch Pro 900 PREMIER Replacement instructions

Tributaries HX410 manual

Tributaries

Tributaries HX410 manual

Vega VEGAWAVE 62 operating instructions

Vega

Vega VEGAWAVE 62 operating instructions

KLIK Boks KB1200 owner's manual

KLIK

KLIK Boks KB1200 owner's manual

Cisco NCS 4200 Series Configuration guide

Cisco

Cisco NCS 4200 Series Configuration guide

IFM Electronic Efector 160 LI5045 operating instructions

IFM Electronic

IFM Electronic Efector 160 LI5045 operating instructions

Quintum CMS240 supplementary guide

Quintum

Quintum CMS240 supplementary guide

HP Compaq Presario,Presario 1910 Getting started guide

HP

HP Compaq Presario,Presario 1910 Getting started guide

Cooper Wiring Devices 6105 installation guide

Cooper Wiring Devices

Cooper Wiring Devices 6105 installation guide

Bticino K4003C quick start guide

Bticino

Bticino K4003C quick start guide

ADTRAN 1200655L1 quick start guide

ADTRAN

ADTRAN 1200655L1 quick start guide

Atlona AT-HDVS-210H-TX-WP manual

Atlona

Atlona AT-HDVS-210H-TX-WP manual

Cisco Nexus 7000 Series Hardware  installation and reference guide

Cisco

Cisco Nexus 7000 Series Hardware installation and reference guide

Moxa Technologies EtherDevice EDS-518A Series Hardware installation guide

Moxa Technologies

Moxa Technologies EtherDevice EDS-518A Series Hardware installation guide

TRENDnet TEG-S5g - Gigabit GREENnet Switch user manual

TRENDnet

TRENDnet TEG-S5g - Gigabit GREENnet Switch user manual

HP 3500 Series Advanced traffic management guide

HP

HP 3500 Series Advanced traffic management guide

Intermatic T1906 supplementary guide

Intermatic

Intermatic T1906 supplementary guide

Balluff BCS M12K4 Series user guide

Balluff

Balluff BCS M12K4 Series user guide

manuals.online logo
manuals.online logoBrands
  • About & Mission
  • Contact us
  • Privacy Policy
  • Terms and Conditions

Copyright 2025 Manuals.Online. All Rights Reserved.