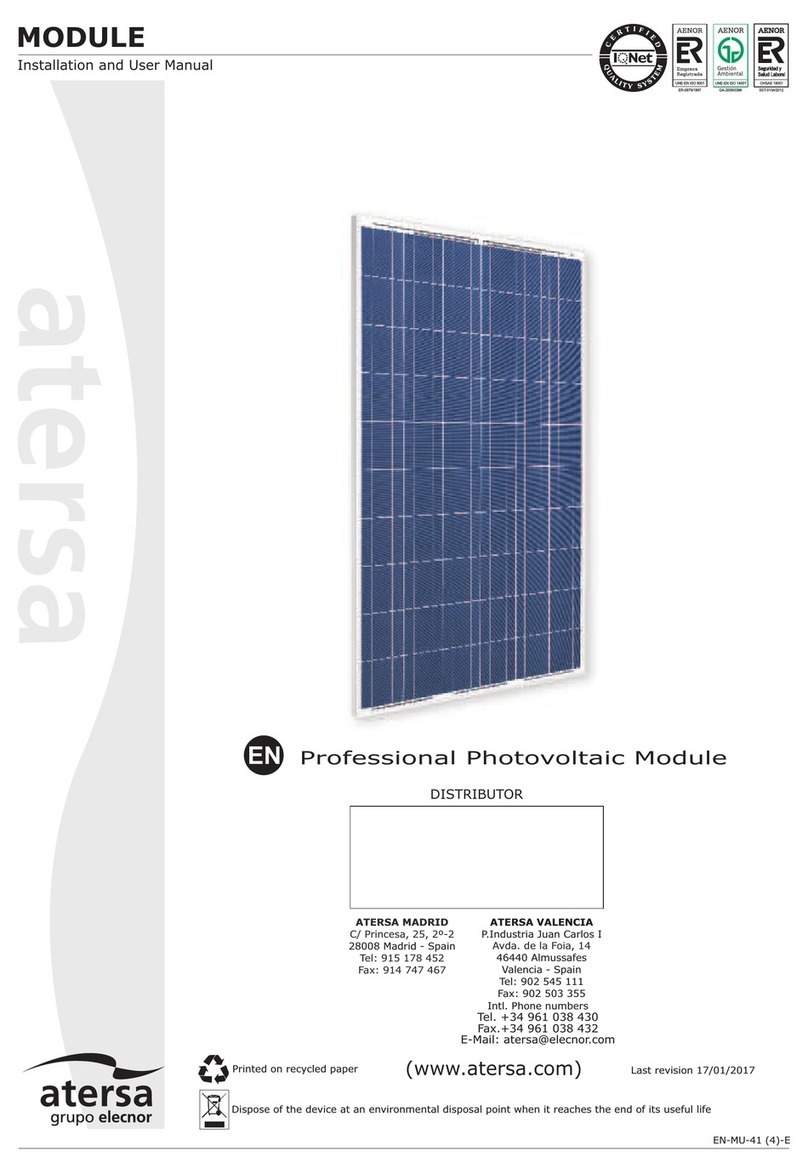
atersa OPTIMUM A-290P GS User manual

OPTIMUM GS MODULES INSTALLATION MANUAL
Page 1
Aplicaciones Técnicas de la Energía S.L. (ATERSA
www.atersa.com – atersa@elecnor.com
Madrid (Spain) +34 915 178 452 - Valencia (Spain) +34 961 038 430
OPTIMUM GS Modules
Installation Manual
Ref : MU-81-A
Revised: 28/01/16

OPTIMUM GS MODULES INSTALLATION MANUAL
Page 2
Aplicaciones Técnicas de la Energía S.L. (ATERSA
www.atersa.com – atersa@elecnor.com
Madrid (Spain) +34 915 178 452 - Valencia (Spain) +34 961 038 430
Table of contents
1Purpose of this manual
2Disclaimer of Liability
3General Safety
4Precaution for unpacking, handling & storage
5Warning
6Installation
6 1 Mechanical Installation
6 1 1 Bolting method
6 1 2 Clamping method
6 2 Electrical Connections
6 2 1 Equipment Grounding
6 2 2 Bypass diodes
7Wiring
8Maintenance and Cleaning
8 1 1 Cleaning
8 1 2 Maintenance safety
9Checklist
Note: The contents and specifications hereof may vary with the product design Atersa reserves the right to make
change to the installation guide without prior notice

OPTIMUM GS MODULES INSTALLATION MANUAL
Page 3
Aplicaciones Técnicas de la Energía S.L. (ATERSA
www.atersa.com – atersa@elecnor.com
Madrid (Spain) +34 915 178 452 - Valencia (Spain) +34 961 038 430
1. Introduction
Thank you for choosing Atersa photovoltaic (PV) module It is the great honor to provide you
our PV modules This manual contains information regarding the installation and safe handling
of Atersa The word "module" or "PV module" used in this manual refers to one or more
GSE-Series solar modules Installers must read and understand the guide before installation
Any questions, please contact our sales department for further explanations The installer
should conform to all safety precautions in the guide and local codes when installing a module
Before installing a solar photovoltaic system, installers should become familiar with the
mechanical and electrical requirement for such a system Keep this guide in a safe place for
future reference (care and maintenance) and in case of sale or disposal of the modules
2. Disclaimer of Liability
Because the use of this manual and the conditions or methods of installation, operation, use
and maintenance of photovoltaic (PV) product are beyond Atersa’s control, Atersa does not
accept responsibility and expressly disclaims liability for loss, damage, or expense arising out
of or in any way connected with such installation, operation, use or maintenance
No responsibility is assumed by Atersa for any infringement of patents or other rights of third
parties, which may result from use of the PV product No license is granted by implication or
otherwise under any patent or patent rights
The information in this manual is based on Atersa’s knowledge and experience and is believed
to be reliable; but such information including product specification (without limitations) and
suggestions do not constitute a warranty, expresses or implied Atersa reserve the right to
change the manual, the PV produce, the specifications, or product information sheets without
prior notice
Warning:
Read this instruction sheet in its entirety before installing, wiring, or
using this product in any way. Failure to comply with these instructions will
invalidate the Atersa Warranty for P Modules.
In summary, the Limited Warranties do not apply to any of the following:
PV modules which in Atersa's absolute judgment have been subjected to: misuse, abuse,
neglect or accident; alteration, improper installation, application or removal (including but not
limited to installation, application or removal by any party other than a Atersa authorized
dealer); non-observance of Atersa's installation, users and/or maintenance instructions;
repair or modifications by someone other than an approved service technician of Atersa;
power failure surges, lightning, flood, fire, accidental breakage or other events outside
Atersa's control

OPTIMUM GS MODULES INSTALLATION MANUAL
Page 4
Aplicaciones Técnicas de la Energía S.L. (ATERSA
www.atersa.com – atersa@elecnor.com
Madrid (Spain) +34 915 178 452 - Valencia (Spain) +34 961 038 430
3. General Safety
•Follow all permission, installation and inspection requirements
•Before installing modules, contact the appropriate authorities to determine
permissions, installation, and inspection requirements which should be followed
•Electrically ground modules for all systems of any voltage
•If not otherwise specified, it is recommended that requirements of national or
international electrical standards be used
•Be sure that the construction or structure (roof, facade, etc ) where the modules are
being installed has enough strength For modules mounted on roofs, special
construction or structures may be required to help provide proper installation Both
roof construction and module installation design have an effect on the fire resistance of
a building Improper installation may contribute to fire hazards Additional devices
such as ground fault, fuses, and disconnects may be required
•Follow all safety precautions of other system components used
•Wiring and grounding method of the frame of arrays shall comply with national,
regional and local codes, laws and standards
•PV modules should be installed and maintained by qualified personnel Only
installation/service personnel should have access to the PV module installation site Do
not work alone (always work as a team of 2 or more people)
•Keep children and animals away from PV modules
•Prior to installation, do not store modules outdoors or in a damp environment
•When PV modules are installed on roofs or any other structures above ground,
appropriate safety practices should be followed and appropriate safety equipment
should be used in order to avoid possible safety hazards Note that the installation of
PV modules on some roof types may require the addition of fireproofing, as required by
local building/fire codes
•Follow all safety precautions of other components used in the system
•In order to avoid risk of injury or electrical shock, do not allow anyone (unqualified or
having limited knowledge of PV modules) to handle damaged PV modules Place
defective PV modules in cartons so that PV cells are completely shaded
•Avoid uneven shade on the PV module surface Shaded cells may become hot (“hot
spot” phenomenon) which may result in permanent damage to the module
•Do not expose PV modules to sunlight concentrated with mirrors, lenses or other
means
•The maximum open circuit voltage must not be greater than the specified maximum

OPTIMUM GS MODULES INSTALLATION MANUAL
Page 5
Aplicaciones Técnicas de la Energía S.L. (ATERSA
www.atersa.com – atersa@elecnor.com
Madrid (Spain) +34 915 178 452 - Valencia (Spain) +34 961 038 430
system voltage Voltage is proportional to the number of PV modules in series and is
affected by weather conditions
•Do not connect the PV modules directly to the loads such as motor since the variation
of the output power depending on the solar irradiation cause damage for the
connected motor
1:In the case of a blushless motor, the lock function becomes active and the hall
IC is most likely to be damaged
2:In the case of a brush type motor, the coil is most likely to be damaged
4. Precaution for unpacking, handling & storage
The handling of modules requires great diligence Therefore, caution is required while
unpacking, transporting and temporarily storing these modules
•Unpack module pallet with extreme care Be careful while unpacking, transporting and
storing the modules Avoid module mishandling during unloading
•When carrying a bigger module, two or more people should carry it by its frame and
wear non-slip gloves (to avoid injury by a slipping module, cuts by the edge of a frame
etc Do not leave the module unsupported or unsecured prior to installation For
example, wind can cause a module which is leaning against a fence to fall and break
Avoid application of excessive bending or twisting forces to the module, it may cause
severe micro- cracks at the cell level, which in turn may compromise module reliability
•A module with broken glass or torn back sheet cannot be repaired and must not be
used since contact with any module surface or the frame can produce electrical shock
•Broken or damaged modules must be handled carefully and disposed of properly
Broken glass can be sharp and can cause injury if not handled with appropriate
protective equipment
•Store modules in a dry and ventilated room Do not place modules on an uneven
surface Do not place excessive loads on the module or twist the module frame, it may
cause severe micro-cracks at the cell level, which in turn may compromise module
reliability
•Do not stand, step, walk and/or jump on the module Do not drop or place objects on
the modules (such as tools )
•Do not mark the modules with sharp instrument Particularly attention should be taken
to avoid module back sheet to come in contact with sharp objects, as scratches may
directly affect product safety

OPTIMUM GS MODULES INSTALLATION MANUAL
Page 6
Aplicaciones Técnicas de la Energía S.L. (ATERSA
www.atersa.com – atersa@elecnor.com
Madrid (Spain) +34 915 178 452 - Valencia (Spain) +34 961 038 430
5. Warning
•Cover the entire front surface of the PV module with a dense, opaque material such as
cardboard box, during installation and handling of the modules
•Do not expose Back sheet directly to sunlight
•Work only under dry conditions, with dry modules and Insulated tools
•Be sure to completely ground all modules
•Since sparks may occur, do not install the module where flammable gases or vapors
are present
•Module installation and operation should be performed by qualified personnel only
Children and unauthorized persons should not be allowed near the installation of PV
modules
•Use module for its intended function only
•Be sure that all other system components are compatible, and they do not subject the
module to mechanical or electrical hazards
•Do not touch terminals while module is exposed to light or during installation As a
Precaution use properly insulated tools only
•Do not damage or scratch the back sheet of the module
•Do not use the junction box to hold or transport the module
•Do not drop module or allow objects to fall on module
•Do not stand or step on the module
•Do not disassemble, modify or adapt the module or remove any part or labeling
installed/ pasted by the manufacturer
•Do not drill holes in the frame or glass of the module
•Do not treat back sheet and front surface of the module with paint and adhesives
•Do not artificially concentrate light on the module
•Do not wear metallic jewelry while installing or trouble shooting the module
•Do not change the wiring of bypass diodes

OPTIMUM GS MODULES INSTALLATION MANUAL
Page 7
Aplicaciones Técnicas de la Energía S.L. (ATERSA
www.atersa.com – atersa@elecnor.com
Madrid (Spain) +34 915 178 452 - Valencia (Spain) +34 961 038 430
6. Installation
Output electricity from PV module may vary according to season, climate and location It is
vital to install PV module in its proper direction and tilting angle to receive the most direct sun
exposure Installation conditions in the following should be considered to help set up PV
module in an optimal position
•Please read this guide completely before installation or use of the modules
•Selecting the proper support frame
•Facing south is the most suitable direction to receive the maximum sun light in the
northern hemisphere, and conversely, facing north is the correct orientation for PV
module in the southern hemisphere
•The assembly is to be mounted over a fire resistant roof covering rated for the
application
•The roof slope should be less than 5 in/ft (less than 22 62º) to maintain fire class
ratings
•Tilting angle of PV module should almost be the same degree of latitude where the
installation locates in most situations In order to set the best tilting angle, 10 degrees
of tilting angle or more is recommended if natural effect of cleaning PV module such as
raining is intended and expected High latitude areas require an additional 10-degree
tilting angle to the degree of latitude to reach the optimal tilting angle of PV module in
the winter The module tilting angle recommended varies according to the location of
installation Please refer to the table below for more information
Degrees of
Latitude
Tilting Angle
0
o
~ 15
o
15
o
15
o
~ 25
o
Same as Latitude
25
o
~ 30
o
Latitude + 5
o
30
o
~ 35
o
Latitude + 10
o
35
o
~ 40
o
Latitude + 15
o
40
o
+ Latitude + 20
o
Tilting angle of PV module
Recommended tilting angles

OPTIMUM GS MODULES INSTALLATION MANUAL
Page 8
Aplicaciones Técnicas de la Energía S.L. (ATERSA
www.atersa.com – atersa@elecnor.com
Madrid (Spain) +34 915 178 452 - Valencia (Spain) +34 961 038 430
Shading PV module by trees, building or any obstructions to sunlight should be avoided Trim
branches and remove unnecessary items that may block the path of sunlight during the
daytime
•Otherwise, the power output will undoubtedly decline
•Only PV modules with the same cell size should be connected in series
•Do not use modules of different specifications in the same system
•Grounding should be completed through an attachment of the frame of PV module and
mounting racks in compliance with the national regulations to avoid risks of electrical
shocks or fire
•Wiring should be protected and used in location not accessible to children or small
animals to ensure personal safety and to prevent PV module from damage
•The junction box shall be in the uppermost position to minimize the ingress of water
•Clearance between the module frame and the mounting surface is required to allow
cooling air to circulate around the back of the module This also allows any
condensation or moisture to dissipate The module should never be sealed to the
mounting surface with sealant that prevents air from circulating under the module
•The recommended standoff height is 10 cm (4 in) (Leave 10 cm of clearance between
the roof and the module frame) Clearance of 10 mm (0 4 in) or more between
modules is required to allow for thermal expansion of the frames
•The max number of module (N) = Vmax system / [Voc (at STC)]
•Recommended maximum number of 60cells module is 24 in series and 2 in parallel, 72
cells module is 21 in series and 2 in parallel
•The maximum PV modules in parallel are two groups of maximum PV modules in
series

OPTIMUM GS MODULES INSTALLATION MANUAL
Page 9
Aplicaciones Técnicas de la Energía S.L. (ATERSA
www.atersa.com – atersa@elecnor.com
Madrid (Spain) +34 915 178 452 - Valencia (Spain) +34 961 038 430
6 1 Mechanical Installation
6.1.1. Bolting method
Each module must be securely fastened at 4 points
•The hardware required to mount the
module is given below
•Stainless steel M8 – 304 bolt
•Stainless steel M8 – 304 washer
•Stainless steel M8 – 304 nut
•We recommend using a torque wrench
for installation
•The tightening torque (using stainless steel M8 bolts) should be around 8Nm Use the
existing holes for securing the module and do not drill additional holes (doing so would
void the warranty) Use appropriate corrosion-proof fastening materials
Module installed using Bolting method

OPTIMUM GS MODULES INSTALLATION MANUAL
Page 10
Aplicaciones Técnicas de la Energía S.L. (ATERSA
www.atersa.com – atersa@elecnor.com
Madrid (Spain) +34 915 178 452 - Valencia (Spain) +34 961 038 430
6.1.2 Clamping method
For the clamping method is recommended use clamps with figure’s sizes
The hardware used is the same as bolting method (M8 Stainless steel nut) and the
same tightening torque too
Clamping Method Bolting method
Clamp size
40 < X < 50

OPTIMUM GS MODULES INSTALLATION MANUAL
Page 11
Aplicaciones Técnicas de la Energía S.L. (ATERSA
www.atersa.com – atersa@elecnor.com
Madrid (Spain) +34 915 178 452 - Valencia (Spain) +34 961 038 430

OPTIMUM GS MODULES INSTALLATION MANUAL
Page 12
Aplicaciones Técnicas de la Energía S.L. (ATERSA
www.atersa.com – atersa@elecnor.com
Madrid (Spain) +34 915 178 452 - Valencia (Spain) +34 961 038 430

OPTIMUM GS MODULES INSTALLATION MANUAL
Page 13
Aplicaciones Técnicas de la Energía S.L. (ATERSA
www.atersa.com – atersa@elecnor.com
Madrid (Spain) +34 915 178 452 - Valencia (Spain) +34 961 038 430
6 2 Electrical Connections
6.2.1. Equipment Grounding
•To avoid the risk of electrical shock or fire, the
module frame should be grounded before the
electrical connection of the modules is
operated
1 Stainless steel M5 - 304 bolt
2 Stainless steel M5 - 304 flat washer
3 Stainless steel M5 - 304 nut
•The tightening torque should be 2 1±0 1 Nm
•A good connection between the grounding hardware is essential for an effective
ground The anodization on a module frame provides a coating to minimize the
corrosion due to weather and it acts as a barrier that reduces the effectiveness of the
grounding connection For an adequate ground, the grounding hardware should
penetrate the anodization layer
Use the marked 5 1 mm grounding holes (5 1mm) to
ground the anodized frame
•10-12 AWG exposed copper wire is recommended as Ground wire
•The fastening system must be spliced with a cable that has a minimum diameter of
2 5mm
2
•The copper wire cannot be attached directly to the aluminum
6.2.2. Bypass Diodes
Partial shading of an individual module can cause a reverse voltage across the shaded GES
SOLAR module Current is then forced through the shaded area by the other modules
When a bypass diode is wired in parallel with the series string, the forced current will flow
through the diode and bypass the shaded GS SOLAR module, thereby minimizing module
heating and array current losses
In system utilizing a battery, blocking diodes are typically placed between the battery and the
GS module output to prevent battery discharge at night
Diodes that are used as blocking diodes must: Have a Rated Average Forward Current [IF(AV)]
above maximum system current at highest module operating temperature Have a Rated
Repetitive Peak Reverse Voltage [VRRM] above maximum system voltage at lowest module
operating temperature

OPTIMUM GS MODULES INSTALLATION MANUAL
Page 14
Aplicaciones Técnicas de la Energía S.L. (ATERSA
www.atersa.com – atersa@elecnor.com
Madrid (Spain) +34 915 178 452 - Valencia (Spain) +34 961 038 430
7. Wiring
•These modules contain factory installed bypass diodes If these modules are
incorrectly connected to each other, the bypass diodes, cables, or junction box may be
damaged
•Modules can be wired in series to increase voltage Connect wires from positive
terminal of one module to the negative terminal of the next module All modules
connected in series should be of the same model number and/or type
•Use system wiring with suitable cross-sectional areas and connectors
that are approved for use at the maximum short-circuit current of the module
•The maximum open circuit voltage of the system must not be greater than the
specified maximum system voltage for the module
•When reverse currents can exceed the value of the maximum protective fuse marked
on the back of the module, a properly rated and certified over current device (fuse or
circuit breaker) must be connected in series with each module or string of modules
•Match the polarities of cables and terminals when making the connections; failure to
do so may result in damage to the module
•Connecting modules in reverse polarity to a high current source, such as a battery, will
destroy the bypass diodes and render the module inoperative Bypass diodes are not
user replaceable
•The junction box is under no circumstances being opened Opening the junction box
may void the warranty
•Modules with a suspected electrical problem should be returned to Atersa for
inspection and possible repair or replacement as per the warranty conditions provided
by Atersa
•For field connections, use the minimum No #12 AWG copper wires insulated for a
minimum of 90°C and Sunlight resistant as well
•The minimum and maximum outer cable diameters of the cable are 5 to 7mm
Ensure proper system operation and maintain the warranty, be careful to observe the correct
cable connection polarity when connection the module to a battery or to other module
Series method
Photovoltaic modules are manufactured to support high voltages The maximum voltage of
the system is indicated on the label of the module’s characteristics Therefore, modules can be
connected in series until that voltage is reached

OPTIMUM GS MODULES INSTALLATION MANUAL
Page 15
Aplicaciones Técnicas de la Energía S.L. (ATERSA
www.atersa.com – atersa@elecnor.com
Madrid (Spain) +34 915 178 452 - Valencia (Spain) +34 961 038 430
Parallel method
The number of modules in parallel to used can be as allowed as by charge controller, frequency
variator, or the corresponding equipment to which the module are connected
A cable with an adequate section for the conduction of the total current generated by the
modules should be used
In all case, the conductor should never use any section less than 4mm
2
Should a larger
section be needed to transport the energy to the corresponding equipment junction boxes
should be used which will allow for longer cable sections for longer distance
Typical wiring connections in series
Typical wiring connections in parallel

OPTIMUM GS MODULES INSTALLATION MANUAL
Page 16
Aplicaciones Técnicas de la Energía S.L. (ATERSA
www.atersa.com – atersa@elecnor.com
Madrid (Spain) +34 915 178 452 - Valencia (Spain) +34 961 038 430
8. Maintenance and Cleaning
8 1 Cleaning
It is common for dust and dirt particles to accumulate on the surface of the module This can
reduce the optimal output performance of the solar modules Normally, the accumulated dust
can be washed with water, but in some instances some maintenance is recommended to clean
the surface of the glass with water and a soft cloth or sponge to remove layer of dirt A mild
non-abrasive detergent may be applied for persistent dirt
•PV Module Cleaning should be done only by properly trained personnel who
understand the risks of applying water to electrical components
•It is advisable to perform periodic inspection of the modules for damage to glass, back
sheet, frame, junction box or external electrical / loose connections and corrosion by
the authorized professional
•No aggressive and abrasive cleansers or chemicals should ever be used on the coated
front glass
No alkali-based chemicals should be used, including ammonia based solutions
•Always wear rubber gloves for electrical insulation while maintaining, washing or
cleaning modules Appropriate electrically insulating Personal Protective Equipment
(PPE) must be worn during any cleaning or inspection operations
•Acceptable module cleaning methods are to spray the modules with low-pressure
water closely matched in temperature to the module Do not apply water that is more
than 20°C warmer or colder than module surface temperature
•Tap water (with low mineral content) or deionized water may be used If needed, a mild,
non -abrasive, non-caustic detergent may be used Do not use solutions containing
hydrochloric acid, D-Limonene, ammonia, or sodium hydroxide
•Clean the module either with soft sponge or a soft rubber wiper; do not use abrasive
cleaners or de- greasers on the module Do not scrub with abrasive brushes The brush
fibers will scratch, reducing the power output of the panel
•In case if water is not available or soft water (with low mineral content) is not available,
Module can be dry cleaned with the help of a soft cloth or with soft sponge to remove
dirt, dust One can also use wet cloth, sponge to clean dirt which is not easily removed
by dry cleaning
•Always make sure that Cleaning should not be done during Generation time, as during
the generation time the temperature of module is higher and washing may cause
thermal stress in module

OPTIMUM GS MODULES INSTALLATION MANUAL
Page 17
Aplicaciones Técnicas de la Energía S.L. (ATERSA
www.atersa.com – atersa@elecnor.com
Madrid (Spain) +34 915 178 452 - Valencia (Spain) +34 961 038 430
•Do not clean or spray water at the Junction Box or any area on the backside of the
module
•Frequency of Cleaning will vary depending upon any special conditions in area where
the modules are installed Modules installed in high windy or dusty areas should be
inspected more frequently
•If excessive soiling is present, a non-conductive soft brush, sponge, or other mild
agitating method may be used before using water Ensure brushes or agitating tools
are not abrasive to glass
•Module damage that arises as a result of improper cleaning will not be warranted by
Atersa
•Do not clean the glass surface with chemicals Do not let water stay on the glass
surfaces of PV modules for a long time This creates a risk of permanent damage to the
glass, such as white efflorescence, otherwise known as “glass disease,” which may
cause reduced power output
•To avoid dirt accumulation or white efflorescence due to water accumulation, do not
install PV modules horizontally (flat)
8 2 Maintenance safety
Safety instructions must be followed during maintenance of PV modules Any Maintenance
work must be performed by a certified installer/servicer to ensure system integrity and safety
•Do not pull the PV cables Do not place/drop objects onto the PV modules
•Not to damage, pull, bend, or place heavy material on Junction box, cables&
connectors
•Upon completion of any service or repairs, ask the installer/servicer to
perform routine checks to determine that the PV modules are in safe and proper
operating condition
•Do not stand or step on the module
•Do not disassemble, modify or adapt the module or remove any part or labeling
installed/ pasted b y the manufacturer
•Do not drill holes in the frame; Do not treat back sheet and front surface of the module
with paint and adhesives
•Do not artificially concentrate light on the module

OPTIMUM GS MODULES INSTALLATION MANUAL
Page 18
Aplicaciones Técnicas de la Energía S.L. (ATERSA
www.atersa.com – atersa@elecnor.com
Madrid (Spain) +34 915 178 452 - Valencia (Spain) +34 961 038 430
9. Checklists:
•All fastenings are tight and secure and free of corrosion
•All cable connections are secure, tight, clean and free of corrosion
•Cables are not damaged in any way
•Checking the earthing resistivity of metals

OPTIMUM GS MODULES INSTALLATION MANUAL
Page 19
Aplicaciones Técnicas de la Energía S.L. (ATERSA
www.atersa.com – atersa@elecnor.com
Madrid (Spain) +34 915 178 452 - Valencia (Spain) +34 961 038 430
ANNEX
Mechanical and Electrical Ratings
1 Mechanical ratings
Nº cells & inch Dimensions (mm) Weight (Kg)
72 cells 6" 1956 x 992 x 40 21,6
60 cells 6" 1640 x 992 x 40 1 ,1
2 Electrical Ratings
All electrical data under STC Irradiance of 1000 W/m2, AM1 5 spectrum, and a cell
temperature of 25 ºC
The tolerance of Electrical Characteristics is less than ±10 under Standard Test Conditions
2.1. Polycrystalline module
Module A-xxxP GS (for 72 cells 6”).
where xxx = 290~320 in step of 5 W..
Max. power (W) 290 295 300 305 310 315 320
Open-circuit voltage (V) 44, 4 44,93 45,20 45,35 45,45 45,60 45, 2
Max. power point voltage (V) 35,90 36,16 36,41 36,71 37,00 37,2 37,56
Short-circuit current (A) ,57 ,66 ,73 ,79 , 5 ,91 9,03
Max. power point current (A) ,0 ,16 ,24 ,31 ,3 ,45 ,52
Efficiency (%) 14,9 15,2 15,5 15,7 16,0 16,2 16,5

OPTIMUM GS MODULES INSTALLATION MANUAL
Page 20
Aplicaciones Técnicas de la Energía S.L. (ATERSA
www.atersa.com – atersa@elecnor.com
Madrid (Spain) +34 915 178 452 - Valencia (Spain) +34 961 038 430
Module A-xxxP GS (for 60 cells 6”).
where xxx = 235~270 in step of 5 W..
Max. power (W) 235 240 245 250 255 260 265 270
Open-circuit voltage (V) 37,31 37,35 37,45 37,63 37, 3 37,97 3 ,13 3 ,23
Max. power point voltage (V) 29,24 29,3 29,59 29,95 30,29 30,63 30,96 31,22
Short-circuit current (A) ,54 ,71 , 4 ,90 ,97 9,05 9,10 9,13
Max. power point current (A) ,04 ,17 ,2 ,35 ,42 ,49 ,56 ,04
Efficiency (%) 14,5 14, 15,1 15,4 15,7 16,0 16,3 14,5
2.2. Monocrystalline modules
Module A-xxxM GS (for 72 cells 6”).
where xxx = 290~325 in step of 5 W..
Max. power (W) 290 295 300 305 310 315 320 325
Open-circuit voltage (V) 45,33 45,50 45,60 45,70 45, 1 45,91 46,01 46,26
Max. power point voltage (V) 35,99 36,34 36,59 37,02 37,31 37,64 37,79 37,93
Short-circuit current (A) ,67 ,70 ,7 , 2 , 7 ,94 ,97 9,01
Max. power point current (A) ,06 ,12 ,20 ,24 ,31 ,37 ,47 ,57
Efficiency (%) 14,9 15,2 15,5 15,7 16,0 16,2 16,5 16,
This manual suits for next models
30
Table of contents
Other atersa Solar Panel manuals
Popular Solar Panel manuals by other brands

Simplicity
Simplicity 5600352 Operator's manual

DAH Solar
DAH Solar DHM-72X10/FS user manual

STIEBEL ELTRON
STIEBEL ELTRON SOL 27 PREMIUM S Operation & installation manual

Solar Technology International
Solar Technology International PV Logic Flexi user manual

Kyocera
Kyocera KD235GX-LPB datasheet

Viessmann
Viessmann VITOSOL 100-F Service instructions