Laser can harm human eyes and skin. Do not expose your eyes or skin directly to laser. The laser product has an optical lens and
emits a straight laser beam. The light emitted by the product, whether direct or reflected, is extremely harmful because it can
spread over long distances while maintaining high light density. When handling the product, you must wear appropriate eye
protection goggles (OD5+) to protect your eyes from laser (including reflected and scattered light) damage. Reflected and scattered
light spilled into unexpected areas should be attenuated and/or absorbed.
2.1 Laser Safety
We have installed a laser protection cover on the laser, which can greatly filter out the diffuse reflection of the laser spot. However,
when using a laser engraving machine, it is recommended that you wear laser protective goggles. Avoid exposing your skin to a
Class4 laser beam, especially at close range. Teenagers must be supervised by their parents during use. Do not touch the laser
engraving module when the machine is starting.
2.2 Fire Safety
Cutting burns the substrate, and high-intensity laser beams generate extremely high temperatures and a large amount of heat.
Some materials may catch fire during cutting, generating gas and smoke inside the equipment. When the laser beam hits the
material, a small flame usually appears at this point. It will move with the laser and will not be on continuously when the laser
passes. Do not leave the machine unattended during the engraving process. After use, be sure to clean the debris, debris, and
flammable materials in the laser cutting machine. Be sure to have a fire extinguisher nearby to ensure safety. When using a laser
engraving machine, smoke, steam, particles, and potentially toxic materials (plastics and other combustible materials) are generat-
ed, which may harm health.
2.3 Material Safety
Do not engrave materials with unknown properties. Recommended materials: wood, bamboo, leather, plastic, fabric, paper, opaque
acrylic, glass, metal. Materials not recommended: gems, transparent materials, any reflective materials, including reflective metals,
etc. Glass and reflective metal materials can only be engraved after they turn black.
User Safety Statement
3
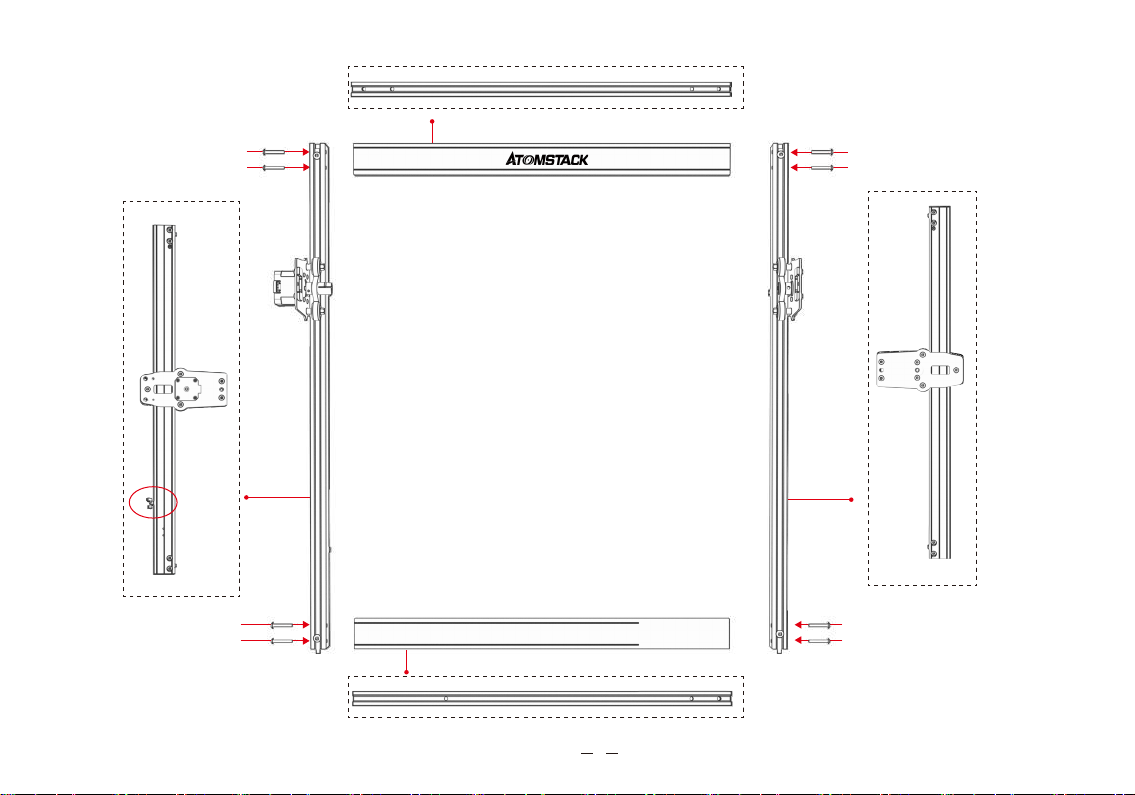
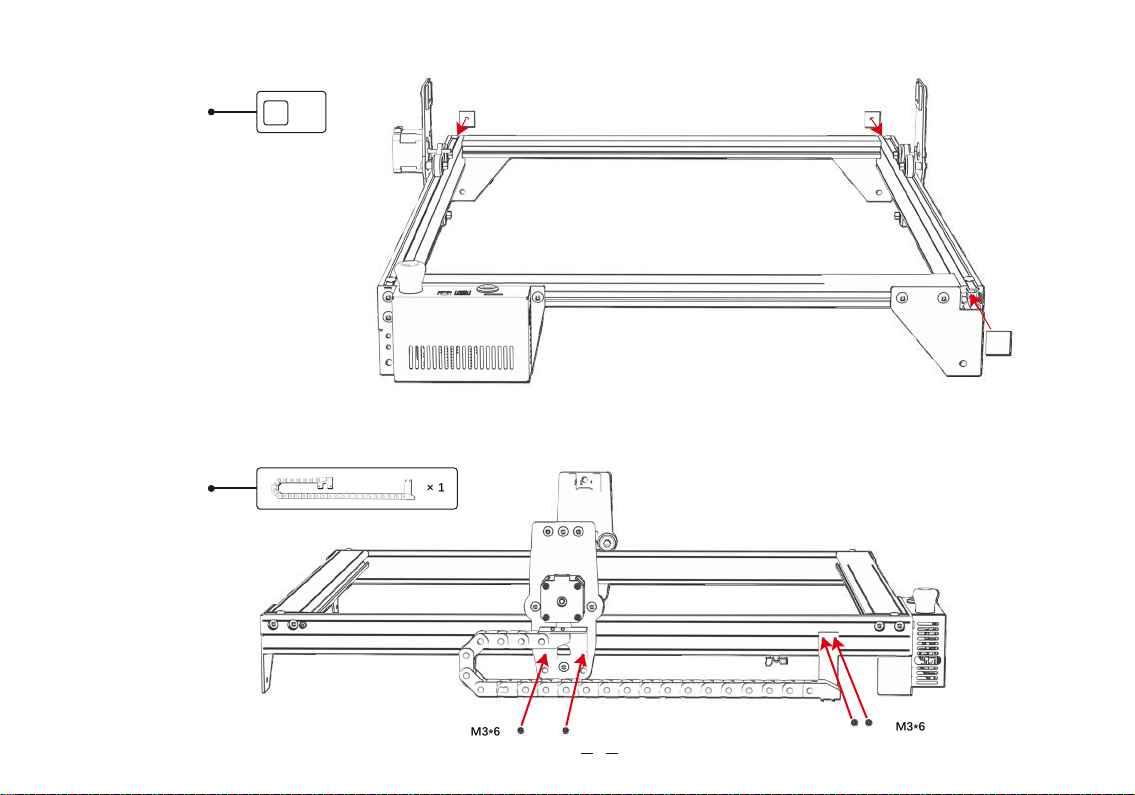
Step 9
Step 10 Connect
14
× 1
5
4
3
2
167
trachea.
The trachea is connected to the laser.
power cable.
Step 9
Step 10 Connect
14
× 1
5
4
3
2
167
trachea.
The trachea is connected to the laser.
power cable.