Page 1
Quick reference guide
Audi RS4
LOCKING SYSTEM
DEAR AUDI DRIVER,
The aim of this quick reference guide is to introduce you to the
main features and controls of your vehicle.
This quick reference guide cannot replace the information
contained in the Owner's Manual; it is therefore important
that you also read the notes and warnings in the Owner's
Manual.
We wish you safe and
enjoyable motoring
with your new Audi.
AUDI AG
The central locking system
locks and unlocks all the
doors, the tailgate and the
tank flap. It can be operated
with the remote control or by
turning the key in the lock.
Operating the radio-
activated remote control
Press the appropriate
button for about 1 second.
1Unlocking button
for doors
Open one of the doors or
the tailgate within about
60 seconds, otherwise the car
will automatically be locked
again.
2Unlocking button for
tailgate
3Locking button
The turn signals will flash
briefly when the car is locked to
confirm that doors and tailgate
are closed properly.
4Folding out
the master key
Press the release button.
Folding away
the master key
Press the button and fold the
key away.
Note: Press and hold unlock-
ing button on remote control
(or turn and hold key in lock
on either the driver’s or front
passenger’s door) to open all
the windows. Press and hold
locking button on remote con-
trol (or turn and hold key in
lock on driver’s or front pas-
senger’s door) to close all the
windows and the sun roof.
ADJUSTING FRONT SEATS
4Adjusting seat height
Press down or pull up the
switch to lower or raise the
seat as required.
5Adjusting seat cushion
To extend or retract the seat
cushion, press in the button
under the seat and pull out or
push back the seat cushion.
6Moving seat backwards
or forwards
Lift the handle and move the
seat.
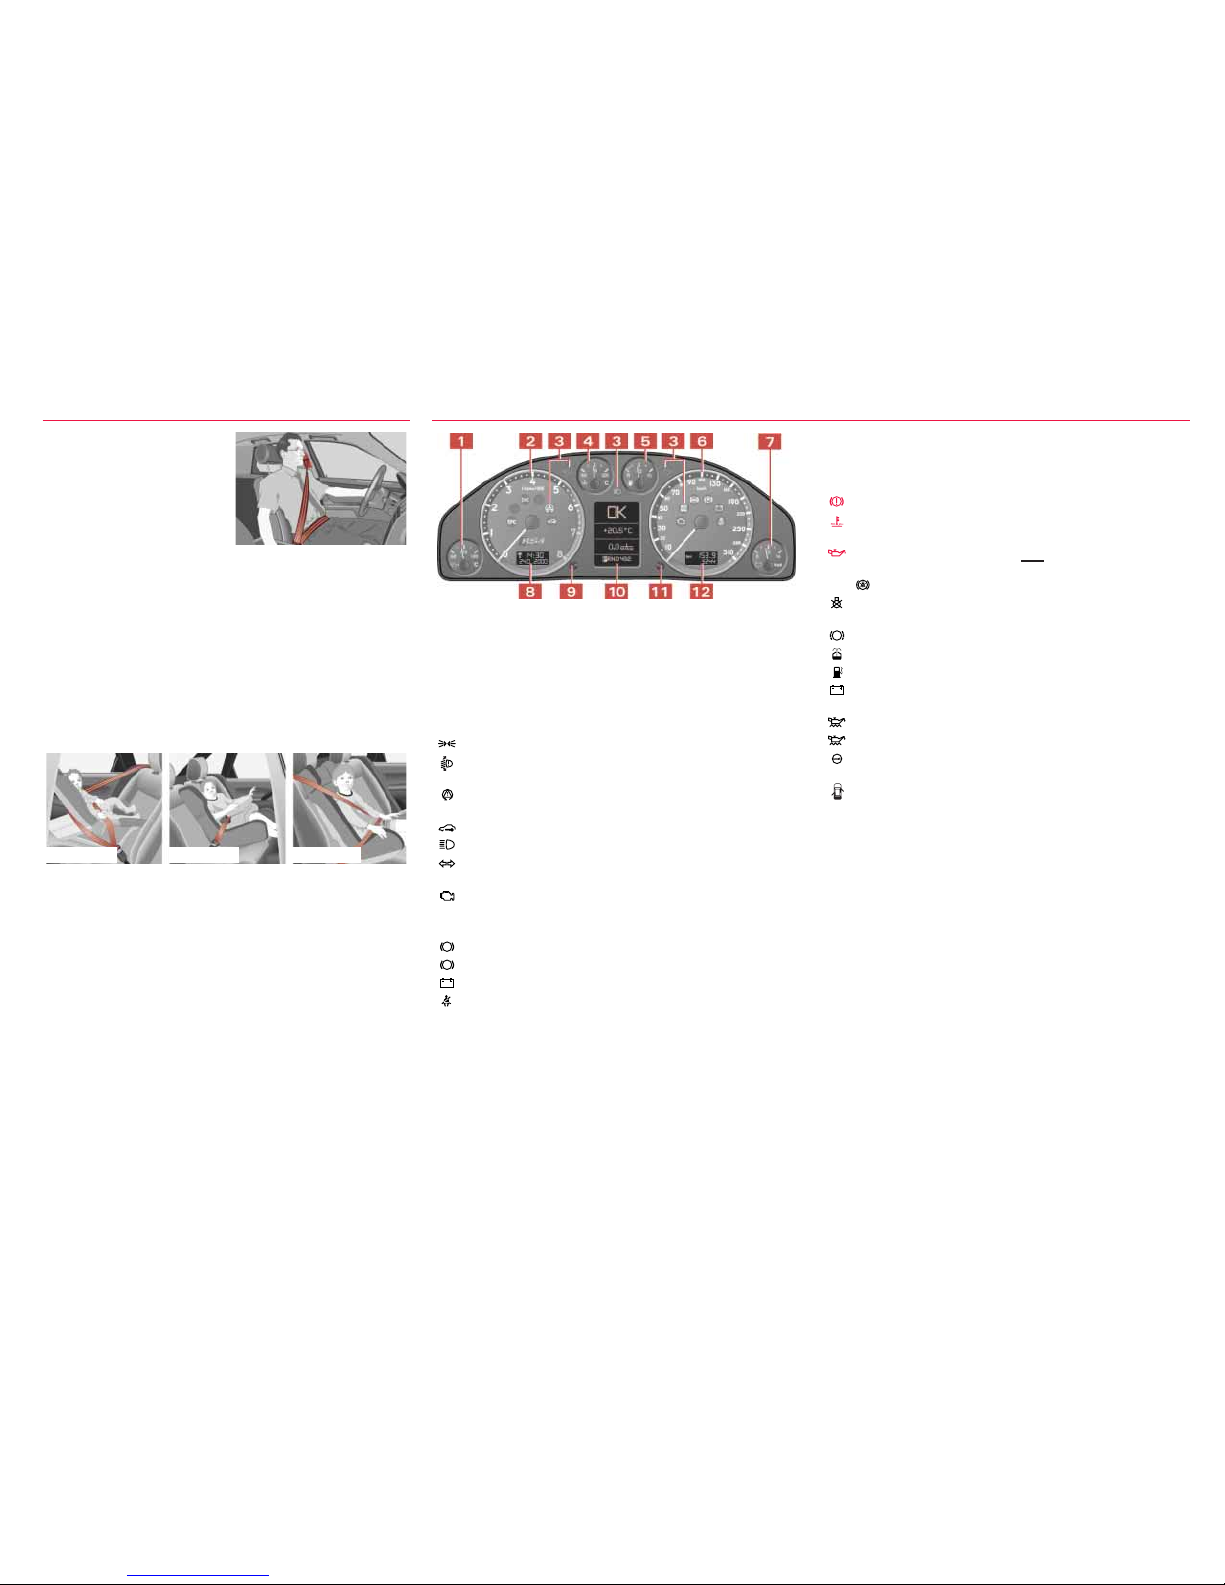
Adjusting belt height
Slide the
guide up or
down. Tug
the belt to
check that the catch is en-
gaged properly.
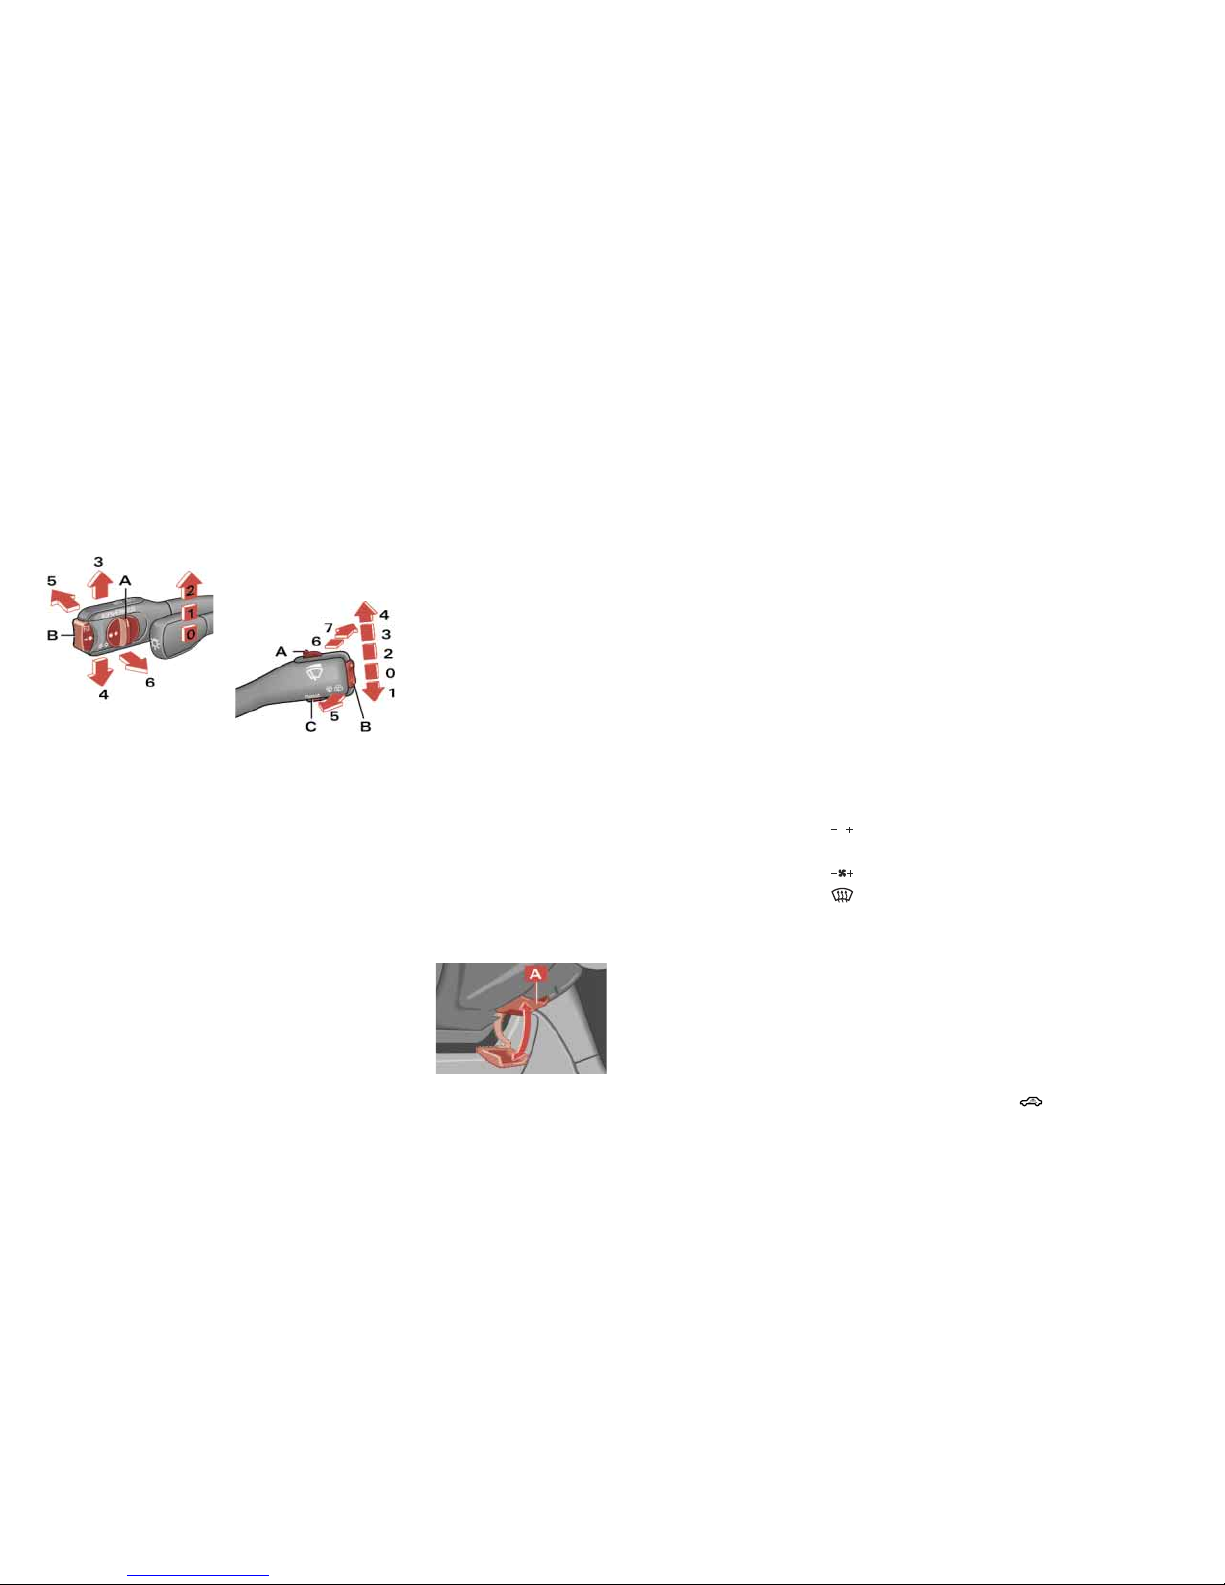
SUN ROOF
Turn the control to the appro-
priate position to open and
close the sun roof:
1To slide roof open
OTo close roof
To tilt roof up at the rear:
turn the control to position O
and press the control.
To mo ve it down again:
pull the control briefly.
FILLING THE TANK
Opening the tank flap
Open the filler flap as illustra-
ted. Unscrew the filler cap and
hook it onto the filler flap.
Stickers for:
1Fuel grade
2Tyre pressures
1Adjusting head
restraints
Move the head restraint up or
down.
2Adjusting angle of
backrest
Press the switch in the appro-
priate direction:
Backrest further
upright/ further reclined
3Adjusting lumbar support
(Ergomatic)
Press the appro-
priate section of the
control to increase
or decrease the
thickness of the
padding in the
backrest.