manuals.online logo
Brands
  1. Home
  2. •
  3. Brands
  4. •
  5. Audicus
  6. •
  7. Hearing Aid
  8. •
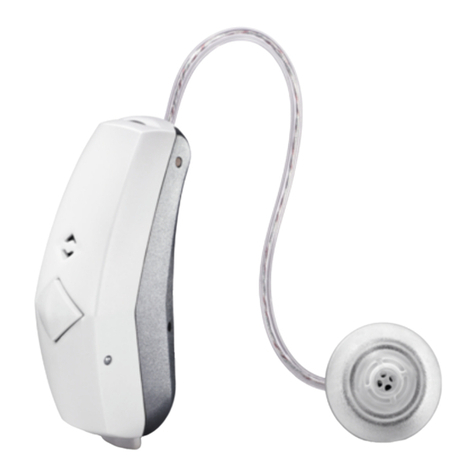
  9. Audicus Wave User manual

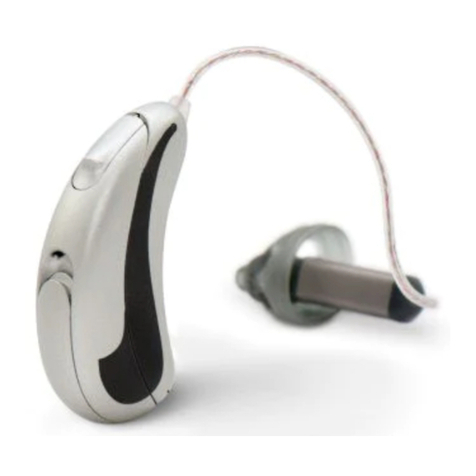
Audicus Wave User manual

Other manuals for Wave

1

Other Audicus Hearing Aid manuals

Audicus Dia II User manual

Audicus

Audicus Dia II User manual

Audicus aSamba User manual

Audicus

Audicus aSamba User manual

Audicus The Spirit User manual

Audicus

Audicus The Spirit User manual

Audicus apearl User manual

Audicus

Audicus apearl User manual

Audicus Dia User manual

Audicus

Audicus Dia User manual

Audicus aNote User manual

Audicus

Audicus aNote User manual

Audicus Omni User manual

Audicus

Audicus Omni User manual

Audicus Oro User manual

Audicus

Audicus Oro User manual

Audicus Canto User manual

Audicus

Audicus Canto User manual

Audicus The Spirit User manual

Audicus

Audicus The Spirit User manual

Audicus The Icon User manual

Audicus

Audicus The Icon User manual

Audicus Clara User manual

Audicus

Audicus Clara User manual

Audicus aJive User manual

Audicus

Audicus aJive User manual

Audicus Clara User manual

Audicus

Audicus Clara User manual

Audicus Uno User manual

Audicus

Audicus Uno User manual

Audicus ALTO User manual

Audicus

Audicus ALTO User manual

Audicus Clara User manual

Audicus

Audicus Clara User manual

Audicus The Wave User manual

Audicus

Audicus The Wave User manual

Audicus The Wave User manual

Audicus

Audicus The Wave User manual

Audicus Bluetooth Remote User manual

Audicus

Audicus Bluetooth Remote User manual

Audicus Solo User manual

Audicus

Audicus Solo User manual

Audicus aSwing User manual

Audicus

Audicus aSwing User manual

Audicus The Wave User manual

Audicus

Audicus The Wave User manual

Audicus Aura User manual

Audicus

Audicus Aura User manual

Popular Hearing Aid manuals by other brands

BTE Alta2 Pro Ti Instructions for use

BTE

BTE Alta2 Pro Ti Instructions for use

Sonic Bliss miniBTE user guide

Sonic

Sonic Bliss miniBTE user guide

Lexie B1 Replacement guide

Lexie

Lexie B1 Replacement guide

Camplicomms HC-200 user guide

Camplicomms

Camplicomms HC-200 user guide

Siemens MUSIC Pro Pro IT user guide

Siemens

Siemens MUSIC Pro Pro IT user guide

Phonak Q90 user guide

Phonak

Phonak Q90 user guide

Williams Sound SoundPlus WIR 237 Manual and user guide

Williams Sound

Williams Sound SoundPlus WIR 237 Manual and user guide

Panasonic WH-216KZ Quick tips

Panasonic

Panasonic WH-216KZ Quick tips

Oticon Medical Ponto SoundConnector Instructions for use

Oticon Medical

Oticon Medical Ponto SoundConnector Instructions for use

Siemens Life micon user guide

Siemens

Siemens Life micon user guide

Starkey Destiny Operation manual

Starkey

Starkey Destiny Operation manual

Advanced Bionics Slim HP Standard Instructions for use

Advanced Bionics

Advanced Bionics Slim HP Standard Instructions for use

Widex DREAM440 THE DREAM SERIES User instructions

Widex

Widex DREAM440 THE DREAM SERIES User instructions

Phonak myPilot user guide

Phonak

Phonak myPilot user guide

NIKEN NK-401 instruction manual

NIKEN

NIKEN NK-401 instruction manual

ON Semiconductor Ezairo 7111 Pre Suite Getting started guide

ON Semiconductor

ON Semiconductor Ezairo 7111 Pre Suite Getting started guide

Sonetik GOHEAR user guide

Sonetik

Sonetik GOHEAR user guide

Widex FL-9 User instructions

Widex

Widex FL-9 User instructions

manuals.online logo
manuals.online logoBrands
  • About & Mission
  • Contact us
  • Privacy Policy
  • Terms and Conditions

Copyright 2025 Manuals.Online. All Rights Reserved.

The Wave
Hearing Aid
Instruction Manual
312 Battery
Welcome!
We’re thrilled to be a part of your hearing journey.
Please take a few minutes to review this guide
to getting the most out of your custom tailored
Audicus Wave hearing aids.
Audicus is with you every step of the way.
Find more info and videos at
audicus.com/support
And remember, you’re never on your own.
each out anytime, for anything at all.
(844) 616 7284 • contact@audicus.com
4
What’s inside?
cleaning brush
earwax guard
dispenser tool
hearing aid(s)
located in the case
size 312 batteries
312
dome variety pack
small, medium large
(styles dependent on
hearing loss)
carrying case
Table of contents
Getting Started..................... pages 6 11
Bluetooth............................pages 20 23
Device Information..............pages 24 29
Troubleshooting..................pages 30 31
Troubleshooting..................pages 12 13
Using The Wave................... pages 14 21
Bluetooth............................pages 22 25
Device Information..............pages 26 31
6
AMulti-function button – switches programs, changes volume
BMicrophones – where sound enters your hearing aids
CBattery door – houses the battery and acts as on/o switch
DReceiver Wire – connects speaker unit to hearing aid
EReceiver – amplifies the sound directly into the ear canal and
contains the earwax guard in the tip
FDome – rubber cover on the receiver to hold the unit in place
comfortably in your ear canal
Your hearing aids
at a glance
B (mic)
A (toggle button)
D
(wire)
F
(dome)
E
(receiver)
C (battery door)
UP
DOWN
7
The battery door acts as an on & o switch.
ON
(fully closed)
OFF
(partly open)
OFF
(fully open)
312 zinc-air
– brown tab
IEC: P 41 | ANSI: 7002ZD
Low battery warning
2 beeps
30 mins remaining
Battery size
Turning on / o
●Do not dispose of batteries in household trash
●Do not recharge batteries as this could result in injury
●Keep batteries away from high temperature
●Keep batteries away from children and pets
●Do not carry batteries loose in your pocket or purse
●Do not place batteries in your mouth; if swallowed,
consult a physician
8
To insert or replace the battery:
1. Gently swing open the battery door with your
fingernail remove the old battery.
2. emove plastic tab from new battery, wait 2-3
minutes for the battery to activate.
3. Line up the battery’s plus “+” sign (flat side of the
battery) with the “+” on the battery door.
4. Close the battery door gently.
5. The hearing aid will play a melody as it turns on
Inserting a
new battery
9
Your hearing aid will be color-coded with a marking
on the back of the device: red = right blue = le
Putting on your
hearing aids
1. Place your hearing aid over the top of your ear
2. Hold the wire where it attaches to the dome and
gently push the dome into your ear canal.
3. Place the retention guard in your ear so it rests
at the bottom of the opening of your ear canal.
Trim the retention guard with scissors if too
long, or remove altogether if not needed.
Handle your hearing aid with care when placing
in your ear. If it does not feel comfortable, do not
attempt to alter the shape of the tube or casing.
10
Using your new
hearing aids
Your hearing aids are programmed to you individually
Adjusting to hearing aids fully may take up to 6 weeks
1. You may hear sounds you haven’t heard in years
●Sounds will be amplified and more distinguished,
e.g., leaves rustling, running water, your own voice
●This is normal and will go away with regular use
2. Find the right dome for your ears
●Your hearing aid ships with a size medium dome
attached, with an additional variety pack of domes
●Use the “Finding the right dome” guide if you have
any discomfort or hear a whistling sound
3. It may take 1–2 weeks to get used to the feel of your
hearing aid. Contact Audicus any time for guidance
and tips for adjusting comfortably to your device.
4. Audicus oers free reprogramming for the life of
your hearing aid. Most people don’t require any
changes, but please get in touch if you feel your
hearing aid needs an adjustment.
11
The toggle button controls volume and
program settings. Both hearing aids are
adjusted simultaneously. Turning o or
opening the battery door will reset the
hearing aid to volume 0 and
program 1 (default settings)
Increase Volume: Short press the UP button
Decrease Volume: Short press DOWN button
A ‘beep’ indicates a change in volume.
‘bop’ indicates halfway (0). A ‘bop-beep’
indicates you have reached max / min.
A long press will cycle the hearing aid program.
The number of beeps indicate the program number
Standard Programs:
1) Auto-adapt / universal 3) Music
2) Conversation in noise 4) Auditorium
Adjusting volume
& program
-5 0 +5
12
Troubleshooting
Cause Remedy
No sound
Not turned on Ensure battery is inserted and
battery door is close, see page
“Turning on / o”
Low / dead battery eplace battery
Poor battery contact Clean battery contacts or contact
Audicus
Battery upside down Insert battery according to
battery symbol. See page
“Inserting a new battery”
Domes blocked with
debris / earwax
Clean domes and replace earwax
guard. See page “ eplacing the
domes and earwax guards”
Plugged microphones Clean device with cleaning brush.
If issue persists, contact Audicus
13
Cause Remedy
Intermittent sound
Low battery eplace battery
Dirty battery contact Clean battery contacts or contact
Audicus
Two long beeps
Low battery eplace battery
Feedback / whistling
Hand / clothing near
device
Move hand / clothing away from
device
Poorly fitting domes See “Finding the right dome”
Domes not inserted
properly
See “Putting on your hearing
aids”
Bluetooth
Bluetooth not
connecting
Disconnect and forget Bluetooth
devices. See page “Bluetooth”
14
Dome styles and sizes
Open Closed Double
Small Medium Large
The dome is the small, gray rubber tip on the end
of the hearing aid that is inserted into your ear.
Domes come in a variety of shapes and sizes. The
proper choice of dome style and size helps with
comfort and sound quality with your hearing aids.
New devices come pre-fitted with a medium
sized dome in your recommended dome style.
Finding the
right dome
15
New orders include a variety of domes sizes and
styles. Depending on your specific hearing loss,
your order may not include all varieties.
Take some time to find which sized dome is right
for you. The dome should fit snugly in your ear
canal. If missized, it can create feedback: a
squealing or whistling sound that can be resolved
with a dierent dome size.
When you are comfortable with your dome size and
style, record it here for for future orders.
Dome size Dome style
●Clean your domes regularly
●eplace old, brittle, discolored or damaged domes
or if they pull o the hearing aid easily
●eplace domes every 8 – 12 weeks
●Always ensure that a new dome is firmly attached
before inserting into your ear
16
Caring for your
hearing aids
Daily: Clean the device with with a lint-free
cloth or non-alcoholic Audiowipes.
Clean immediately aer removal to
prevent earwax from hardening.
Weekly: emove earwax and debris from device
and domes using supplied cleaning
brush. eplace batteries if needed.
Quarterly: Domes and earwax guards should be
replaced every 2-3 months
●Never use cleaning agents such as detergent, soap,
alcohol or bleach to clean your hearing aids
●Do not submerge your hearing aids or rinse your
hearing aids under water
With regular maintenance your devices will sound
great for years to come
17
Audicus Care
All the products needed to care and maintain your
devices are available at audicus.com/accessories
Audicus Care is the easiest way to get everything
you need to maintain for your Wave. Sign up and
you’ll receive an unlimited supply of batteries,
domes, earwax guards, wipes and cleaning
brushes conveniently delivered every 3 months or
whenever you need. Never worry about ordering
hearing aid supplies again. Find out more at
audicus.com/care
Sign up at:
audicus.com/care
18
Replacing the domes
and earwax guards
1. To remove the dome: hold the receiver with one
hand while gently pulling o the dome
2. You now have access to change the earwax guard
The earwax guard is a very small white plastic part
that is inserted to the receiver tip. The earwax guard
prevents earwax from entering the receiver, which
may impair or damage the device.
Earwax collects into the earwax guard and should be
replaced regularly: every 2-3 months or any time the
hearing aid is quieter than normal.
Your order comes with a gray circular accessory
which contains eight new earwax guards as well as a
disposal system for used earwax guards
19
Used earwax guards
are disposed here
New earwax guards
are stored here Rotate to expose
new earwax guards
A.To dispose of the used earwax
guard in chamber 1, press the
receiver into an empty slot and
the earwax guard will separate
o and remain behind.
B.Ensure the receiver is empty and
a new earwax guard is visible in
chamber 2. Press the empty
receiver into chamber 2 and the
earwax guard should be inserted
into the receiver.
C. eattach the rubber dome
to the end of the receiver.