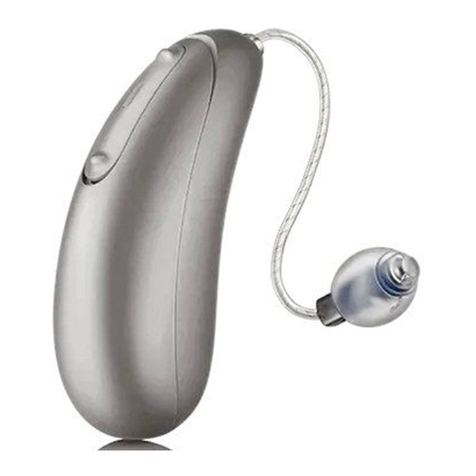
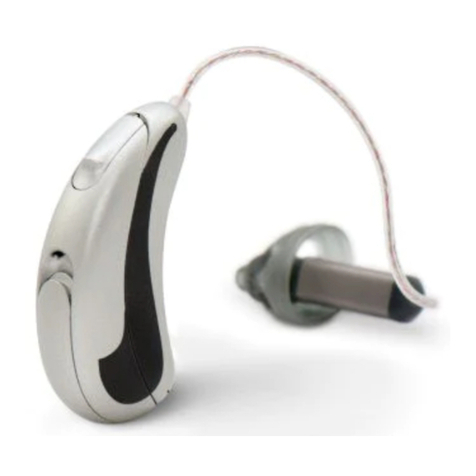
Audicus apearl User manual

Instruction Manual!
aPearl!
2013 Audicus Inc, All Rights Reserved!

2013 Audicus Inc, All Rights Reserved

Thank you for choosing Audicus!!
!
We are very proud of our devices and hope you enjoy
your high-tech hearing aid.!
!
In order to benefit the most from your Audicus hearing
aid, please read these instructions carefully. This manual
contains important information about the aPearl.!
!
!
!
If you have any questions, feel free to contact us at "
3!
Welcome!!

Introduction 5
Quick Start 6
Batteries 7
On/Off 9
Placement in the Ear 10
Memory Programs 12
Cleaning 13
Maintenance and Use 14
4
Troubleshooting 16
Technical Information 18
Returns and Warranty 19
Serial Information 20
Medical Information 21
Warnings and Side Effects 22
Information for Prospective Users 23
Contact 24
Content!

5!
The aPearl is a powerful hearing aid that is
designed to keep up with your lifestyle. It offers
supreme sound quality, advanced sound
processing, and is currently one of the smallest
hearing aids ever designed. In addition, it has:!
- Improved speech recognition !
- Superior feedback and noise reduction!
- Receiver-in-Canal!
- Sleek, award-winning design!
- Comfortable, adjustable fit!
!
The aPearl is customized with multiple memory
settings for various listening environments. !
Auto-Adaptive
Microphones!
Click Dome!
Push "
Button!
Battery !
Compartment !Wax Guard!
Receiver Unit!
Click Domes (included)!
Introduction!

6
These basic steps will get more experienced users started.
We recommend you to read the rest of the manual to fully familiarize yourself with the device.
1. Open the battery compartment
2. Insert a size 10 battery and fully close the compartment
3. Place the hearing aid behind the ear
4. Insert the ear-dome into the ear canal
5. Press the program button for the appropriate listening setting
6. To turn “OFF”the device, open the battery door OR hold the program button for two seconds
7. Do not expose the device to heat or humid environments and keep it away from children
To benefit the most from your new hearing aids, wear them regularly and
allow yourself a few weeks to fully adjust to them.
Quick Start!

Battery Compartment!
"
The battery compartment is at the back of the
device, as indicated. Gently press the tab on the
battery door until it snaps open. When opening and
closing the battery door you should never have to
exert force.!
!
!
Inserting a Battery!
1. Open the battery compartment!
2. The aPearl uses size 10 batteries. Take off the
sticker from a new battery. !
3. Place battery into battery compartment, with the
“+”sign facing up. !
4. Close the battery compartment completely. Your
device should now be switched ON.!
1!
2!
3!
7!
4!
Batteries!

8
Battery Use
When you are not using your device (e.g. when you go to sleep) we recommend
opening the battery compartment completely to preserve battery power. Leaking
batteries damage the system. Please remove batteries when the hearing systems are
not in use for a prolonged period of time.
Low Battery Warning
When your battery runs low, the device will emit multiple continuous beeps.
Battery Safety
• Batteries contain harmful substances that pollute the environment:
- Do not dispose of batteries in household trash
- Dispose of batteries according to federal and local regulations
• Never attempt to recharge batteries that are not designed for that purpose
• Keep batteries away from sources of high temperature
• Keep batteries away from children and pets
• Do not carry batteries loose in your pocket or purse
• Do not place batteries in your mouth. If swallowed, consult a physician immediately
Batteries!

Switching your Device ON / OFF
The aPearl can be switched “ON”or “OFF”through its
battery compartment. When the battery door is closed, the
device is switched “ON”. If you want to turn the device
“OFF”, gently open the battery door until it is fully open.
When the device is not in use, we recommend opening the
battery compartment in order to preserve battery power.
Standby Mode
The standby mode is another way of preserving battery
power.
Just press the push button for more than two seconds until
the device goes into standby. To re-activate the device,
simply hold the push button for more than two seconds.
9
Switch off
Switch On
Press Button for +2 seconds
On / Off!

The aPearl can be inserted in 3 easy steps:
1. Place the device over the top of your ear, so that the hard casing is behind your ear
and the tubing is in front
2. Push the dome into your ear until it sits comfortably and the tube lies flat against the
side of your head. The dome should be just inside the ear canal. You should not see it
if placed correctly
3. Place the retention guard of the sound tube into the bowl of your outer ear
To remove your hearing aid, hold the tube and pull it outward
1 2 3
10
Placement in the Ear!

11!
Considerations!
Handle your hearing aid with care when placing it in your ear. If it does not feel
natural, do not attempt to alter the shape of the tubing or casing. If you feel physical
discomfort or experience irritations, contact Audicus and/or a hearing professional.!
!
Click Domes and Receivers!
At some point you will have to replace the click domes due to normal wear and tear.
You will be able to order click domes from Audicus when replacement is needed. !
To remove click dome, see page 13 for visual instructions. !
In addition to the click domes, you will have to replace the receiver. The receiver may
last the life of the hearing aid if proper care is taken. The receiver has a 1 year
manufacturer warranty.!
To verify the receiver is working properly, remove receiver from hearing aid and
reattach. You may have to do this step 3 times until it turns back on. See pages 17-18
for visual instructions. !
If additional support is needed, contact Audicus. !
!
Placement in the Ear!

The aPearl comes with up to 5 memory programs for
different listening environments. These can be selected by
pressing the button on the back of the hearing aid or with
the remote control:
• Program 1: Automatic
• Program 2: Automatic + more volume
• Program 3: Automatic + less volume
• Program 4: Speech in noise
When a memory is selected, a beeping sound is emitted.
For example, when Memory 1 is selected, one beep will
sound. When Memory 2 is selected, two beeps will sound.
The hearing aid cycles the programs; after program 4,
program 1 will follow.
12
Memory Programs!
Program!
Button"

13
2
1
Receiver
3
Accumulated earwax on can cause diminished sound quality.
We highly recommend cleaning the click dome regularly.
Step 1: Locate the receiver
Step 2: Remove click dome
Use your left index finger and left thumb to grip receiver. With
your right index finger and thumb, pinch off the dome from the
end piece (exert caution when removing dome).
Step 3: Clean excessive earwax and debris
Use bush included in order to remove earwax buildup on dome
and earwax guard. Wipe receiver with cloth to remove moisture.
Keep hearing dry and clean at all times and
do not submerge in water.
Click domes should be replaced every 3-4 months.
Cleaning!

14
Your aPearl is a very durable device, if handled with care. Therefore, be particularly
careful in the following everyday circumstances:
Moisture
Moisture is one of the main causes of hearing aid failure. Protect your device from
moisture at all times.
• Never wear your hearing aid in the shower, bath, sauna or while swimming
• Always keep the device protected when out in the rain
• If the device becomes wet, remove the battery and ensure the device is dry before using it again
• Never subject your device to hairspray, perfume, gel, cream or other cosmetic/medical products
• In areas of high humidity, periodically remove the device and put it in a warm place to dry out
Temperature
Keep your hearing aids away from sources of high temperature at all times.
• Keep it away from fires, stoves, heating systems, boilers or other heating sources
• Do not wear your hearing aids when using a hair dryer
• Do no leave your hearing aid exposed to direct sunlight for an extended period of time
Maintenance and Use!

15
Storage
• Always remove the battery from the device when not in use for extended periods
• Always store your hearing device in its case, in a clean and dry environment
• Keep your hearing aids from children and pets
• Consider a dehumidifier for most effective storage (see www.audicus.com for that)
Other
• Do not allow others to use your instrument
• Do not wear a hearing aid when conducting an X-ray or MRI scan
• Handle the device over a flat surface, such as a table, to avoid dropping it
• Do not alter or attempt any repairs on the device, as it might void the warranty
Maintenance and Use!

Issue Possible Cause Action
Device does not
turn on or no
sound
• Is receiver attached to hearing aid?
• Is the device switched on?
• Is there a battery in the hearing aid?
• Did the battery wear out?
• Is the battery inserted correctly?
• Is the tubing or eardome blocked?
• Do you have excessive ear wax?
! Remove and reattach receiver, carefully.
See page 16-17 for instructions
! Switch it on by closing the battery door
! Insert a new battery
! Replace the old battery with a new one
! Insert the battery with the “+” facing up
! Clean the tubing and eardome
! See a physician
The sound is
distorted or weak
• Did the battery wear out?
• Did your hearing aid get moist?
• Is the tubing or eardome blocked?
• Are you using the right volume setting?
• Do your have excessive ear wax?
! Insert a new battery
! Dry your hearing aids
! Clean the tubing and eardome
! Change program or increase volume with
remote control (optional)
! See a physician
While we are always here to help, you might be able to resolve the majority of issues very
quickly yourself. If these guidelines do not resolve the problem, call us at 888 979 6918.
16
Trouble Shooting!

Issue Possible Cause Action
There is a lot of
“whistling”or
feedback
• Is the eardome and tubing inserted
correctly?
• Are you using the right size of eardomes?
• Is the volume too loud?
• Are you holding your hand or a foreign
object too close to the hearing aid?
• Does it occur when using the telephone?
• Do you have excessive ear wax?
! Insert it correctly, so it sits snug
! Try different-size eardomes or a tulip dome
! Tone down the volume
! Create some space between the hearing
aid and the object
! Position the telephone near, but not
directly on the hearing instrument
! See a physician
Battery runs out
quickly
• Did you leave your hearing aid switched
on during the night?
! Switch your hearing aid off by opening the
battery door
17
Trouble Shooting!

The aPearl is made for Audicus by Hansaton.
FCC-ID: WU7-WL002BTE
Operating frequencies: Fc = 3.28 MHz
Changes or modifications not expressly approved by the party responsible for compliance could void the
users authority to operate the equipment.
This device complies with Part 15 of the FCC Rules. Operation is subject to the following conditions:
(1) this device may not cause harmful interference, and
(2) this device must accept any interference received, including interference that may cause undesired
operation.
This equipment has been tested and found to comply with the limits for a Class B digital device, pursuant
to Part 15 of the FCC Rules. These limits are designed to provide reasonable protection against harmful
interference in a residential installation. This equipment generates, uses and can radiate radio frequency
energy and, if not installed and used in accordance with the instructions, may cause harmful interference
to radio communications. However, there is no guarantee that interference will not occur in a particular
installation. If this equipment does cause harmful interference to radio or television reception, which can be
determined by turning the equipment off and on, the user is encouraged to try to correct the interference
by one or more of the following measures:
• Reorient or relocate the receiving antenna.
• Increase the separation between the equipment and receiver.
• Connect the equipment into an outlet on a circuit different from that to which the receiver is connected.
• Consult the dealer or an experienced radio/TV technician for help.
18
Technical Information!

The Audicus 100% Happiness Guarantee
If for any reason you are not satisfied with your Audicus hearing aid, you may return it
within 45 days after purchase for a full refund of the original purchase price.
Note that we will not be able to maintain this guarantee if the device has been modified,
tampered with, damaged or repaired by the user.
Please see the return instructions on the Audicus website.
Manufacturer Warranty
All our hearing aids come with a full 12 month manufacturer guarantee that covers
manufacturing defects. The guarantee will not be valid if the devices have been
modified or damaged by the user, or if the serial number has been altered, or if repairs
have been made without the consent and knowledge of Audicus.
If your device stops functioning correctly and you believe you have a guarantee case,
please download and print the return instructions on www.audicus.com.
Loss, Damage and Repairs
If you lose or damage your hearing aids within the first 6 months, contact us for a
discount on your next pair. Also, feel free to contact us if you think you require repairs
on your device.
19
Returns and Warranty!

20
The serial number on the device includes the
year of manufacture and the production
number of the hearing aid.
To find the serial number in the aPearl::
1. Open battery door
2. Look inside the hearing aid (into the circuit)
3. Serial number begins with an alphabetical
letter, e.g. BE00131
4. If you have trouble retrieving your hearing
aid’s serial number, email us at
Serial Number!
1
2
Serial Number
Inside
Table of contents
Other Audicus Hearing Aid manuals

Audicus
Audicus Dia II User manual

Audicus
Audicus aNote User manual

Audicus
Audicus Clara User manual

Audicus
Audicus Clara User manual

Audicus
Audicus Uno User manual

Audicus
Audicus Aura User manual

Audicus
Audicus The Mini User manual

Audicus
Audicus The Spirit User manual

Audicus
Audicus The Icon User manual
Audicus
Audicus Oro User manual

Audicus
Audicus Wave User manual

Audicus
Audicus The Wave User manual

Audicus
Audicus aSwing User manual

Audicus
Audicus aJive User manual

Audicus
Audicus The Wave User manual

Audicus
Audicus aSamba User manual

Audicus
Audicus Bluetooth Remote User manual

Audicus
Audicus The Wave User manual
Audicus
Audicus Solo User manual

Audicus
Audicus Clara User manual