manuals.online logo
Brands
  1. Home
  2. •
  3. Brands
  4. •
  5. Audiovox
  6. •
  7. Automobile Accessories
  8. •
  9. Audiovox CarStream Troubleshooting guide

Audiovox CarStream Troubleshooting guide

AUDIO,T"OX®
'------------'
r m
BLUETOOTH
NTEGRATION
KIT
for selected Volkswagen I Audi vehicles
using CD Changer emulation
Installation Guide/User manual
./
2
Copyrights and Trademarks
Copyright 2015 VOXX Electronics Corporation
All Trademarks and Logos are the property
of
their respective owners.
All rights reserved.
3
Table
of
Contents
Warning and safety .........................................................
.4
Pairing Your Phone ............................................................18
Product registration .........................................................5 Bluetooth I AUX operation in CDC mode ...........................19
Kit contents ......................................................................6 Operation .......................................................................... 20
DIP switch overview .........................................................7 Managing Multiple calls ....................................................
21
Note to Installer .....
___
..
___
...................................................8 Music Control ...................................................................22
Connection diagram -Bluetooth and AUX .....................9 Audio Streaming ...............................................................23
Vehicle bus
connecotr-
BT100AUD kit .........................10 Auxiliary audio source ......................................................24
Vehicle bus connecotr -
BT1
01
AVW kit .......................
11
Optional remote controller ...............................................25
Vehicle bus
connecotr-
BT101AVW kit ........................12 Troubleshooting ..............................................................26
Harness modification for BT101AVW ............................13 Firmware update .........................................................27-28
Vehicle bus
connector-
BT1
02AVW kit ........................14 Auxiliary audio source .......................................................28
Installation ................................................................15-16 Warranty ..........................................................................30
Controls and Indicators .................................................17 FCC Compliance ..............................................................
31
4
AUDIO~~ox~
Warning
and
safety!
Please read these instructions carefully before proceeding. Failure to follow instructions may result
in
improper operation or injury. VOXX Electronics Corporation, its regional offices, distribuotrs or resellers
won't take any responsibility for any damage or injury as a result
of
using the integration kit.
-Do not open, disassemble or alter the interface
in
any way.
-Do not insert anything into the casing.
-Do not cut or try to alter cables
in
any way and always use the correct connections.
-Only
operate unit when stationary or ask passengers to operate it for you.
-Do
not allow the Mobile Phone to distract you from driving.
-Exercise good judgement and keep your eyes on the road at all times.
-Do not expose unit to extreme temperatures, humidity or shock.
X
X
-Keep away from children! -Interface components may contain small parts, can be broken or disassembled
and components may become loose from vibration and heat. Small components and packaging materials
may
be
a choking hazard when handled by children.
'
'
AUDio~~oxGD
Congratulations
on
your
purchase!
Thank you for purchasing this integration kit. Please review this booklet before operating the unit. This
interface was designed and manufactured to seamlessly integrate with your vehicle's factory audio system.
Product
registration
5
We recommend registering yourAudiovox product so you can receive news about important firmware updates
and have unlimited access to our online support system.
To
register
your
Audiovox
product, please complete the
following
steps:
1.
Visit http://www.audiovoxoei.com
2.
Look up and save the serial number
of
the product.
3.
Complete the product registration form.
4.
Submit the form.
5.
Save the registration sheet
in
a safe place for future reference.
If you are unable to complete the registration via internet, please call VOXX Electronics at 1-800-645-4994.
Prior to installation make sure the module's firmware is up to date to ensure compatibility
with the latest features and enhancements. Please refer to page 28 to update firmware.
6
CarStream
kit
contents
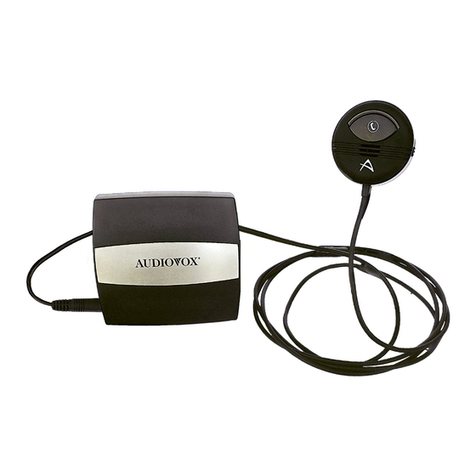
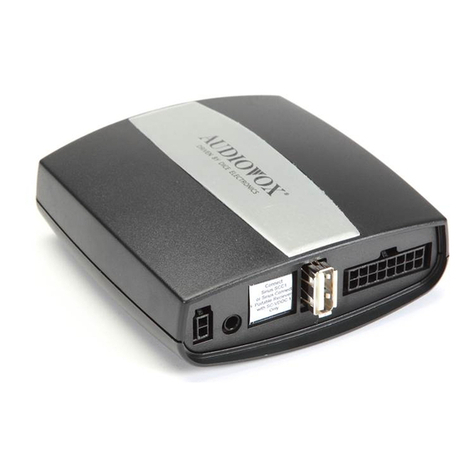
CarStream module Vehicle Interface
Harness
Optional accessories (sold separately):
AUX connector
(MCC1
06AUX) IR Receiver &
Remote controller
(MCC613RCK)
BCS
1M
Bluetooth
module
~
\
(
/
\')
\
~)
Clip and 2-sided mount
For more accessories, visit
www
.audiovoxoei.com
DIP
switch
settings
At the time of printing, the DIP switch settings are currently
not
being used on the
Audi
I Volkswagen CO-Changer emulation compatible CarStream module.
l 1
ON/OFF Switch Positions
7
8
AUDIO~~ox·
Attention
installer!
Please
read
the
following!
Audiovox
strongly
recommends
that
the
unit
be installed in an easily accessible location!
DO NOT PLACE IT BEHIND THE RADIO AND DO NOT HIDE UNDER CARPET!
Whether the unit is professionally or self installed, put the module where you, the end user can get to it easily
in
the future. (Have the installer show you where the interface module is installed.)
Installing the module behind the radio will make it difficult to:
-Add possible future upgrades, changing software, adding new features, improving operation;
-Access the AUX input on the module to attach any audio device;
-Access the DIP switches located on the module;
-Remove the unit
in
case
of
failure.
MAKE
SURE THAT THE MODULE IS IN AN ACCESSIBLE LOCATION!
Connection
diagram
-
Bluetooth
and
AUX
inputs
0
IR
Receiver
(optional)
CarStream module
(front) Vehicle Inter-
face Cable
Auxiliary device
(not included)
AUX cable
(optional)
0
[>
t
CarStream module
(back)
LJo
~
~
ll~
Upgrade Port Bluetooth module
USB to
PC
or MAC computer
* Do not connect the Bluetooth module under any circumstance to the AUXILIARY input
connector! Improper connection can cause permanent damage to Bluetooth/lnterface module.
9
10
AUDIO~
..
OXGD
Vehicle
bus
connector-
BT100AUD
kit
only.
You
can access the
CD
changer connector located on the back of the radio. Unplug the factory connection
if present and plug the
BT1
OOAUD
connector into the receptacle. The connector should securely lock.
Ground wire MUST
be
connected to a stable grounding point.
To
factory harness
in vehicle
BT1
OOAUD
Connector
To
ground
To
CarStream
Interface Module
Vehicle
bus
connector-
BT101AVW
kit
old
style
connecor.
You
can access the CD changer connector located on the back of the radio. Unplug the factory connection if
present and plug the BT101AVW connector into the receptacle. The connector should securely lock.
Ground wire MUST be connected to a stable grounding point.
BT101AVW
(old style
blue
color)
connector
to
ground
to
interface
unit
11
12
AUDIO,
..
ox·
Vehicle
bus
connector-
BT101AVW
kit
new
style
connector.
You
can access the CD changer connector located on the back
of
the radio. Unplug the factory connection if
present and plug the BT101AVW connector into the receptacle. The connector should securely lock.
Ground wire MUST be connected to a stable grounding point.
0 0
0 0
0
w
BT1
01AVW
(new
style
white
color)
connector
to
interface
unit
13
BT101AVW
harness
Modification
for
cars
with
factory
SAT
tuner
If vehicle
is
equipped with factory satellite radio and it
is
to
be
retained, the harness modification illustrated
below
is
required. NOTE: This modification will only work for VW vehicles.
1 Disconnect main radio
harness and locate
SAT
connector. Remove it
from main harness
by
pressing on the release
tab of the
SAT
connector.
ffiffii
~
1111111
!=--;;
u
·~
o
SAT
Connector
2 Slide out the inner part of
the
SAT
connector from
plastic housing.
3 Disassemble the
BT101AVW connector the
same way as the factory
SAT
connector.
4 Remove the
SAT
wires from
the factory connector
by
releasing the pins with a small
screw driver or ball point pen.
pins 1,3, 7
5 Relocate wires to
BT101AVW connector
keeping the same order and
location.
I~Hj
pins 1,3, 7 t
6 Put plastic connector covers
back on. Insert BT101AVW
connector to factory
VW main harness.
ffiffill
~
T~
1111111
BT101AVW
connector
7 Connect ground wire
to
chassis of radio.
14 AUDIO-,
..
ox·
Vehicle
bus
connector-
BT102AVW
kit
only.
The connection for this is made at the external CO-changer connection
in
certain AudiNW vehicles. On VW
models, the connection
is
usually
in
the trunk (does not apply to vehicles that came with a CO-changer built
in
to the radio). ForAudi vehicles, the connection is inside the glove box, standard with navigation radios and/
or single-CO radios (also does not apply for vehicles that came with a CO-changer built
in
to the radio). The
external CO-changer cannot
be
retained.
To
factory CD
changer harness
To
CarStream
Interface Module
15
Installation
1.
Verify compatibility
5.
Route kit to glove box or other accessible location
2.
Disconnect battery
6.
Connect Bluetooth module
3.
Remove radio from car
4.
Set DIP switches for desired
mode and Install car specific harness
~1;~J
e.:e;qj-~
Continue on next page.
16
7.
Mount
the
microphone
in
a
suitable
location
as
per
the
illustration.
Use
the
included
2-sided
tape
or
the
clip.
Make
sure
the
microphone
is
directly
facing
the
drivier.
I
/
8.
Complete
install
by
re-installing
radio
e
Optimal Stickey Mount
,»,
Acceptable Stickey Mount
·t
Clip Mount
co
Avotd
9.
Complete
install
by
re-installing
radio
ca
:
IlJ-
~~·=gj
AUDIO''~ox·
Controls and Indicators
1
2
3
1.
Light Ring
Unlit-
unit
is
off.
Red
-unit
is
disconnected.
Blue -unit
is
connected.
Alternating red and blue -unit
is
in
pairing mode.
2.
Multi-Function Button
3.
Built-In Microphone
----
4
4.
OffI
On
I*
(Biuetooth) Switch
Slide down to OFF to turn the unit off.
Slide up to ON to turn the unit on.
Slide up to *to initiate pairing mode.
17
18
AUDIO"
..
OX~
Pairing Your Phone
Your mobile phone can initiate a search for the BCS1M.
Note: The following procedures are generic. Procedures for pairing mobile phones may vary. Please
refer to the manual that came with your mobile phone.
1.
Turn the
BCS1
M
on
and slide the button slider up to
the*
(Biuetooth) position. The light bar will
flash red and blue alternatively.
2.
Access the mobile phone's Bluetooth function and turn the function on.
3.
Set the mobile phone's Bluetooth discover mode to on.
4.
Use the mobile phone's add new device feature. "Biuetooth car kit" will appear
on
your mobile
phone's device list.
5.
A prompt to pair should appear on your mobile phone. Accept the request to initiate the process.
6.
Some mobile phones require a PIN to connect. If asked, enter "0000".
7.
A message stating that pairing is successful should appear on your mobile phone. A prompt
asking you to connect should also appear. Accept the request to initiate the connection.
8.
Once connected, the light bar will turn a solid blue.
19
Bluetooth
I
AUX
operation
in
CDC
emulation
mode:
Much like the radio's AMIFM tuner
or
CD player, CarStream is integrated to be part
of
the factory audio system.
1.
Select CDC mode on the radio using the source selector button. The display will show DISC1 I TRACK 1
At this time the AUXILIARY
INPUT PORT OF THE
CARSTREAM MODULE
is
enabled.
Phone call
or
Bluetooth music
streaming will automatically
take over the AUX input.
I
Audl
symphony
: Pickup I Hang-up
= 1
....
1 CD EXT CD 01:52 CD
EXT44
=
= l
1>2
CD EXT TRACK1 CD EXT
54
=
=
1>3
CD EXT CD
EXT64
' '/
FM
AM
SAT
INFO
TONE
MENU
MIX
20
Operation
Activating Voice Assistant (Siri I Google Voice I Voice Dial)
To
activate the Voice Assistant feature
of
the mobile phone (ifavailable), press and hold the multi-function
button for 2-3 seconds and then release it. Compatible Apple iPhone
4S
or
later model will trigger a
Siri session. Google Voice may be available on select Android phones.
Feature must
be
enabledon phone.
Managing Phone Calls
To make a call:
• Place calls as you normally do on your phone. The call audio will be heard through your
car
stereo.
To make a call using voice-dialing:
•
If
your phone supports voice-dialing, press and hold the multi-function button for
2-3
seconds, and
then release the multi-function button. You should hearyour phone prompt you for a command.
To answer a call:
• When an incoming call is detected, the light ring will blink blue.
• Tap the multi-function button to answer the call. The light ring will return to solid blue.

Other manuals for CarStream

3

Other Audiovox Automobile Accessories manuals
Audiovox HR9000PKG User manual

Audiovox

Audiovox HR9000PKG User manual

Audiovox MEDIABRIDGE Troubleshooting guide

Audiovox

Audiovox MEDIABRIDGE Troubleshooting guide

Audiovox Voyager AOS-44 User manual

Audiovox

Audiovox Voyager AOS-44 User manual

Audiovox RVMPKG3 User manual

Audiovox

Audiovox RVMPKG3 User manual

Audiovox RVMPKG4 User manual

Audiovox

Audiovox RVMPKG4 User manual

Audiovox XMp3i User manual

Audiovox

Audiovox XMp3i User manual

Audiovox AS 9075 User manual

Audiovox

Audiovox AS 9075 User manual

Audiovox CAMSBAR Instruction Manual

Audiovox

Audiovox CAMSBAR Instruction Manual

Audiovox CCDLF User manual

Audiovox

Audiovox CCDLF User manual

Audiovox GC-600GAB User manual

Audiovox

Audiovox GC-600GAB User manual

Audiovox TV Cables Instruction sheet

Audiovox

Audiovox TV Cables Instruction sheet

Audiovox Automobile Accessories User manual

Audiovox

Audiovox Automobile Accessories User manual

Audiovox Voyager AOC-75 User manual

Audiovox

Audiovox Voyager AOC-75 User manual

Audiovox CCS-100 User manual

Audiovox

Audiovox CCS-100 User manual

Audiovox ACAB104 User manual

Audiovox

Audiovox ACAB104 User manual
Audiovox UNIVERSAL RDS PRO A-UNI-150 Troubleshooting guide

Audiovox

Audiovox UNIVERSAL RDS PRO A-UNI-150 Troubleshooting guide

Audiovox 50-0301x-002 SERIES User manual

Audiovox

Audiovox 50-0301x-002 SERIES User manual

Audiovox 1287074A User manual

Audiovox

Audiovox 1287074A User manual

Audiovox AA-BAT Owner's manual

Audiovox

Audiovox AA-BAT Owner's manual

Audiovox 50-0312x SERIES User manual

Audiovox

Audiovox 50-0312x SERIES User manual

Audiovox Microcruise IV Installation instructions

Audiovox

Audiovox Microcruise IV Installation instructions

Audiovox CDC-TO3 User manual

Audiovox

Audiovox CDC-TO3 User manual
Audiovox CMOLF User manual

Audiovox

Audiovox CMOLF User manual

Audiovox FLO TV User manual

Audiovox

Audiovox FLO TV User manual

Popular Automobile Accessories manuals by other brands

HOOKE ROAD FT.20009 quick start guide

HOOKE ROAD

HOOKE ROAD FT.20009 quick start guide

Tuv nord Pre - Easy Fitting instructions

Tuv nord

Tuv nord Pre - Easy Fitting instructions

Prorack K347 Fitting Instructions for Basic Carrier

Prorack

Prorack K347 Fitting Instructions for Basic Carrier

NORTHMAN 2500 Series Installation & operating guide

NORTHMAN

NORTHMAN 2500 Series Installation & operating guide

STO N SHO SNS 194 Installation procedures

STO N SHO

STO N SHO SNS 194 Installation procedures

STO N SHO SNS 303 Installation procedures

STO N SHO

STO N SHO SNS 303 Installation procedures

Young Electric Fellow manual

Young Electric

Young Electric Fellow manual

Neo Car Audio Neo Gateway owner's manual

Neo Car Audio

Neo Car Audio Neo Gateway owner's manual

B-Speech B-Speech Prim user manual

B-Speech

B-Speech B-Speech Prim user manual

Rugged Ridge Omix-Ada Alloy Savannah JL manual

Rugged Ridge

Rugged Ridge Omix-Ada Alloy Savannah JL manual

Thule 1294 Fitting instructions

Thule

Thule 1294 Fitting instructions

LSD-Doors 50040002 installation instructions

LSD-Doors

LSD-Doors 50040002 installation instructions

Blue Ox BX2323 installation instructions

Blue Ox

Blue Ox BX2323 installation instructions

Active Controls ActiveStart ACS50M Installation, operation & application guide

Active Controls

Active Controls ActiveStart ACS50M Installation, operation & application guide

Whelen Engineering Company EB6 installation guide

Whelen Engineering Company

Whelen Engineering Company EB6 installation guide

Havis-Shields WGI-D23-1 & 6 Install instructions

Havis-Shields

Havis-Shields WGI-D23-1 & 6 Install instructions

Yakima SkyBox 12 quick start guide

Yakima

Yakima SkyBox 12 quick start guide

LAS 10155 manual

LAS

LAS 10155 manual

manuals.online logo
manuals.online logoBrands
  • About & Mission
  • Contact us
  • Privacy Policy
  • Terms and Conditions

Copyright 2025 Manuals.Online. All Rights Reserved.