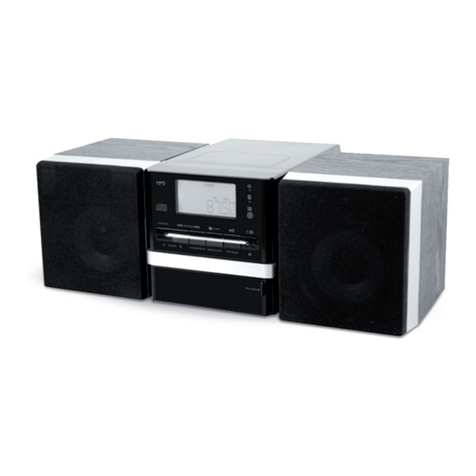
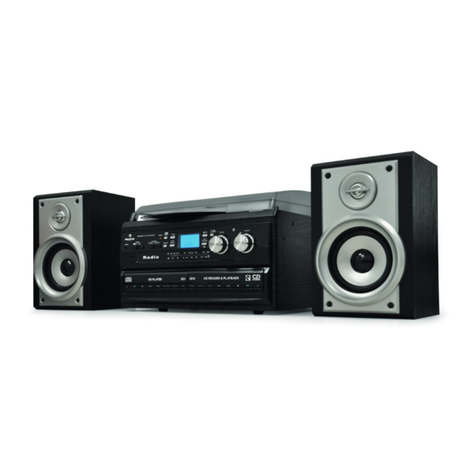
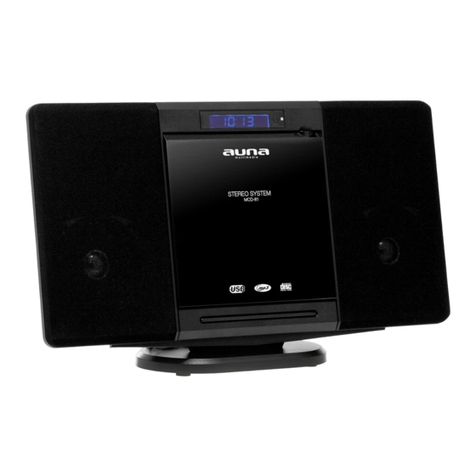
auna multimedia CD-99 User manual

www.auna-multimedia.com10027970 10027971
BT Stereoradio mit CD & USB
CD-99

2
Sehr geehrter Kunde,
zunächst möchten wir Ihnen zum Erwerb Ihres Gerätes gratulieren.
Bitte lesen Sie die folgenden Anschluss- und Anwendungshinweise sorgfältig durch und befolgen Sie diese
um möglichen technischen Schäden vorzubeugen.
Wichtige Hinweise
• Diese Bedienungsanleitung dient dazu, Sie mit der Funktionsweise dieses Produktes vertraut zu ma-
chen. Bewahren Sie diese Anleitung daher stets gut auf, damit Sie jederzeit darauf zugreifen können.
• Sie erhalten bei Kauf dieses Produktes zwei Jahre Gewährleistung auf Defekt bei sachgemäßem Ge-
brauch.
• Bitte verwenden Sie das Produkt nur in seiner bestimmungsgemäßen Art und Weise. Eine anderweiti-
ge Verwendung führt eventuell zu Beschädigungen am Produkt oder in der Umgebung des Produktes.
• Ein Umbauen oder Verändern des Produktes beeinträchtigt die Produktsicherheit.
• Önen Sie das Produkt niemals eigenmächtig und führen Sie Reparaturen nie selber aus!
• Behandeln Sie das Produkt sorgfältig. Es kann durch Stöße, Schläge oder den Fall aus bereits geringer
Höhe beschädigt werden.
• Halten Sie das Produkt fern von Feuchtigkeit und extremer Hitze.
• Lassen Sie keine Gegenstände aus Metall in dieses Gerät fallen.
• Stellen Sie keine schweren Gegenstände auf dieses Gerät.
• Reinigen Sie das Gerät nur mit einem trockenen Tuch.
• Verwenden Sie ausschließlich vom Hersteller oder vom qualizierten Fachhandel empfohlenes Zubehör.
• Der Netzadapter kann mit Wechselstrom von 220 - 240 V betrieben werden.
• Verwenden Sie einen geeigneten Steckeradapter, wenn der Stecker nicht in die Netzsteckdose passt.
Die Gewährleistung verfällt bei Fremdeingrien in das Gerät.
Kleine Objekte/Verpackungsteile (Plastikbeutel, Karton, etc.)
Bewahren Sie kleine Objekte (z.B. Schrauben und anderes Montagematerial, Speicherkarten) und
Verpackungsteile außerhalb der Reichweite von Kindern auf, damit sie nicht von diesen verschluckt
werden können. Lassen Sie kleine Kinder nicht mit Folie spielen. Es besteht Erstickungsgefahr!
Transport des Gerätes
Bitte bewahren Sie die Originalverpackung auf. Um ausreichenden Schutz beim Transport des Gerätes zu
erreichen, verpacken Sie das Gerät in der Originalverpackung.
Reinigung der äußeren Oberäche
Verwenden Sie keine üchtigen Flüssigkeiten, wie Insektensprays. Durch zu starken Druck beim
Abwischen können die Oberächen beschädigt werden. Gummi- oder Plastikteile sollten nicht über einen
längeren Zeitraum mit dem Gerät in Kontakt sein. Nutzen Sie ein trockenes Tuch.

3
Technische Daten
Artikelnummer 10027970 / 10027971
Stromversorgung Netzkabel; 230V, 50Hz
Leistung 2 x 10W Speakers + 2 x 10W Subwoofer = 40W
FM 87.5 - 108 MHz
Abmessungen 58,8 x 23,2 x 21,0 cm
Lieferumfang Gerät, Netzkabel, Bedienungsanleitung
Bedienung
Generell
• Schalten Sie das Radio mit Druck auf POWER ein bzw. aus.
• Tippen Sie wiederholt auf den FUNCTION-Knopf, um zwischen USB, Radio Kassette, Aux und BT als
jeweilige Klangquelle zu wählen.
• Drücken Sie den Play/Pause-Knopf, um im BT- oder USB-Modus Songs anzuspielen bzw. zu pausieren.
Im Radio-Modus führt Play/Pause zu einem automatischen Sendersuchlauf. Mit der Stop-Taste been-
den Sie die Wiedergabe von Musikstücken (im USB- oder BT-Modus).
• Zurück/Vor: Navigieren Sie im USB- oder BT-Modus zwischen Musikstücken. Gedrückt halten für
schnellen Vor- bzw Rücklauf.
• USB-Anschluss zum Anschluss von USB-Speichermedien mit Medieninhalten (USB-Sticks, portable
Festplatten, MP3-Player etc.)
• Auf der Rückseite nden Sie einen 3,5mm-Klinke-Anschluss, an dem Sie externe Geräte wie Smartpho-
nes oder MP3-Player anschließen können. Wählen Sie mit dem Function-Knopf den AUX-Modus und
bedienen Sie Ihren externen Player wie gewohnt.
• Das LCD-Display zeigt Informationen zum aktuell abgespielten Track oder zum gewählten Radiosen-
der an.
• Mit EQ können Sie zwischen einigen voreingestellten Klang-Presets wählen.
• Wählen Sie mit PRE-DN und PRE-UP im MP3-Modus den nächsten bzw. den vorigen Ordner. Analog
dazu haben diese Tasten im Radio-Modus die Funkition, den nächsten bzw. vorigen Sender in der
Senderliste anzuwählen.

4
• Mit REP haben Sie Zugri auf die Wiederhol-Funktion („Repeat“).
• Drücken Sie MUTE zum Stummschalten.
• Programmieren Sie eine Wiedergabeliste mit TIME/PROG und stellen Sie die Uhrzeit ein.
• Die großen silbernen Tasten steuern die Kassettenwiedergabe.
Radio
• Schalten Sie das Gerät ein und wählen Sie den Radio-Modus durch mehrfachen Druck auf Function.
• Halten Sie Play/Pause gedrückt, um einen automatischen Sendersuchlauf zu starten.
USB-Modus
• Drücken Sie Function mehrfach, um in den USB-Modus zu gelangen.
• Navigieren Sie in gewohnter Weise mit den Pfeiltasten durch Ihre Musik-Bibliothek.
BT-Modus
• Die BT-Reichweite beträgt (Luftlinie) circa 10 Meter. Kompatibilität ist nicht mit allen BT-Geräten ga-
rantiert.
• Drücken Sie Function mehrfach, um in den BT-Modus zu gelangen.
• Aktivieren Sie BT auf Ihrem Smartphone/Tablet o.ä. und verbinden Sie es mit „CD-56“.
• Geben Sie „0000“ (viermal null) als Passwort ein, falls Sie dazu aufgefordert werden.
• Nutzen Sie die Pfeiltasten sowie Play/Pause in gewohnter Weise, um durch Ihre Musikauswahl zu na-
vigieren.
Wiedergabelisten
Programmieren Sie eine persönlichen Wiedergabeliste im CD- (Audio-CD und MP3-CD sind möglich) oder
im USB-Modus.
• Drücken Sie PROG. Das PROG-Icon sowie „P01“ erscheinen auf dem Display.
• Suchen Sie den ersten Titel der Wiedergabeliste mit den Pfeiltasten aus und bestätigen Sie mit erneu-
tem Druck auf PROG.
• Wiederholen Sie den Vorgang für weitere Tracks. Sie können bis zu 99 MP3-Dateien oder 20 Audio-
CD-Spuren in einer Wiedergabeliste zusammenfassen.
• Die programmierte Wiedergabe wird beendet, wenn Sie das CD-Fach önen, mit FUNC einen anderen
Modus wählen oder zwei Mal hintereinander auf STOP drücken.

5
CD-Player
Der integrierte CD-Player spielt herkömmliche Audio-CDs ebenso ab wie MP3-CDs. Der Player erkennt aber
keine DVDs, VCDs oder CD-Roms.
Navigieren Sie auf gewohnte Weise mit Pfeiltasten, Play/Pause, Stop. Drücken Sie REPEAT, um den aktuel-
len Track zu wiederholen. Ein weiterer Druck („Repeat all“) wiederholt die ganze CD. Drücken Sie nochmal,
um die Repeat-Funktion abzustellen.
Problembehebung
Problem Mögliche Ursache
Gerät lässt sich nicht einschalten Das Netzteil sitzt nicht richtig in der Steckdose
oder ist nicht richtig mit dem Gerät verbunden.
Gerät lässt sich trotzdem nicht einschalten. Die Steckdose liefert keinen Strom. Prüfen Sie
Steckdose und Sicherungen.
BT funktioniert nicht. Ihr Smartphone/Tablet ist nicht richtig verbunden.
Die Lautstärke ist zu niedrig.
Kein Ton bei AUX-Verbindung. Das Audio-Kabel ist nicht richtig eingesteckt.
Das Audio-Kabel ist beschädigt.
Die Lautstärke am externen Gerät ist zu niedrig ein-
gestellt.
Die Lautstärke am Radio ist zu niedrig eingestellt.

6
Hinweise zur Entsorgung
Elektroaltgeräte: Bendet sich die diese Abbildung (durchgestrichene Mülltonne auf
Rädern) auf dem Produkt, gilt die Europäische Richtlinie 2002/96/EG. Diese Produkte
dürfen nicht mit dem normalen Hausmüll entsorgt werden. Informieren Sie sich über die
örtlichen Regelungen zur getrennten Sammlung elektrischer und elektronischer Gerät-
schaften. Richten Sie sich nach den örtlichen Regelungen und entsorgen Sie Altgeräte
nicht über den Hausmüll. Durch die regelkonforme Entsorgung der Altgeräte werden
Umwelt und die Gesundheit ihrer Mitmenschen vor möglichen negativen Konsequenzen
geschützt. Materialrecycling hilft, den Verbrauch von Rohstoen zu verringern.
Konformitätserklärung
Hersteller: CHAL-TEC GmbH, Wallstraße 16, 10179 Berlin, Deutschland
Dieses Produkt entspricht den folgenden Europäischen Richtlinien:
1999/05/EG (R&TTE)
2011/65/EU (RoHS)
2006/95/EG (LVD)

7
Dear Customer,
Congratulations on purchasing this product. Please read and follow these instructions, in order to avoid
damaging the item. We do not cover any damages that may arise from improper use of the item or the
disregard of the safety instructions.
Safety advice
• Read all instructions before using.
• To protect against a re, electric shock or personal injury, do not immerse cord, electric plugs or device
in water or other liquids.
• Do not expose the appliance to extreme temperatures. The appliance shall be used in moderate cli-
mates.
• The use of attachments that are not recommended by the appliance manufacturer may result in re,
electric shock or personal injury.
• Do not open the unit by removing any cover parts. Do not attempt to repair the unit. Any repairs or
servicing should be done by qualied personell only.
• Only qualied persons may perform technical work on the product. The product may not be ope-
ned or changed. The components cannot be serviced by the user. The manufacturer is not responsible
for any radio or TV interference caused by unauthorized modications.
• The appliance is not a toy. Do not let children play with it. Never let children insert foreign objects into
the appliance.
• Never clean the surface of the device with solvents, paint thinners, cleansers or other chemical pro-
ducts. Instead, use a soft, dry cloth or soft brush.
• This appliance is to be used with 12V car power supply.
• Save these instructions.
Small objects: Keep small objects (i.e. screws, mounting material, memory cards etc.) and packaging out of
the range of children. Do not let Children play with foil. Choking hazard!
Transporting the device: Please keep the original packaging. To gain suicient protection of the device
while shipment or transportation, make sure to put it back in its original packaging.
Cleaning the surface: Do not use any volatile liquids, detergents or the like. Use a clean dry cloth.

8
Technical Data
Item # 10027970 / 10027971
Power supply Mains; AC 230V, 50Hz
Output power 2 x 10W Speakers + 2 x 10W Subwoofer = 40W
FM band 87.5 - 108 MHz
Dimensions 58.8 x 23.2 x 21.0 cm
Scope of delivery Device, mains cable, user manual
Operation
Basic functions / buttons
• FUNCTION: To select modes USB/Radio/AUX/BT/Cassette/CD
• POWER Press Power button to turn ON/OFF power
• PLAY/PAUSE: Start or pause in USB, CD or BT mode. In radio mode, long press this button to enter
the automatic channel scan mode.
• VOLUME: Turn to de- and increase the volume.
• BACK/NEXT/Tuning knob: Select back/next track of USB/BT/CD. Press this button 1.5 sec backward/
forward search. In radio mode, turn to perform a manual search backward/forward in the FM frequen-
cy band.
• STOP: Stop USB/CD/BT playback. In BT mode, press and hold to turn o the BT connection with cou-
pled device to allow another device to pair with the CD-56.
• USB JACK: Listen to your USB with MP3 music les.
• AUX JACK: Select AUX mode, insert aux jack to play Mp3, discman, walkman.
• STEREO HEADPHONE JACK: Insert a 3.5mm stereo headphone.
• TIME/PROG: Create a playlist (up to 99 MP3 les resp. up to 20 audio cd tracks)
• REPEAT: Press to Repeat current track, press twice to repeat all, press again to switch o repeat func-
tion.
• EQ: Select one of several equalizer presets.
• PRE-DN/PRE-UP: In MP3 mode (CD, USB) select the next / the previous folder.

9
CD Player
This CD-player can play Audio Discs,MP3 CD-R. Do not try to play CD-ROM,CDi,VCD,DVD or computer CD.
• Press function button to CD state, to open the cd door, press cd open button.
• Insert a mp3/cd or cd-r with the printed side facing up and press cd door gently to close.
• Press play/pause on the set to start playback.
• Press the pause button to pause play, press the play button back playing.
• To stop cd playback , press stop.
Note: cd/mp3 play will also stop when: you open the cd compartment; you select radio sound source; the
cd/mp3 has reached to the end.
During playback you can use back or next to select a particular track. If you have selected a track number in
the stop or pause position, press play to start playback. Press next once briey for the next track, or press
repeatedly until the desired track number appears in the display.
Press back once briey to return to the beginning of a current track. Press back more than once briey for
a previous track.
Radio
• Press POWER to power on the unit, the yellow status indicator will be on, then the unit will turn to
radio status automatically.
• Manual Tuning: Press BACK or NEXT and then release within 1 sec.
• Auto Tuning:
• Press PLAY/PAUSE button about 2 seconds, the yellow indicator light will become twin-
kling and the radio will start auto search channel. In general, in can be search about 10~30
channels.
• After the search is done, the yellow indicator light will stop twinkle and keep bright. The unit
will start play the channel that auto saved during auto search.
• Press BACK or NEXT to select desired channel station.
• Press [VOL-] or [VOL +] to adjust the volume level.
• The radio frequency last tuned will be stored in the speaker memory.
• To turn o the radio, press POWER button or press FUNCTION button to select another mode.
USB
The unit is designed to play MP3 audio les contained in a USB key, if the les are not in MP3 format, the
les cannot be read correctly.
• Press FUNCTION to select USB mode.
• Insert one USB key; the status indicator will light on in yellow. The unit will read the USB and playback
automatically.
• Navigate through your library in the common way, usinng Play/Pause, Stop and the next/back buttons.
10
Aux
The auxiliary input of your device allows you to connect an external source and play its content through its
speakers.
• Connect your external audio equipment to the AUX INPUT JACK (13)
• Press FUNCTION to select AUX.
• To adjust the sound level press VOLUME buttons.
Note: The unit cannot control the player.
BT
• The operational range between this unit and a BT device is approximately 10 meters.
• Before you connect a BT device to this unit, familiarize yourself with the BT capabilities of the device.
• Compatibility with all BT devices is not guaranteed.
• Any obstacle between this unit and a BT device can reduce the operational range.
• Keep this unit away from any other electronic device that may cause interference.
• Press FUNCTION to select the BT mode. The status indicator ashes blue to indicate an attempt cou-
pling is underway.
• Enable the BT function of your BT audio source device to make it discoverable (see your device’s ope-
ration instructions to add or setup a BT device). Select SP-5 on your BT device to make the pairing.
• Enter default password “0000” if necessary and required by the External BT audio source.
• Once your BT speaker paired with a BT device, the status indicator lights continuously in blue and two
beeps conrm that the pairing is complete.
• Navigate through your library in the common way, usinng Play/Pause, Stop and the next/back buttons.
Programming a Playlist
• Press the PROGRAM key at STOP mode, system will go to PROGRAM mode. -The PRG icon and P01 will
blink.This prompts the user to enter the rst songs in the program PLAY list.
• The user can select the desire tracks by using NEXT/BACK buttons. Once these keys are pressed, the
Display will show the selected track.
• After select the desired track, press PROGRAM again and it will be stored in the memory.
• Mp3 maximum 99 and CD maximum 20 tracks can be programmed when repeat steps (2) to (3) pro-
cedures.
• If press STOP during the program mode, then the selected TRACKS will be stored in the memory and
return to STOP mode (Continuous Play mode)

11
Environment Concerns
According to the European waste regulation 2002/96/EG this symbol on the product
or on its packaging indicates that this product may not be treated as household waste.
Instead it should be taken to the appropriate collection point for the recycling of electrical
and electronic equipment. By ensuring this product is disposed of correctly, you will hep
prevent potential negative consequences for the environment and human health, which
could otherwise be caused by inappropriate waste handling of this product. For more
detailled information about recycling of this product, please contact your local council or
your household waste disposial service.
Declaration of Conformity
Manufacturer: CHAL-TEC GmbH, Wallstraße 16, 10179 Berlin, Germany.
This product is conform to the following European directives:
1999/05/EC (R&TTE)
2011/65/EC (RoHS)
2006/95/EC (LVD)

12
Chère cliente, cher client,
Toutes nos félicitations pour l’acquisition de ce nouvel appareil. Veuillez lire attentivement et respecter les
consignes suivantes de branchements et d’utilisation pour éviter d’éventuels dommages techniques.
Avertissement
• Ce mode d’emploi sert à vous familiariser aux fonctions de ce produit. Conservez-le bien an de pou-
voir vous y référer à tout moment.
• L’achat de ce produit donne droit à une garantie de deux ans en cas de défectuosité de l’appareil sous
réserve d’une utilisation appropriée de celui-ci.
• Veiller à utiliser le produit conformément à l’usage pour lequel il a été conçu. Une mauvaise utilisation
est susceptible d’endommager le produit ou son environnement.
• Tout démontage ou toute modication de l’appareil porte atteinte à la sécurité du produit. Attention
aux risques de blessure !
• Ne jamais ouvrir le produit de son propre chef et ne jamais le réparer soi-même !
• Manipuler le produit avec précaution. Les chocs, les coups ou les chutes - même de faible hauteur -
peuvent endommager l’appareil.
• Ne pas exposer le produit à l’humidité ou à une chaleur extrême.
• Ne pas introduire d’objets métalliques dans cet appareil.
• Ne pas poser d’objets lourds sur l’appareil.
• Nettoyer l’appareil uniquement avec un chion sec.
• Ne pas obstruer les ouvertures d’aération.
• Utiliser uniquement les accessoires recommandés par le fabricant ou par une entreprise spécialisée
et qualiée.
• Baisser le volume sonore avant de brancher un casque à un appareil audio.
• Utiliser le bloc d’alimentation pour raccorder l’appareil au circuit électrique et le brancher à une prise
électrique domestique classique (220-240 V).
Toute ouverture non autorisée de l’appareil entraîne l’annulation de la garantie.
• Le fabricant n’est pas tenu responsable des dégâts et des dysfonctionnements causés par une mauvai-
se utilisation ou un mauvais montage de l’appareil.
Petits objets / éléments d’emballage (sac plastique, carton, etc.)
Tenir les petits objets (par exemple les vis et le matériel d’assemblage, les cartes mémoire) et le matériel
d’emballage hors de la portée des enfants pour éviter qu’ils ne les avalent. Empêcher les enfants de jouer
avec les lms de protection. Il existe un risque d’étouement !
Transport de l’appareil
Conserver l’emballage d’origine. Pour garantir une protection suisante de l’appareil pendant son trans-
port, emballer l’appareil dans son emballage d’origine.
Nettoyage en surface de l’appareil
Ne pas utiliser de liquides volatiles comme ceux contenus dans les bombes insecticides. Une pression trop
importante exercée sur la surface de l’appareil pendant le nettoyage peut l’endommager. Éviter le contact
prolongé du caoutchouc ou du plastique avec l’appareil. Utiliser un chion sec.

13
Fiche Technique
Numéro d’article 10027970 / 10027971
Alimentation électrique Cordon d’alimentation ; 230 V, 50 Hz
Puissance 2 x 10 W (haut-parleurs) + 2 x 10 W (caissons de bas-
ses) = 40 W
FM 87.5 - 108 MHz
Dimensions 58,8 x 23,2 x 21,0 cm
Contenu de l‘emballage Apareille, câble, mode d‘emploi
Utilisation
Touches de contrôle et fonctions basiques
• Appuyer sur la touche POWER pour allumer et éteindre l’appareil.
• Appuyer plusieurs fois sur la touche FUNCTION pour choisir entre les modes USB, Radiocassette, AUX
et Bluetooth.
• Appuyer sur la touche PLAY/PAUSE pour interrompre ou reprendre la lecture d’une chanson en mode
Bluetooth ou en mode USB. En mode Radio, appuyer sur cette touche pour lancer une recherche auto-
matique des stations de radio.
• Appuyer sur la touche STOP pour arrêter la lecture en cours en mode USB ou Bluetooth.
• BACK/NEXT (bouton de réglage) : passer d’un morceau de musique à l’autre en mode USB ou Blue-
tooth. Maintenir appuyé pour une avance ou un retour rapide.
• Port USB pour connecter des dispositifs de stockage USB contenant des chiers médias (clés USB,
disques durs externes, lecteurs MP3, etc.)
• Une prise jack 3,5 mm est disponible à l’arrière de l’appareil pour connecter des dispositifs externes
tels que les Smartphones ou les lecteurs MP3. Sélectionner le mode AUX en appuyant sur la touche
FUNCTION et utiliser votre lecteur externe comme vous le désirez.
• L’écran LCD aiche les informations de la chanson écoutée ou de la station de radio sectionnée.
• Appuyer sur la touche EQ pour accéder aux diérents égaliseurs préréglés.
• Appuyer sur les touches PRE-DN et PRE-UP en mode MP3 pour accéder au chier suivant ou précédent.

14
En mode Radio, elles permettent d’accéder à la station de radio mémorisée précédente ou suivante.
• Appuyer sur la touche REP pour accéder à la fonction Repeat (écoute en boucle).
• Appuyer sur MUTE pour couper le son.
• Appuyer sur TIME/PROG pour programmer une liste d’écoute ou régler l’heure.
• Utiliser les grosses touches argentées pour contrôler la reproduction des casettes.
Radio
• Allumer l’appareil et sélectionner le mode Radio en appuyant plusieurs fois sur la touche FUNCTION.
• Maintenir la touche PLAY/PAUSE enfoncée pour lancer une recherche automatique des stations de
radio.
Mode USB
• Appuyer plusieurs fois sur la touche FUNCTION pour accéder au mode USB.
• Explorer la bibliothèque médias à votre convenance en appuyant sur les touches échées.
BT-Modus
• La portée maximum du Bluetooth est de 10 mètres.
• La compatibilité n’est pas garantie pour tous les dispositifs Bluetooth.
• Appuyer plusieurs fois sur la touche FUNCTION pour accéder au mode Bluetooth.
• Activer le Bluetooth de votre Smartphone/Tablette/etc. et le connecter à « Soundblaster ».
• Introduire le code « 0000 » (quatre fois zéro) si un mot de passe vous est demandé.
• Utiliser les touches échées ou la touche PLAY/PAUSE à votre convenance pour explorer vos chiers
audio.
Liste de lecture
Programmer une liste de lecture personnalisée en mode CD (des CD au format audio ou MP3 sont compa-
tibles) ou en mode USB.
• Appuyer sur la touche PROG. L’icône « PROG » et « P01 » s’aichent sur l’écran.
• Rechercher le titre de la première chanson que vous désirez ajouter à la liste de reproduction à l’aide
des touches échées. Valider en appuyant une nouvelle fois sur PROG.
• Répéter l’action pour les autres chansons. Il est possible de mémoriser jusqu’à 99 chiers au format
MP3 ou 20 pistes d’un CD Audio.

15
• La lecture de la liste programmée s’arrête lorsque le compartiment à CD est ouvert, lorsqu’un autre
mode est sélectionné avec la touche FUNCTION ou lorsque vous appuyez deux fois de suite sur la
touche STOP.
Lecteur CD
Le lecteur de CD intégré peut lire des CD Audio ainsi que des CD au format MP3. Cependant le lecteur ne
reconnaît pas les DVD, VCD ou CD-ROM.
Explorer à votre convenance les chiers en utilisant les touches échées, PLAY/PAUSE, et STOP. Appuyer
sur REPEAT pour réécouter la chanson actuelle. Appuyer une nouvelle fois sur REPEAT pour réécouter tout
le CD. Appuyer une troisième fois pour stopper la fonction Repeat.
Résolutions des problèmes
Problème Cause possible
L’appareil ne veut pas s’allumer. Le cordon d’alimentation n’est pas correctement
branché ou n’est pas bien connecté à l’appareil.
L’appareil ne veut toujours pas s’allumer. La prise n’est pas alimentée en électricité. Vérier
la prise et le disjoncteur.
Le Bluetooth ne fonctionne pas. Votre Smartphone/Tablette n’est pas connecté(e).
Le volume est trop bas.
Pas de son lors d’une connexion AUX. Le câble audio n’est pas correctement connecté.
Le câble audio est endommagé.
Le volume du dispositif externe est trop bas.
Le volume de la radio est trop bas.

16
Informations sur le recyclage
Vous trouverez sur le produit l’image ci-contre (une poubelle sur roues, barrée d‘une
croix), ce qui indique que le produit se trouve soumis à la directive européenne 2002/96/
CE. Renseignez-vous sur les dispositions en vigueur dans votre région concernant la coll-
ecte séparée des appareils électriques et électroniques. Respectez-les et ne jetez pas les
appareils usagés avec les ordures ménagères. La mise en rebut correcte du produit usagé
permet de préserver l’environnement et la santé. Le recyclage des matériaux contribue à
la préservation des ressources naturelles.
Déclaration de conformité
Fabricant : CHAL-TEC GmbH, Wallstraße 16, 10179 Berlin, Allemagne
Ce produit est conforme aux directives européennes suivantes :
1999/05/CE (R&TTE)
2011/65/UE (RoHS)
2006/95/CE (LVD)

17
Gentile cliente,
La ringraziamo per aver acquistato il nostro prodotto. La preghiamo di leggere attentamente le seguenti
istruzioni e di seguirle per evitare eventuali danni. Non ci assumiamo alcuna responsabilità per danni deri-
vati da una mancata osservazione delle avvertenze di sicurezza e da un uso improprio del dispositivo.
Avvertenze di sicurezza
Il presente manuale ha lo scopo di illustrare il funzionamento del prodotto. Conservarlo per consultazioni
future.
• Questo prodotto ha una garanzia di due anni di conformità. Non sono coperti da garanzia i danni
causati da un utilizzo improprio.
• Utilizzare il prodotto esclusivamente per lo scopo previsto. Un utilizzo improprio può danneggiare il
prodotto o l’ambiente circostante.
• Apportare modiche al prodotto compromette la sua sicurezza. Attenzione pericolo di farsi male!
• Non aprire mai il prodotto e non eseguire mai riparazioni autonomamente.
• Maneggiare il prodotto con cautela. Può danneggiarsi in caso di urti, colpi o cadute anche da altezze
minime.
• Non esporre il prodotto all’umidità e al calore eccessivo.
• Non fare cadere oggetti di metallo nel dispositivo.
• Non fare cadere oggetti pesanti sul dispositivo.
• Pulire il dispositivo solo con un panno asciutto.
• Non bloccare le fessure di aereazione.
• Utilizzare esclusivamente gli accessori consigliati dal produttore o da un rivenditore qualicato.
La garanzia decade in caso di intervento di terzi.
Parti più piccole/imballaggio
Conservare le parti più piccole (ad es. viti, materiale di montaggio e di imballaggio) lontano dalla portata dei
bambini, per evitare che le ingeriscano. Non lasciare che i bambini giochino con il materiale d’imballaggio.
Pericolo di soocamento!
Trasporto del dispositivo
Conservare la confezione originale. Per garantire una protezione adeguata del dispositivo durante il tras-
porto, riporlo nella confezione originale.
Pulizia delle superci esterne
Non utilizzare liquidi volatili come ad esempio spray per insetti. Le superci si possono danneggiare se si
puliscono troppo energicamente. Le parti in plastica o in gomma non devono restare a contatto con il dis-
positivo per lungo tempo. Utilizzare un panno asciutto.

18
Technische Daten
Numero articolo 10027970 / 10027971
Alimentazione elettrica Cavo elettrico; 230 V; 50 Hz
Potenza 2 altoparlanti 10 W+ 2 Subwoofer 10 W= 40 W
FM 87.5 - 108 MHz
Dimensioni 58,8 x 23,2 x 21,0 cm
Consegna Dispositivo, cavo, manuale di istruzioni
Comandi e funzioni
Funzioni base
• Premendo il tasto “POWER “la radio si accende e/o si spegne.
• Premere ripetutamente il pulsante “FUNCTION” per selezionare la fonte audio (USB/ Radio / Musicas-
setta/AUX/ BT/ CD).
• Premere il tasto “PLAY/PAUSE” per avviare o interrompere la riproduzione in modalità BT o USB. Nella
modalità Radio il tasto PLAY/PAUSE avvia la ricerca automatica delle emittenti radio. Con il tasto
“STOP”, si termina la riproduzione dei brani musicali in modalità USB o BT.
• Premendo i tasti “BACK/NEXT”, in modalità BT e USB, rispettivamente si ritorna al brano precedente
o si passa a quello successivo. Tenendoli premuti più a lungo si naviga più velocemente all’interno del
contenuto musicale.
• L’ingresso USB consente il collegamento con i dispositivi USB e simili (chiavi USB, Hard Disk esterni,
lettori MP3 ecc.).
• Sul retro del dispositivo l’attacco AUX da 3,5mm permette di collegare dispositivi esterni come Smart-
phones o lettori MP3. Dal pulsante MODE selezionare la modalità AUX e manovrare il lettore esterno
come si è soliti.
• Il display LCD riporta le informazioni sul brano o sull’ emittente radiofonica in corso di riproduzione
• Con il comando “EQ” è possibile selezionare una delle equalizzazioni predenite.
• Nella modalità MP3 selezionare “PRE-DN” e “PRE-UP” per passare rispettivamente alla cartella pre-
cedente o successiva. Questi tasti svolgono la stessa funzione nella modalità radio per passare alla
precedente o successiva emittente radio.

19
• Con “REPEAT” si accede alla funzione REPEAT (Ripetizione).
• Premere “MUTE” per attivare sul dispositivo la modalità silenziosa.
• Con “TIME/PROG” è possibile programmare una playlist e impostare l’orario.
• I grandi tasti argentati servono per la riproduzione di cassette musicali.
Radio
• Accendere il dispositivo e premendo più volte tasto “MODE” selezionare la modalità radio.
• Tenere premuti “PLAY/PAUSE” per avviare la ricerca automatica delle stazioni radio
USB
• Premere più volte il tasto “MODE” per accede alla modalità USB
• Navigare all’interno della biblioteca musicale del dispositivo USB utilizzando normalmente tasti dire-
zionali.
BT-Modus
• Non è garantita la compatibilità con tutti i dispositivo BT.
• Premere più volte il tasto BT per acceder alla modalità BT.
• Attivare il BT sullo Smartphone, sul Tablet e su dispositivi simili e collegarli a “CD-56”.
• In caso venga richiesta una password, digitare “0000” (quattro volte zero).
• Per navigare all’ interno del contenuto musicale, utilizzare come di consueto i tasti direzionali e il tasto
“PLAY /PAUSE”.
Sequenza di riproduzione
È possibile personalizzare la sequenza di riproduzione dei brani musicali sia dal CD (CD- Audio e CD MP3)
sia in modalità USB.
• Premere “PROG.” e sul display appare la scritta “P01”.
• Con i tasti direzionali selezionare il primo brano da inserire nella playlist e confermare la selezione
con il tasto “PROG.”
• Ripetere l’operazione per i brani successivi. È possibile raccogliere nella playlist no a 99 brani MP3
e 20 Brani Audio.
• Terminare la riproduzione programmata, aprendo il vano CD o selezionando un’altra modalità dal
tasto “FUNCTION” o premendo due volte consecutive il tasto “STOP”.

20
CD Player
Il lettore CD integrato riproduce sia CD Audio, sia CD MP3; non riconosce DVD, VCDs o CD-Rom.
Navigare come di consueto utilizzando i tasti direzionali, PLAY/PAUSE, STOP. Premere REPEAT per ripro-
durre nuovamente il brano attualmente in corso. Premere di nuovo (“Repeat all”) per riprodurre di nuovo
l’intero CD. Premere una terza volta REPEAT per disattivare la funzione REPEAT.
Risoluzione problemi
Problema Possibili cause
Il dispositivo non si accende. L’alimentatore non è inserito correttamente nella
presa di corrente.
Il dispositivo continua a non accendersi. Dalla presa di corrente non viene distribuita cor-
rente elettrica. Vericare la presa di corrente e i
fusibili.
Il BT non funziona. Lo Smartphone/ Tablet non è collegato corretta-
mente.
Il volume è troppo basso.
Nessun segnale audio con la connessione AUX. Il cavo audio non è inserito correttamente.
Il cavo audio è difettoso.
Il volume del dispositivo esterno è troppo basso.
Il volume della radio è troppo basso.
Other manuals for CD-99
1
Table of contents
Languages:
Other auna multimedia Stereo System manuals

auna multimedia
auna multimedia Graceland User manual

auna multimedia
auna multimedia 10008845 User manual

auna multimedia
auna multimedia 10021815 User manual

auna multimedia
auna multimedia Memphis User manual

auna multimedia
auna multimedia Doppel User manual

auna multimedia
auna multimedia 10029104 User manual

auna multimedia
auna multimedia AV3800USB User manual

auna multimedia
auna multimedia MCD-107C User manual

auna multimedia
auna multimedia RCD320 User manual

auna multimedia
auna multimedia MCD-81 User manual