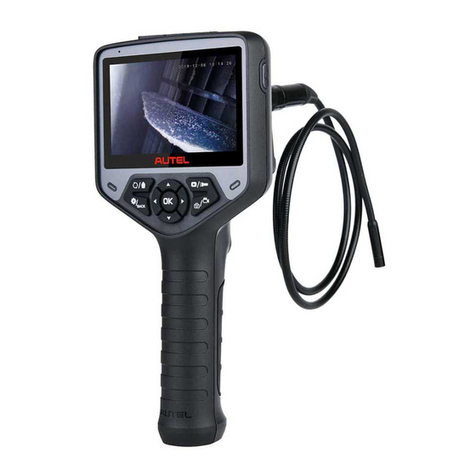
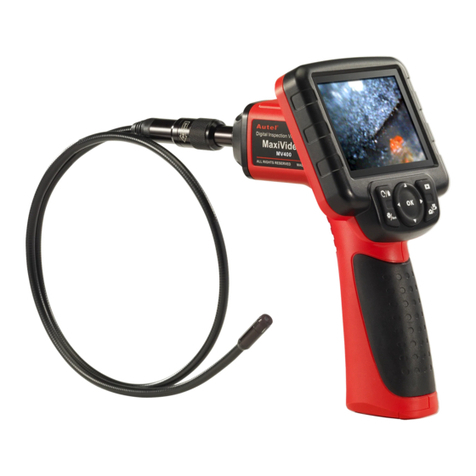
Autel MaxiVideo MV460 User manual

i
Trademarks
Autel®, MaxiSys®, MaxiCheck®, MaxiDAS®, MaxiDiag®,
MaxiRecorder®, MaxiScan®, and MaxiTPMS® are trademarks of
Autel Intelligent Technology Corp., Ltd., registered in China, the
United States and other countries. All other marks are trademarks or
registered trademarks of their respective holders.
Copyright Information
No part of this manual may be reproduced, stored in a retrieval system
or transmitted, in any form or by any means, electronic, mechanical,
photocopying, recording, or otherwise, without the prior written
permission of Autel.
Disclaimer of Warranties and Limitation of Liabilities
All information, specifications and illustrations in this manual are based
on the latest information available at the time of printing.
Autel reserves the right to make changes at any time without notice.
While information of this manual has been carefully checked for
accuracy, no guarantee is given for the completeness and correctness of
the contents, including but not limited to the product specifications,
functions, and illustrations.
Autel will not be liable for any direct damages or for any special,
incidental, or indirect damages or for any consequential economic
damages.
IMPORTANT
Before operating or maintaining this unit, please read this manual
carefully, paying extra attention to the safety warnings and precautions.
For Services and Support
http://pro.autel.com
www.autel.com
1-855-288-3587/1-855-AUTELUS (NorthAmerica)
0086-755-86147779 (China)
Support@autel.com
For technical assistance in all other markets, please contact your local
selling agent.

ii
Safety Instructions
To prevent personal injury or damage to vehicles and/or the inspection
tool, read this instruction manual first and observe the following safety
precautions at a minimum whenever working on a vehicle.
Work Area Safety
Always perform automotive testing in a safe environment.
Keep clothing, hair, hands, tools, test equipment, etc. away from
all moving or hot engine parts. The cable shall be operated under
60 °C (140 °F).
Operate the tool in a well-ventilated work area.
Do not operate the tool in a potentially combustive atmosphere,
such as in the presence of flammable liquids, gases, or heavy
dust.
Keep a fire extinguisher for use on gasoline/chemical/electrical
fires nearby.
Do not use the tool around corrosive chemicals.
Keep bystanders, children and visitors away vehicle testing area.
Keep the tool dry, clean, free from oil, water and grease. Use a
mild detergent on a clean, damp cloth to clean the outside of the
tool when necessary.
Electrical Safety
Keep the tool away from grounded surfaces such as pipes,
radiators, ranges and refrigerators.
Do not expose the tool to rain or wet conditions. Water entering

iii
the tool will increase the risk of electric risk.
Do not unplug the tool from the electrical outlet by pulling on
electrical cord. Never carry tool by cord. Keep cord away from
heat, oil, sharp edges or moving parts.
If operating the tool in a damp location is unavoidable, use a
ground fault circuit interrupter (GFCI) to protect the tool from
damage and the operator from injury.
Personal Safety
Do not use the tool while tired or under the influence of drugs,
alcohol, or medications. A moment of distraction can result in
serious personal injury.
Do not over-reach. Keep proper footing and balance at all times.
Proper footing and balance enable better control of the tool in
unexpected situations.
Always wear safety eye protection that meets ANSI standards.
Do not wear loose clothing or jewelry. Keep your hair, clothing,
and gloves away from moving parts.
Do not place the tool on any unstable cart or surface. The tool
may fall causing serious injury to a person or serious damage to
the tool itself.
Do not have liquids near the tool. Liquid increases the risk of
electric shock and damage to the tool.
Do not use the tool for personal or medical use.
The product is not shock-resistant. Handle it with care and be
careful not to drop it.

iv
Contents
1. USING THE MANUAL......................................................................................... 1
CONVENTIONS ......................................................................................................... 1
2. GENERAL INTRODUCTION ............................................................................. 3
2.1 DESCRIPTION ..................................................................................................... 3
2.2 SPECIFICATIONS................................................................................................. 3
2.3 ACCESSORIES INCLUDED ................................................................................... 4
2.4 TOOL COMPONENTS AND PORTS....................................................................... 5
2.5BUTTONS AND CONTROLS.................................................................................. 8
3. INSTALLATION AND CONNECTION ........................................................... 11
3.1 THE IMAGER HEAD AND CABLE INSTALLATION............................................. 11
3.2 ACCESSORIES INSTALLATION .......................................................................... 11
3.3MICRO SD CARD INSTALLATION..................................................................... 12
3.4MINI USB CABLE CONNECTION...................................................................... 12
3.5MICRO HDMI CABLE CONNECTION............................................................... 13
4. BATTERY CHARGING PRECAUTIONS........................................................ 14
4.1BATTERY CHARGING SAFETY.......................................................................... 14
4.2BATTERY AND CHARGER SPECIFICATIONS ..................................................... 14
4.3 CHARGER INSPECTION..................................................................................... 15
4.4BATTERY CHARGING PROCEDURES................................................................. 15

v
5. OPERATION INSTRUCTIONS......................................................................... 17
5.1BASIC OPERATION ........................................................................................... 17
5.2 OPERATION PRECAUTIONS .............................................................................. 18
5.3 TOOL INSPECTION............................................................................................ 20
5.4 TOOL AND WORK AREA SET-UP..................................................................... 21
5.5 ON SCREEN NAVIGATION ................................................................................ 23
5.6 SETTINGS ......................................................................................................... 32
5.7 FIRMWARE UPDATE......................................................................................... 40
6. TROUBLESHOOTING....................................................................................... 42
7. COMPLIANCE INFORMATION...................................................................... 43
8. WARRANTY INFORMATION ......................................................................... 44
8.1 LIMITED ONE YEAR WARRANTY..................................................................... 44
8.2 SERVICE PROCEDURES..................................................................................... 44

1
1. Using the Manual
This manual contains device usage instructions.
Some illustrations shown in this manual may depict tool models and/or
optional equipment that are not included on or with your system.
Contact your sales representative for availability of tool options or
accessories not included.
Conventions
The following conventions are used.
Bold Text
Bold text is used to highlight selectable items such as buttons and menu
options.
Example:
Press OK.
Notes and Important Messages
Notes
A NOTE provides helpful information such as additional explanations,
tips, and comments.
Example:
NOTE
New batteries reach full capacity after approximately 3 to 5 charging
and discharging cycles.
Important
IMPORTANT indicates a situation which, if not avoided, may result in
damage to the test equipment or vehicle.
Example:

2
IMPORTANT
Keep the cable away from heat, oil, sharp edges and moving parts.
Replace damaged cable immediately.
Hyperlinks
Hyperlinks or links that take you to other related articles, procedures,
and illustrations are available in electronic documents. Blue italic text
indicates a selectable hyperlink.
Illustrations
Illustrations used in this manual are samples, the actual testing screen
may vary for each vehicle being tested. Observe the menu titles and
on-screen instructions to make correct option selection.

3
2. General Introduction
2.1 Description
The MaxiVideo MV460, the next generation of digital videoscope, is
ideal for inspecting difficult-to-reach areas with its semi-rigid flexible
cable and 10-level adjustable LED light. It features a 1920 x 1080
high resolution camera, a 3.5-inch 640 x 480 full color LCD display,
an 8.5mm camera probe, and a built-in 2600mAh battery with up to 4
hours of continuous use. This multipurpose videoscope is an
economical solution to inspect machinery, facilities, and infrastructure
in the safest, quickest and most cost-effective manner possible.
This manual describes the construction and operation of the device
and how it works to examine difficult-to-reach areas.
2.2 Specifications
Recommended use
Indoor
Optimal viewing
Distance
0.79" to 2" (2 cm to 5 cm)
Image capture
JPG images (1920 x 1080 pixels)
MP4 videos (1920 x 1080 pixels)
Screen type display
3.5" TFT LCD
Display resolution
640 x 480 pixels
Power supply
Built-in rechargeable lithium-ion battery
pack (3.7V/2600 mAh)
Tested battery life
Approximately 4 hours of continuous use

4
Dimensions
235 x 97 x 125mm (9.3" x 3.8" x 4.9" )
Weight
0.393kg (0.87lbs)
Recording medium
Micro SD card (8GB Standard/128GB
Max)
Image controls
Zoom, low light vision
Lighting
Fully adjustable LED
Cable reach
1m (39.4")
Imager head
8.5mm (0.33"), 2 megapixel (1920 x
1080 pixels)
Waterproof
To a depth of 1m (39.4") (Imager heads
and cable only)
Additional ports
TF, Mini USB, Micro HDMI
Operating temp.
Main unit: 14°F to 122°F (-10°C to
50°C);
Cable: 14°F to 140°F (-10°C to 60°C)
Storage temp.
-4°F to 158°F (-20°C to 70°C)
Operating humidity
5% - 95% non-condensing
2.3 Accessories Included
1) User Manual
2) Imager Head and Cable (8.5mm)
3) Magnet, Hook, Mirror
4) Charger

5
5) Mini USB Cable
6) Micro SD Card
7) Protective Carrying Case
2.4 Tool Components and Ports
The MaxiVideo MV460 comes with the following items:
NOTE
Because of continuing improvements and modifications, actual product
may differ slightly from photo.
Figure 2-1 MaxiVideo MV460 Right Side View
1. Handheld Display Unit –The ergonomic tool with comfortable
pistol grip design.
2. Power Button –Powers tool on and off.

6
3. Shoot Button –Takes photos, starts and stops video recording.
While in Settings or Galley, press to exit to live image screen.
4. Imager Head and Cable –Connects to the tool, enables the viewing
of images and videos.
5. Cable Connector –Connects the display unit to the imager head
and cable.
6. Battery Compartment Cap –Battery is installed under the cap.
Figure 2-2 MaxiVideo MV460 Top View
1. Micro HDMI Port –Enables images and videos to be displayed on
a monitor. Attach a micro HDMI cable to this port and the HDMI
port of a monitor to view live or recorded still and video images.
2. Micro SD card Slot –Holds the Micro SD card.
3. Mini USB/Power Source Port –Connects the tool to a computer
with the supplied Mini USB cable for uploading images. Connects
the tool with the supplied charger to power on the tool or to charge
battery.

7
Figure 2-3 MaxiVideo MV460 Cable and Imager Head
1. Imager Head
2. LED Light
3. Cable
4. Alignment Key
Figure 2-4 MaxiVideo MV460 Accessories
1. Accessory Magnet –Attach to tool to pick up small metal objects
such as screws.
2. Accessory Hook –Attach to tool to pick up wires or rings in pipes
or confined areas.
3. Accessory Mirror –Attach to tool to inspect corners and
unreachable areas.

8
2.5 Buttons and Controls
Figure 2-5 MaxiVideo MV460 Buttons and Controls
A. LCD Screen
B. Charging Indicator Light –Lights yellow when charging and lights
green when charging is complete.
C. Trash/Reverse Button –In Play mode, press button to delete captured
photos and videos. In Camera/Video mode, press button to change the
orientation of still or video images. Depending on the setting, when
the Reverse button is pressed, the image can be flipped (vertically or
horizontally) or rotated 90 degrees.
D. Play Button –In Play mode, press button to replay captured photos
and videos. In Camera/Video mode, press Play button to switch to
play mode.

9
E. Setting/Back Button –Moves to the primary Settings screen in
camera/video mode. Returns to the last viewed screen or cancels a
selection in Settings mode and Play mode. In Play mode, press to
suspend the playing of photos or videos or to exit from photo/video
editing.
F. Camera/Video Button –Switches between two modes: Camera or
Video. In Play mode, press to advance cursor to editing to select,
invert selection of, lock, or unlock image or video.
G. Down Arrow, Zoom Button –Uses Down arrow button to zoom out
while in Camera/Video mode. Press to navigate down menus and
submenus in Settings mode. In Play mode, press to navigate photo or
video thumbnails.
H. Up Arrow, Zoom Button –In Camera/Video mode, press Up to zoom
in. In Settings mode, press to navigate up menus and submenus. In
Play mode, press to navigate photo or video thumbnails; or to advance
the cursor to editing to select, invert selection of, lock, or unlock
image or video.
I. Left Arrow, LED Adjusting Button –In Camera/Video mode, press
Left arrow button to decrease LED brightness. In Settings mode, press
to advance the cursor. In Play mode, press to advance the cursor to the
left; or to return to the previous photo or video; or to exit editing.
J. Right Arrow, LED Adjusting Button –In Camera/Video mode, press
Right arrow button to increase LED brightness. In Settings mode,
press to advance the cursor. In Play mode, press to advance the cursor
to the right; or to advance to the next photo or video; or to exit
editing.
K. OK Button –In Settings mode, press to confirm a selection or action.
In Play mode, press to confirm a selection or action; to start or
suspend the replaying of photos or videos. Press OK button to

10
freeze-frame camera stills while capturing photo; press OK button
again to continue taking stills. Press OK button to freeze-frame video
recording; press again to resume recording.

11
3. Installation and Connection
3.1 The Imager Head and Cable Installation
To use the tool, the imager head and cable must be connected to the
display unit. To connect the cable to the display unit, align the key on
the probe connector with slot on the coupling (Figure 3-1). Push the
two ends together and, finger-tighten the collar to hold the connection
firmly in place.
Figure 3-1 Connect Imager with Cable
3.2 Accessories Installation
Three accessories are included: a magnet, a hook, and a mirror (Figure
2-4). All are attached to the imager head in the same manner. Detach
the cap from the imager head as shown in Figure 3-2 and Figure 3-3.
Slip the end of the accessory over the imager head and then secure the
accessory as shown in Figure 3-4 and Figure 3-5.

12
Figure 3-2 Figure 3-3
Figure 3-4 Figure 3-5
3.3 Micro SD Card Installation
To insert a Micro SD card into the Micro SD card slot, make sure the
pins are facing towards slot and the angled portion of the card is facing
down. To remove a Micro SD card, gently push the Micro SD card
inward and then release to eject it from the card slot.
NOTE
A standard 8 GB Micro SD card is included to provide additional
memory. The Micro SD card port supports Micro SD cards sized up to
128 GB.
3.4 Mini USB Cable Connection
Use the supplied Mini USB cable to connect the tool to a PC to charge
or transfer captured photos and videos. When the tool is successfully

13
connected to a PC, a popup menu will display (Figure 3-6). Press Up
or Down button to select Transfer Files or Charge Only.
Figure 3-6 USB Mode
If you select Charge Only, the tool will start charging and a battery
charging icon will appear on the top right of screen. If you select
Transfer Files, a USB icon will appear on the top right of the screen
(Figure 3-7); you can manage and store still images and videos on the
computer.
Figure 3-7 USB icon displays when Transfer Files selected
3.5 Micro HDMI Cable Connection
Use a micro HDMI cable (not included) to connect the tool to the
HDMI port on a television or computer monitor and view real-time,
high-quality images.

14
4. Battery Charging Precautions
IMPORTANT
To reduce the risk of serious injury, read these precautions and
specification label on charger carefully before using.
4.1 Battery Charging Safety
Do not probe charger with conductive objects.
Do not use charger if it has been dropped or damaged.
Charge battery in temperatures above 41°F (5°C) and below
113°F (45°C).
Keep charger out of the reach of children.
Use only the charger supplied.
Do not charge the battery for more than 24 hours.
Do not cover the charger while in use.
Do not clean charger while it is plugged into electrical outlet.
Do not store charger in damp, wet area or with corrosive liquids.
Do not open charger housing. Do not attempt to repair.
Do not charge battery near fire or in the sunlight or in direct heat.
Proper care will prevent serious damage to the charger.
4.2 Battery and Charger Specifications
Input
USB-5V
Battery Type
3.7V lithium-ion
Battery Capacity
2600mAh

15
Input Current
1A Max(USB)
Charging Time
3-4 hours
Cooling
Passive convention cooling (No fan)
4.3 Charger Inspection
IMPORTANT
Before using, inspect the charger for any damage. Set up charger
according to these procedures to reduce the risk of injury to persons and
tool. Inspect the charger for damage or modifications including broken,
worn, missing, misaligned or binding parts. Do not use charger if
damaged.
To ensure the tool’s proper operation the tool should be clean and free
of oil, grease and dirt.
The warning label on charger’s surface is intact and readable.
The tool should only be charged in an appropriate workspace,
with a temperature of between 41°F (5°C) and 113°F (45°C). If
the temperature is out of this range at any point during
charging, the operation will be suspended.
The charger should plug correctly into the desired electrical
outlet.
The charger should have a clearance of at least 4" (10 cm) on
all sides so as not to overheat.
4.4 Battery Charging Procedures
The tool has a 3.7V built-in rechargeable lithium-ion battery. If the
battery level is too low to continue operating, the tool will
automatically shut off.
There are two battery charging methods:
Table of contents
Other Autel Analytical Instrument manuals
Popular Analytical Instrument manuals by other brands

Teledyne
Teledyne 8800P instruction manual

Teledyne
Teledyne 8800A operating instructions

Philadelphia Scientific
Philadelphia Scientific iBOS Pro 6 Series installation manual

Würth
Würth CLL 11 user manual

SICK
SICK MCS200HW operating instructions

Ametek
Ametek Solatron Analytical EnergyLab XM Getting started