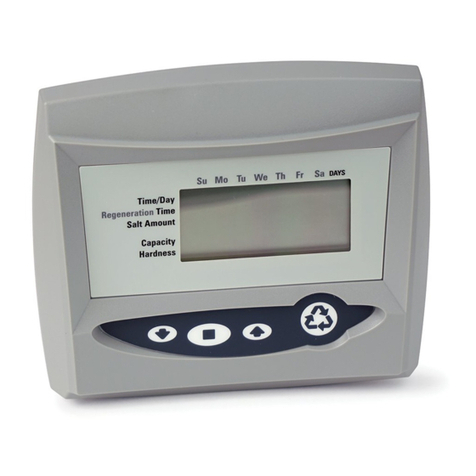
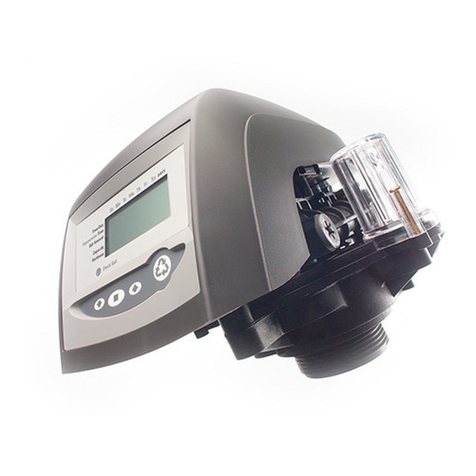
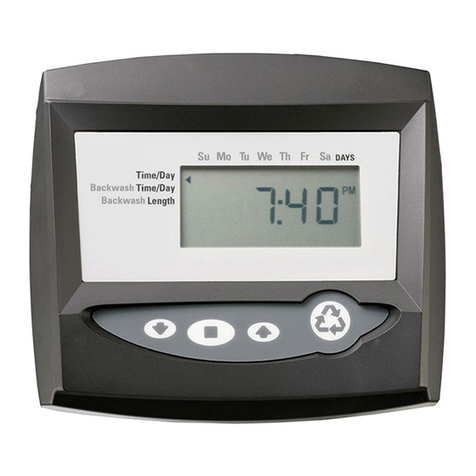
Autotrol 255-960 User manual

Water Conditioning Control System
Operation and Maintenance Manual
Series 255 Valve / 960 Control
®

2
Table of Contents
Table of ContentsTable of Contents
Table of Contents
Introduction . . . . . . . . . . . . . . . . . . . . . . . . . . . 3
Special Features . . . . . . . . . . . . . . . . . . . . . . . 3
General Conditioner Information . . . . . . . . . . . 3
How Your Conditioner Works
Model 960 Control Front Panel
Control Settings. . . . . . . . . . . . . . . . . . . . . . . . 4
General Information
Time Of Day Clock
Time of Regeneration
Hardness Setting
Salt Setting
Capacity Setting
Water Conditioner Regeneration . . . . . . . . . . . 7
Automatic Regeneration
Manual Regeneration
Care of Your Water Conditioner. . . . . . . . . . . . 7
General
Cleaning the Injector/Injector Screen
Maintaining the Drain Line
Manual Valve Operation. . . . . . . . . . . . . . . . . . 9
Additional Features . . . . . . . . . . . . . . . . . . . . . 9
Disinfection of Water Conditioners . . . . . . . . . 9
Replacement Parts . . . . . . . . . . . . . . . . . . . . 10
Troubleshooting. . . . . . . . . . . . . . . . . . . . . . . 14
Alarms
Troubleshooting Procedures
Specifications . . . . . . . . . . . . . . . . . . . . . . . . 17
Glossary of Terms . . . . . . . . . . . . . . . . . . . . . 17
Safety
SafetySafety
Safety
Important: The plug-in transformer for this equipment
is rated for indoor use only.
Important: Never attempt to work on this control while
standing in or near water without disconnecting
electrical power to the control.

3
Introduction
IntroductionIntroduction
Introduction
The Model 960 control provides sophisticated,
demand-based water conditioning by incorporating a
microprocessor and a water meter to electronically
monitor the amount of water used daily. Each day, at
Time of Regeneration, the control determines if the
capacity remaining is sufficient to provide conditioned
water for the next day. If the remaining capacity is too
small, the control automatically regenerates the resin
bed.
If water usage changes, the computer automatically
compensates for the change and regenerates as
needed. Regeneration is based on actual water usage.
The control provides efficient, trouble-free,
uninterrupted soft water luxury.
The Series 255 valve combines design simplicity with
glass reinforced Noryl* plastic construction to provide
an uncommonly reliable appliance.
If maintenance becomes necessary, the Model 960
Series 255 water conditioning system offers a unique
“separation” capability for quick repairs.
*Noryl is a trademark of General Electric Company.
Special Features
Special FeaturesSpecial Features
Special Features
•Memory Retention. During a power outage,
critical operating information in the control’s
memory is stored in a special electronic device
called a NOVRAM. This information includes the
time of day, water usage amounts, daily average
waterusage,allprogrammingdataandthenumber
of days since the last regeneration. When power is
restored, the information is returned to the
microprocessor and operation resumes as if an
outage never occurred. The time of day will be late
by the length of the power outage. Because most
power outages are less than one minute in
duration, it may be months or years before the time
display requires resetting. If an outage of one or
more hours occurs, the time of day should be reset
but no other reprogramming is necessary.
•Design Reliability. Solid-state electronics assure
many years of trouble-free performance. The
metering system has only one moving part – a
rotating turbine that measures water usage.
•Time and Capacity Display. During normal
conditioning operation, the correct time of day
alternates with capacity on the display. The
capacity value is the number of gallons (cubic
meters for metric units) of water that the unit can
condition before another regeneration is needed.
•Flow Indicator. The colon between the hours and
minutes in the Time of Day display flashes to
indicatetheflowofservicewater throughthevalve.
This provides an easy determination of proper
meter operation.
•Hardness and Capacity Settings. Once the
hardness and capacity settings are entered, the
information cannot be lost due to a power outage,
so reprogramming is not necessary.
•Guest Cycle. An extra regeneration can be
achieved at any time by pressing the REGEN
button on the front panel. It takes a few minutes for
the regeneration to start. The unit completes the
regeneration in about two hours. This feature is
beneficial when you expect to use more than the
normal amount of water; for example, guest visits
or an extra heavy laundry day.
General Conditioner Information
General Conditioner InformationGeneral Conditioner Information
General Conditioner Information
How Your Conditioner Works
In general, your water conditioner works in the
following manner. Hard water flows into the conditioner
and through the resin bed where calcium and
magnesium hardness minerals are exchanged. The
conditioned water flows out of the resin bed into your
plumbing system. After a certain amount of hard water
has passed through the conditioner, the resin cannot
remove any more minerals. This resin state is called
exhaustion and indicates that the resin needs to be
regenerated. The regeneration process restores the
conditioner’s ability to soften water. The control
monitors the amount of water that flows through the
conditioner and automatically calculates when to
regenerate the resin bed.
Model 960 Control Front Panel
Figure 1
The main components of the Model 960 control front
panel are:
•Regeneration Cycle Indicator
•Green Indicator Lights
•Four-Digit Display
•Programming Push Buttons
•REGEN Push Button
Refer to Figure 1 or your conditioner for the location of
these features.

4
The front panel incorporates several important features
which allow you to know the status of your water
conditioner. These features are:
•RegenerationCycleIndicator.Thewhiteindicator
points to the status of the conditioner. Soft water is
available when the indicator points to
REGENERATION COMPLETE. Other positions
indicate that the conditioner is regenerating the
resin bed and only hard water is available.
•Four-Digit Display. The four-digit red LED display
shows system information such as time of day,
gallons of conditioned water available, time the
conditioner will regenerate, or any error alarms.
•Green Indicator Lights. The green indicator lights
are located at the right of the control panel.
•TIME OF DAY
•TIME OF REGEN
•HARDNESS
•SALT AMOUNT
•CAPACITY
•REGEN TIME REMAINING
When a green light is on next to one of the six control
legends, the LED display provides information
pertaining to that legend. When conditioned water is
available, the display alternates between TIME OF DAY
and CAPACITY and the corresponding green lights
alternate between these control legends.
•Programming Push Buttons. The programming
buttons are located at the bottom of the panel
under the display. Use the buttons to look at or
change the conditioner settings.
•REGEN Push Button. The REGEN button is
located at the bottom of the panel below the six
indicator lights. Press the button to start a
regeneration of the water conditioner.
Note: If you press the button again a minute or more
after regeneration begins, a second regeneration will
start when the first regeneration is complete. The
display freezes with the REGEN TIME REMAINING
information. After the firstregenerationiscomplete, the
second regeneration begins immediately. The display
will alternate between the TIME OF DAY and REGEN
TIME REMAINING.
Control Settings
Control SettingsControl Settings
Control Settings
General Information
Use the four programming push buttons to change any
of the control settings. Settings can only be changed if
the regeneration cycle indicator is pointing at
REGENERATION COMPLETE. If you try to change a
setting when the cycle indicator is in any other position
or if the setting is not valid, the control beeps to let you
know that the new setting has been ignored.
To change a setting: Press the down arrow [↓] button
until the green light is illuminated next to the control
setting you want to change. That control setting value
shows on the display. Press the SET button and the far
right number on the display starts flashing. If you want
to change the number, press the up arrow [↑] button to
increase the number or the down arrow [↓] button to
decrease the number. To skip the number without
changing, press the left arrow [←] button.
Note: If you press and hold either the up arrow [↑]
button or the down arrow [↓] button for more than one
second, the flashing number will scroll up or down.
When the number is correct, press the left arrow [←]
button. The first number stops flashing and the next
number starts flashing. You can only change the
flashing number. Continue changing numbers until you
reach the desired setting. Press the SET button. The
numbers stop flashing and the control accepts the new
setting. After approximately 30 seconds, the control
starts alternating the display between TIME OF DAY
and CAPACITY.
Note: If abeepsounds,thenewsettingisnotaccepted
because it was outside the range of allowable values.
The old setting will be shown on the display.
Time of Day Clock
The control uses the Time of Day clock and the amount
of conditioned water remaining to decide when to
beginaregeneration.Whenaregenerationisnecessary
and the Time of Day clock is at the same time as the
Time of Regeneration setting, the control starts the
regeneration.
When the green light is on next to the TIME OF DAY
legend, the display is showing the time that the control
thinks is correct. Ifyou need to change the Time of Day,
refer tothe instructionslaterinthissection.TheTimeof
Day displays time in hours and minutes separated by a
colon[:]. When the colon is flashing on and off, water is
flowing through the conditioner. There is a small red dot
in the upper left corner near the p.m. letters to indicate
p.m. for 12-hour clocks. When the dot is off, the time is
a.m. You can set the clock for any time, a.m. or p.m.
Complete the following steps to change the Time of
Day:
1. Press the down arrow [↓] button until the green light
next to the TIME OF DAY legend is on.
2. Press the SET button and the minute number on
the display starts flashing. If you want to change
this number, press the up arrow [↑] button to
increase the number or the down arrow [↓] button
to decrease the number. To skip the number
without changing, press the left arrow [←] button.
3. When the number is correct, press the left arrow
[←] button. The first number stops flashing and the

5
next number starts flashing. You can only change
the flashing number.
4. Continue changing numbers until you reach the
desired setting.
5. Press the SET button. The number stops flashing
and the control accepts the new setting. After
approximately 30 seconds, the control starts
alternating the display between TIME OF DAY and
CAPACITY.
Note: If a beep sounds, the new setting is not
accepted.
Reminder: The control does not keep time during a
poweroutagebutwillresumeitstime,keepingfromthe
time of day power was lost. A short power outage
should not cause a problem. If the outage is several
hours, the control will regenerate at the wrong time of
day. All other memory is stored in the NOVRAM and
maintained during power outage. Refer to page 3.
Time of Regeneration
The control uses the Time of Regeneration to decide
when to begin a regeneration. When a regeneration is
necessary and the Time of Day clock is at the same
time as the Time of Regeneration setting, the control
starts regeneration. The factory setting for Time of
Regeneration is 2:00 a.m. If this time is inconvenient,
you can select any other time of day. Remember that
soft water is not available during a regeneration of the
water conditioner. Time of Regeneration can be set for
any time, a.m. or p.m.
Note: The control may be programmed for an
immediate regeneration option. In this case, the control
does not wait for the Time of Regeneration but
regenerateswhentheremainingcapacityreacheszero.
Contact your dealer for more information regardingthis
option.
Complete the following steps to change the Time of
Regeneration:
1. Press the down arrow [↓] button until the green light
next to the TIME OF REGEN legend is on.
2. Press the SET button and the minute number on
the display starts flashing. If you want to change
this number, press the up arrow [↑] button to
increase the number or the down arrow [↓] button
to decrease the number. To skip the number
without changing, press the left arrow [←] button.
3. When the number is correct, press the left arrow
[←] button. The first number stops flashing and the
next number starts flashing. You can only change
the flashing number.
4. Continue changing numbers until you reach the
desired setting.
5. Press the SET button. The number stops flashing
and the control accepts the new setting. After
approximately 30 seconds, the control starts
alternating the display between TIME OF DAY and
CAPACITY.
Note: If a beep sounds, the new setting is not
accepted.
Hardness Setting
The Hardness Setting refers to the amount of hardness
minerals in your water before it is conditioned. The
control uses this setting to calculate how many gallons
of water can be conditioned before a regeneration is
necessary.
Your water treatmentdealertestedthewaterat thetime
of installation and entered a Hardness Setting in the
control. We recommend that you consult your dealer or
have your water retested before changing this setting.
You can see the Hardness Setting the dealer enteredby
pressing the down arrow [↓] button until the green light
next to the HARDNESS legend is on. The number on
the display is the measure of water hardness in grains
per gallon (milligrams per liter for metric).
Complete the following steps to change the Hardness
Setting:
1. Press the down arrow [↓] button until the green light
next to the HARDNESS legend is on. The setting
range is 3 to 250 grains/gallon (30 to
2500 milligrams/liter for metric).
2. Press the SET button and the first number starts
flashing. If you want to change this number, press
the up arrow [↑] button to increase the number or
the down arrow [↓] button to decrease the number.
To skip the number without changing, press the left
arrow [←] button.
3. When the number is correct, press the left arrow
[←] button. The first number stops flashing and the
next number starts flashing. You can only change
the flashing number.
4. Continue changing numbers until you reach the
desired setting.
5. Press the SET button. The number stops flashing
and the control accepts the new setting. After
approximately 30 seconds, the control starts
alternating the display between TIME OF DAY and
CAPACITY.
Note: If a beep sounds, the new setting is not
accepted.
Reminder: Whenever the HARDNESS or CAPACITY
setting is changed, you should regenerate the
conditioner by pressing the REGEN button.

6
Salt Setting
The Salt Setting refers to the total amount of salt, in
pounds, that the control uses during a regeneration of
the resin bed. The amount of salt used in a regeneration
determines the amount of water that the conditioner
softens between regenerations. If this setting is
changed, it may be necessary to change the Capacity
Setting as well. Refer to Table 1 for SALT and
CAPACITY information.
Complete the following steps to change the Salt
Setting:
1. Press the down arrow [↓] button until the green light
next to the SALT legend is on. The display shows a
number with a zero or a five to the right of the
decimal point, no other number can be entered in
this position. The setting range is 0.5 to 99.5 pounds
(0.1 to 25.5 kilograms for metric).
2. Press the SET button and the first number starts
flashing. If you want to change this number, press
the up arrow [↑] button to increase the number or
the down arrow [↓] button to decrease the number.
To skip the number without changing, press the left
arrow [←] button.
3. When the number is correct, press the left arrow
[←] button. The first number stops flashing and the
next number starts flashing. You can only change
the flashing number.
4. Continue changing numbers until you reach the
desired setting.
5. Press the SET button. The number stops flashing
and the control accepts the new setting. After
approximately 30 seconds, the control starts
alternating the display between TIME OF DAY and
CAPACITY.
Note: If a beep sounds, the new setting is not
accepted.
If the control does not display this setting, your dealer
has disabled it. Some municipalities require that the
Salt Setting not be adjustable. Contact your dealer for
additional information.
Capacity Setting
The Capacity Setting refers to the kilograins of
hardness that can be removed by the conditioner
between regenerations. Yourdealerentered this setting
when the control was installed. Please consult with
your dealer before changing this setting.
*Consult factory for specific settings information.
Table 1 – Suggested Salt Settings (Pounds of Salt for Various Size Conditioners)
Kilograins
ofHardness
Capacity
Setting
0.5 ft30.75 ft31.0 ft31.25 ft31.5 ft31.75 ft32.0 ft3*2.5 ft3*3.0 ft3*3.5 ft3
124.5- --------
169.05.0--------
20-8.56.0-------
24-14.08.57.0------
30 - - 15.0 11.0 10.0 - - - - -
32 - - 18.5 13.0 11.0 9.0 - - - -
35 - - - 17.0 13.0 11.0 10.0 - - -
40 - - - 23.0 18.0 14.0 13.0 - - -
48 - - - - 28.0 22.0 18.0 14.0 - -
60 - - - - - - 30.0 23.0 18.0 -
72-- -----35.026.023.0
78-- ------30.028.0
81-- ------36.030.0
90-- ------45.038.0
95-- -------42.0
105-- -------56.0

7
Complete the following steps to change the Capacity
Setting; refer to Table 1:
1. Press the down arrow [↓] button until the green light
next to the CAPACITY legend is on. The setting
range is 0.1 to 140.0 kilograins (0.1 to 14.00
kilograms for metric).
2. Press the SET button and the first number starts
flashing. If you want to change this number, press
the up arrow [↑] button to increase the number or
the down arrow [↓] button to decrease the number.
To skip the number without changing, press the left
arrow [←] button.
3. When the number is correct, press the left arrow
[←] button. The first number stops flashing and the
next number starts flashing. You can only change
the flashing number.
4. Continue changing numbers until you reach the
desired setting.
5. Press the SET button. The number stops flashing
and the control accepts the new setting. After
approximately 30 seconds, the control starts
alternating the display between TIME OF DAY and
CAPACITY.
Note: If a beep sounds, the new setting is not
accepted.
Reminder: Whenever the HARDNESS or CAPACITY
setting is changed, you should regenerate the
conditioner by pressing the REGEN button.
If the control does not display the Capacity Setting,
yourdealerhasdisabledit.Somemunicipalitiesrequire
that the Salt Setting be disabled, which also disables
theCapacitySetting.Contactyourdealerforadditional
information.
Water Conditioner Regeneration
Water Conditioner RegenerationWater Conditioner Regeneration
Water Conditioner Regeneration
Your water conditioner regenerates for one of two
reasons:
•The control determines that the conditioner
does not have enough capacity remaining to
satisfy your soft water needs for the next day.
•The REGEN button was pressed.
In eithercase, the REGENERATION INDICATOR makes
one complete counterclockwise rotation and returns to
REGENERATION COMPLETE. The indicator pauses at
some or all of the different positions shownon the label
around the indicator. The display alternates between
TIME OF DAY and REGEN TIME REMAINING, as
indicatedby thegreenlights nextto thelegends. Regen
Time Remaining is shown in minutes on the display.
When the indicator reaches REGENERATION
COMPLETE and the time remaining is zero, the
regeneration is complete, conditioned water is
available for use, and the control starts alternating the
display between TIME OF DAY and CAPACITY. No
settings can be changed during a regeneration. The
settings can be viewed, but the control beeps and
ignores any attempt to change settings.
Automatic Regeneration
Thecontrolmakesregenerationdecisionsbasedonthe
amount of water that has flowed through the
conditioner. The control uses the Hardness and
Capacity settings to calculate the number of gallons
(cubic meters for metric) which can be conditioned. At
the Time of Regeneration, the control updates the
average usage for the previous day and adjusts the
reserve capacity accordingly. The reserve is kept at a
minimum for optimum economy. The control reacts to
a sudden increase in water usage. If a day’s usage is
more than double the current average, the control
anticipates that a second day of high usage is likely to
occur. The high usage amount is used as the reserve
when the control performs the regeneration
computation.
The Guest Cycle option and the Calendar Override
option may override this computation. Refer to the
Additional Features section in this manual or contact
your dealer for more information about these options.
The factory setting for Time of Regeneration is
2:00 a.m. You can change this time. Refer to the Time
of Regeneration section in this manual for additional
information.
Manual Regeneration
Toforcethecontroltoperformaregeneration,pressthe
REGEN push button. This button is located on the front
of the control. When you press the REGEN button, the
control performs a full regeneration of the conditioner.
You can use this feature if you need a large amount of
conditioned water but the capacity remaining is low.
Note: If you press this button again a minute or more
after regeneration begins, a second regeneration will
start when the first regeneration is complete. The
display shows only the REGEN TIME REMAINING
information.
Care of Your Water Conditioner
Care of Your Water ConditionerCare of Your Water Conditioner
Care of Your Water Conditioner
General
Checkthesaltlevelinthesaltstorage tankafewweeks
after installation and weekly after that. Always maintain
the salt level above the water level for a consistent salt
dosage and proper water conditioner operation. Don’t
allow the conditioner to run out of salt before refilling.
When filled, the salt storage tank contains enough salt
to support numerous resin bed regenerations. Use
pellet, block, or nugget water conditioner salt. Do not


9
Be sure that the drain line remains unrestricted so that
regeneration water and brine can flow freely to the
drain. Do not set objects on the drain line that could
crimp the line and restrict flow.
Manual Valve Operation
Manual Valve OperationManual Valve Operation
Manual Valve Operation
The camshaft may be rotated manually to actuate the
valve functions for service purposes.
1. Unplug the wall-mount transformer.
2. Remove the rear cover by pulling back on the tab
provided on the cover. Next, lift the rear cover off
the valve, Figure 2.
3. Rotate the camshaft COUNTERCLOCKWISE until
the appropriate valve is opened by the camshaft
lobe. Use the regeneration cycle indicator as a
guide to which valve discs are open.
4. When the service is complete, rotate the camshaft
so the regeneration cycle indicator is pointing to
the end of the refill cycle.
5. Reinstall cover, reconnect electric power, and reset
the time of day.
6. The display will show Err3 and the motor will start
up. After approximately five minutes, the indicator
will point to REGENERATION COMPLETE and the
control starts alternating the display between TIME
OF DAY and CAPACITY.
7. The conditioner is now in operation.
Additional Features
Additional FeaturesAdditional Features
Additional Features
When your dealer installs the conditioner, the control
settings are adjusted to meet your soft water needs.
However, there are additional features which your
dealer can incorporate into the control. These features
are 12- or 24-hour clock, U.S. or metric units of
measure, Calendar Override and Immediate
Regeneration.
12 or 24-Hour Clock
The standard clock is a 12-hour with a p.m. indicator.
An optional 24-hour clock without a p.m. indicator is
available. Time can be set from 00:00 to 23:59. This
option applies to both the Time of Day and Time of
Regeneration settings.
U.S. or Metric Units of Measure
The standard units of measure are U.S. values.
Hardness is in grains per gallon, salt is in pounds, and
capacity is in kilograins. The metric option changes
these to milligrams per liter, kilograins to kilograms
respectively. All control settings use the metric values
when the metric option is selected.
Calendar Override
TheCalendarOverrideoptionisamethodofforcing the
control to regenerate after a preset number of days, if a
normal demand-based regeneration does not occur
first. This feature is not set at the factory; your dealer
can set it at one to 30 days.
Immediate Regeneration
The control is factory set to wait until the Time of Day
reaches the Time of Regeneration to begin a
regeneration. Your dealer can program the control to
regenerate any time the capacity remaining reaches
zero. Remember that you do not have soft water
available during any regeneration.
Disinfection of Water Conditioners
Disinfection of Water ConditionersDisinfection of Water Conditioners
Disinfection of Water Conditioners
The construction materials of the water conditioning
system do not support bacterial growth or contaminate
the water supply. However, we recommend that your
conditioner be disinfected after installation and before
the conditioner is used to treat potable water. In
addition, a conditioner can become fouled with organic
matter during normal usage or with bacteria from the
watersupply.Periodicdisinfection is recommendedfor
all conditioners.
Use one ofthe following methods of disinfection based
onoperatingconditions,styleofconditioner,typeofion
exchanger, and disinfectant available.
Sodium Hypochlorite
Sodium hypochlorite, 5.25% solutions, can be used
withpolystyreneresin,synthetic gelzeolite,greensand,
and bentonites and are available under trade names
such as Clorox, Linco, Bo Peep, White Sail, and Eagle
Brand Bleach.
The recommended dosage for 5.25% solutions is:
•Polystyrene resin: 1.2 fluid ounces per cubic foot
•Non-resinous exchangers: 0.8 fluid ounce per
cubic foot
Calcium Hypochlorite
Calcium hypochlorite, 70% available chlorine, is
available in several forms including tablets and
granules. These solid materials can be used directly
without dissolving before application. The
recommended dosage for calcium hypochlorite is two
grains (approximately 0.1 ounce) per cubic foot.
Complete the following steps to disinfect the
conditioner:
1. Add the disinfectant to the brine well of the brine
tank. Make sure that the brine tank has water in it so
the solution is carried into the conditioner.
2. Press the REGEN button.


11
Valve Body and Tank Adapter Module
Valve Body and Tank Adapter ModuleValve Body and Tank Adapter Module
Valve Body and Tank Adapter Module
*Not Shown
Code Part
No. Description Qty. Code Part
No. Description Qty.
1 1000238 Valve Assembly w/o Flow Controls 1 9 Injector Cap with O-Ring: 1
2 1000824 Camshaft, Standard, One-Piece 1 1000217 “A” Cap
3 1000827 Valve Cover, Black 1 1000218 “B” Cap
4 Brine Refill Flow Control Assembly: 1 1000219 “C” Cap
1000221 .14 gpm 10 1033784 Tank Adapter Assembly 1
1000223 .40 gpm 11 1010429 O-Ring, 3-1/8 x 3-1/2 x 3/16 BN 1
5 1000226 Screen/Cap Assembly w/O-Ring 1 12 1010428 O-Ring, 3/4 x 1 x 1/8 EP 1
6 Drain Control Assembly w/O-Rings 1 13 1031402 Locking Bar: English Language 1
1034162 No. 6 for 6-inch Diameter Tank 14 1006093 Screw, No. 8 x 9/16 inch 1
1000209 No. 7 for 7-inch Diameter Tank 15 1001580 Spring, Valve Discs 9
1000210 No. 8 for 8-inch Diameter Tank Kits:
1000211 No. 9 for 9-inch Diameter Tank 16 1033066 New to Old Air Check Adapter
1000212 No. 10 for 10-inch Diameter Tank 17 1032416 Air Check Assembly 1
1000213 No. 12 for 12-inch Diameter Tank 18 1001404 O-Ring Group: Tank Adapter
1000214 No. 13 for 13-inch Diameter Tank 19 1040459 O-Ring Group: Piping Boss
1000215 No. 14 for 14-inch Diameter Tank 20 1041010 13/16 Rubber Insert (Optional)
7 1030502 Ball, Flow Control 1 * 1000250 Valve Discs Replacement
8 Injector Assembly with O-Rings: 1
1032970 “A” Injector – White
1032971 “B” Injector – Blue
1032972 “C” Injector – Red

12
Meter Adapter, Bypass Valve and Piping Boss
Meter Adapter, Bypass Valve and Piping BossMeter Adapter, Bypass Valve and Piping Boss
Meter Adapter, Bypass Valve and Piping Boss
B
Y
P
A
S
S
B
Y
P
A
S
S
Bypass Valve
Piping Boss
Meter Adapter
960 Control
Wall-Mount Transformer
Inlet
Drain Outlet
Inlet
Drain Outlet
2
1
1
2
3
4
1
2

13
Meter Adapter, Bypass Valve and Piping Boss
Meter Adapter, Bypass Valve and Piping BossMeter Adapter, Bypass Valve and Piping Boss
Meter Adapter, Bypass Valve and Piping Boss
*Not Shown
Code Part
No. Description Qty. Code Part
No. Description Qty.
1 1040769 Bypass 1 Kit Piping Boss (includes hardware): 1
2 1040524 Installation Kit-Bypass 11040277 3/4-inch NPT, Brass
1040278 1-inch NPT, Brass
* Plumbing Adapters 1040281 3/4-inch BSPT, Brass
1001606 3/4-inch Copper Tube Adapter Kit 11040282 1-inch BSPT, Brass
1001670 1-inch Copper Tube Adapter Kit 11040279 3/4-inch NPT, Noryl
1001608 22-mm Copper Tube Adapter Kit 11040280 1-inch NPT, Noryl
1001609 28-mm Copper Tube Adapter Kit 11040283 3/4-inch BSPT, Noryl
1001613 3/4-inch CPVC Tube Adapter Kit 11040284 1-inch BSPT, Noryl
1001614 1-inch CPVC Tube Adapter Kit 12 1040339 Installation Kit-Piping Boss
1001615 25-mm CPVC Tube Adapter Kit 1* 1001408 Elbow Adapter
1001769 3/4-inch NPT Plastic Pipe Adapter Kit 11 1032350 Kit, Meter Adapter 1
1001603 1-inch NPT Plastic Pipe Adapter Kit 12 1032351 Installation Kit-Meter Adapter 1
1001604 3/4-inch BSPT Plastic Pipe Adapter Kit 1
1001605 1-inch BSPT Plastic Pipe Adapter Kit 1
1001611 3/4-inch BSPT Brass Pipe Adapter Kit 13 960 or 960B Electronic Timer 1
1001610 1-inch NPT Brass Pipe Adapter Kit 14 Wall-Mount Transformer 1
1001612 1-inch BSPT Brass Pipe Adapter Kit 11000810 100V Japanese Plug
1000811 120V North American Plug
1000812 220V Australian Plug
1000813 220V British Plug
1000814 220V European Plug
Bypass Valve
Bypass ValveBypass Valve
Bypass Valve Piping Boss
Piping BossPiping Boss
Piping Boss
Meter Adapter
Meter AdapterMeter Adapter
Meter Adapter


15
Table 3 Troubleshooting Procedures
Problem Cause Solution
Hard Water at the Tap. a. Low or no salt in the salt storage tank.
b. Salt setting too low to accommodate
water hardness or water usage.
c. Unit did not regenerate.
d. Plugged injector !
e. Air check valve prematurely closed.
a. Refill the salt storage tank and manually
initiate a regeneration. Refer to the
Manual Regeneration section in this
manual.
b. Change the salt setting. Refer to the Salt
Setting section in this manual.
c. Check power.
d. Clean injector and screen. Refer to the
Cleaning the Injector/Injector Screen in
this manual. Briefly put control into brine
refill status. Refer to the Manual Valve
Operation section in this manual.
e. Replace or repair air check if needed.
Check brine line connections.
Hard water leakage during
service. a. Improper regeneration.
b. Leaking of bypass valve !
c. O-ring around riser tube damaged !
a. Check that the correct salt dosage is
used. Repeat Regeneration.
b. Contact dealer.
c. Contact dealer.
Loss of power to the system. a. Transformer unplugged.
b. Fuse blown, circuit breaker open, or
circuit switched off.
a. Connect power.
b. Correct the electrical problem.
Control does not regenerate
automatically. a. Transformer unplugged.
b. Defective control. a. Plug transformer into outlet; plug
transformer cable into control.
b. Contact dealer.
Control regenerates at the
wrong time of day. a. Clock set incorrectly. a. Reset clock. Refer to the Time of Day
clock/Time of Regeneration sections in
this manual.
Control does not draw brine. a. Low water pressure.
b. Restricted drain line.
c. Injector or injector screen plugged !
d. Injector defective !
e. Valve disc 2 and/or 3 not closed.
f. Air check prematurely closed.
a. Increase water pressure.
b. Remove restriction.
c. Clean injector and screen. Refer to the
Cleaning the Injector/Injector Screen
section in this manual.
d. Replace injector. Contact dealer.
e. Manually operate valve stem to flush out
foreign matter holding disc open. Briefly
put control into brine refill status. Refer to
the Manual Valve Operation section in
this manual.
f. Replace or repair air check if needed.
Check brine line connections.

16
Problem Cause Solution
Intermittent or irregular brine
draw. a. Low water pressure.
b. Defective injector !a. Increase water pressure.
b. Replace both injector and injector cap.
Contact dealer.
Brine tank overflow. a. Brine valve disc 1 held open.
b. Valve disc 2 and/or 3 not closed
during brine draw, causing brine refill.
c. Air leak in brine line to air check.
d. Salt setting too high.
a. Manually operate valve stem to flush out
foreign matter holding disc open.
b. Manually operate valve stem(s) to flush
out foreign matter holding disc(s) open.
c. Check all connections in brine line for
leaks.
d. See Table 1 for suggested salt settings.
System using more or less
salt than salt setting. a. Inaccurate setting. a. Correct salt setting. Refer to the Salt
Setting section in this manual.
Control backwashes at
excessively low or high rate. a. Incorrect backwash controller.
b. Foreign matter affecting controller
operation !
a. Contact dealer.
b. Remove backwash controller. Clean and
replace.
Flowing or dripping water at
drain line after regeneration. a. Drain valve (5 or 6) held open by
foreign matter.
b. Weak valve stem return spring.
a. Manually operate valve stem to flush out
foreign matter holding disc open. Contact
dealer.
b. Contact dealer.
Table 3 Troubleshooting Procedures

17
Specifications
SpecificationsSpecifications
Specifications
Voltage. . . . . . . . . . . . . . . . . . . . . . . . . . . . . . . . . . . . . . . . . . . . . . . . . . . . . . . . . . . . . . . . . . . . 102 to 132 VAC, 60 Hz
Current. . . . . . . . . . . . . . . . . . . . . . . . . . . . . . . . . . . . . . . . . . . . . . . . . . . . . . . . . . . . . . . . . . . . . . . . . . . . . . . . . 50 mA
Operating Temperature . . . . . . . . . . . . . . . . . . . . . . . . . . . . . . . . . . . . . . . . . . . . . . . . . . . . . . .34 to 120oF (1 to 49oC)
Humidity . . . . . . . . . . . . . . . . . . . . . . . . . . . . . . . . . . . . . . . . . . . . . . . . . . . . . . . . . . 10 to 100% condensing allowed
Water Meter Accuracy. . . . . . . . . . . . . . . . . . . . . . . . . . . . . . . . . . . . . . . . . . . . . . . . . . 0.5 to 23 gpm (1.9 to 87 Lpm)
Note: Wall-mount transformer is rated for indoor use only.
Glossary of Terms
Glossary of TermsGlossary of Terms
Glossary of Terms
Alarms
Alarms are beeps which alert you to operating
conditionsrequiringattention.Thebeepsareon forone
secondandofffornineseconds.Thedisplayshowsthe
type of error. Referto the Alarms section in this manual
for additional information.
Backwash
An upward flow of water which expands the resin bed
to remove foreign particles.
Brine
The salt solution which regenerates the conditioner’s
resin bed.
Brine Draw
The process of drawing the brine solution from the salt
storage tank into the resin tank.
Calendar Override Regeneration
If a normal demand-based regeneration does not
occur, the Model 960 Control regenerates the system
after a preset number of days. Your dealer can set this
feature at one to 30 days.
Fast Rinse (Purge)
Aflowof waterthroughtheresin bedwhichpropelsany
remaining brine solution out of the resin tank to the
drain.
Hardness
A common quality of water containing dissolved
calcium, magnesium and other elements. Water
hardness is usually expressed in grains per gallon or
milligrams per liter as calcium carbonate equivalent.
Manual Regeneration (Guest Cycle)
Forces the control to regenerate by pressing the
REGEN button.
Regeneration
Includes the backwash, brine draw, and fresh water
rinse steps necessary to prepare the resin bed for
conditioning after exhaustion. Abbreviated as
“REGEN” in this manual.
Regeneration Indicator
The mechanical component which indicates the
regeneration cycle status.
Resin Bed
The supply of synthetic organic ion exchange material
used in water conditioners.

© Copyright 2000, 1999 Osmonics
Printed in the USA P/N 1017934 Rev. C
Table of contents
Other Autotrol Control Unit manuals
