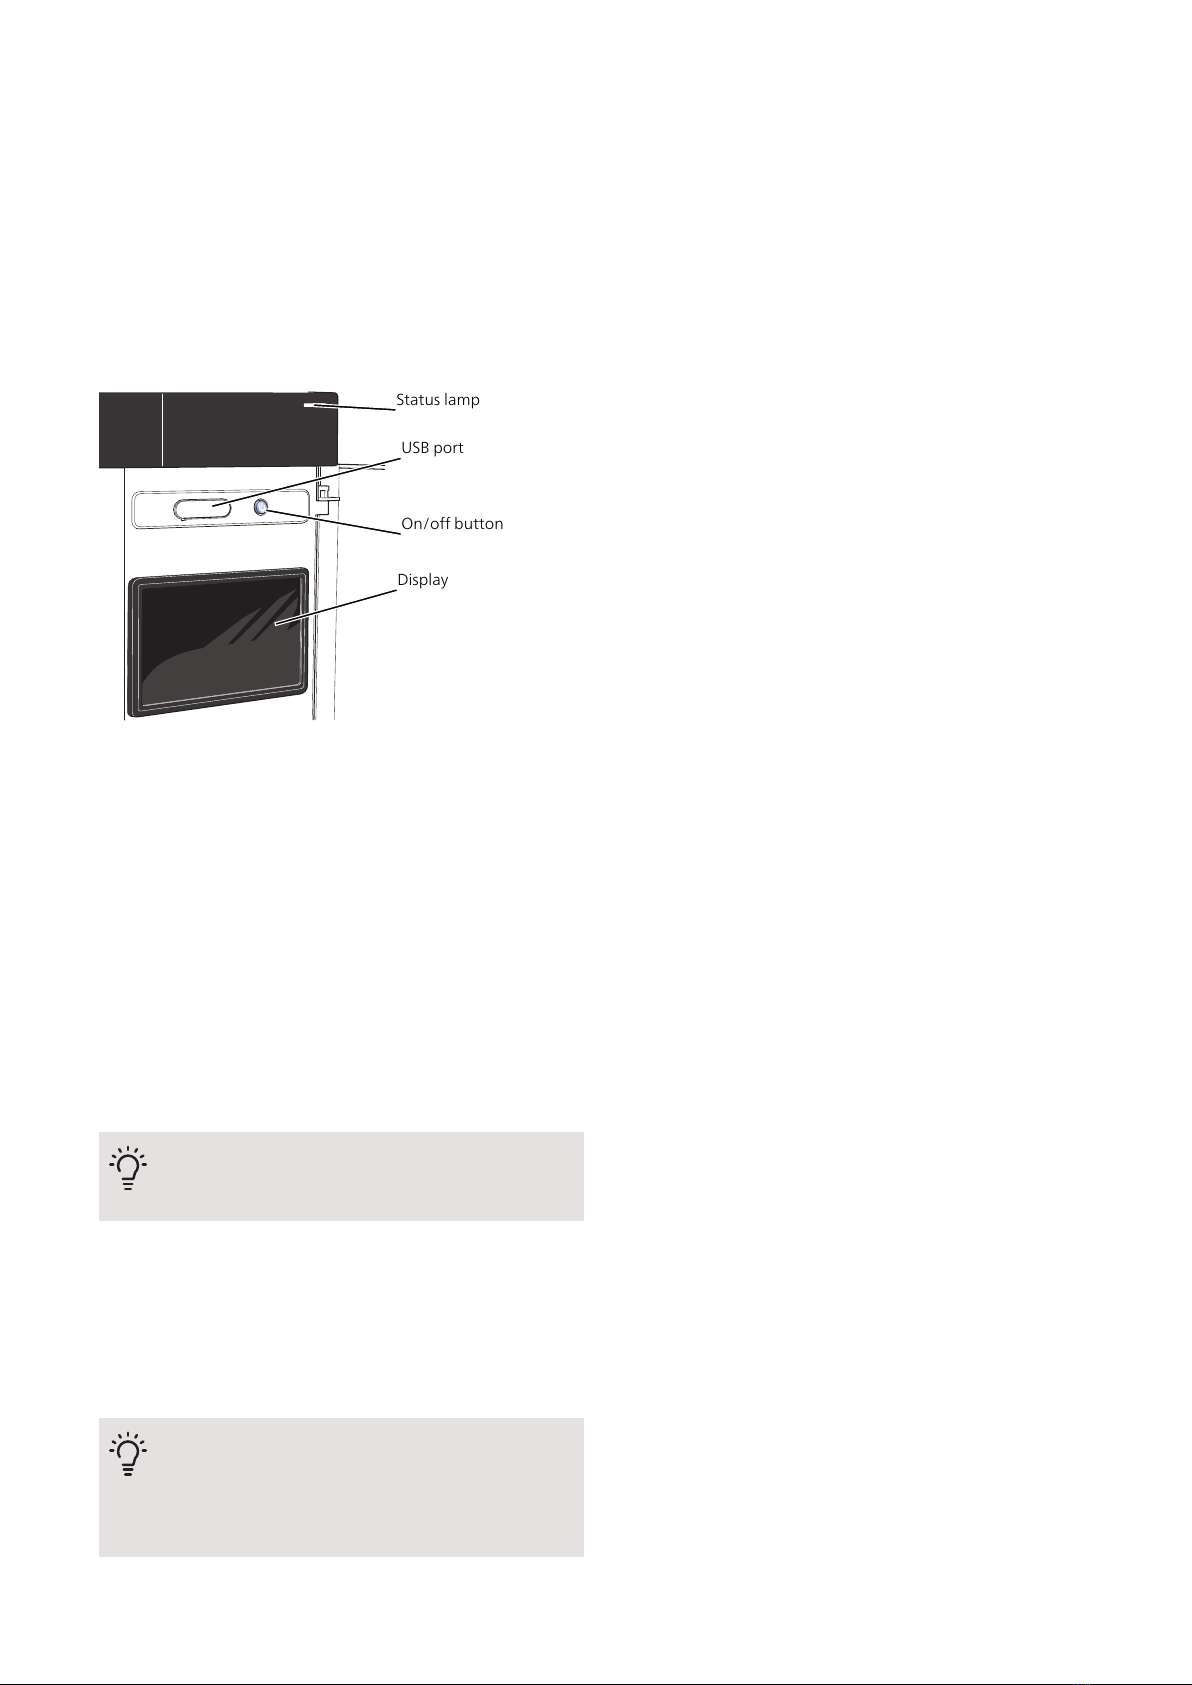
Navigation
SMO S40 has a touchscreen where you simply navigate
by pressing and dragging with your finger.
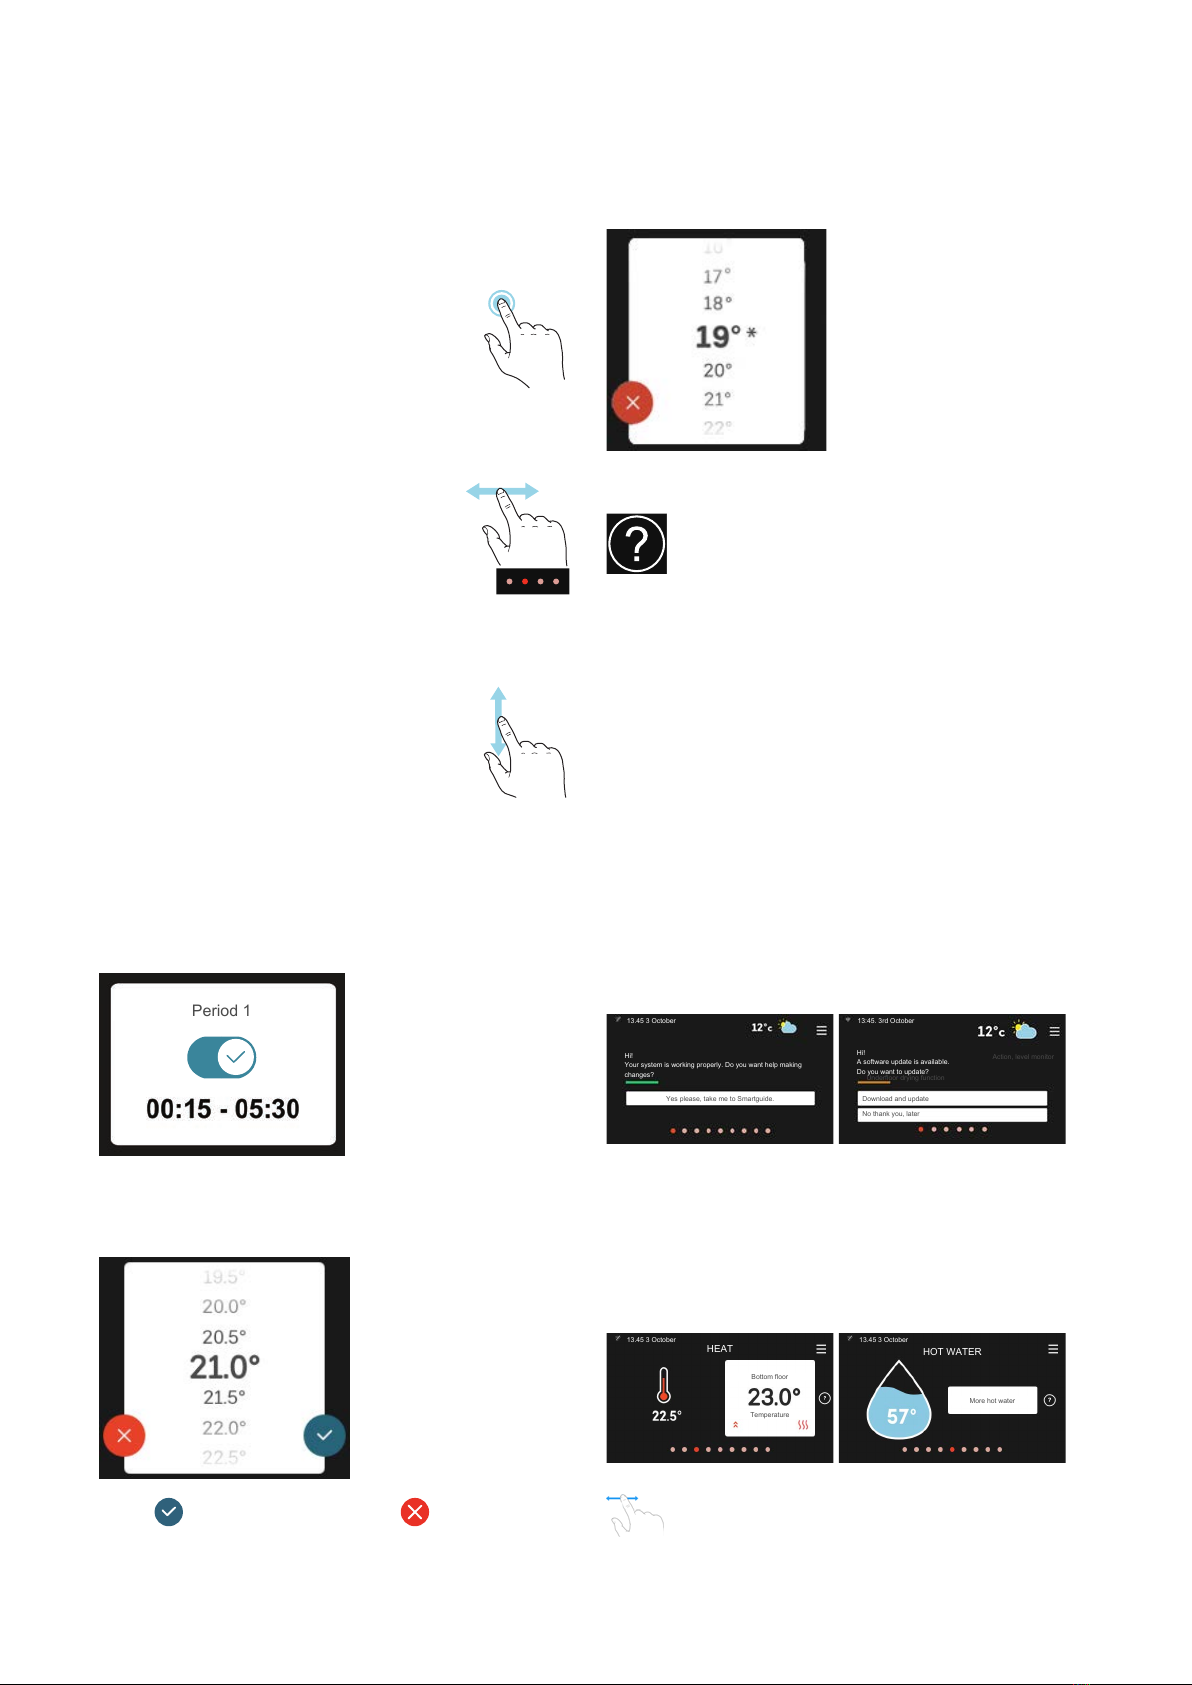
SELECT
Most options and functions are activ-
ated by lightly pressing on the display
with your finger.
BROWSE
The dots at the bottom edge show that
there are more pages.
Drag to the right or left with your finger
to browse between the pages.
SCROLL
If the menu has several sub-menus,
you can see more information by drag-
ging up or down with your finger.
CHANGE A SETTING
Press the setting you want to change.
If it is an on/off setting, it changes as soon as you press
it.
If there are several possible values, a spinning-wheel
appears that you drag up or down to find the desired
value.
Press to save your change, or if you don't want
to make a change.
FACTORY SETTING
Factory set values are marked with *.
Your installer may have chosen other values that suit
your system better.
HELP MENU
In many menus there is a symbol that indicates
that extra help is available.
Press the symbol to open the help text.
You may need to drag with your finger to see all text.
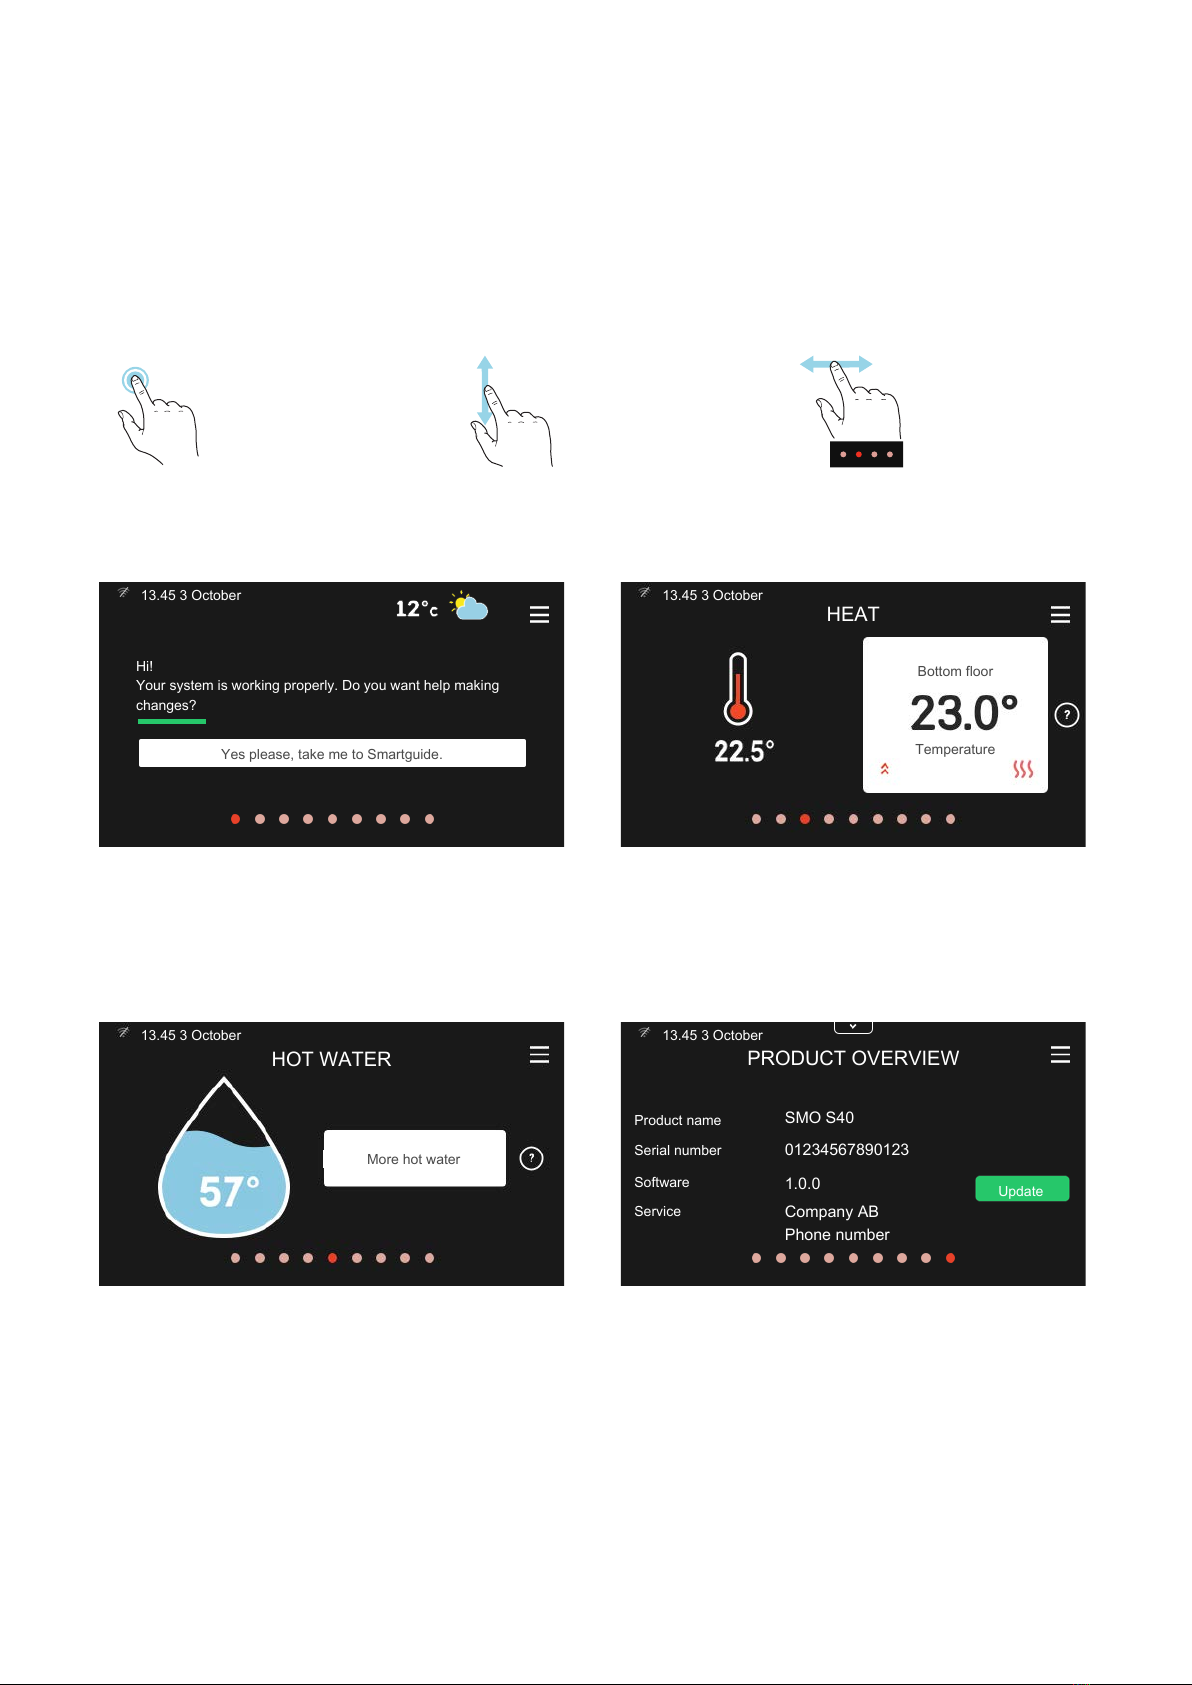
Menu types
HOME SCREENS
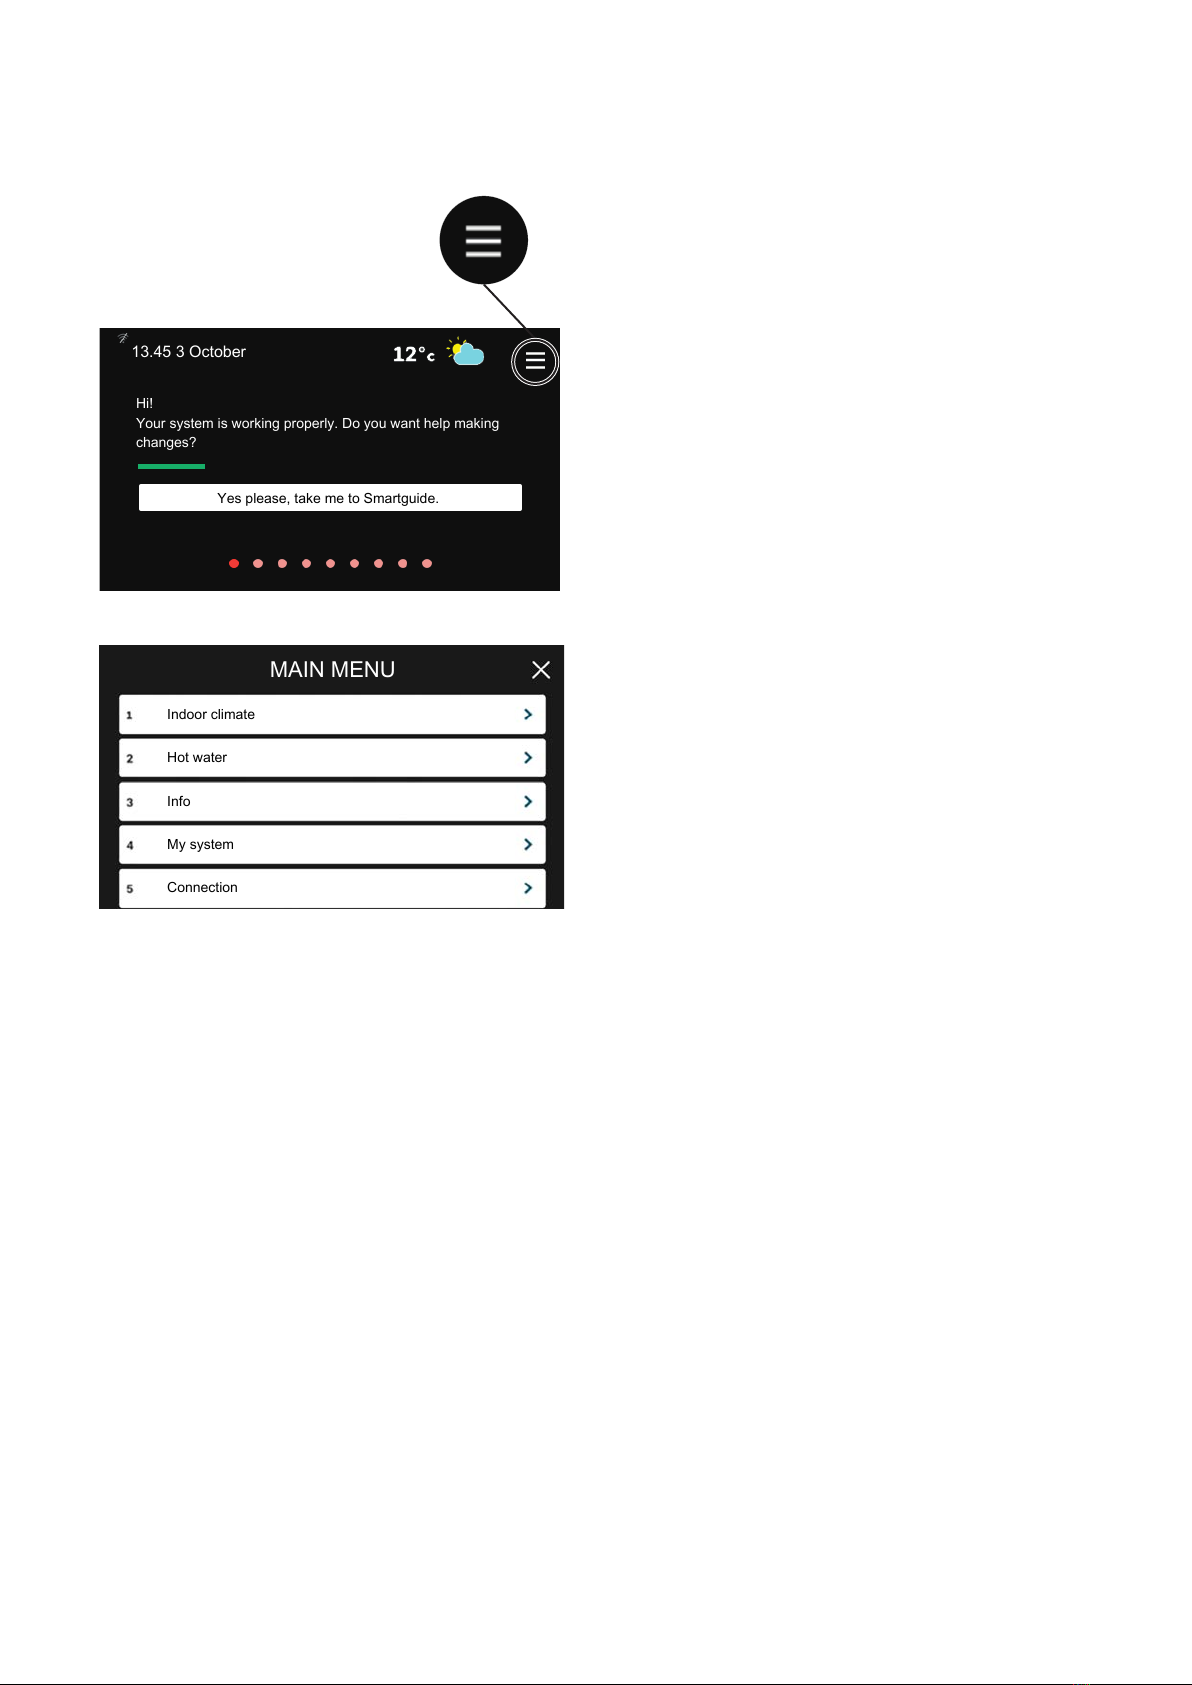
Smartguide
Smartguide helps you both to view information about
the current status and to make the most common set-
tings easily. The information that you see depends on
the product you have and the accessories that are con-
nected to the product.
Select an option and press it to proceed. The instructions
on the screen help you to choose correctly or give you
information about what is happening.
Yes please, take me to Smartguide.
Hi!
Your system is working properly. Do you want help making
changes?
13.45 3 October
13:45. 3rd October
Underfloor drying function
Action, level monitor
Download and update
No thank you, later
Hi!
A software update is available.
Do you want to update?
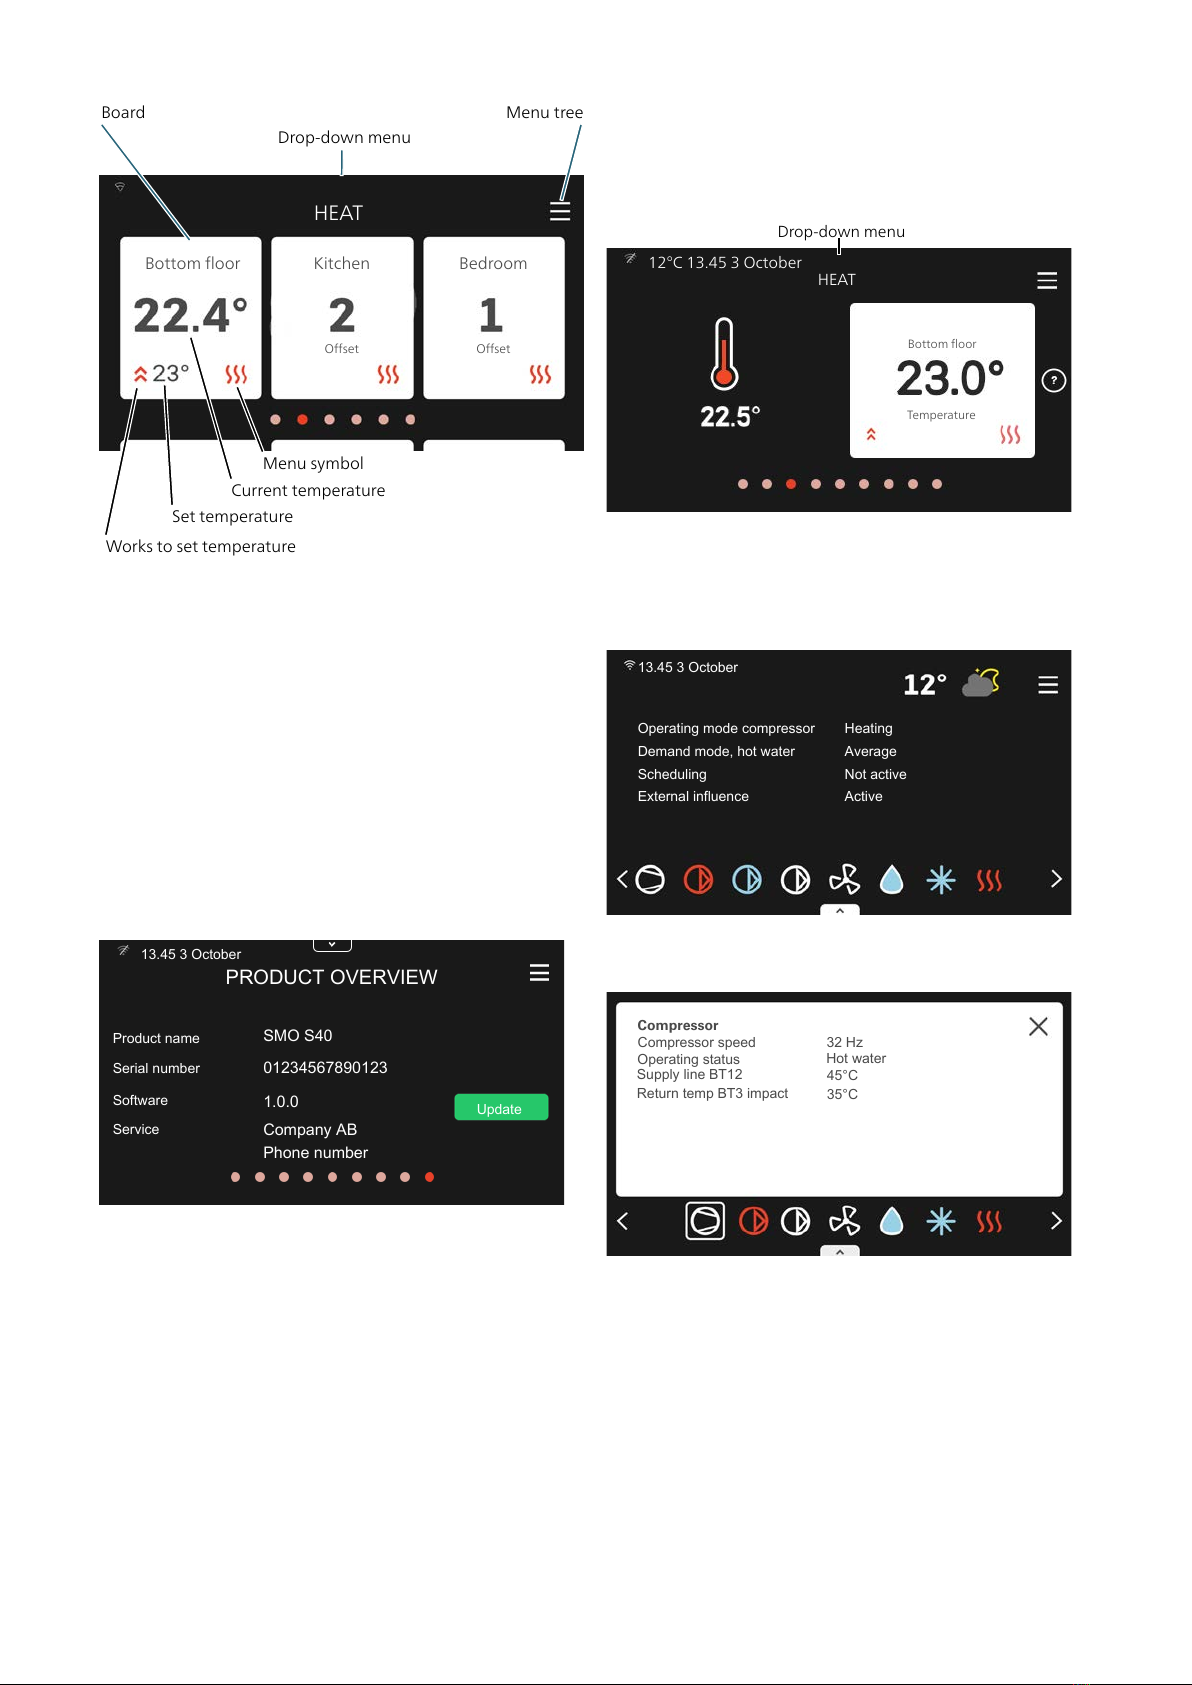
Function pages
On the function pages, you can both view information
about the current status and easily make the most
common settings. The function pages that you see de-
pend on the product you have and the accessories that
are connected to the product.
Bottom floor
Temperature
HEAT
13.45 3 October
HOT WATER
More hot water
13.45 3 October
Drag to the right or left with your finger to browse
between the function pages.
NIBE SMO S40Chapter 3 | Display unit8