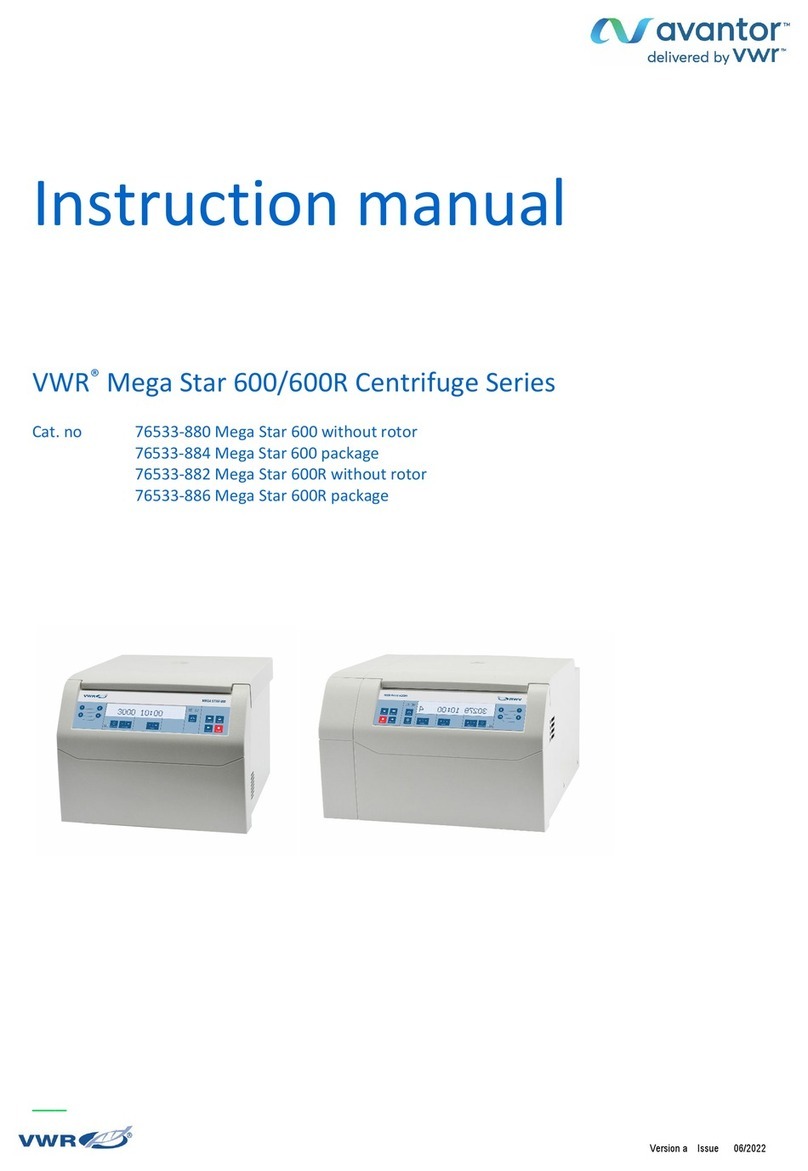
avantor VWR MICRO STAR 30 User manual

___
Version 03 Issue 11/2021
Instruction manual
VWR®MICRO STAR 30
EU cat. no 521-2752 MICRO STAR 30 with rotor RA 24/2
521-2753 MICRO STAR 30 without rotor

2vwr.com I EN Instruction manual VWR®MICRO STAR 30
Legal address of Manufacturer
Europe
VWR International bv,
Researchpark Haasrode 2020
Geldenaaksebaan 464
B-3001 Leuven
+3216385011
be.vwr.com
UK Importer:
VWR International Ltd
Hunter Boulevard, Magna Park
Lutterworth, Leicestershire, LE17 4XN
uk.vwr.com
Country of Origin
SLOVENIA
Dear customer,
Congratulations for purchasing our centrifuge MICRO STAR 30. You have selected a reliable device which
combines many advantages.
A wide selection of programming options and electronic control allow trouble-free operation. The brushless
motor provides quiet, maintenance-free operation without any carbon dust pollution.
Your device is equipped with user-friendly functions, which makes the operation and settings easier for you.
Built-in safety functions prevent incorrect usage and they control the complete operation of the centrifuge.
The centrifuge has the functionality to save programs. You can save up to 100 different data sets in the
memory. The centrifuge always keeps the last run program in its memory for an unlimited amount of time,
allowing the program to be restarted at any time - even if the centrifuge was turned off in-between. All operation
parameters can be seen at a glance on the displays.
The settings are executed via a knob and the keys on the control panel.
The centrifuge and its interior are easy to clean.
We thank you for your confidence and we hope you enjoy your new centrifuge.

3vwr.com I EN Instruction manual VWR®MICRO STAR 30
Table of Contents
Warning
5
Safety information
5
Package contents
6
Unpacking
6
Installation
6
Intended use
7
Symbols and conventions
7
Product specifications
7
Overview
8
Description of knobs and switches
9
Control panel
9
Operational keys
10
Getting Started
12
Turning on the centrifuge
12
Opening and closing of the lid
12
Important Guidelines
12
Rotor mounting and dismounting
12
Imbalance indicator
13
Operation
14
Pre-selecting speed/RCF
14
Pre-selecting run time, acceleration and braking level
15
Program setting
16
Starting and stopping the centrifuge
17
Rotor recognition
17
Display of the set values during the run
17
Fast spin
18
Reset of lid latch
18
Auxiliary lid release
18
Automatic braking after power restoration
18
Troubleshooting
19
Error messages
19
Exit from error display
20
User's parameters
21
Replacing the centrifuge fuses
21

4vwr.com I EN Instruction manual VWR®MICRO STAR 30
General maintenance
22
Regular service
22
Cleaning the centrifuge
22
Cleaning the rotor
23
Rotor sterilization
23
Shipping
23
User replaceable accessories and spare parts
24
Calculations
24
Calculation of centrifugal force
24
Calculation of maximum permitted rotor speed
25
Technical Service
25
Warranty
25
Compliance with local laws and regulations
26
Equipment disposal
26
Local VWR offices in Europe and Asia Pacific
27

5vwr.com I EN Instruction manual VWR®MICRO STAR 30
Warning
Before using the machine, make sure to read and understand this manual thoroughly. Keep the manual close
to the machine, easily accessible to all the users.
Improper operation can cause injury to persons or damage to the equipment.
Safety information
Please follow the guidelines below, and read this manual in its entirety to ensure safe operation of the unit.
•Do not use rotors and buckets, which show clear signs of corrosion or mechanical defects. Please check
the accessories at regular intervals.
•Always load the rotor with the same test tubes on all positions or symmetrically with the pairs of the same
test tubes. To prevent negative consequences of unbalanced rotor, like damaged bearings and motor
axle, or inadequate results of centrifugation, equal or equally loaded test tubes must be symmetrically
arranged according to the rotation axis.
•Please use only the original accessories for centrifugation.
•Do not move or knock the centrifuge during operation!
•Repairs must only be performed by an authorized service technician.
•The centrifuge may only be used for specified applications. It may not be used in a hazardous or
potentially flammable environment or for centrifugation of explosive or highly reactive substances.
•When handling toxic, aggressive or radioactive materials, observe national regulations or regulations
defined by World Health Organization.
•Fluids or materials used for cleaning and disinfecting should be disposed of in accordance with approved
laboratory regulations.
•If any liquids are spilled in the rotor chamber, on the rotor or accessories, the surfaces must be cleaned
immediately. You can use a damp cloth and mild soap solution. This is particularly important for the
cleaning of the bores of the fixed-angle rotors.
•Density of the liquid must not be exceeded 1.2 g/ml at maximum rotational speed.
•During longer spin times, test tubes may heat up. Observe the requirements and regulations specified by
test tube manufacturer.
•The use of organic solvents and reagents may have adverse effect on the stability of plastic test tubes.
•Rotors are high-grade components which are subjected to extreme mechanical strain. Aluminium rotors
are protected against corrosion.
•Please ensure that the rotors are protected from mechanical damage. Even slight scratches and cracks
can cause severe inner damage to the rotor material.
•Please clean your rotors regularly using a neutral cleaning liquid (e.g. Extran). This will protect the rotors
and maintain their service life.

6vwr.com I EN Instruction manual VWR®MICRO STAR 30
Package contents
Description
Quantity
Laboratory centrifuge VWR MICRO STAR 30
1
Instruction manual
1
Hexagonal rotor key
1
Power cord
1
Angle rotor RA 24/2 (only with ECN 521-2752)
1
Unpacking
The weight of the centrifuge is 22.5 kg. To prevent possible injuries, at least two people should lift and
carry the centrifuge by holding it at the bottom from opposite sides.
Open the carton box. Take out the accessories and remove the packaging material. Reach with your hands
under the centrifuge and lift it from the box together with another person.
When lifting the centrifuge, never hold it by the front or top plastic part of the housing
or by the lid, as the appliance may get damaged!
Retain the packaging material for any subsequent transport or storage, which are allowed only in the original
packaging.
Installation
The centrifuge should only be operated indoors. Place the centrifuge on a stable, solid, horizontal and clean
surface, without vibrations. Make sure that the centrifuge is not exposed to direct sunlight. To ensure sufficient
ventilation, there should be enough clearance on all sides of the centrifuge. It must be far enough away from

the wall and other devices. According to recommendations of the EN 61010-2-020 standard, a safety
clearance of 30 cm should be observed around the centrifuge during operation. Please remove all objects
from this area.
If the centrifuge isn’t levelled, imbalances can occur and the centrifuge can be damaged. Do not place anything
under the centrifuge feet to level the centrifuge.
After installation, it is recommended that you wait for some time, before connecting the
centrifuge to the mains power supply. This prevents damage to electronic components
due to condensation, which can occur, when you bring the device from a cold
environment to a warm environment.

7vwr.com I EN Instruction manual VWR®MICRO STAR 30
Before connecting the centrifuge to the mains power supply, check that the mains voltage and frequency
correspond to the specifications on the name label of the centrifuge. The mains cable of the centrifuge may
only be connected to a properly grounded wall socket.
To disconnect the mains supply from the centrifuge in the event of malfunction, an emergency switch separate
from the centrifuge must be available. This switch should be outside the room, where the centrifuge is installed,
or next to the entrance to the room.
Intended use
Centrifuge MICRO STAR 30 is a universal laboratory centrifuge. It is designed for use in medical, scientific
and industrial laboratories, for separating the substances with different specific densities, by centrifugal force.
In particular, it is intended for preparation of human samples (body fluids), in approved test tubes, before
further analysis. Not intended for in vitro diagnostic use. The maximum rotational speed of 18,000 RPM gives
the centrifugal force of 31,150 xg.
Symbols and conventions
The following chart is an illustrated glossary of the symbols that are used in this manual.
This symbol indicates a potential risk and alerts you to proceed with caution.
Product specifications
Power supply: 230 V ±10%, 50 / 60 Hz
Power consumption: 450 W
Electric current: 2 A
Fuses: 2 x 6.3AT 250V
Protection class: I
Rotational speed: 200 to 18,000 RPM
Maximum centrifugal force: 31,150 xg
Maximum load: 6 x 50 ml
Maximum kinetic energy: 7,300 Nm
Max. density of material to be centrifuged: 1.2 g/ml
Noise level at max. speed: ≤62 dB(A)
Run time: 10 s to 99 min 50 s, continuous operation (HOLD)
Number of programs: 100 programs
Acceleration: levels from 0 to 9
Deceleration: levels from 0 to 9 (0 - no braking)

8vwr.com I EN Instruction manual VWR®MICRO STAR 30
Ambient temperature: 2 °C to 35 °C
Maximum relative humidity: 75%, non-condensing
Dimensions (W x D x H): 360 x 430 x 288 mm
Weight: 22.5 kg
We reserve the right to alter specification details without prior notice or liability!
Overview
Main parts of the centrifuge are designated on the following pictures:
Window
Lid
Main switch
Name label
Fan
Auxiliary lid release
Control panel
Mains socket
Fuse compartment
Rotor key
Magnets
Knob
Foot

9vwr.com I EN Instruction manual VWR®MICRO STAR 30
Description of knobs and switches
Main switch
By turning on the main switch, you turn on the power of the centrifuge.
By turning off the main switch, you turn off the power of the centrifuge.
Knob
By rotating the knob, you change the values of the parameters on display. By rotating
the knob clockwise, the value increases, and by rotating it counter-clockwise, the value
decreases. By pressing on the knob, you confirm the new value for the parameter.
Control panel
1
Indicator for selection of rotational speed (RPM)
2
Display for rotational speed (RPM) or centrifugal force (RCF)
3
Indicator for selection of centrifugal force (RCF)
4
SPEED key
5
Display for time (TIME), acceleration level ( ) and braking level ( )
6
Indicator for selection of time (TIME)
7
Indicator for selection of acceleration level ( )
8
TIME key
9
Indicator for selection of braking level ( )
6
12
15
1
4
3
2
5
10
13
14
8
7
9
11
16

10 vwr.com I EN Instruction manual VWR®MICRO STAR 30
10
Program display
11
PROGRAM key
12
Knob
13
FAST SPIN key
14
LID key
15
START key
16
STOP key
Operational keys
SPEED
By pressing this key, you can set the rotational speed (RPM) or centrifugal force (RCF).
The key lights up. By repeated pressings on this key, you select which parameter will
be set. When indicator RPM is lit, you can set the rotational speed, and when indicator
RCF is lit, you can set the centrifugal force. Set new values of both parameters by
rotating the knob and confirm them by pressing on the knob. The key light will then turn
off.
TIME
By pressing this key, you can set the time (TIME), acceleration level ( ) and braking
level ( ). The key lights up. By repeated pressings on this key, you select which
parameter will be set. When indicator TIME is lit, you can set the run time, when indicator
is lit, you can set the acceleration level, and when indicator is lit, you can set the
braking level. Set new values of all parameters by rotating the knob and confirm them
by pressing on the knob. The key light will then turn off.
PROGRAM
By pressing this key, you can set the programs. The key lights up. Select new program
by rotating the knob and confirm it by pressing on the knob. The key light will then turn
off.
If you want to change the values of parameters of an existing program, set the values
of individual parameters as described above, when this key is lit.

11 vwr.com I EN Instruction manual VWR®MICRO STAR 30
FAST SPIN
By pressing and holding this key, you perform the fast spin. The centrifuge runs for as
long as you hold the key pressed. Time of run in seconds is displayed on time display.
The acceleration and braking levels are fixed to 9 (the highest), and they can't be
changed. When you release the key, the braking procedure of the rotor is activated and
the centrifuge stops.
LID
SHORT PRESS:
By pressing this key, you open the lid of the centrifuge. When the lid opens, the key light
turns off. When closing the lid, press it down with your hands, until it locks up. When the
lid is closed, the key lights up.
The key light turns off during the run of the centrifuge and thus indicates that you can't
open the lid during the run.
LONG PRESS:
By pressing and holding this key, you set the lid latch to initial position. This is needed
in case of power failure during the opening of the lid, when lid latch motor stops in
undefined position. When power returns, it could happen that you can't open or close
the lid. If this happens, press the key for approximately five seconds, until you hear the
sound of lid latch motor, then release it. After that, you will be able to open and close
the lid normally.
START
By pressing this key, you start the run of the centrifuge. The key lights up and thus
indicates that the centrifuge is running.
At the end of the set running time or manual stopping of the centrifuge, the braking
procedure of the rotor is activated and the centrifuge stops. The next run is possible,
when the rotor stops completely.
STOP
By pressing this key, you stop the run of the centrifuge. The key lights up and thus
indicates that the centrifuge is stopping. The braking procedure of the rotor is activated
and the centrifuge stops. Until the centrifuge stops completely, the START key remains
lit, thus indicating that the rotor is still turning.

12 vwr.com I EN Instruction manual VWR®MICRO STAR 30
Getting Started
Before using the centrifuge for the first time, familiarize yourself with the control panel and the functions of the
knob and keys/icons.
Turning on the centrifuge
Use the enclosed power cord to connect the centrifuge to the mains power supply.
Turn on the main switch, which is located on the front of the right side of the centrifuge.
All segments (eights) are displayed on all displays at first, and all the keys and indicators light up
simultaneously. Then centrifuge model (C-30) and program version (X.XX) are displayed, then lines, and
finally the values of operation parameters are displayed.
The values of operation parameters (rotational speed, centrifugal force, run time, acceleration and braking
level) are automatically set to the last used values.
Opening and closing of the lid
By pressing the LID key, you open the lid of the centrifuge. When the lid is open, the
key light turns off.
When closing the lid, press it down with your hands, until it locks up. When the lid is
closed, the key lights up.
The key light turns off during the run of the centrifuge and thus indicates that you can't
open the lid during the run.
Always open the centrifuge lid completely, to prevent it from falling!
When closing the lid, make sure to always place your fingers on the top side of the lid
and never in the gap between the lid and the housing of the centrifuge, otherwise you
could crush your fingers!
Important Guidelines
Rotor mounting and dismounting
Before attaching the rotor on the motor axle, make sure that axle and rotor are clean and undamaged.
Wipe all fixing surfaces (motor axle and rotor cone) with clean soft cloth. Thus you will avoid potential
damages to the axle and motor.

13 vwr.com I EN Instruction manual VWR®MICRO STAR 30
•Mount the rotor on the motor axle and firmly tighten the rotor nut by turning it clockwise, using the supplied
hexagonal rotor key.
•To dismount the rotor, turn the rotor nut counter-clockwise, using the hexagonal rotor key and then
remove the rotor.
Do not use the rotors, rotor lids and test tubes, which are mechanically or chemically
damaged or with visible corrosion defects!
The rotor and the rotor lid must always be securely fastened. Do not begin with
centrifugation before the rotor has been securely fastened!
Imbalance indicator
The centrifuge is fitted with an imbalance detector, to ensure safety.
Imbalance at high speed may indicate a tube breakage or leak or rotor crash. Therefore additional care should
be taken depending on the samples loaded.
You must always load the rotor with test tubes symmetrically. You may only use approved test tubes. Weight
difference of the samples in test tubes should be as low as possible in order to avoid potential damages to the
motor and to minimize running noise and vibration.
Following are examples of correctly and wrongly loaded rotors:
CORRECT CORRECT CORRECT WRONG
CORRECT CORRECT CORRECT

14 vwr.com I EN Instruction manual VWR®MICRO STAR 30
CORRECT WRONG WRONG
If an imbalance is detected at speeds higher than approx. 300 RPM, the centrifuge will
automatically stop and an error message IMBAL OUR will be displayed.
Operation
Pre-selecting speed/RCF
By pressing the SPEED key, you can set the rotational speed (RPM) and centrifugal force (RCF). The
key lights up. By repeated pressings on this key, you select which parameter will be set. When indicator
RPM is lit, you can set the rotational speed, and when indicator RCF is lit, you can set the centrifugal
force. Set new values of both parameters by rotating the knob and confirm them by pressing on the knob.
The key light will then turn off.
•Rotational speed (indicator RPM is lit)
Rotational speed can be set from 200 to 18,000 RPM in steps of 10 RPM.
The maximum rotational speed is automatically set according to the rotor
type in use.
•Relative Centrifugal Force (indicator RCF is lit)
Relative centrifugal force can be set from 5 to 31,150 xg in steps of 10 xg.
Relative centrifugal force is calculated according to the radius of used rotor,
so the minimum and maximum forces are dependent on the rotor type.

15 vwr.com I EN Instruction manual VWR®MICRO STAR 30
Pre-selecting run time, acceleration and braking level
By pressing the TIME key, you can set the time (TIME), acceleration level ( ) and braking level ( ). The
key lights up. By repeated pressings on this key, you select which parameter will be set. When indicator
TIME is lit, you can set the run time, when indicator is lit, you can set the acceleration level, and when
indicator is lit, you can set the braking level. Set new values of all parameters by rotating the knob and
confirm them by pressing on the knob. The key light will then turn off.
•Run time
Run time can be set between 0.10 and 99.5 minutes. Time setting from 0.10 to 9.59
minutes is possible in 1 second steps. Between 10.0 and 99.5 minutes the setting
is possible in 10 second steps. By rotating the knob either clockwise until after 99.5
is displayed, or counter-clockwise until after 0.10 is displayed, you can set
continuous operation (HLd on display).
NOTE: 0.10 = 10 s, 9.59 = 9 min 59 s, 10.0 = 10 min, 99.5 = 99 min 50 s
•Acceleration level (AcX)
Acceleration level can be set from 0 to 9. Level 0 means very slow acceleration,
level 9 very fast acceleration.
•Braking level (brX)
Braking level can be set from 0 to 9. Level 0 means stopping without braking, level
9 maximum braking.
NOTE:
All the operation parameters can be changed during the operation of the centrifuge, and it starts to work with
the new settings after that.
Changing of run time during the operation:
You should be aware, that when you extend run time, the difference between newly set and originally set time
is added to current time, and when you shorten run time, the difference is subtracted.
Example: The centrifuge started with time set to 10 minutes. It has been running for 3 minutes. Then you
changed the time to 5 minutes. The centrifuge will run for another 2 minutes.

16 vwr.com I EN Instruction manual VWR®MICRO STAR 30
Program setting
You can save 100 programs, with different operational parameters, in the centrifuge
memory.
NOTE:
You can cancel the procedure for program setting by pressing the STOP key and return
to stand-by mode without confirming the data.
If you want to use the existing program, follow the next procedure:
By pressing the PROGRAM key, you can set and select programs. The key lights up. Select new program
by rotating the knob and confirm it by pressing on the knob. The key light turns off.
Operation parameters set in selected program are displayed on display.
If you want to change the existing program, follow the next procedure:
By pressing the PROGRAM key, you can set the programs. The key lights up. Select the program that
you want to change, by rotating the knob. While the PROGRAM key is lit, set the values of individual
operation parameters (rotational speed, centrifugal force, run time, acceleration level and braking level)
using the procedures, described in the previous chapters.
If you want to change another program, select it by rotating the knob, and set the values of individual
operation parameters for this program. Otherwise skip this step.
By rotating the knob, select a program that you want to use and confirm it by pressing on the knob. The
light for the PROGRAM key will then turn off.
Operation parameters set in selected program are displayed on display.
The following table shows factory preset values of operation parameters for all 100 programs:
Program
Rotational
speed (RPM)
Run time
(min)
Acceleration
level (AcX)
Braking level
(brX)
0
13,000
10
6
6
1
10,000
2
9
9
2
1,500
10
6
6
3
3,000
10
9
9
4
4,000
3
6
6
5
15,000
3
9
9
6
4,000
3
6
6
7
8,000
5
9
9
8
5,000
10
6
6
9
16,000
10
9
9
10
1,200
10
5
5
11
3,000
5
5
5
⁞
3,000
5
5
5
99
3,000
5
5
5

17 vwr.com I EN Instruction manual VWR®MICRO STAR 30
Starting and stopping the centrifuge
Before starting the centrifuge, turn on the main switch, open the centrifuge lid, insert the rotor and load it with
test tubes, close the centrifuge lid and set the operation parameters or select a suitable program.
By pressing the START key, you start the run of the centrifuge. The key lights up and
thus indicates that the centrifuge is running.
After the expiration of set running time or after manual stopping of the centrifuge, the
braking procedure of the rotor is activated and the centrifuge stops. The next run is
possible, when the rotor stops completely.
By pressing the STOP key, you stop the run of the centrifuge. The key lights up and
thus indicates that the centrifuge is stopping. The braking procedure of the rotor is
activated and the centrifuge stops. Until the centrifuge stops completely, START key is
lit, thus indicating that the rotor is still turning.
Do not move or knock the centrifuge during operation!
Rotor recognition
Rotor recognition is executed automatically, every time when the centrifuge starts. After rotor change, the
centrifuge stops and display shows ROTOR CHG. Press the STOP key to clear this message. New maximum
rotational speed is automatically set, to correspond with the inserted rotor. To start the centrifuge again, press
the START key.
Display of the set values during the run
During the run, the centrifuge shows the current values of the operation parameters on displays. If you wish
to check the set values of the parameters, select the desired parameter by pressing the corresponding key.
The key lights up. Display shows the set value of the parameter. To exit the display of the set values, press
on the knob. The key light will then turn off.

18 vwr.com I EN Instruction manual VWR®MICRO STAR 30
Fast spin
By pressing and holding the FAST SPIN key, you perform the fast spin. The centrifuge
will run as long as you hold the key pressed. Time of run is displayed on time display,
and the program display shows FS (fast spin). The acceleration and braking levels are
fixed to 9 (the highest), and they can't be changed. When you release the key, the
braking procedure of the rotor is activated and the centrifuge stops.
Reset of lid latch
By pressing and holding the LID key, you set the lid latch to initial position. This is
needed in the case of power failure during the opening of the lid, when lid latch motor
stops in undefined position. When power returns, it could happen that you can't open or
close the lid. If this happens, press the key for approximately five seconds, until you
hear the sound of lid latch motor, then release it. After that, you will be able to open and
close the lid normally.
Auxiliary lid release
In case of power failure, the lid can be opened manually. If power failure occurs during the operation of the
centrifuge, the rotor may continue rotating for several minutes, before it stops.
Before auxiliary lid release, turn off the main switch of the centrifuge and wait until rotor
fully stops. Check this by looking through the lid window. Otherwise, injury from rotating
rotor may occur!
On the underside of the centrifuge, by the front left foot, there is a plastic plug, which you pull out of the hole.
There is a string fastened to the plug. Pull the string to open the lid of the centrifuge. Then insert the string
and the plug back in the hole.
Automatic braking after power restoration
If power failure occurs during the operation of the centrifuge, the rotor may continue rotating for several
minutes, before it stops. When power returns, the centrifuge checks if the rotor is still rotating. If it is still rotating
then the display shows message Error brX (X is a number from 0 to 9 and represents the set braking level).
The centrifuge begins with the automatic rotor braking, which is performed with preset braking level. When
rotor stops, display shows error message MAINS INT and thus warns you, that power failure occurred during
operation and the centrifugation was interrupted. By pressing the STOP key, you exit from error display and
go back to stand-by mode. You can use the centrifuge again.

19 vwr.com I EN Instruction manual VWR®MICRO STAR 30
Troubleshooting
Review the information below to troubleshoot operating problems.
Error messages
If an error occurs during the operation of the centrifuge, an error message appears on the display, and the
centrifuge stops automatically. The program display shows message Er, while speed display and time display
show the error message. For the list of errors, see below table.
DISPLAY
PROBLEM
SOLUTION
WHO
REPAIRS
SPEED
TIME
ROTOR
CHG
Rotor change
Repeat run
User
HI
Rotor speed too high
Reduce speed
User
Check rotor sensor
Service-SP
IMBAL
SEN
Imbalance sensor
Check imbalance sensor
Service-SP
Check imbalance sensor
Service
Electronics error
Service
OUR
Imbalance to high
Check rotor loading
arrangement
User
Check the samples weight in
the rotor
User
Check if the rotor and rotor lid
are fastened
User
Check the rotor and the lid
User
Check rotor sensor
Service-SP
Repeat the balancing
procedure
Service
LID
OPN
The lid of the
centrifuge open
Close the lid of the centrifuge
User
SEN
Lid latch not engaged
Open and close the lid of the
centrifuge again
User
Check lid sensors
Service-SP
MOTOR
SEN
Speed sensor error
Check speed sensor
Service-SP
Check speed sensor
Service
Electronics error
Service
SPD
Speed deviates for
more than
±500 RPM / 5 s
Check rotor, motor and
frequency regulator
Service
Electronics error
Service

20 vwr.com I EN Instruction manual VWR®MICRO STAR 30
DISPLAY
PROBLEM
SOLUTION
WHO
REPAIRS
SPEED
TIME
DRIVE
HIV
Voltage overload on
the DC link
Reduce braking level
User
Error on frequency regulator
Service
Error on braking resistor
Service
LOV
Voltage too low on the
DC link
Check power supply
Service
OC
Current overload of the
motor
Repeat run
User
Reduce acceleration level
User
Check start-up parameters
Service-SP
Check motor
Service
Error on frequency regulator
Service
HOT
Driver temperature too
high
Reduce speed
User
Check motor
Service
Error on frequency regulator
Service
MAINS
INT
Power failure during
the run
Repeat run
User
-----
---
After 1 hour of
standstill centrifuge
goes to sleep mode
(lines on all displays)
Press any key
User
Note: SP = service parameters
Exit from error display
By pressing the STOP key, you exit from error display and go back to stand-by mode.
If error is still displayed, turn off the main switch of the centrifuge and turn it on again.
If the centrifuge still doesn't return to stand-by mode, call service!
This manual suits for next models
2
Table of contents
Other avantor Laboratory Equipment manuals