Charging headphones Tips
Please charge the headphones if you hear the “low battery” voice prompt. You can charge
using a phone charger (5V/500mA-2A output), PC USB port, TV USB port or any other USB
outlet using the included USB cable.
It takes about 2 hours to fully charge the headphones. The LED will turn RED during charging and
turn off once charging is complete.
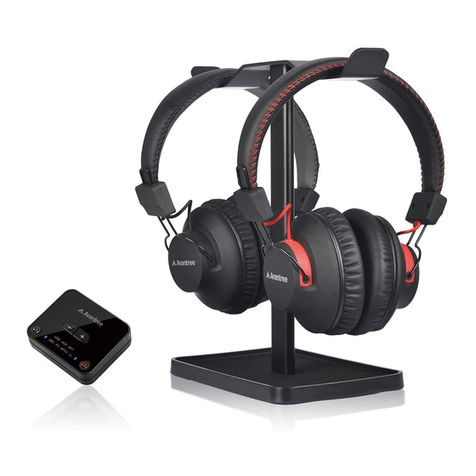
Add a 2nd pair of Bluetooth headphones
Step 1: Powering up the transmitter, then turn on the HT4186 headphones and transmitter -
they will connect automatically.
Step 2: Enter the transmitter into PAIRING MODE manually - press and hold for 2
seconds, close to flash BLUE and RED alternately.
Step 3: Place your 2nd set of headphones into Bluetooth PAIRING MODE (please refer to
your 2nd headphones’ user manual).
Step 4: Keep the devices close to each other and wait. Once connected, close to on
the transmitter will turn SOLID BLUE.
For Next Use, the 2nd headphones will also auto reconnect to the transmitter once turn on.
Otherwise, click once on the transmitter to initiate the reconnecting and close to flash-
es BLUE once per 2 seconds.
NOTE: If HT4186 headphone fails to reconnect Audikcast, please press button once.
Troubleshooting
1. No Sound.
1.1. Transmitter and Headphones are not connected properly
Turn off and on both headphones and transmitter, they should auto connect to each other,
once connected successfully, close to on transmitter and LEDs on headphones turn
SOLID BLUE.
1.2. No audio signal into the transmitter
If connected using OPTICAL port, 1) Ensure your TV audio format is set to “PCM”; 2)
Change your TV audio OUT setting to “External Speaker”.
If connected using the RCA ports, 1) Ensure use the Red/White ports labeled “AUDIO
OUT”. Other RCA ports are usually AUDIO IN and incorrect. 2) Change your TV audio OUT
setting to "External Speakers".
If connected using AUX/3.5mm audio out, change your TV audio OUT setting to "Head-
set", and can you hear any sound with the headphone plugged directly into the TV?
2. TV speaker is muted while using HT4186.
This is a TV feature.
For many older models of TV, the internal TV speaker is muted when any of the audio output
ports are connected (AUX, RCA, Optical, etc). For some TVs, e.g. LG, you can chose to play
audio from the internal TV speakers and an external audio device simultaneously. Please try
to change your TV settings or contact your TV manufacturer for more details.
If your family prefer to listen to TV speaker while you use the Bluetooth headphone, then one
workaround is using an audio splitter, either a 3.5mm audio splitter ( e.g. Avantree TR302) or an
optical audio splitter depending on which audio output you use, with an EXTERNAL SPEAKER to
share TV audio with the HT4186.
3. Transmitter and headphones within HT4186 fail to reconnect
Turn OFF both transmitter and headphones. Then turn them both back ON and wait 5-10
seconds for them to reconnect. If they don't connect please follow directions below.
Step 1: Clear paired history of headphones: Make sure NB16 is powered on. Press and hold
+ and - together for about 5s, until LED lights on BLUE and RED simultaneously for about 2s
(looks PINK). It will power off thereafter. Power on again,it then enters pairing
mode automatically with the LED flashing alternately RED and BLUE.
Step 2: Now, turn on the transmitter and wait for 5-10 seconds, they will auto-reconnect,
close to on the transmitter and LED on headphones turn SOLID BLUE.
More FAQs on support.avantree.com
LED indicators of the transmitter(Audikast Plus)
EN
LEDs indicationStatus
Connected close to turn SOLID BLUE
LEDs indication
Power On
Status
Power Off
Pairing
Connected with
Audikast Plus
Charging/charging
complete
Low battery
BLUE LED is on for 1 second
RED LED flashes
once per 10 seconds
RED LED is on for 2 seconds, then turn off
RED and BLUE LED flashes alternately
BLUE LED on
RED LED on/off
Voice prompt
Power on
Power off
Pairing
Your device is connected
NA
Low battery
LED indicators & voice prompts of headphones(HT4186)
Connected with HT4186
Connected with 2nd
headphones
Pairing with HT4186
Pairing with 2nd
headphones
Reconnect with HT4186
Reconnect with 2nd
headphones
close to turn SOLID BLUE
Pairing
Reconnecting
close to flashes BLUE and RED alternately
close to flashes BLUE and RED alternately
close to flashes BLUE once per 2 seconds
close to flashes BLUE once per 2 seconds
Bedienung
1. Überprüfen Sie die Output-Optionen des TV/ Tonquelle, siehe “Fig 1-1”.
2. Schalten Sie den Transmitter und die Kopfhörer ein
2.1 Transmitter starten
Starten Sie den Transmitter über das mitgelieferte USB-Kabel. Verbinden Sie es mit einem USB-Anschluss
am Fernseher, oder mit einem anderen USB Ladegerät, welches 5V/500mA-2A unterstützt.
2.2 Schalten Sie beide Geräte ein
Schalten Sie den Transmitter ein – schieben Sie den An-/ Ausschalter auf die “AN”-Position, bei
blinkt alle 2 Sekunden BLAU auf.
Schalten Sie die Kopfhörer ein – halten Sie ( ) 3 Sekunden lang gedrückt, bis Sie ein BLAUES Licht
sehen.
Die Geräte verbinden sich automatisch miteinander, die Anzeigen lauten: 1) Kopfhörer „Willkommen bei
Avantree, verbunden“. 2) bei auf dem Transmitter, und die LED-Anzeige auf den Kopfhörern
leuchtet DURCHGEHEND BLAU.
3. Verbinden Sie den Transmitter mit Ihrem Fernseher/ Tonquelle
3.1 Optisch Audio Out, siehe “Fig 3-1”
a. Stellen Sie sicher, dass Ihr TV-Lautsprecher auf “externer Lautsprecher” eingestellt ist, siehe“Fig 3-2”
b. Stellen Sie sicher, dass das Audioformat auf “PCM” eingestellt ist (wichtig),siehe“Fig 3-3”.
Hinweis: Ziehen Sie Gerätekabel aus dem 3,5mm AUX Anschluss, wenn Sie den OPTISCHEN Output
verwenden.
3.2 AUX/3,5mm Audio Out, siehe “Fig 3-4”
Jetzt sollten Sie über die Kopfhörer einen Ton hören können. Falls nicht, stellen Sie sicher, dass Ihr
TV-Lautsprecher auf „Kopfhörer“ eingestellt ist. Siehe “Fig 3-5”.
3.3 RCA Audio Out (rote/weiße Anschlüsse namens “AUDIO OUT”), siehe “Fig 3-6”.
Jetzt sollten Sie über die Kopfhörer einen Ton hören können. Falls nicht:
a. Stellen Sie sicher, dass Sie die roten/ weißen Anschlüsse namens „AUDIO OUT“ nutzen, andere rote/
weiße Anschlüsse sind nicht richtig.Siehe “Fig 3-7”.
b. Stellen Sie sicher, dass Ihr TV-Lautsprecher auf „externer Lautsprecher“ eingestellt ist. Siehe “Fig 3-8”.
3.4 Empfänger mit 6,35mm Kopfhöreranschluss vorne, siehe “Fig 3-9”
Ladetipps für die Kopfhörer
Bitte laden Sie die Kopfhörer auf, wenn Sie die Ansage “Niedrige Batterie” hören. Sie können diese mit dem
beigefügten USB Kabel über ein Handyladegerät aufladen (5V/500mA-2A Output), sowie über einen PC USB
Anschluss, TV USB Anschluss oder einen anderen USB-Anschluss. Es dauert ungefähr 2 Stunden, um die
Kopfhörer vollständig aufzuladen. Während des Ladevorgangs ist die LED-Anzeige ROT und geht nach vollständi-
ger Ladung aus.
Utilisation
1. Vérifiez les options de sortie de votre téléviseur / source audio, se référer à “Fig 1-1”.
2. Mettre en marche le Transmetteur et le casque
2.1 Mise en marche du Transmetteur
Mettre en marche l'émetteur avec le câble USB fourni. Connectez-le à un port USB TV ou à tout autre port
USB délivrant 5V / 500mA-2A.
2.2 Mettre en marche les deux équipements
Mettre en marche le transmetteur – Glisser le bouton on/off sur “ON”, proche de clignote BLEU 1
fois toutes les 2 secondes.
Mettre en marche le casque – Appuyer et maintenir ( ) durant 3 secondes et jusqu’à voir le 1ier flash
LED BLEU.
Ils s’auto-reconnecteront comme suit : 1) Dans le casque, vous entendrez “ Welcome to Avantree,
Connected”. 2) proche de sur le transmetteur et la LED sur le casque resteront BLUE fixe.
3. Connecter le transmetteur sur votre source audio/TV
3.1 Sortie audio Optique, se référer à “Fig 3-1”
Vous devriez entendre du son dans votre casque. Dans le cas contraire:
a. Vérifiez que votre réglage Haut-parleurs TV est à “ Haut-parleursExternes”, se référer à “Fig 3-2”
b. Vérifiez que le format numérique audio de votre TV est réglé à “PCM”(très IMPORTANT), se référer à
“Fig 3-3”
Remarque: Débranchez tous les appareils de la prise AUX 3.5 mm lorsque vous utilisez la sortie
OPTIQUE.
3.2 Sortie Audio AUX/3.5mm, se référer à “Fig 3-4”
Dès à présent, vous devriez entendre du son dans le casque. Dans le cas contraire, assurez-vous que
votre haut-parleur TV est réglé sur "Casque". Se référer à “Fig 3-5”.
3.3 Sortie Audio RCA (ports ROUGE/BLANC ports nommés "AUDIO OUT "), se référer à “Fig 3-6”.
Dès à présent, vous devriez entendre du son dans le casque. Dans le cas contraire:
a. Assurez-vous d'utiliser les ports TV ROUGE / BLANCS nommés "AUDIO OUT", les autres ports
ROUGE / BLANCS sont incorrects. Se référer à “Fig 3-7”.
b. Assurez-vous que vos haut-parleurs TV soient réglés sur "Haut-parleur externe". Se référer à
“Fig 3-8”.
3.4 Récepteur avec sortie casque 6.35mm en facade, se référer à “Fig 3-9”.
Conseils de recharge pour votre casque
Veuillez charger le casque si vous entendez l'invite vocale "low battery". Vous pouvez le recharger en utilisant un
chargeur de téléphone (sortie 5V / 500mA-2A), un port USB PC, un port USB TV ou toute autre prise USB, à l'aide
du câble USB fourni.
Il faut environ 2h pour charger complètement le casque. La LED deviendra ROUGE pendant le chargement et
s'éteindra une fois la charge terminée.
Utilizzo
1. Controlla le opzioni output della tua TV/ Fonte Audio, vedi “Fig 1-1”.
2. Accendere la trasmittente e le cuffie.
2.1 Accendere la trasmittente
Accendere la trasmittente con il cavo USB fornito. Connetterla con la porta USB della TV o altro
caricatore USB che supporti 5V/500mA-2A.
2.2 Accendere entrambi i dispositivi
Accendere la trasmittente – Portare il pulsante on/off in posizione ON,
vicino a
, A lampeggia in
BLU
una volta per 2 secondi.
Accendi le cuffie –
Tieni premuto
( )
per 3 secondi, fino a quando non si accende la luce
BLU
.
Si riconnetteranno automaticamente, gli indicatori sono: 1) Le cuffie dicono “Benvenuto in Avantree,
Connesso.” 2)
vicino a
, A sulla trasmittente e il LED sulle cuffie diventano
BLU
.
3. Connettere la trasmittente alla tua fonte audio/TV
3.1 Uscita Audio Ottica, vedi“Fig 3-1”
Ora dovresti essere in grado di sentire un suono proveniente dalle cuffie, se non è così:
a. Assicurati che lo speaker della TV sia impostato su “cassa esterna”. Vedi “Fig 3-2”.
b. Assicurati che il Formato Audio sia impostato su “PCM” (
IMPORTANTE
). Vedi “Fig 3-3”.
Nota: disconnettere tutti i dispositivo dal jack AUX da 3.5 mm mentre si utilizza l’output OTTICO.
3.2 Uscita audio AUX/3.5mm, vedi“Fig 3-4”
Ora dovresti essere in grado di sentire un suono proveniente dalle cuffie, se non è così assicurati che lo
speaker della TV sia impostato su “Cuffie”. Vedi “Fig 3-5”.
3.3 Uscita Audio RCA (Porte Rosse/Bianche denominate “USCITA AUDIO”), vedi“Fig 3-6”
Ora dovresti essere in grado di sentire un suono proveniente dalle cuffie, se non è così:
a. Assicurati di utilizzare le porte Rosse/Bianche denominate “USCITA AUDIO”, altre porte Rosse/Bi
anche non sono corrette. Vedi “Fig 3-7”.
b. Assicurati che lo speaker della TV sia impostato su “Speaker esterno”. Vedi “Fig 3-8”.
3.4
Ricevitore con Jack del telefono 6.35mm sulla parte frontale, vedi“Fig 3-9”
Suggerimento per la ricarica delle cuffie
Si prega di ricaricare le cuffie quando viene emesso il comando vocale “batteria scarica”. È possibile effettuare la
ricarica usando un caricatore per il telefono (uscita 5V/500mA-2A), porta USB del PC o qualunque altro USB
utilizzando il cavo USB incluso nella confezione.
Occorrono circa 2 ore per ricaricare completamente le cuffie. Il LED si accenderà in
ROSSO
durante la ricarica,
e si spegnerà una volta completata.
Instrucciones de uso
1.
Compruebe las opciones de salida de suTV/fuente de audio, ver “Fig 1-1”.
2. Encender el Transmisor y los Auriculares
2.1 Encender el transmisor
Encienda el transmisor con el cable USB. Conectarlo al Puerto USB de la TV o cualquier otro cargador
USB que soporte 5V/500mA-2A.
2.2 Encender ambos dispositivos
Encienda el transmisor – deslizar el interruptor a la "posición ON",
cerca de
parpadeará una luz
AZUL una vez cada 2 segundos.
Encienda los auriculares - Mantenga pulsado
( )
durante 3 segundos hasta que vea la luz
AZUL
.
Se volverán a conectar automáticamente, los indicadores son:1) Los auriculares dicen "Bienvenido a
Avantree, conectado".2) Poner el Bluetooth cerca de
en el transmisor y el LED de los auriculares se
pondrá en
AZUL
.
3
. Conectar el Transmisor a la fuente de TV/audio
3.1 Salida óptica de audio, ver “Fig 3-1”.
Ahora podrá escuchar el sonido en los auriculares, si no hay sonido:
a. Compruebe que el altavoz de su tv esté configurado como "Altavoz externo". Ver “Fig 3-2”.
b. Asegúrese de que el formato de audio de su tv es PCM (esto es IMPORTANTE). Ver “Fig 3-3”.
Nota:
Desconecte cualquier dispositivo de la toma de aux de 3, 5mm mientras utiliza la salida ÓPTICA.
3.2 Salida de Audio AUX/3.5mm, ver “Fig 3-4”.
Ahora, usted debería poder escuchar el sonido de los auriculares, si no hay sonido, asegúrese de que
el altavoz de su TV esté configuradocomo "Auriculares". Ver “Fig 3-5”.
3.3 Salida de audio RCA (puertos rojo/blanco etiquetados como "SALIDA DE AUDIO"). Ver “Fig 3-6”.
Ahora podrá escuchar el sonido con los auriculares, si no hay sonido:
a. Asegúrese de que está utilizando los puertos rojo y blanco etiquetados como SALIDA DE AUDIO,
los otros puertos rojo/ blanco son incorrectos. Ver “Fig 3-7”.
b. Asegúrese de que el altavoz de su TV esté configurado como "Altavoz externo".Ver “Fig 3-8”.
3.4
Receptor con clavija telefónica de 6.35mm en la parte frontal. Ver “Fig 3-9”
Recargar los auriculares
Por favor cargar los auriculares si escucha "batería baja". Puede cargarlos con un cargador de teléfono (salida
5V/500mA-2A), puerto USB del PC, puerto USB de la TV o cualquier otra toma de corriente USB usando el
cable USB incluido.
Tarda unas 2 horas para cargar completamente los auriculares. El LED emite luz
ROJA
durante la carga y se
apaga una vez que la carga está completa.
DE IT
FR
ES
