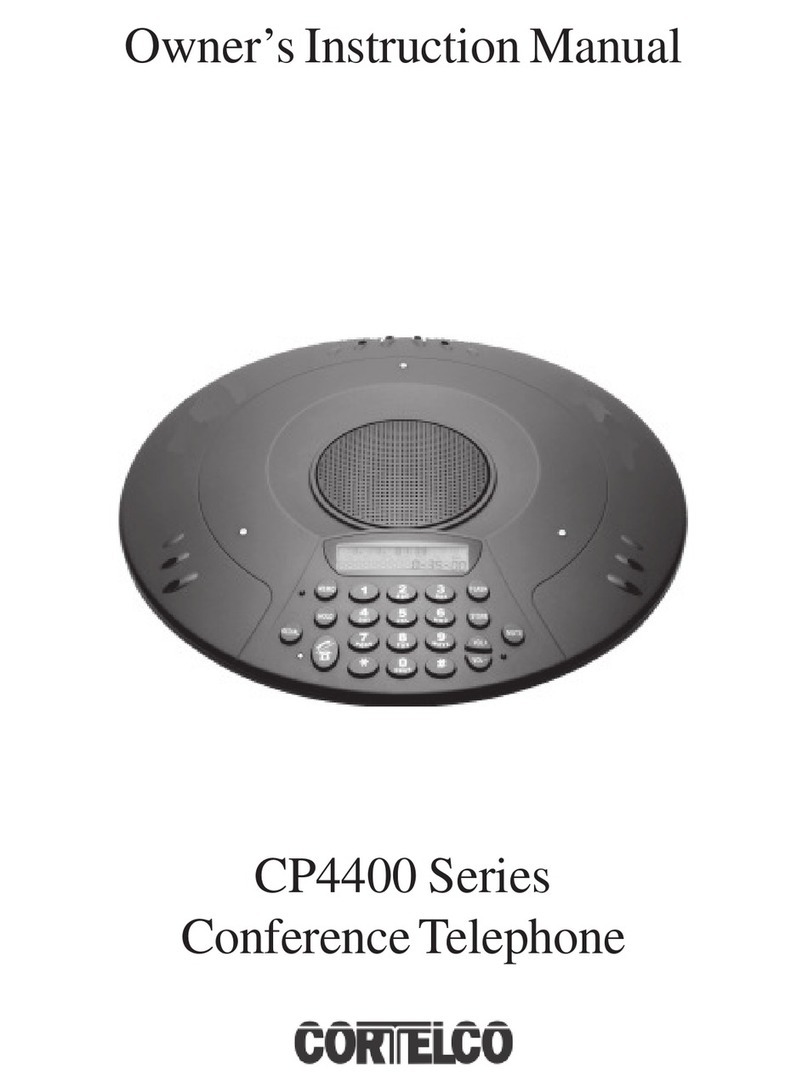
Avaya B159 Series User manual

Issue 02a - (06 November 2017)
B159 Series User Guide
IP Office™ Platform 10.0

B159 Series User Guide Page 2
Issue 02a (06 November 2017)IP Office™ Platform 10.0
© 2017 AVAYA All Rights Reserved.
Notice
While reasonable efforts have been made to ensure that the information in this document is complete and accurate at the time of printing, Avaya assumes no liability for any
errors. Avaya reserves the right to make changes and corrections to the information in this document without the obligation to notify any person or organization of such
changes.
Documentation disclaimer
“Documentation” means information published by Avaya in varying mediums which may include product information, operating instructions and performance specifications
that Avaya may generally make available to users of its products and Hosted Services. Documentation does not include marketing materials. Avaya shall not be responsible
for any modifications, additions, or deletions to the original published version of documentation unless such modifications, additions, or deletions were performed by Avaya.
End User agrees to indemnify and hold harmless Avaya, Avaya's agents, servants and employees against all claims, lawsuits, demands and judgments arising out of, or in
connection with, subsequent modifications, additions or deletions to this documentation, to the extent made by End User.
Link disclaimer
Avaya is not responsible for the contents or reliability of any linked websites referenced within this site or documentation provided by Avaya. Avaya is not responsible for the
accuracy of any information, statement or content provided on these sites and does not necessarily endorse the products, services, or information described or offered within
them. Avaya does not guarantee that these links will work all the time and has no control over the availability of the linked pages.
Warranty
Avaya provides a limited warranty on Avaya hardware and software. Refer to your sales agreement to establish the terms of the limited warranty. In addition, Avaya’s
standard warranty language, as well as information regarding support for this product while under warranty is available to Avaya customers and other parties through the
Avaya Support website: https://support.avaya.com/helpcenter/getGenericDetails?detailId=C20091120112456651010 under the link “Warranty & Product Lifecycle” or such
successor site as designated by Avaya. Please note that if You acquired the product(s) from an authorized Avaya Channel Partner outside of the United States and Canada,
the warranty is provided to You by said Avaya Channel Partner and not by Avaya.
“Hosted Service” means a hosted service subscription that You acquire from either Avaya or an authorized Avaya Channel Partner (as applicable) and which is described
further in Hosted SAS or other service description documentation regarding the applicable hosted service. If You purchase a Hosted Service subscription, the foregoing
limited warranty may not apply but You may be entitled to support services in connection with the Hosted Service as described further in your service description documents
for the applicable Hosted Service. Contact Avaya or Avaya Channel Partner (as applicable) for more information.
Hosted Service
THE FOLLOWING APPLIES IF YOU PURCHASE A HOSTED SERVICE SUBSCRIPTION FROM AVAYA OR AN AVAYA CHANNEL PARTNER (AS APPLICABLE), THE
TERMS OF USE FOR HOSTED SERVICES ARE AVAILABLE ON THE AVAYA WEBSITE, HTTPS://SUPPORT.AVAYA.COM/LICENSEINFO UNDER THE LINK “Avaya
Terms of Use for Hosted Services” OR SUCH SUCCESSOR SITE AS DESIGNATED BY AVAYA, AND ARE APPLICABLE TO ANYONE WHO ACCESSES OR USES THE
HOSTED SERVICE. BY ACCESSING OR USING THE HOSTED SERVICE, OR AUTHORIZING OTHERS TO DO SO, YOU, ON BEHALF OF YOURSELF AND THE
ENTITY FOR WHOM YOU ARE DOING SO (HEREINAFTER REFERRED TO INTERCHANGEABLY AS “YOU” AND “END USER”), AGREE TO THE TERMS OF USE. IF
YOU ARE ACCEPTING THE TERMS OF USE ON BEHALF A COMPANY OR OTHER LEGAL ENTITY, YOU REPRESENT THAT YOU HAVE THE AUTHORITY TO BIND
SUCH ENTITY TO THESE TERMS OF USE. IF YOU DO NOT HAVE SUCH AUTHORITY, OR IF YOU DO NOT WISH TO ACCEPT THESE TERMS OF USE, YOU MUST
NOT ACCESS OR USE THE HOSTED SERVICE OR AUTHORIZE ANYONE TO ACCESS OR USE THE HOSTED SERVICE. YOUR USE OF THE HOSTED SERVICE
SHALL BE LIMITED BY THE NUMBER AND TYPE OF LICENSES PURCHASED UNDER YOUR CONTRACT FOR THE HOSTED SERVICE, PROVIDED, HOWEVER,
THAT FOR CERTAIN HOSTED SERVICES IF APPLICABLE, YOU MAY HAVE THE OPPORTUNITY TO USE FLEX LICENSES, WHICH WILL BE INVOICED ACCORDING
TO ACTUAL USAGE ABOVE THE CONTRACT LICENSE LEVEL. CONTACT AVAYA OR AVAYA’S CHANNEL PARTNER FOR MORE INFORMATION ABOUT THE
LICENSES FOR THE APPLICABLE HOSTED SERVICE, THE AVAILABILITY OF ANY FLEX LICENSES (IF APPLICABLE), PRICING AND BILLING INFORMATION, AND
OTHER IMPORTANT INFORMATION REGARDING THE HOSTED SERVICE.
Licenses
THE SOFTWARE LICENSE TERMS AVAILABLE ON THE AVAYA WEBSITE, HTTPS://SUPPORT.AVAYA.COM/LICENSEINFO, UNDER THE LINK “AVAYA SOFTWARE
LICENSE TERMS (Avaya Products)” OR SUCH SUCCESSOR SITE AS DESIGNATED BY AVAYA, ARE APPLICABLE TO ANYONE WHO DOWNLOADS, USES AND/OR
INSTALLS AVAYA SOFTWARE, PURCHASED FROM AVAYA INC., ANY AVAYA AFFILIATE, OR AN AVAYA CHANNEL PARTNER (AS APPLICABLE) UNDER A
COMMERCIAL AGREEMENT WITH AVAYA OR AN AVAYA CHANNEL PARTNER. UNLESS OTHERWISE AGREED TO BY AVAYA IN WRITING, AVAYA DOES NOT
EXTEND THIS LICENSE IF THE SOFTWARE WAS OBTAINED FROM ANYONE OTHER THAN AVAYA, AN AVAYA AFFILIATE OR AN AVAYA CHANNEL PARTNER;
AVAYA RESERVES THE RIGHT TO TAKE LEGAL ACTION AGAINST YOU AND ANYONE ELSE USING OR SELLING THE SOFTWARE WITHOUT A LICENSE. BY
INSTALLING, DOWNLOADING OR USING THE SOFTWARE, OR AUTHORIZING OTHERS TO DO SO, YOU, ON BEHALF OF YOURSELF AND THE ENTITY FOR
WHOM YOU ARE INSTALLING, DOWNLOADING OR USING THE SOFTWARE (HEREINAFTER REFERRED TO INTERCHANGEABLY AS “YOU” AND “END USER”),
AGREE TO THESE TERMS AND CONDITIONS AND CREATE A BINDING CONTRACT BETWEEN YOU AND AVAYA INC. OR THE APPLICABLE AVAYA AFFILIATE
(“AVAYA”).
Avaya grants You a license within the scope of the license types described below, with the exception of Heritage Nortel Software, for which the scope of the license is detailed
below. Where the order documentation does not expressly identify a license type, the applicable license will be a Designated System License. The applicable number of
licenses and units of capacity for which the license is granted will be one (1), unless a different number of licenses or units of capacity is specified in the documentation or
other materials available to You. “Software” means computer programs in object code, provided by Avaya or an Avaya Channel Partner, whether as stand-alone products,
pre-installed on hardware products, and any upgrades, updates, patches, bug fixes, or modified versions thereto. “Designated Processor” means a single stand-alone
computing device. “Server” means a Designated Processor that hosts a software application to be accessed by multiple users. “Instance” means a single copy of the Software
executing at a particular time: (i) on one physical machine; or (ii) on one deployed software virtual machine (“VM”) or similar deployment.
License type(s)
Designated System(s) License (DS). End User may install and use each copy or an Instance of the Software only on a number of Designated Processors up to the number
indicated in the order. Avaya may require the Designated Processor(s) to be identified in the order by type, serial number, feature key, Instance, location or other specific
designation, or to be provided by End User to Avaya through electronic means established by Avaya specifically for this purpose.
Concurrent User License (CU). End User may install and use the Software on multiple Designated Processors or one or more Servers, so long as only the licensed number of
Units are accessing and using the Software at any given time. A “Unit” means the unit on which Avaya, at its sole discretion, bases the pricing of its licenses and can be,
without limitation, an agent, port or user, an e-mail or voice mail account in the name of a person or corporate function (e.g., webmaster or helpdesk), or a directory entry in
the administrative database utilized by the Software that permits one user to interface with the Software. Units may be linked to a specific, identified Server or an Instance of
the Software.

B159 Series User Guide Page 3
Issue 02a (06 November 2017)IP Office™ Platform 10.0
Database License (DL). End User may install and use each copy or an Instance of the Software on one Server or on multiple Servers provided
that each of the Servers on which the Software is installed communicates with no more than one Instance of the same database.
CPU License (CP). End User may install and use each copy or Instance of the Software on a number of Servers up to the number indicated in
the order provided that the performance capacity of the Server(s) does not exceed the performance capacity specified for the Software. End
User may not re-install or operate the Software on Server(s) with a larger performance capacity without Avaya’s prior consent and payment of
an upgrade fee.
Named User License (NU). You may: (i) install and use each copy or Instance of the Software on a single Designated Processor or Server per
authorized Named User (defined below); or (ii) install and use each copy or Instance of the Software on a Server so long as only authorized
Named Users access and use the Software. “Named User”, means a user or device that has been expressly authorized by Avaya to access
and use the Software. At Avaya’s sole discretion, a “Named User” may be, without limitation, designated by name, corporate function (e.g.,
webmaster or helpdesk), an e-mail or voice mail account in the name of a person or corporate function, or a directory entry in the
administrative database utilized by the Software that permits one user to interface with the Software.
Shrinkwrap License (SR). You may install and use the Software in accordance with the terms and conditions of the applicable license
agreements, such as “shrinkwrap” or “clickthrough” license accompanying or applicable to the Software (“Shrinkwrap License”).
Heritage Nortel Software
“Heritage Nortel Software” means the software that was acquired by Avaya as part of its purchase of the Nortel Enterprise Solutions Business
in December 2009. The Heritage Nortel Software is the software contained within the list of Heritage Nortel Products located at
https://support.avaya.com/LicenseInfo under the link “Heritage Nortel Products” or such successor site as designated by Avaya. For Heritage
Nortel Software, Avaya grants Customer a license to use Heritage Nortel Software provided hereunder solely to the extent of the authorized
activation or authorized usage level, solely for the purpose specified in the Documentation, and solely as embedded in, for execution on, or for
communication with Avaya equipment. Charges for Heritage Nortel Software may be based on extent of activation or use authorized as
specified in an order or invoice.
Copyright
Except where expressly stated otherwise, no use should be made of materials on this site, the Documentation, Software, Hosted Service, or
hardware provided by Avaya. All content on this site, the documentation, Hosted Service, and the product provided by Avaya including the
selection, arrangement and design of the content is owned either by Avaya or its licensors and is protected by copyright and other intellectual
property laws including the sui generis rights relating to the protection of databases. You may not modify, copy, reproduce, republish, upload,
post, transmit or distribute in any way any content, in whole or in part, including any code and software unless expressly authorized by Avaya.
Unauthorized reproduction, transmission, dissemination, storage, and or use without the express written consent of Avaya can be a criminal,
as well as a civil offense under the applicable law.
Virtualization
The following applies if the product is deployed on a virtual machine. Each product has its own ordering code and license types. Note that each
Instance of a product must be separately licensed and ordered. For example, if the end user customer or Avaya Channel Partner would like to
install two Instances of the same type of products, then two products of that type must be ordered.
Third Party Components
“Third Party Components” mean certain software programs or portions thereof included in the Software or Hosted Service may contain
software (including open source software) distributed under third party agreements (“Third Party Components”), which contain terms regarding
the rights to use certain portions of the Software (“Third Party Terms”). As required, information regarding distributed Linux OS source code
(for those products that have distributed Linux OS source code) and identifying the copyright holders of the Third Party Components and the
Third Party Terms that apply is available in the products, Documentation or on Avaya’s website at: https://support.avaya.com/Copyright or
such successor site as designated by Avaya. The open source software license terms provided as Third Party Terms are consistent with the
license rights granted in these Software License Terms, and may contain additional rights benefiting You, such as modification and distribution
of the open source software. The Third Party Terms shall take precedence over these Software License Terms, solely with respect to the
applicable Third Party Components to the extent that these Software License Terms impose greater restrictions on You than the applicable
Third Party Terms.
The following applies if the H.264 (AVC) codec is distributed with the product. THIS PRODUCT IS LICENSED UNDER THE AVC PATENT
PORTFOLIO LICENSE FOR THE PERSONAL USE OF A CONSUMER OR OTHER USES IN WHICH IT DOES NOT RECEIVE
REMUNERATION TO (i) ENCODE VIDEO IN COMPLIANCE WITH THE AVC STANDARD (“AVC VIDEO”) AND/OR (ii) DECODE AVC
VIDEO THAT WAS ENCODED BY A CONSUMER ENGAGED IN A PERSONAL ACTIVITY AND/OR WAS OBTAINED FROM A VIDEO
PROVIDER LICENSED TO PROVIDE AVC VIDEO. NO LICENSE IS GRANTED OR SHALL BE IMPLIED FOR ANY OTHER USE.
ADDITIONAL INFORMATION MAY BE OBTAINED FROM MPEG LA, L.L.C. SEE HTTP://WWW.MPEGLA.COM.
Service Provider
THE FOLLOWING APPLIES TO AVAYA CHANNEL PARTNER’S HOSTING OF AVAYA PRODUCTS OR SERVICES. THE PRODUCT OR
HOSTED SERVICE MAY USE THIRD PARTY COMPONENTS SUBJECT TO THIRD PARTY TERMS AND REQUIRE A SERVICE
PROVIDER TO BE INDEPENDENTLY LICENSED DIRECTLY FROM THE THIRD PARTY SUPPLIER. AN AVAYA CHANNEL PARTNER’S
HOSTING OF AVAYA PRODUCTS MUST BE AUTHORIZED IN WRITING BY AVAYA AND IF THOSE HOSTED PRODUCTS USE OR
EMBED CERTAIN THIRD PARTY SOFTWARE, INCLUDING BUT NOT LIMITED TO MICROSOFT SOFTWARE OR CODECS, THE AVAYA
CHANNEL PARTNER IS REQUIRED TO INDEPENDENTLY OBTAIN ANY APPLICABLE LICENSE AGREEMENTS, AT THE AVAYA
CHANNEL PARTNER’S EXPENSE, DIRECTLY FROM THE APPLICABLE THIRD PARTY SUPPLIER.
WITH RESPECT TO CODECS, IF THE AVAYA CHANNEL PARTNER IS HOSTING ANY PRODUCTS THAT USE OR EMBED THE G.729
CODEC, H.264 CODEC, OR H.265 CODEC, THE AVAYA CHANNEL PARTNER ACKNOWLEDGES AND AGREES THE AVAYA CHANNEL
PARTNER IS RESPONSIBLE FOR ANY AND ALL RELATED FEES AND/OR ROYALTIES. THE G.729 CODEC IS LICENSED BY SIPRO
LAB TELECOM INC. SEE WWW.SIPRO.COM/CONTACT.HTML. THE H.264 (AVC) CODEC IS LICENSED UNDER THE AVC PATENT
PORTFOLIO LICENSE FOR THE PERSONAL USE OF A CONSUMER OR OTHER USES IN WHICH IT DOES NOT RECEIVE
REMUNERATION TO: (I) ENCODE VIDEO IN COMPLIANCE WITH THE AVC STANDARD (“AVC VIDEO”) AND/OR (II) DECODE AVC
VIDEO THAT WAS ENCODED BY A CONSUMER ENGAGED IN A PERSONAL ACTIVITY AND/OR WAS OBTAINED FROM A VIDEO
PROVIDER LICENSED TO PROVIDE AVC VIDEO. NO LICENSE IS GRANTED OR SHALL BE IMPLIED FOR ANY OTHER USE.
ADDITIONAL INFORMATION FOR H.264 (AVC) AND H.265 (HEVC) CODECS MAY BE OBTAINED FROM MPEG LA, L.L.C. SEE
HTTP://WWW.MPEGLA.COM.

B159 Series User Guide Page 4
Issue 02a (06 November 2017)IP Office™ Platform 10.0
Compliance with Laws
Customer acknowledges and agrees that it is responsible for complying with any applicable laws and regulations, including, but not limited to
laws and regulations related to call recording, data privacy, intellectual property, trade secret, fraud, and music performance rights, in the
country or territory where the Avaya product is used.
Preventing Toll Fraud
“Toll Fraud” is the unauthorized use of your telecommunications system by an unauthorized party (for example, a person who is not a
corporate employee, agent, subcontractor, or is not working on your company's behalf). Be aware that there can be a risk of Toll Fraud
associated with your system and that, if Toll Fraud occurs, it can result in substantial additional charges for your telecommunications services.
Avaya Toll Fraud intervention
If You suspect that You are being victimized by Toll Fraud and You need technical assistance or support, call Technical Service Center Toll
Fraud Intervention Hotline at +1-800-643-2353 for the United States and Canada. For additional support telephone numbers, see the Avaya
Support website: https://support.avaya.com or such successor site as designated by Avaya.
Security Vulnerabilities
Information about Avaya’s security support policies can be found in the Security Policies and Support section of
https://support.avaya.com/security. Suspected Avaya product security vulnerabilities are handled per the Avaya Product Security Support Flow
(https://support.avaya.com/css/P8/documents/100161515).
Downloading Documentation
For the most current versions of Documentation, see the Avaya Support website: https://support.avaya.com, or such successor site as
designated by Avaya.
Contact Avaya Support
See the Avaya Support website: https://support.avaya.com for product or Hosted Service notices and articles, or to report a problem with your
Avaya product or Hosted Service. For a list of support telephone numbers and contact addresses, go to the Avaya Support website:
https://support.avaya.com (or such successor site as designated by Avaya), scroll to the bottom of the page, and select Contact Avaya
Support.

B159 Series User Guide Page 5
Issue 02a (06 November 2017)IP Office™ Platform 10.0
Contents
Contents
General1.
..................................................................... 91.1 The Phone
..................................................................... 101.2 LEDs
..................................................................... 101.3 The Keypad
..................................................................... 101.4 Writing Text
..................................................................... 111.5 Navigating the Menus
..................................................................... 111.6 The Menu Tree
Installation2.
..................................................................... 142.1 Unpacking
..................................................................... 142.2 Connecting
..................................................................... 152.3 Set the Phone Region
..................................................................... 152.4 Set the Phone Language
..................................................................... 152.5 Set the Phone Caller ID
..................................................................... 152.6 Set the Phone Flash Recall Pulse Setting
..................................................................... 162.7 Configure the Conference Codes
..................................................................... 162.8 Connectivity Options
Answering and Making Calls3.
..................................................................... 183.1 Answering Calls
..................................................................... 183.2 Making Calls
..................................................................... 183.3 Redialing
..................................................................... 183.4 Calling from the Phonebook
..................................................................... 193.5 Making Three-Way Calls
..................................................................... 193.6 Adjusting the Speaker Volume
..................................................................... 193.7 Muting Calls
..................................................................... 193.8 Placing Calls on Hold
..................................................................... 193.9 Ending Calls
..................................................................... 203.10 During a Call
............................................................................ 203.10.1 Connecting a New Line
............................................................................ 203.10.2 Putting a Line on Hold
............................................................................ 203.10.3 Disconnecting a Line
..................................................................... 213.11 VoIP Calls
............................................................................ 213.11.1 Line Mode
............................................................................ 213.11.2 Making VoIP Calls
............................................................................ 213.11.3 Answering a VoIP Call
............................................................................ 213.11.4 Ending a VoIP Call
..................................................................... 223.12 Calls via DECT and Mobile Phones
............................................................................ 223.12.1 Select Mobile as the Telephone Line
............................................................................ 223.12.2 Making Calls Using a Mobile Phone
............................................................................ 223.12.3 Ending Calls
Conferencing4.
..................................................................... 244.1 Creating Conference Groups
..................................................................... 244.2 Making Conference Group Calls
..................................................................... 254.3 Making Multiparty Calls
..................................................................... 254.4 Display Conference Group Members
..................................................................... 254.5 Editing Conference Groups
..................................................................... 254.6 Deleting Conference Groups
..................................................................... 264.7 Delete All Conference Groups
..................................................................... 264.8 Display Conference Guide Status
Phonebook5.
..................................................................... 285.1 Searching for Contacts
..................................................................... 285.2 Adding Contacts
..................................................................... 285.3 Editing Contacts
..................................................................... 285.4 Deleting Contacts
..................................................................... 285.5 Deleting All Contacts
..................................................................... 295.6 Display Phonebook Status
Recording6.
..................................................................... 326.1 Starting a Recording
..................................................................... 326.2 Hold
..................................................................... 326.3 Mute
..................................................................... 326.4 Stopping Recording
..................................................................... 336.5 Listening to Recordings
............................................................................ 336.5.1 Listening to Recordings
............................................................................ 336.5.2 Adjusting the Volume
............................................................................ 336.5.3 Pause Playback
............................................................................ 336.5.4 Move Forward During Playback
............................................................................ 336.5.5 Stop Playback
..................................................................... 346.6 Managing Recordings
............................................................................ 346.6.1 Editing the Name of a Recording
............................................................................ 346.6.2 Deleting a Recording
............................................................................ 346.6.3 Deleting All Recordings
..................................................................... 346.7 Adjusting the Recording Indicator
..................................................................... 346.8 Display Recording Status
Settings7.
..................................................................... 377.1 Selecting the Language
..................................................................... 377.2 Selecting the Region
..................................................................... 377.3 Deactivating the Keypad Tones
..................................................................... 377.4 Adjusting the Ring Volume
..................................................................... 387.5 Configuring the Conference Codes
..................................................................... 387.6 Adjusting the Flash/Recall Pulse
..................................................................... 397.7 Selecting the Caller ID Method
..................................................................... 397.8 Adjusting the Date and Time
............................................................................ 397.8.1 Changing the Date
............................................................................ 397.8.2 Changing the Time
............................................................................ 397.8.3 Changing the Time Format
..................................................................... 407.9 Settings During a Call
............................................................................ 407.9.1 Turning the Internal Speakers Off
............................................................................ 407.9.2 Adjusting the PA Calibration
............................................................................ 407.9.3 Adjust the PA Microphone Volume
..................................................................... 41
7.10 Adjust the Microphone Volume with Mobile
Connected
..................................................................... 417.11 Adjusting the Sound Equalizer
..................................................................... 417.12 Connecting External Equipment (AUX)
..................................................................... 417.13 External PA Settings
..................................................................... 427.14 Changing the Display Screen Text
..................................................................... 427.15 Adjusting the LCD Contrast
..................................................................... 427.16 Defaulting the Phone
..................................................................... 427.17 Checking the Phone Status
Appendix8.
..................................................................... 448.1 Maintenance
..................................................................... 448.2 Upgrading Software
..................................................................... 448.3 Technical Specification
...............................................................................0Index
B159 Series User Guide Page 7
Issue 02a (06 November 2017)IP Office™ Platform 10.0
General
Chapter 1.


B159 Series User Guide Page 9
Issue 02a (06 November 2017)IP Office™ Platform 10.0
General:
1. General
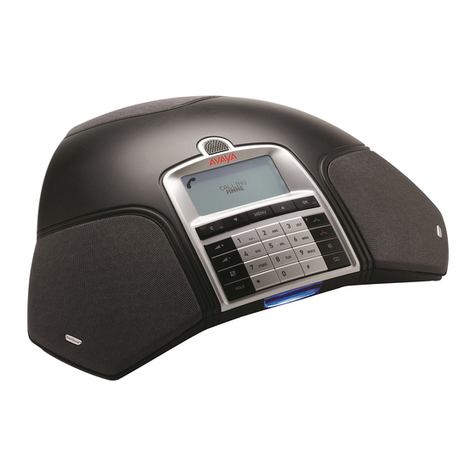
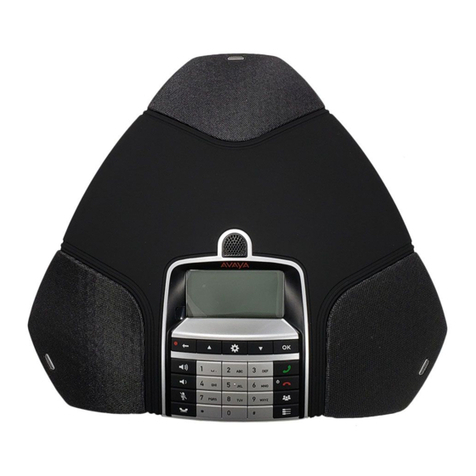
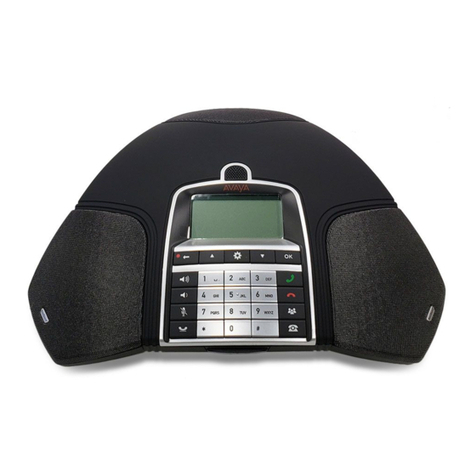
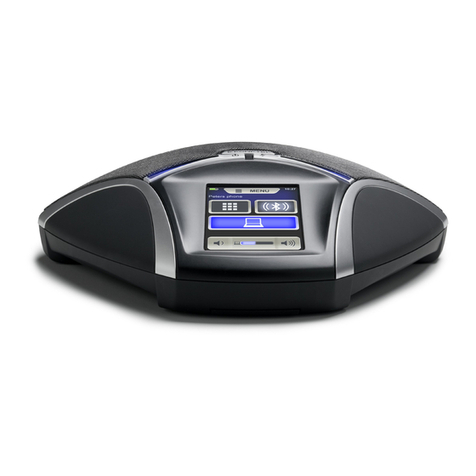
The Avaya IP Office B159 Conference Phone offers a host of innovative features:
·OmniSound audio technology.
·Conference guide for easy set-up of multiparty calls.
·Record your meetings with an SD memory card so that you can listen to them later on.
·Optional expansion microphones can be added to increase the voice pickup range.
·USB connectivity allows the phone to be used to make VoIP calls.
·The line mode enables you to combine and switch easily between connectivity technologies – analog, USB, mobile
(GSM/DECT).
·A wireless headset or PA system can be connected. (Optional.)
·Can be upgraded with smart features, making it future-proof.
1.1 The Phone

B159 Series User Guide Page 10
Issue 02a (06 November 2017)IP Office™ Platform 10.0
1.2 LEDs
The phone uses the following LEDs:
·Flashing Blue: Incoming call.
·Steady Blue: Call in progress.
·Flashing Red: On Hold. Microphone and speaker off.
·Steady Red: Mute. Microphone off.
1.3 The Keypad
1.4 Writing Text
Each button contains letters and characters –more than those shown on the button (see illustration below). Press the
same button repeatedly to change to another character. If there are two letters under the same button that you want to
enter one after the other, you need to pause slightly before entering the second letter.
Press the button to delete the last character you entered.

B159 Series User Guide Page 11
Issue 02a (06 November 2017)IP Office™ Platform 10.0
General: Writing Text
1.5 Navigating the Menus
1.Press .
2.Select the option you want from the menu tree using the arrow buttons.
3.Confirm by pressing OK to select the marked option.
4.Cancel the setting or go back one level in the menu by pressing .
5.Quit the menu by pressing again.
6.Note that after you have made changes to a setting, you must press OK to activate the setting.
1.6 The Menu Tree
11


B159 Series User Guide Page 13
Issue 02a (06 November 2017)IP Office™ Platform 10.0
Installation
Chapter 2.

B159 Series User Guide Page 14
Issue 02a (06 November 2017)IP Office™ Platform 10.0
2. Installation
2.1 Unpacking
Check that all parts are included in the package. If any parts are missing, please contact your retailer.
·The Avaya IP Office Conference Phone
·Power adapter with universal socket compatibility
·7.5 metre cable for electric power and line connection
·1.5 metre USB cable
·Intermediate plugs for analog connection
·Quick reference guides in different languages
2.2 Connecting
Connect to an analog line, wireless DECT telephone/mobile phone or PC as illustrated:
·Plug the conference phone into the mains using the power adapter as illustrated.
·Place the conference phone in the middle of the table.
·An optional phone cable is required for connection to DECT/mobile phones.

B159 Series User Guide Page 15
Issue 02a (06 November 2017)IP Office™ Platform 10.0
Installation: Connecting
2.3 Set the Phone Region
The first time the phone is started, you need to select the region in which you are located. The conference phone then
automatically configures to the normal telecom network settings for that region. Your selected entry can be changed later
via this menu.
To set the phone's region:
1.Select > SETTINGS > REGION.
2.Select the region in which you are located and press OK to confirm.
2.4 Set the Phone Language
The phone supports a range of languages for the menu display.
To set the phone's menu language:
1.Select > SETTINGS > LANGUAGE.
2.Select the language you want and press OK to confirm.
2.5 Set the Phone Caller ID
The phone needs to be configured to match the caller ID signalling method used in your country or region. The table
below is a guideline for choosing the correct setting. If the caller ID is not working properly, select another setting or
contact your telephone service provider for further information.
To set the phone's call ID setting:
1.Select > SETTINGS > CALLER ID.
2.Select your choice.
Caller ID Standard
Country
Bellcore (Telcordia)
Canada (usually), USA, Australia, New Zealand, China, Hong Kong, Singapore.
ETSI
Austria, Belgium, Czech Republic, France, Germany, Italy, Luxemburg, Norway,
Poland, Spain, Slovenia, Switzerland, Turkey, South Africa, Taiwan.
BT (British Telecom)
United Kingdom
DTMF
Denmark, Finland, Greece, Iceland, Netherlands, Portugal, Sweden, China, India,
Saudi Arabia, Brazil, Uruguay.
3.Press OK to confirm.
2.6 Set the Phone Flash Recall Pulse Setting
The Flash/Recall signal sent when is pressed during a call. It is used to request a new line from the telephone system
to which the telephone is connected. Typically the length of the signal required varies between different countries and so
must be set correctly.
To set the phone's flash/recall pulse width:
1.Select > SETTINGS > FLASH.
2.Select your choice. Examples of settings are:
·100ms = Scandinavia, Europe, Siemens HiPath
·300ms = Germany, France, Israel
·500ms = USA
3.Press OK to confirm.

B159 Series User Guide Page 16
Issue 02a (06 November 2017)IP Office™ Platform 10.0
2.7 Configure the Conference Codes
To automate multiparty conferencing, the phone needs to be configured with codes that match those expected by the
telephone system to which it is connected. For example, by default IP Office systems use the system short code *47 to
let a user conference together their current and held calls.
In the actions below:
·To enter F, press the button.
·To backspace, press the button.
To set the phone's conference signalling settings:
1.Select > CONF GUIDE > SETTINGS.
2.At the ENQUIRY prompt, enter the command the telephone system uses to hold the current call and press OK.
For IP Office, enter Fand press OK.
3.At the CONFERENCE prompt, enter the command the telephone system uses to conference your held and current
calls together and press OK. For IP Office, enter F*47 and press OK.
4.At the RETURN prompt, enter the command your telephone system uses to switch between calls and press OK.
For IP Office, enter Fand press OK.
2.8 Connectivity Options
The phone can be connected to (make and receive calls) in several different ways. The default is to make and receive
calls via an analog connection to a telephone system such as IP Office.
To set the phones active connections:
1.Press the key.
2.Use the arrow buttons to select a connectivity option required. The options are:
·ANALOGUE = Analog telephone line.
·MOBILE = Mobile/DECT telephone.
·USB = Computer (VoIP). See VoIP Calls for more details.
·ANALOGUE+USB = Analog telephone line+computer.
·MOBILE+USB = Mobile/DECT telephone+computer.
3.Press OK to confirm your choice.
21

B159 Series User Guide Page 17
Issue 02a (06 November 2017)IP Office™ Platform 10.0
Answering and Making Calls
Chapter 3.

B159 Series User Guide Page 18
Issue 02a (06 November 2017)IP Office™ Platform 10.0
3. Answering and Making Calls
3.1 Answering Calls
A ring tone and the blue flashing LED indicates an incoming call.
To answer a call:
1.Press to answer.
2.The LEDs show a steady blue light. The duration of the call is shown on the display screen.
3.2 Making Calls
To make a call:
1.Either:
·Dial the number and press .
·Press and dial the number.
2.The number is called and the LEDs show a steady blue light. The duration of the call is shown on the display
screen.
3.3 Redialing
To redial the previous number called:
1.Press an arrow button. The last number that you dialled appears on the display screen.
2.Use the arrow buttons to look through previously dialled numbers.
3.Press . The number you select is dialled.
3.4 Calling from the Phonebook
See Phonebook for instructions on adding and updating contacts in the phonebook.
To make a call from the phonebook:
1.Press and hold down a number button for two seconds.
2.The phonebook appears on the display screen. The pre-programmed names appear in alphabetical order, starting
with the number button’s first letter.
3.Use the arrow buttons to look through the phonebook.
4.Press . The contact you select is dialled.
28

B159 Series User Guide Page 19
Issue 02a (06 November 2017)IP Office™ Platform 10.0
Answering and Making Calls: Calling from the Phonebook
3.5 Making Three-Way Calls
The simplest way to set up a multi-party call is to use the conference guide . You can connect another party to an
existing call as follows.
To start a simple conference:
1.Press . A second dialling tone is heard.
2.Dial the second participant’s number and wait for an answer.
·If you don’t get an answer when you dial the second number, go back to the first call by pressing .
3.Press the button and then *47. All three participants are now linked together in one call.
3.6 Adjusting the Speaker Volume
To adjust the speaker volume:
1.Adjust the speaker volume using the buttons and .
Adjusting the speaker volume when two lines are connected
If you have selected double lines, you can adjust the volume level for each line. This is useful if the lines have different
volume levels.
1.Press the button or the button to display the current volume setting.
2.The current main volume appears on the display screen. Above it are two smaller volume indicators which can be
used to adjust the two connection lines.
3.Increase or decrease the speaker volume for both lines in the normal way, using the and buttons.
4.Use the arrow buttons to mark either of the connected lines.
5.Select a line and adjust its speaker volume using the and buttons.
3.7 Muting Calls
When a call is muted, you can still hear the other parties but they cannot hear you.
To mute a call:
1.Press to turn off the microphone. The LEDs change from blue to red. The other party cannot hear what you are
saying.
2.Press to reconnect the call.
3.8 Placing Calls on Hold
To hold a call:
1.Press to put the call on hold. The LEDs change from blue to flashing red. Both the microphone and the speaker
are turned off and the call is on hold.
2.Press to reconnect the call.
3.9 Ending Calls
To end a call:
1.End the call by pressing .
25

B159 Series User Guide Page 20
Issue 02a (06 November 2017)IP Office™ Platform 10.0
3.10 During a Call
3.10.1 Connecting a New Line
You can add another line or switch between connected lines during a call.
To connect a line to a call:
1.Press the button during the call. An indicator appears on the display screen in front of the selected line(s).
2.Use the arrow buttons to mark the line you want to connect and confirm your choice by pressing .
·If you selected USB or MOBILE, this line will open. You then connect the call via the computer or mobile
phone.
·If you selected ANALOGUE, you will hear a dialling tone. You then dial the number on the conference phone
or use the Phonebook.
3.Please note that an analog line and a mobile line cannot be used simultaneously. If you are using ANALOGUE or
ANALOGUE+USB as a line connection and you wish to connect MOBILE during a call, the ANALOGUE line will be
put on hold. This is indicated by a flashing LED on the display screen.
3.10.2 Putting a Line on Hold
To put a line on hold:
1.Press the button during the call.
2.Use the arrow buttons to mark the line you want to put on hold and press the button. The indicator in front of
the selected line starts to flash.
3.Repeat the above to reconnect the line.
3.10.3 Disconnecting a Line
To disconnect a line:
1.Press the button during the call.
2.Use the arrow buttons to mark the line you want to disconnect and confirm your choice by pressing .
3.The indicator in front of the selected line goes out and the line is disconnected. The other calls can continue.
Other manuals for B159 Series
4
Table of contents
Other Avaya Conference Phone manuals

Avaya
Avaya 2033 User manual

Avaya
Avaya B179 Instruction Manual

Avaya
Avaya B199 User manual

Avaya
Avaya B189 Assembly Instructions

Avaya
Avaya Digital Audio Conferencing Unit User manual

Avaya
Avaya B179 User manual

Avaya
Avaya 1030 User manual

Avaya
Avaya B159 Series User manual

Avaya
Avaya B159 Series User manual

Avaya
Avaya B199 User manual