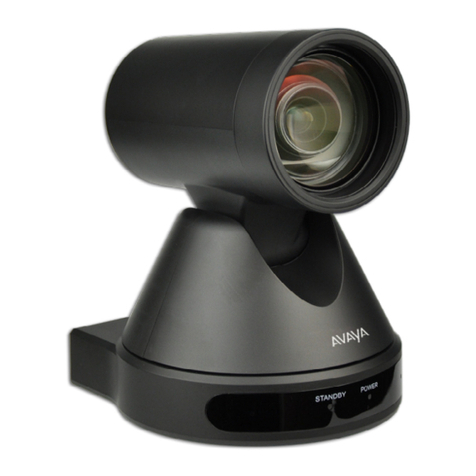
Avaya RC100 Guide

Using Avaya Room Camera RC100
Release 1.0
Issue 1
May 2022

© 2021-2022, Avaya Inc.
All Rights Reserved.
Notice
While reasonable efforts have been made to ensure that the
information in this document is complete and accurate at the time of
printing, Avaya assumes no liability for any errors. Avaya reserves
the right to make changes and corrections to the information in this
document without the obligation to notify any person or organization
of such changes.
Documentation disclaimer
“Documentation” means information published in varying mediums
which may include product information, operating instructions and
performance specifications that are generally made available to users
of products. Documentation does not include marketing materials.
Avaya shall not be responsible for any modifications, additions, or
deletions to the original published version of Documentation unless
such modifications, additions, or deletions were performed by or on
the express behalf of Avaya. End User agrees to indemnify and hold
harmless Avaya, Avaya's agents, servants and employees against all
claims, lawsuits, demands and judgments arising out of, or in
connection with, subsequent modifications, additions or deletions to
this documentation, to the extent made by End User.
Link disclaimer
Avaya is not responsible for the contents or reliability of any linked
websites referenced within this site or Documentation provided by
Avaya. Avaya is not responsible for the accuracy of any information,
statement or content provided on these sites and does not
necessarily endorse the products, services, or information described
or offered within them. Avaya does not guarantee that these links will
work all the time and has no control over the availability of the linked
pages.
Warranty
Avaya provides a limited warranty on Avaya hardware and software.
Refer to your sales agreement to establish the terms of the limited
warranty. In addition, Avaya’s standard warranty language, as well as
information regarding support for this product while under warranty is
available to Avaya customers and other parties through the Avaya
Support website: https://support.avaya.com/helpcenter/
getGenericDetails?detailId=C20091120112456651010 under the link
“Warranty & Product Lifecycle” or such successor site as designated
by Avaya. Please note that if You acquired the product(s) from an
authorized Avaya Channel Partner outside of the United States and
Canada, the warranty is provided to You by said Avaya Channel
Partner and not by Avaya.
“Hosted Service” means an Avaya hosted service subscription that
You acquire from either Avaya or an authorized Avaya Channel
Partner (as applicable) and which is described further in Hosted SAS
or other service description documentation regarding the applicable
hosted service. If You purchase a Hosted Service subscription, the
foregoing limited warranty may not apply but You may be entitled to
support services in connection with the Hosted Service as described
further in your service description documents for the applicable
Hosted Service. Contact Avaya or Avaya Channel Partner (as
applicable) for more information.
Hosted Service
THE FOLLOWING APPLIES ONLY IF YOU PURCHASE AN AVAYA
HOSTED SERVICE SUBSCRIPTION FROM AVAYA OR AN AVAYA
CHANNEL PARTNER (AS APPLICABLE), THE TERMS OF USE
FOR HOSTED SERVICES ARE AVAILABLE ON THE AVAYA
WEBSITE, HTTPS://SUPPORT.AVAYA.COM/LICENSEINFO UNDER
THE LINK “Avaya Terms of Use for Hosted Services” OR SUCH
SUCCESSOR SITE AS DESIGNATED BY AVAYA, AND ARE
APPLICABLE TO ANYONE WHO ACCESSES OR USES THE
HOSTED SERVICE. BY ACCESSING OR USING THE HOSTED
SERVICE, OR AUTHORIZING OTHERS TO DO SO, YOU, ON
BEHALF OF YOURSELF AND THE ENTITY FOR WHOM YOU ARE
DOING SO (HEREINAFTER REFERRED TO INTERCHANGEABLY
AS “YOU” AND “END USER”), AGREE TO THE TERMS OF USE. IF
YOU ARE ACCEPTING THE TERMS OF USE ON BEHALF A
COMPANY OR OTHER LEGAL ENTITY, YOU REPRESENT THAT
YOU HAVE THE AUTHORITY TO BIND SUCH ENTITY TO THESE
TERMS OF USE. IF YOU DO NOT HAVE SUCH AUTHORITY, OR IF
YOU DO NOT WISH TO ACCEPT THESE TERMS OF USE, YOU
MUST NOT ACCESS OR USE THE HOSTED SERVICE OR
AUTHORIZE ANYONE TO ACCESS OR USE THE HOSTED
SERVICE.
Licenses
THE SOFTWARE LICENSE TERMS AVAILABLE ON THE AVAYA
WEBSITE, HTTPS://SUPPORT.AVAYA.COM/LICENSEINFO,
UNDER THE LINK “AVAYA SOFTWARE LICENSE TERMS (Avaya
Products)” OR SUCH SUCCESSOR SITE AS DESIGNATED BY
AVAYA, ARE APPLICABLE TO ANYONE WHO DOWNLOADS,
USES AND/OR INSTALLS AVAYA SOFTWARE, PURCHASED
FROM AVAYA INC., ANY AVAYA AFFILIATE, OR AN AVAYA
CHANNEL PARTNER (AS APPLICABLE) UNDER A COMMERCIAL
AGREEMENT WITH AVAYA OR AN AVAYA CHANNEL PARTNER.
UNLESS OTHERWISE AGREED TO BY AVAYA IN WRITING,
AVAYA DOES NOT EXTEND THIS LICENSE IF THE SOFTWARE
WAS OBTAINED FROM ANYONE OTHER THAN AVAYA, AN AVAYA
AFFILIATE OR AN AVAYA CHANNEL PARTNER; AVAYA
RESERVES THE RIGHT TO TAKE LEGAL ACTION AGAINST YOU
AND ANYONE ELSE USING OR SELLING THE SOFTWARE
WITHOUT A LICENSE. BY INSTALLING, DOWNLOADING OR
USING THE SOFTWARE, OR AUTHORIZING OTHERS TO DO SO,
YOU, ON BEHALF OF YOURSELF AND THE ENTITY FOR WHOM
YOU ARE INSTALLING, DOWNLOADING OR USING THE
SOFTWARE (HEREINAFTER REFERRED TO
INTERCHANGEABLY AS “YOU” AND “END USER”), AGREE TO
THESE TERMS AND CONDITIONS AND CREATE A BINDING
CONTRACT BETWEEN YOU AND AVAYA INC. OR THE
APPLICABLE AVAYA AFFILIATE (“AVAYA”).
Avaya grants You a license within the scope of the license types
described below, with the exception of Heritage Nortel Software, for
which the scope of the license is detailed below. Where the order
documentation does not expressly identify a license type, the
applicable license will be a Designated System License as set forth
below in the Designated System(s) License (DS) section as
applicable. The applicable number of licenses and units of capacity
for which the license is granted will be one (1), unless a different
number of licenses or units of capacity is specified in the
documentation or other materials available to You. “Software” means
computer programs in object code, provided by Avaya or an Avaya
Channel Partner, whether as stand-alone products, pre-installed on
hardware products, and any upgrades, updates, patches, bug fixes,
or modified versions thereto. “Designated Processor” means a single
stand-alone computing device. “Server” means a set of Designated
Processors that hosts (physically or virtually) a software application
to be accessed by multiple users. “Instance” means a single copy of
the Software executing at a particular time: (i) on one physical
machine; or (ii) on one deployed software virtual machine (“VM”) or
similar deployment.
License types
Designated System(s) License (DS). End User may install and use
each copy or an Instance of the Software only: 1) on a number of
Designated Processors up to the number indicated in the order; or 2)
up to the number of Instances of the Software as indicated in the
order, Documentation, or as authorized by Avaya in writing. Avaya
may require the Designated Processor(s) to be identified in the order
by type, serial number, feature key, Instance, location or other
specific designation, or to be provided by End User to Avaya through
electronic means established by Avaya specifically for this purpose.
Shrinkwrap License (SR). End User may install and use the Software
in accordance with the terms and conditions of the applicable license
agreements, such as “shrinkwrap” or “clickthrough” license
accompanying or applicable to the Software (“Shrinkwrap License”)
as indicated in the order, Documentation, or as authorized by Avaya
in writing.
Copyright
Except where expressly stated otherwise, no use should be made of
materials on this site, the Documentation, Software, Hosted Service,
or hardware provided by Avaya. All content on this site, the
documentation, Hosted Service, and the product provided by Avaya
including the selection, arrangement and design of the content is
owned either by Avaya or its licensors and is protected by copyright
and other intellectual property laws including the sui generis rights
relating to the protection of databases. You may not modify, copy,
reproduce, republish, upload, post, transmit or distribute in any way
any content, in whole or in part, including any code and software
unless expressly authorized by Avaya. Unauthorized reproduction,
transmission, dissemination, storage, and or use without the express
written consent of Avaya can be a criminal, as well as a civil offense
under the applicable law.
Virtualization
The following applies if the product is deployed on a virtual machine.
Each product has its own ordering code and license types. Unless
otherwise stated, each Instance of a product must be separately
licensed and ordered. For example, if the end user customer or
Avaya Channel Partner would like to install two Instances of the
same type of products, then two products of that type must be
ordered.
Third Party Components
“Third Party Components” mean certain software programs or
portions thereof included in the Software or Hosted Service may
contain software (including open source software) distributed under
third party agreements (“Third Party Components”), which contain
terms regarding the rights to use certain portions of the Software
(“Third Party Terms”). As required, information regarding distributed
Linux OS source code (for those products that have distributed Linux
OS source code) and identifying the copyright holders of the Third
Party Components and the Third Party Terms that apply is available
in the products, Documentation or on Avaya’s website at: https://
support.avaya.com/Copyright or such successor site as designated
by Avaya. The open source software license terms provided as Third
Party Terms are consistent with the license rights granted in these
Software License Terms, and may contain additional rights benefiting
You, such as modification and distribution of the open source
software. The Third Party Terms shall take precedence over these
Software License Terms, solely with respect to the applicable Third
Party Components to the extent that these Software License Terms
impose greater restrictions on You than the applicable Third Party
Terms.
The following applies only if the H.264 (AVC) codec is distributed with
the product. THIS PRODUCT IS LICENSED UNDER THE AVC
PATENT PORTFOLIO LICENSE FOR THE PERSONAL USE OF A
CONSUMER OR OTHER USES IN WHICH IT DOES NOT RECEIVE
REMUNERATION TO (i) ENCODE VIDEO IN COMPLIANCE WITH
THE AVC STANDARD (“AVC VIDEO”) AND/OR (ii) DECODE AVC
VIDEO THAT WAS ENCODED BY A CONSUMER ENGAGED IN A
PERSONAL ACTIVITY AND/OR WAS OBTAINED FROM A VIDEO
PROVIDER LICENSED TO PROVIDE AVC VIDEO. NO LICENSE IS
GRANTED OR SHALL BE IMPLIED FOR ANY OTHER USE.
ADDITIONAL INFORMATION MAY BE OBTAINED FROM MPEG LA,
L.L.C. SEE HTTP://WWW.MPEGLA.COM.
Service Provider
THE FOLLOWING APPLIES TO AVAYA CHANNEL PARTNER’S
HOSTING OF AVAYA PRODUCTS OR SERVICES. THE PRODUCT
OR HOSTED SERVICE MAY USE THIRD PARTY COMPONENTS
SUBJECT TO THIRD PARTY TERMS AND REQUIRE A SERVICE
PROVIDER TO BE INDEPENDENTLY LICENSED DIRECTLY FROM
THE THIRD PARTY SUPPLIER. AN AVAYA CHANNEL PARTNER’S
HOSTING OF AVAYA PRODUCTS MUST BE AUTHORIZED IN
WRITING BY AVAYA AND IF THOSE HOSTED PRODUCTS USE
OR EMBED CERTAIN THIRD PARTY SOFTWARE, INCLUDING
BUT NOT LIMITED TO MICROSOFT SOFTWARE OR CODECS,
THE AVAYA CHANNEL PARTNER IS REQUIRED TO
INDEPENDENTLY OBTAIN ANY APPLICABLE LICENSE
AGREEMENTS, AT THE AVAYA CHANNEL PARTNER’S EXPENSE,
DIRECTLY FROM THE APPLICABLE THIRD PARTY SUPPLIER.
WITH RESPECT TO CODECS, IF THE AVAYA CHANNEL
PARTNER IS HOSTING ANY PRODUCTS THAT USE OR EMBED
THE H.264 CODEC OR H.265 CODEC, THE AVAYA CHANNEL
PARTNER ACKNOWLEDGES AND AGREES THE AVAYA
CHANNEL PARTNER IS RESPONSIBLE FOR ANY AND ALL
RELATED FEES AND/OR ROYALTIES. THE H.264 (AVC) CODEC
IS LICENSED UNDER THE AVC PATENT PORTFOLIO LICENSE
FOR THE PERSONAL USE OF A CONSUMER OR OTHER USES
IN WHICH IT DOES NOT RECEIVE REMUNERATION TO: (I)
ENCODE VIDEO IN COMPLIANCE WITH THE AVC STANDARD
(“AVC VIDEO”) AND/OR (II) DECODE AVC VIDEO THAT WAS
ENCODED BY A CONSUMER ENGAGED IN A PERSONAL
ACTIVITY AND/OR WAS OBTAINED FROM A VIDEO PROVIDER
LICENSED TO PROVIDE AVC VIDEO. NO LICENSE IS GRANTED
OR SHALL BE IMPLIED FOR ANY OTHER USE. ADDITIONAL
INFORMATION FOR H.264 (AVC) AND H.265 (HEVC) CODECS
MAY BE OBTAINED FROM MPEG LA, L.L.C. SEE HTTP://
WWW.MPEGLA.COM.
Compliance with Laws
You acknowledge and agree that it is Your responsibility for
complying with any applicable laws and regulations, including, but not
limited to laws and regulations related to call recording, data privacy,
intellectual property, trade secret, fraud, and music performance
rights, in the country or territory where the Avaya product is used.
Preventing Toll Fraud
“Toll Fraud” is the unauthorized use of your telecommunications
system by an unauthorized party (for example, a person who is not a
corporate employee, agent, subcontractor, or is not working on your
company's behalf). Be aware that there can be a risk of Toll Fraud
associated with your system and that, if Toll Fraud occurs, it can
result in substantial additional charges for your telecommunications
services.
Avaya Toll Fraud intervention
If You suspect that You are being victimized by Toll Fraud and You
need technical assistance or support, call Technical Service Center
Toll Fraud Intervention Hotline at +1-800-643-2353 for the United
States and Canada. For additional support telephone numbers, see
the Avaya Support website: https://support.avaya.com or such
successor site as designated by Avaya.
Security Vulnerabilities
Information about Avaya’s security support policies can be found in
the Security Policies and Support section of https://
support.avaya.com/security.
Suspected Avaya product security vulnerabilities are handled per the
Avaya Product Security Support Flow (https://
support.avaya.com/css/P8/documents/100161515).
Downloading Documentation
For the most current versions of Documentation, see the Avaya
Support website: https://support.avaya.com, or such successor site
as designated by Avaya.
Contact Avaya Support
See the Avaya Support website: https://support.avaya.com for
product or Hosted Service notices and articles, or to report a problem
with your Avaya product or Hosted Service. For a list of support
telephone numbers and contact addresses, go to the Avaya Support
website: https://support.avaya.com (or such successor site as
designated by Avaya), scroll to the bottom of the page, and select
Contact Avaya Support.
Regulatory Statements
General Safety Warning
• Ensure that you:
- Do not operate the device near water.
- Do not use the device during a lightning storm.
- Do not report a gas leak while in the vicinity of the leak.
• Do not place a naked flame source, such as lighted candles,
on or near the device.
• Do not intentionally hit the device or place heavy or sharp
objects on the device.
• Do not attempt to repair the device yourself. Always use a
qualified service agent to perform adjustments and repairs.
• Keep the device away from benzene, diluents, and other
chemicals.
Industry Canada (IC) Statements
This Class B digital apparatus complies with Canadian ICES-003.
Cet appareil numérique de la classe B est conformeà la norme
NMB-003 du Canada.

USA / FCC Part 15
This equipment has been tested and found to comply with the limits
for a Class B digital device, pursuant to part 15 of the FCC Rules.
These limits are designed to provide reasonable protection against
harmful interference in a residential installation. This equipment
generates, uses and can radiate radio frequency energy and, if not
installed and used in accordance with the instructions, may cause
harmful interference to radio communications. However, there is no
guarantee that interference will not occur in a particular installation. If
this equipment does cause harmful interference to radio or television
reception, which can be determined by turning the equipment off and
on, the user is encouraged to try to correct the interference by one or
more of the following measures:
• Reorient or relocate the receiving antenna.
• Increase the separation between the equipment and receiver.
• Connect the equipment into an outlet on a circuit different from
that to which the receiver is connected.
• Consult the dealer or an experienced radio/TV technician for
help.
Japan Statements
Class B Statement
This is a Class B product based on the standard of the VCCI Council.
If this is used near a radio or television receiver in a domestic
environment, it may cause radio interference. Install and use the
equipment according to the instruction manual.
注意事項
•本製品は室内用に設計されています。
•本製品は金属または磁石がある所では性能が低下する恐れが
あります。
•本製品は誘導性技術を利用する通信装置であり, 13.56MHz の
周波数を使っています。
製品の任意的な分解, 修正, 部品の除去などの作業は製品の特
性に影響を与えます。
•製品に供給される電圧はノイズに対する影響を減らすために
安定的でなければなりません。
電源供給端子から過度な電圧が入力されないようにお願いし
ます。
•製品に物理的または化学的な衝撃を与えないようにお願いし
ます。
•製品を静電気から保護するために試験治工具, ワークベンチ,
作業者の身体などに接地処理 した状態で作業を遂行してくだ
さい。
•安全のために製品を扱う時は手袋の着用をお願いします。
•他の無線器機からの障害を防止するために製品が露出しない
ようにお願いします。
•強い磁場がある所には製品の性能に悪い影響を与えますので
設置しないでください。
•本製品を組み込まれる場合は、組み込んだ製品の取り扱い説
明書等に 「電波法に基づく誘導式読み書き通信設備の型式指
定を受けた無線設備を内蔵しています」
Denan Power Cord Statement
Danger:
Please be careful of the following while installing the
equipment:
• Please only use the connecting cables, power cord, and
AC adapters shipped with the equipment or specified by
Avaya to be used with the equipment. If you use any
other equipment, it may cause failures, malfunctioning,
or fire.
• Power cords shipped with this equipment must not be
used with any other equipment. In case the above
guidelines are not followed, it may lead to death or
severe injury.
本製品を安全にご使用頂くため、以下のことにご注意ください。
•接続ケーブル、電源コード、AC アダプタなどの部品は、必ず
製品に同梱されております添付品または指定品をご使用くだ
さい。添付品指定品以外の部品をご使用になると故障や動作
不良、火災の原因となることがあります。
•同梱されております付属の電源コードを他の機器には使用し
ないでください。上記注意事項を守らないと、死亡や大怪我
など人身事故の原因となることがあります。
EU Countries
This device when installed complies with the essential requirements
and other relevant provisions of EMC Directive 2014/30/EU and LVD
Directive 2014/35/EU. A copy of the Declaration may be obtained
from http://support.avaya.com or Avaya Inc., 2605 Meridian Parkway,
Suite 200, Durham, NC 27713 USA.
This product has been tested and found to comply with the limits for
Class B equipment according to European Standards harmonized in
the Directives in compliance. The limits for Class B equipment were
derived for the domestic environment.
Trademarks
The trademarks, logos and service marks (“Marks”) displayed in this
site, the Documentation, Hosted Service(s), and product(s) provided
by Avaya are the registered or unregistered Marks of Avaya, its
affiliates, its licensors, its suppliers, or other third parties. Users are
not permitted to use such Marks without prior written consent from
Avaya or such third party which may own the Mark. Nothing
contained in this site, the Documentation, Hosted Service(s) and
product(s) should be construed as granting, by implication, estoppel,
or otherwise, any license or right in and to the Marks without the
express written permission of Avaya or the applicable third party.
Avaya is a registered trademark of Avaya Inc.
All non-Avaya trademarks are the property of their respective owners.

Contents
Chapter 1: Introduction............................................................................................................ 7
Purpose.................................................................................................................................. 7
Chapter 2: Avaya Room Camera RC100 overview................................................................. 8
Avaya Room Camera RC100 safety warnings........................................................................... 8
Avaya Room Camera RC100 overview..................................................................................... 9
Avaya Room Camera RC100 main parts................................................................................. 11
Avaya Room Camera RC100 remote control unit..................................................................... 12
Avaya Room Camera RC100 Rotary selector settings.............................................................. 13
Chapter 3: Avaya Room Camera RC100 Packing list.......................................................... 15
Avaya Room Camera RC100 packing list................................................................................ 15
Installing Avaya Room Camera RC100 using wall mount bracket ............................................. 16
Chapter 4: Setting up Avaya Room Camera RC100............................................................ 19
Configuring Avaya Room Camera RC100 as IP camera for Avaya CU360................................. 19
Configuring Avaya Room Camera RC100 as USB camera for Avaya CU360............................. 20
Logging in to the Avaya CU360 web interface.......................................................................... 22
Enabling the Avaya CU360 advanced settings......................................................................... 22
Configuring Avaya Room Camera RC100 as the main HD camera for Avaya XT Series.............. 23
Configuring Avaya Room Camera RC100 as an additional HD camera for Avaya XT Series........ 24
Configuring Avaya Room Camera RC100 as USB camera for Avaya XT Series......................... 26
Logging in to the Avaya XT Series web interface...................................................................... 27
Enabling the Avaya XT Series advanced settings..................................................................... 28
VISCA-cross cable for Avaya Room Camera RC100................................................................ 29
Configuring Avaya Room Camera RC100 as USB camera for your laptop................................. 29
Configuring Avaya Room Camera RC100 for Avaya Vantage™.................................................. 30
Avaya Room Camera RC100 coding capacity limitation............................................................ 30
Avaya Room Camera RC100 menu configuration.................................................................... 36
Menu Explanation............................................................................................................ 38
Image field descriptions................................................................................................... 38
Exposure field descriptions............................................................................................... 39
Colortone field descriptions.............................................................................................. 39
Camera field descriptions................................................................................................. 39
PTZ field descriptions...................................................................................................... 39
System field descriptions................................................................................................. 40
Resetting default values using the Avaya Room Camera RC100 remote control......................... 40
Resetting Avaya Room Camera RC100 to factory values......................................................... 40
Chapter 5: Maintenance......................................................................................................... 42
Upgrading Avaya Room Camera RC100................................................................................. 42
Chapter 6: Resources............................................................................................................. 43
Documentation...................................................................................................................... 43
May 2022 Using Avaya Room Camera RC100 5
Comments on this document? [email protected]

Support................................................................................................................................ 43
Using the Avaya InSite Knowledge Base........................................................................... 43
Contents
May 2022 Using Avaya Room Camera RC100 6
Comments on this document? [email protected]

Chapter 1: Introduction
Purpose
This document describes how to use the Avaya Room Camera RC100.
This document is intended for people who want to learn how to use the Avaya Room Camera
RC100.
May 2022 Using Avaya Room Camera RC100 7
Comments on this document? [email protected]

Chapter 2: Avaya Room Camera RC100
overview
Avaya Room Camera RC100 safety warnings
Follow these safety instructions when setting up and using Avaya Room Camera RC100:
• Use only the power source provided with Avaya Room Camera RC100 when used as stand-
alone.
• Take proper safety precautions when handling the AC power plug.
• Ensure that the plug is inserted into the socket securely.
• Do not overload wall sockets, extension cords or multi-way plug boards as this may cause
fire or electric shock.
• Do not place Avaya Room Camera RC100 where the cord can be stepped on as this may
result in fraying or damage to the lead or the plug.
• Do not block openings in the Avaya Room Camera RC100 case as poor ventilation may lead
to overheating the camera. Do not place Avaya Room Camera RC100 on a sofa, rug, or
other soft surfaces.
• Do not push any objects through Avaya Room Camera RC100 openings.
• Do not allow any liquid to spill to Avaya Room Camera RC100.
• Refer all servicing to licensed service personnel.
• Unplug Avaya Room Camera RC100 and remove the batteries from the remote control if they
are not going to be used for an extended period. Do not place Avaya Room Camera RC100
or remote control on top of vibrating equipment or heated objects, such as an endpoint or
computer.
• To reduce the risk of fire or electric shock, do not expose Avaya Room Camera RC100 to rain
or moisture.
• Unplug Avaya Room Camera RC100 from the wall outlet and refer servicing to licensed
service personnel:
- If the power cord or plug becomes damaged or frayed.
- If the liquid is spilled on Avaya Room Camera RC100 or Avaya Room Camera RC100 has
been exposed to rain or water.
May 2022 Using Avaya Room Camera RC100 8
Comments on this document? [email protected]

Note:
Using an incorrect battery type in the remote control may result in a breakdown. Follow local
instructions on how to dispose of used batteries.
Avaya Room Camera RC100 overview
Avaya Room Camera RC100 is a flexible and high-end solution covering a broad spectrum of
room sizes and use cases for high-end features and connectivity.
Avaya Room Camera RC100 has the following features:
• Excellent video quality with a maximum resolution of 2160p@60fps.
• Ultra HD 60fps camera, with 24x Full HD Zoom and 12x Ultra HD Optical Zoom.
• Used as an HDMI camera and support up to 2160p@60fps resolution.
• USB connectivity allows easy interoperability with laptops up to 2160p@30fps resolution.
• Avaya Room Camera RC100 allows easy connectivity with Avaya CU360 and Avaya XT
Series.
• IP connectivity makes Avaya Room Camera RC100 suitable for video surveillance and
extends the video range of Avaya CU360 up to 1080p@30fps resolution.
• Line-level type audio source routed to the HDMI and USB interfaces.
Avaya Room Camera RC100 Technical Specifications
Features Description
Camera
Image Sensor 1/2.8" 4K CMOS, 8.46MP
Focal Lens f=3.4mm-40.3mm
Iris F1.8-F3.6
Optical Zoom 12x
Field of view 80.5° ~ 7.6°
Image Auto Focus, Auto Exposure, Auto White Balance
Video Format Up to 4Kp60
Video Compression H.264 and MJPG
S/N ≥55dB
DNR 2D&3D
Features Description
Function
Pan Angle -130°~+130°
Table continues…
Avaya Room Camera RC100 overview
May 2022 Using Avaya Room Camera RC100 9
Comments on this document? [email protected]

Features Description
Function
Tilt Angle -30°~+90°
Pan Speed 0.2°~80°/s
Tilt Speed 0.2°~60°/s
Preset Number • Up to 12 through Avaya Room Camera RC100
Remote Control
• Up to 64 through IP with Avaya CU360
• Up to 122 through VISCA and USB with Avaya XT
Series
• Up to 122 through USB through Avaya CU360
Features Description
Interfaces
HDMI 1×HDMI 2.0
Video resolution: up to 4Kp60
Ethernet (LAN) 1×10M/100M/1000M RJ45, self-adaptation ethernet
port
Video resolution: up to 4Kp30
Video Format: H264
USB Interface 1×USB 2.0
UVC1.5 protocol
UAC
Video Format: H264/MJPEG
Video Resolution: up to 4Kp30
Audio Input 1x jack 3.5mm LINE LEVEL
Control 1×RS-232 IN,1×RS-232 OUT
Rotary Selector F as default for automatic video format
Power DC12V
Features Description
General
Protocol VISCA
Power Consumption Less than 13W
Working Environment Temperature: 0 ~ +40°C, Humidity: 10%RH ~
90%RH
Dimension (LxWxH) 250mm×136mm×165mm
Weight Less than 2kg
Color Black
Avaya Room Camera RC100 overview
May 2022 Using Avaya Room Camera RC100 10
Comments on this document? [email protected]

Avaya Room Camera RC100 main parts
No Interface
1 Rotary Selector (SYS-SEL)
Table continues…
Avaya Room Camera RC100 main parts
May 2022 Using Avaya Room Camera RC100 11
Comments on this document? [email protected]

No Interface
2 HDMI
3 USB
4 Reset pinhole
5 LAN
6 Audio In
7 RS232-IN
8 RS232-OUT
9 Power(DC12V)
10 Anti-theft lock
11 Camera Module
Avaya Room Camera RC100 remote control unit
Avaya Room Camera RC100 supports a remote control unit.
Avaya Room Camera RC100 overview
May 2022 Using Avaya Room Camera RC100 12
Comments on this document? [email protected]

Key no. Key name Function
1 Menu Press the button to enter the OSD
menu.
2 Zoom Out Press the button to zoom out.
3 Tilt • In menu mode, set menu
options.
• In non-menu mode, use the
button for vertical adjustment of
the screen.
4 Home • In menu mode, confirm to enter.
• In non-menu mode, the screen
returns to the original position.
5 Focus Near Press the button to focus near.
6 Set Preset Press the button, then press the
number button to set preset
7 Auto Focus Press the button to focus
automatically.
8 Power button Turn on or off the camera.
9 Zoom In Press the button to zoom in.
10 Pan • In menu mode, set menu
options.
• In non-menu mode, use the
button for vertical adjustment of
the screen.
11 Focus Far Press the button to focus far.
12 Back In menu mode, press the button
to go back to the previous menu.
13 Preset Setting Press the number button to call
the corresponding preset.
Avaya Room Camera RC100 Rotary selector settings
Before installing and operating Avaya Room Camera RC100, make sure the Rotary selector is set
to F (The default setting is AUTO). For advanced settings, you can select the desired specific
video format based on the following table:
Rotary selector
0 1080P60
Table continues…
Avaya Room Camera RC100 Rotary selector settings
May 2022 Using Avaya Room Camera RC100 13
Comments on this document? [email protected]

Rotary selector
1 1080P50
2 720P60
3 720P50
4 1080P30
5 1080P25
6 4KP25
7 4KP30
8 4KP50
9 4KP60
A 1080i60
B 1080i50
C --
D --
E --
F AUTO as default
After configuring the video format, restart the Avaya Room Camera RC100.
Avaya Room Camera RC100 overview
May 2022 Using Avaya Room Camera RC100 14
Comments on this document? [email protected]

Chapter 3: Avaya Room Camera RC100
Packing list
Avaya Room Camera RC100 packing list
Avaya Room Camera RC100 contains the following standard equipment:
• Camera
• Remote Control
• USB Cable
• AC/DC Adapter
• HDMI Cable
• Bracket
• Four sets of screws and plastic dowel
• 1/4"-20 UNC screw
• Two AAA Batteries
May 2022 Using Avaya Room Camera RC100 15
Comments on this document? [email protected]

Installing Avaya Room Camera RC100 using wall mount
bracket
About this task
You can install Avaya Room Camera RC100 on a wall using the wall mount bracket.
Avaya Room Camera RC100 Packing list
May 2022 Using Avaya Room Camera RC100 16
Comments on this document? [email protected]

Procedure
1. Drill four holes according to the hole diameter and position of the wall bracket.
Installing Avaya Room Camera RC100 using wall mount bracket
May 2022 Using Avaya Room Camera RC100 17
Comments on this document? [email protected]

2. Install the plastic expansion tube on the hole.
3. Fix the wall bracket at the installation position with expansion screws.
4. Place Avaya Room Camera RC100 on the wall bracket, and fix Avaya Room Camera
RC100 with screws.
Avaya Room Camera RC100 Packing list
May 2022 Using Avaya Room Camera RC100 18
Comments on this document? [email protected]

Chapter 4: Setting up Avaya Room Camera
RC100
Configuring Avaya Room Camera RC100 as IP camera for
Avaya CU360
About this task
You can use Avaya Room Camera RC100 as an IP camera on Avaya CU360.
Avaya CU360 does not support audio when using Avaya Room Camera RC100 as an IP camera.
Note:
If the camera uses both the USB and ethernet interfaces simultaneously, the stream sent over
the ethernet and USB have the same resolutions.
Before you begin
• Connect one side of the ethernet cable to the Avaya Room Camera RC100 LAN port and the
other side to your IP Network or connect Avaya CU360 through Wi-Fi.
• Connect the power supply plug to the DC IN 12V port of the Avaya Room Camera RC100
and turn on the Avaya CU360 endpoint.
• Enable the advanced settings for the Avaya CU360 endpoint.
• Log in to the Avaya CU360 web interface.
May 2022 Using Avaya Room Camera RC100 19
Comments on this document? [email protected]

Procedure
1. Do one of the following:
• On the endpoint main menu, click Configure.
• On the web interface, click Administrator Settings.
2. On the endpoint, click Advanced.
The default PIN for Advanced settings on the endpoint is 1234.
If your administrator configures a PIN to access the advanced settings on the endpoint,
Avaya CU360 prompts you to enter the PIN. After you enter the PIN, Avaya CU360
displays the Advanced window.
3. On the endpoint and web interface, click I/O Connections > Cameras > IP.
4. Configure the following fields:
•Enable: Select Yes to enable the IP camera.
•URL: Enter the IP address of the Avaya Room Camera RC100.
rtsp://admin:@ip_address/ch1
•Control Camera: Yes
Use the remote control to view the IP address of Avaya Room Camera RC100 from the
Network section.
Default parameters for Avaya Room Camera RC100 are:
•Control Protocol
-Username: admin
-Password: 123456
-Port: 80
5. On the web interface, click Save.
Related links
Avaya Room Camera RC100 coding capacity limitation on page 30
Logging in to the Avaya CU360 web interface on page 22
Enabling the Avaya CU360 advanced settings on page 22
Configuring Avaya Room Camera RC100 as USB camera
for Avaya CU360
About this task
You can use Avaya Room Camera RC100 as a USB camera on Avaya CU360.
Setting up Avaya Room Camera RC100
May 2022 Using Avaya Room Camera RC100 20
Comments on this document? [email protected]
Other manuals for RC100
1
Table of contents
Other Avaya Digital Camera manuals

Avaya
Avaya HC020 How to use

Avaya
Avaya XT Flex User manual

Avaya
Avaya HC020 User manual

Avaya
Avaya IX Tracking Camera TC220 Guide

Avaya
Avaya HC020 User manual

Avaya
Avaya IX Tracking Camera TC220 User manual

Avaya
Avaya Huddle HC050 User manual

Avaya
Avaya XT Deluxe User manual

Avaya
Avaya HC020 User manual

Avaya
Avaya IX Tracking Camera TC220 How to use