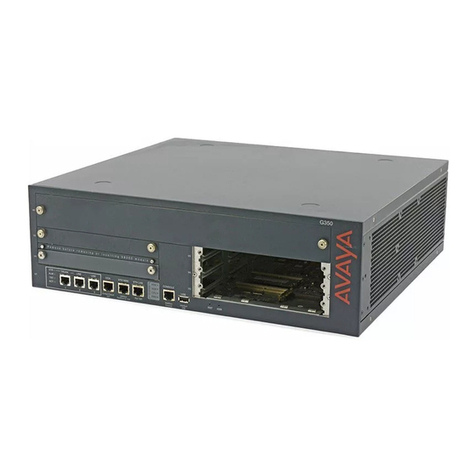
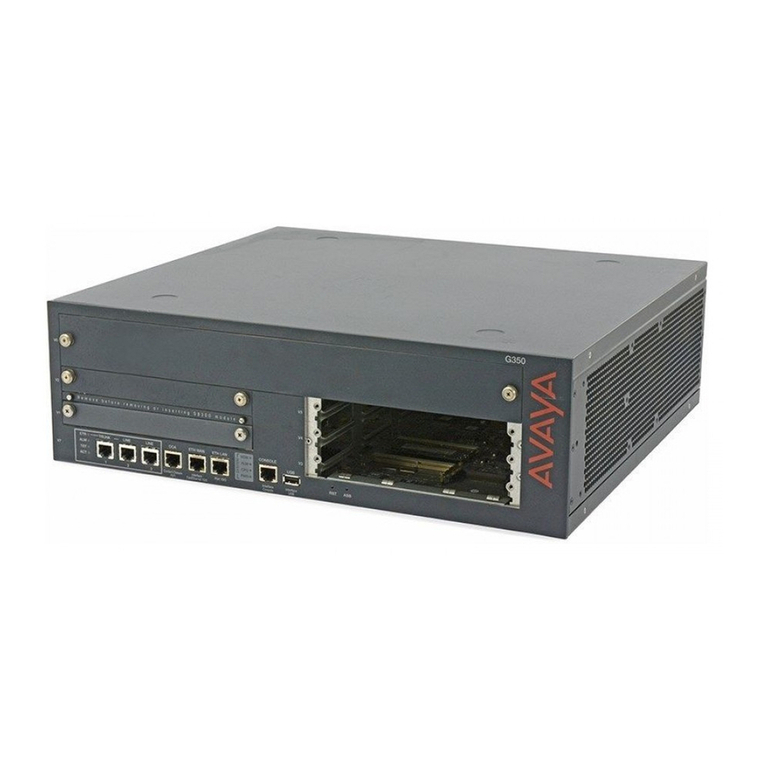
Avaya Media Gateway G350 Instruction Manual

Installing and Upgrading the Avaya
G350 Media Gateway
03-300394
Issue 3.1
June 2006

© 2006 Avaya Inc.
All Rights Reserved.
Notice
While reasonable efforts were made to ensure that the information in this
document was complete and accurate at the time of printing, Avaya Inc. can
assume no liability for any errors. Changes and corrections to the information
in this document may be incorporated in future releases.
For full legal page information, please see the complete document, Avaya
Legal Page for Hardware Documentation, Document number 03-600759.
To locate this document on our web site, simply go to
http://www.avaya.com/support and search for the document number in
the search box.
Documentation disclaimer
Avaya Inc. is not responsible for any modifications, additions, or deletions to
the original published version of this documentation unless such modifications,
additions, or deletions were performed by Avaya. Customer and/or End User
agree to indemnify and hold harmless Avaya, Avaya's agents, servants and
employees against all claims, lawsuits, demands and judgments arising out of,
or in connection with, subsequent modifications, additions or deletions to this
documentation to the extent made by the Customer or End User.
Link disclaimer
Avaya Inc. is not responsible for the contents or reliability of any linked Web
sites referenced elsewhere within this documentation, and Avaya does not
necessarily endorse the products, services, or information described or offered
within them. We cannot guarantee that these links will work all of the time and
we have no control over the availability of the linked pages.
Warranty
Avaya Inc. provides a limited warranty on this product. Refer to your sales
agreement to establish the terms of the limited warranty. In addition, Avaya’s
standard warranty language, as well as information regarding support for this
product, while under warranty, is available through the following Web site:
http://www.avaya.com/support
Copyright
Except where expressly stated otherwise, the Product is protected by copyright
and other laws respecting proprietary rights. Unauthorized reproduction,
transfer, and or use can be a criminal, as well as a civil, offense under the
applicable law.
Avaya support
Avaya provides a telephone number for you to use to report problems or to ask
questions about your product. The support telephone number
is 1-800-242-2121 in the United States. For additional support telephone
numbers, see the Avaya Web site:
http://www.avaya.com/support
Issue 3.1 June 2006 3
About this book . . . . . . . . . . . . . . . . . . . . . . . . . . . . . . . 11
Overview . . . . . . . . . . . . . . . . . . . . . . . . . . . . . . . . . . . . . . . . 11
Audience . . . . . . . . . . . . . . . . . . . . . . . . . . . . . . . . . . . . . . . . 11
Downloading this book and updates from the Web . . . . . . . . . . . . . . . . . 11
Downloading this book . . . . . . . . . . . . . . . . . . . . . . . . . . . . . . 12
Safety labels and security alert labels . . . . . . . . . . . . . . . . . . . . . . . . 12
Related resources . . . . . . . . . . . . . . . . . . . . . . . . . . . . . . . . . . . 13
Technical assistance . . . . . . . . . . . . . . . . . . . . . . . . . . . . . . . . . 14
Within the US. . . . . . . . . . . . . . . . . . . . . . . . . . . . . . . . . . . . 14
International . . . . . . . . . . . . . . . . . . . . . . . . . . . . . . . . . . . . 14
Trademarks. . . . . . . . . . . . . . . . . . . . . . . . . . . . . . . . . . . . . . . 14
Sending us comments . . . . . . . . . . . . . . . . . . . . . . . . . . . . . . . . 15
Chapter 1: Introduction . . . . . . . . . . . . . . . . . . . . . . . . . . . 17
Chapter 2: Before you install . . . . . . . . . . . . . . . . . . . . . . . . 19
Before going to the site . . . . . . . . . . . . . . . . . . . . . . . . . . . . . . . . 19
Read the planning documentation . . . . . . . . . . . . . . . . . . . . . . . . 19
Prepare required equipment . . . . . . . . . . . . . . . . . . . . . . . . . . . 20
Obtain the G350 serial number . . . . . . . . . . . . . . . . . . . . . . . . . . 20
Obtain RFA access . . . . . . . . . . . . . . . . . . . . . . . . . . . . . . . . 21
Check license file and Avaya Communication
Manager versions for a Local Survivable Processor (LSP) . . . . . . . . . . 21
Check license file for VPN. . . . . . . . . . . . . . . . . . . . . . . . . . . . . 21
Download license and authentication files to your laptop . . . . . . . . . . . 22
Run the Automatic Registration Tool (ART)
for the RAS IP address. . . . . . . . . . . . . . . . . . . . . . . . . . . . . . 22
Download recent firmware . . . . . . . . . . . . . . . . . . . . . . . . . . . . 24
Obtain the Electronic Preinstallation Worksheet (EPW) . . . . . . . . . . . . 24
Site requirements . . . . . . . . . . . . . . . . . . . . . . . . . . . . . . . . . . . 24
Environmental verification . . . . . . . . . . . . . . . . . . . . . . . . . . . . 24
Power verification . . . . . . . . . . . . . . . . . . . . . . . . . . . . . . . . . 25
Grounding verification . . . . . . . . . . . . . . . . . . . . . . . . . . . . . . 25
Unpacking . . . . . . . . . . . . . . . . . . . . . . . . . . . . . . . . . . . . . . . 26
Chapter 3: Installing the Avaya G350 Media Gateway . . . . . . . . . . 29
Step 1: Mount the G350 chassis . . . . . . . . . . . . . . . . . . . . . . . . . . . 29
Mounting the G350 in a rack . . . . . . . . . . . . . . . . . . . . . . . . . . . 30
Mounting the G350 on a wall . . . . . . . . . . . . . . . . . . . . . . . . . . . 33
Placing the G350 on a table . . . . . . . . . . . . . . . . . . . . . . . . . . . . 34
Contents

Contents
4 Installation and Upgrades for the Avaya G350 Media Gateway
Step 2: Install the media modules . . . . . . . . . . . . . . . . . . . . . . . . . . 34
Combination limitations. . . . . . . . . . . . . . . . . . . . . . . . . . . . . . 35
Allocating slots . . . . . . . . . . . . . . . . . . . . . . . . . . . . . . . . . . 35
Inserting the S8300 Media Server module . . . . . . . . . . . . . . . . . . . . 37
Inserting media modules . . . . . . . . . . . . . . . . . . . . . . . . . . . . . 39
Step 3: Attach ground conductors . . . . . . . . . . . . . . . . . . . . . . . . . . 40
General grounding requirements. . . . . . . . . . . . . . . . . . . . . . . 40
Approved grounds. . . . . . . . . . . . . . . . . . . . . . . . . . . . . . . 42
Connect the safety ground . . . . . . . . . . . . . . . . . . . . . . . . . . 43
Step 4: Connect power to the G350 . . . . . . . . . . . . . . . . . . . . . . . . . 44
Chapter 4: Connecting devices. . . . . . . . . . . . . . . . . . . . . . . 45
Step 1: Connecting data and voice devices . . . . . . . . . . . . . . . . . . . . . 45
Connecting a switch or a network data port . . . . . . . . . . . . . . . . . . . 46
Connecting a computer . . . . . . . . . . . . . . . . . . . . . . . . . . . . . . 47
Connecting a server . . . . . . . . . . . . . . . . . . . . . . . . . . . . . . . . 48
Connecting an IP telephone. . . . . . . . . . . . . . . . . . . . . . . . . . . . 49
Connecting an ISDN BRI station . . . . . . . . . . . . . . . . . . . . . . . . . 49
Connecting an analog telephone . . . . . . . . . . . . . . . . . . . . . . . . . 50
Connecting a DCP telephone . . . . . . . . . . . . . . . . . . . . . . . . . . . 52
Connecting an analog trunk . . . . . . . . . . . . . . . . . . . . . . . . . . . 53
Connecting an E1/T1 trunk . . . . . . . . . . . . . . . . . . . . . . . . . . . . 54
Connecting an ISDN BRI trunk . . . . . . . . . . . . . . . . . . . . . . . . . . 54
Connecting devices to the MM717 and MM716 media modules . . . . . . . . 55
Step 2: Install circuit protection . . . . . . . . . . . . . . . . . . . . . . . . . . . 56
Over-voltage and sneak-current protection . . . . . . . . . . . . . . . . . . . 56
Step 3: Connect to the Wide Area Network (WAN) . . . . . . . . . . . . . . . . . 56
Connecting a WAN to the G350. . . . . . . . . . . . . . . . . . . . . . . . . . 57
Connecting a USP WAN link . . . . . . . . . . . . . . . . . . . . . . . . . 57
Connecting an E1/T1 WAN link . . . . . . . . . . . . . . . . . . . . . . . . 57
Connecting an Ethernet WAN link . . . . . . . . . . . . . . . . . . . . . . 58
Connecting an external router to the G350 . . . . . . . . . . . . . . . . . . . 58
Step 4: Install the Coupled Bonding Conductor. . . . . . . . . . . . . . . . . . . 58
Step 5: Install the Avaya Partner Contact Closure Adjunct . . . . . . . . . . . . . 59
Chapter 5: Connecting and enabling a modem for remote access . . . 61
Connecting and enabling a modem (G350 without S8300) . . . . . . . . . . . . . 61
Enabling and connecting a serial modem . . . . . . . . . . . . . . . . . . . . 62
Enabling and connecting a USB modem. . . . . . . . . . . . . . . . . . . . . 67
Test the modem connection . . . . . . . . . . . . . . . . . . . . . . . . . . . 72

Contents
Issue 3.1 June 2006 5
Connecting and enabling a modem (G350 with S8300) . . . . . . . . . . . . . . . 73
Access the Maintenance web pages . . . . . . . . . . . . . . . . . . . . . . . 73
Change the modem settings on the Configure
Server Maintenance web pages . . . . . . . . . . . . . . . . . . . . . . . . . 76
Connect and enable the USB modem . . . . . . . . . . . . . . . . . . . . . . 77
Test the modem connection . . . . . . . . . . . . . . . . . . . . . . . . . . . 78
Chapter 6: Configuring the G350. . . . . . . . . . . . . . . . . . . . . . 79
Chapter 7: After installation. . . . . . . . . . . . . . . . . . . . . . . . . 81
Step 1: Test the installation . . . . . . . . . . . . . . . . . . . . . . . . . . . . . . 81
Testing telephones . . . . . . . . . . . . . . . . . . . . . . . . . . . . . . . . 81
Testing trunks . . . . . . . . . . . . . . . . . . . . . . . . . . . . . . . . . . . 82
LSP failover testing . . . . . . . . . . . . . . . . . . . . . . . . . . . . . . . . 82
Step 2: Remove the installation equipment . . . . . . . . . . . . . . . . . . . . . 84
Chapter 8: Upgrading media modules and devices. . . . . . . . . . . . 85
Adding a media module . . . . . . . . . . . . . . . . . . . . . . . . . . . . . . . . 85
Adding voice modules. . . . . . . . . . . . . . . . . . . . . . . . . . . . . . . 86
Adding WAN and LAN modules . . . . . . . . . . . . . . . . . . . . . . . . . 86
Adding a LAN device . . . . . . . . . . . . . . . . . . . . . . . . . . . . . . . . . 87
Connect the LAN device. . . . . . . . . . . . . . . . . . . . . . . . . . . . . . 87
Configure the LAN device on the G350 . . . . . . . . . . . . . . . . . . . . . 87
Test the LAN device . . . . . . . . . . . . . . . . . . . . . . . . . . . . . . . . 87
Adding a telephone . . . . . . . . . . . . . . . . . . . . . . . . . . . . . . . . . . 88
Connect the telephone . . . . . . . . . . . . . . . . . . . . . . . . . . . . . . 88
Configure the telephone on the G350 . . . . . . . . . . . . . . . . . . . . . . 88
Test the telephone . . . . . . . . . . . . . . . . . . . . . . . . . . . . . . . . . 88
Adding a trunk . . . . . . . . . . . . . . . . . . . . . . . . . . . . . . . . . . . . . 89
Order the trunk. . . . . . . . . . . . . . . . . . . . . . . . . . . . . . . . . . . 89
Special considerations when ordering an analog trunk . . . . . . . . . . 89
Connect the trunk . . . . . . . . . . . . . . . . . . . . . . . . . . . . . . . . . 90
Configure the trunk on the G350 . . . . . . . . . . . . . . . . . . . . . . . . . 90
Test the trunk . . . . . . . . . . . . . . . . . . . . . . . . . . . . . . . . . . . 90
Adding a WAN line. . . . . . . . . . . . . . . . . . . . . . . . . . . . . . . . . . . 90
Order the WAN line . . . . . . . . . . . . . . . . . . . . . . . . . . . . . . . . 91
Connect the WAN line . . . . . . . . . . . . . . . . . . . . . . . . . . . . . . . 91
Configure the WAN line on the G350 . . . . . . . . . . . . . . . . . . . . . . . 91
Test the WAN link . . . . . . . . . . . . . . . . . . . . . . . . . . . . . . . . . 91
Adding an Avaya Partner Contact Closure Adjunct. . . . . . . . . . . . . . . . . 91

Contents
6 Installation and Upgrades for the Avaya G350 Media Gateway
Chapter 9: Upgrading the Avaya
Communication Manager software . . . . . . . . . . . . . . 93
Upgrading the software using a CD-ROM drive . . . . . . . . . . . . . . . . . . . 93
Upgrading the software without a CD-ROM drive . . . . . . . . . . . . . . . . . . 94
Performing the upgrade. . . . . . . . . . . . . . . . . . . . . . . . . . . . . . . . 94
Chapter 10: Upgrading the G350 firmware. . . . . . . . . . . . . . . . . 95
Upgrading G350 firmware using Avaya Software Update Manager . . . . . . . . 96
Upgrading G350 firmware from the primary controller . . . . . . . . . . . . . . . 96
Upgrading G350 firmware using Gateway Installation Wizard (GIW). . . . . . . . 97
Upgrading G350 firmware and Avaya Communication
Manager software using Avaya Installation Wizard (IW). . . . . . . . . . . . . . 97
Upgrading G350 firmware using the CLI . . . . . . . . . . . . . . . . . . . . . . . 98
CLI Commands for upgrading G350 firmware . . . . . . . . . . . . . . . . . . 99
Preparing installation worksheets . . . . . . . . . . . . . . . . . . . . . . . . . . 100
Software and firmware upgrade files for upgrade. . . . . . . . . . . . . . . . 101
TFTP server values . . . . . . . . . . . . . . . . . . . . . . . . . . . . . . . . 101
Setting up a TFTP server . . . . . . . . . . . . . . . . . . . . . . . . . . . . . . . 102
Downloading G350 firmware files to a local TFTP server. . . . . . . . . . . . . . 103
Installing firmware from the TFTP server on the S8300 Media Server . . . . . 104
Chapter 11: Upgrading IP phone configuration and firmware files . . . 107
Overview . . . . . . . . . . . . . . . . . . . . . . . . . . . . . . . . . . . . . . . . 107
Administering the Upgrade . . . . . . . . . . . . . . . . . . . . . . . . . . . . . . 108
TFTP IP telephone upgrade example. . . . . . . . . . . . . . . . . . . . . . . . . 110
Failure scenarios and repair actions . . . . . . . . . . . . . . . . . . . . . . . 113
Upgrading Considerations . . . . . . . . . . . . . . . . . . . . . . . . . . . . . . 114
Chapter 12: Troubleshooting . . . . . . . . . . . . . . . . . . . . . . . . 115
One telephone stops working. . . . . . . . . . . . . . . . . . . . . . . . . . . . . 115
Several telephones stop working. . . . . . . . . . . . . . . . . . . . . . . . . . . 116
No power on the G350. . . . . . . . . . . . . . . . . . . . . . . . . . . . . . . . . 117
A trunk stops working. . . . . . . . . . . . . . . . . . . . . . . . . . . . . . . . . 117
A WAN line stops working . . . . . . . . . . . . . . . . . . . . . . . . . . . . . . 118

Contents
Issue 3.1 June 2006 7
Appendix A: Front panel description . . . . . . . . . . . . . . . . . . . 119
The front panel of the Avaya G350 Media Gateway chassis . . . . . . . . . . . . 119
Media module slots . . . . . . . . . . . . . . . . . . . . . . . . . . . . . . . . 120
System LEDs. . . . . . . . . . . . . . . . . . . . . . . . . . . . . . . . . . . . 120
Analog telephone ports and LEDs . . . . . . . . . . . . . . . . . . . . . . . . 121
Contact closure port (CCA) . . . . . . . . . . . . . . . . . . . . . . . . . . . . 121
Router port (ETH WAN) . . . . . . . . . . . . . . . . . . . . . . . . . . . . . . 122
Switch port (ETH LAN) . . . . . . . . . . . . . . . . . . . . . . . . . . . . . . 122
Console port (CON) . . . . . . . . . . . . . . . . . . . . . . . . . . . . . . . . 122
USB port . . . . . . . . . . . . . . . . . . . . . . . . . . . . . . . . . . . . . . 122
Reset (RST) and Alternate Software Bank (ASB) buttons. . . . . . . . . . . . 122
The front panel of the Avaya S8300 Media Server. . . . . . . . . . . . . . . . . . 123
S8300 Media Server ports . . . . . . . . . . . . . . . . . . . . . . . . . . . . . 123
S8300 Media Server port LEDs . . . . . . . . . . . . . . . . . . . . . . . . . . 124
The front panel of the Avaya MM312 media module. . . . . . . . . . . . . . . . . 124
MM312 ports . . . . . . . . . . . . . . . . . . . . . . . . . . . . . . . . . . . . 125
MM312 LEDs . . . . . . . . . . . . . . . . . . . . . . . . . . . . . . . . . . . . 125
The front panel of the Avaya MM314 media module. . . . . . . . . . . . . . . . . 125
MM314 ports . . . . . . . . . . . . . . . . . . . . . . . . . . . . . . . . . . . . 126
MM314 alarm LED . . . . . . . . . . . . . . . . . . . . . . . . . . . . . . . . . 126
MM314 port LEDs . . . . . . . . . . . . . . . . . . . . . . . . . . . . . . . . . 127
The front panel of the Avaya MM316 media module. . . . . . . . . . . . . . . . . 127
MM316 ports . . . . . . . . . . . . . . . . . . . . . . . . . . . . . . . . . . . . 128
MM314 alarm LED . . . . . . . . . . . . . . . . . . . . . . . . . . . . . . . . . 128
MM314 port LEDs . . . . . . . . . . . . . . . . . . . . . . . . . . . . . . . . . 129
The front panel of the Avaya MM340 media module. . . . . . . . . . . . . . . . . 129
MM340 ports . . . . . . . . . . . . . . . . . . . . . . . . . . . . . . . . . . . . 130
MM340 LEDs . . . . . . . . . . . . . . . . . . . . . . . . . . . . . . . . . . . . 130
The front panel of the Avaya MM342 media module. . . . . . . . . . . . . . . . . 131
MM342 ports . . . . . . . . . . . . . . . . . . . . . . . . . . . . . . . . . . . . 131
MM342 LEDs . . . . . . . . . . . . . . . . . . . . . . . . . . . . . . . . . . . . 131
The front panel of the Avaya MM710 media module. . . . . . . . . . . . . . . . . 132
MM710 ports . . . . . . . . . . . . . . . . . . . . . . . . . . . . . . . . . . . . 132
MM710 LEDs . . . . . . . . . . . . . . . . . . . . . . . . . . . . . . . . . . . . 132
The front panel of the Avaya MM711 media module. . . . . . . . . . . . . . . . . 134
MM711 ports . . . . . . . . . . . . . . . . . . . . . . . . . . . . . . . . . . . . 134
MM711 LEDs . . . . . . . . . . . . . . . . . . . . . . . . . . . . . . . . . . . . 134

Contents
8 Installation and Upgrades for the Avaya G350 Media Gateway
The front panel of the Avaya MM712 media module. . . . . . . . . . . . . . . . . 135
MM712 ports . . . . . . . . . . . . . . . . . . . . . . . . . . . . . . . . . . . . 135
MM712 LEDs . . . . . . . . . . . . . . . . . . . . . . . . . . . . . . . . . . . . 135
The front panel of the Avaya MM714 media module. . . . . . . . . . . . . . . . . 136
MM714 ports . . . . . . . . . . . . . . . . . . . . . . . . . . . . . . . . . . . . 136
MM714 LEDs . . . . . . . . . . . . . . . . . . . . . . . . . . . . . . . . . . . . 136
The front panel of the Avaya MM716 media module. . . . . . . . . . . . . . . . . 137
MM716 ports . . . . . . . . . . . . . . . . . . . . . . . . . . . . . . . . . . . . 137
MM716 LEDs . . . . . . . . . . . . . . . . . . . . . . . . . . . . . . . . . . . . 138
The front panel of the Avaya MM717 media module. . . . . . . . . . . . . . . . . 139
MM717 ports . . . . . . . . . . . . . . . . . . . . . . . . . . . . . . . . . . . . 139
MM717 LEDs . . . . . . . . . . . . . . . . . . . . . . . . . . . . . . . . . . . . 141
The front panel of the Avaya MM720 media module. . . . . . . . . . . . . . . . . 141
MM720 ports . . . . . . . . . . . . . . . . . . . . . . . . . . . . . . . . . . . . 141
MM720 LEDs . . . . . . . . . . . . . . . . . . . . . . . . . . . . . . . . . . . . 142
The front panel of the Avaya MM722 media module. . . . . . . . . . . . . . . . . 142
MM722 ports . . . . . . . . . . . . . . . . . . . . . . . . . . . . . . . . . . . . 142
MM722 LEDs . . . . . . . . . . . . . . . . . . . . . . . . . . . . . . . . . . . . 143
Appendix B: Technical specifications . . . . . . . . . . . . . . . . . . . 145
G350 Media Gateway specifications . . . . . . . . . . . . . . . . . . . . . . . . . 145
Power Cord Specifications . . . . . . . . . . . . . . . . . . . . . . . . . . . . . . 146
Appendix C: Running the Avaya Installation Wizard (Avaya IW). . . . . 147
Accessing Avaya IW. . . . . . . . . . . . . . . . . . . . . . . . . . . . . . . . . . 147
Preliminary screens . . . . . . . . . . . . . . . . . . . . . . . . . . . . . . . . . . 149
MGC configuration and upgrade . . . . . . . . . . . . . . . . . . . . . . . . . . . 151
Upgrading an existing MGC. . . . . . . . . . . . . . . . . . . . . . . . . . . . . . 155
Configuring the primary controller IP addresses . . . . . . . . . . . . . . . . . . 158
Gateway configuration . . . . . . . . . . . . . . . . . . . . . . . . . . . . . . . . 164
Firmware configuration . . . . . . . . . . . . . . . . . . . . . . . . . . . . . . . . 168
Modem configuration . . . . . . . . . . . . . . . . . . . . . . . . . . . . . . . 172
Telephony configuration . . . . . . . . . . . . . . . . . . . . . . . . . . . . . 175
Trunk configuration . . . . . . . . . . . . . . . . . . . . . . . . . . . . . . . . 178
Adding a trunk . . . . . . . . . . . . . . . . . . . . . . . . . . . . . . . . . 180
Modifying trunk parameters. . . . . . . . . . . . . . . . . . . . . . . . . . 181
Modifying IP route configuration . . . . . . . . . . . . . . . . . . . . . . . 182

Contents
Issue 3.1 June 2006 9
Displaying trunk status . . . . . . . . . . . . . . . . . . . . . . . . . . . . 183
Removing a trunk . . . . . . . . . . . . . . . . . . . . . . . . . . . . . . . 184
Configuring a trunk media module . . . . . . . . . . . . . . . . . . . . . . 185
Endpoint installation . . . . . . . . . . . . . . . . . . . . . . . . . . . . . . . 185
Alarm configuration . . . . . . . . . . . . . . . . . . . . . . . . . . . . . . . . 186
Password and final screens. . . . . . . . . . . . . . . . . . . . . . . . . . . . 189
Appendix D: Running the Gateway Installation Wizard (GIW) . . . . . . 195
Run the Gateway Installation Wizard (GIW) . . . . . . . . . . . . . . . . . . . . . 195
Connect a modem, if necessary . . . . . . . . . . . . . . . . . . . . . . . . . . . 213
Test the modem connection, if necessary . . . . . . . . . . . . . . . . . . . . . . 214
Index . . . . . . . . . . . . . . . . . . . . . . . . . . . . . . . . . . 215

Contents
10 Installation and Upgrades for the Avaya G350 Media Gateway

Issue 3.1 June 2006 11
About this book
Overview
Installing and Upgrading the Avaya G350 Media Gateway describes how to:
●Physically install the Avaya G350 Media Gateway
●Establish remote connectivity to the G350 via a modem
●Perform a basic initial configuration of the G350
●Upgrade G350 hardware and firmware
●Upgrade software for an Avaya S8300 Media Server installed in a G350
●Upgrade IP telephone configuration
Audience
This book is intended for the following audiences:
●Trained field installation personnel
●Technical support personnel
●Network engineers and technicians
●Authorized business partners
Downloading this book and updates from the Web
You can download the latest version of Installing and Upgrading the Avaya G350 Media
Gateway from the Avaya Web site. You must have access to the Internet, and a copy of Acrobat
Reader must be installed on your personal computer.
Avaya makes every effort to ensure that the information in this book is complete and accurate.
However, information can change after we publish this book. Therefore, the Avaya Web site
might also contain new product information and updates to the information in this book. You can
also download these updates from the Avaya Web site.

About this book
12 Installation and Upgrades for the Avaya G350 Media Gateway
Downloading this book
To download the latest version of this book:
1. Access the Avaya web site at http://www.avaya.com/support.
2. On the left side of the page, click Product Documentation.
The system displays the Welcome to Product Documentation page.
3. On the right side of the page, type 03-300394 and click Search.
The system displays the Product Documentation Search Results page.
4. Scroll down to find the latest issue number, and click the book title that is to the right of the
latest issue number.
5. On the next page, scroll down and click one of the following options:
-PDF Format to download the book in regular PDF format.
-ZIP Format to download the book as a zipped PDF file.
Safety labels and security alert labels
Observe all caution, warning, and danger statements to help prevent loss of service, equipment
damage, personal injury, and security problems. This book uses the following safety labels and
security alert labels:
!CAUTION:
CAUTION: A caution statement calls attention to a situation that can result in harm to
software, loss of data, or an interruption in service.
!WARNING:
WARNING: A warning statement calls attention to a situation that can result in harm to
hardware or equipment. A warning can also indicate the presence of a hazard
that could cause personal injury if the hazard is not avoided by following the
instructions provided.
!DANGER:
DANGER: A danger statement indicates the presence of a hazard that can result in severe
personal injury or death if the hazard is not avoided by following the instructions
provided.

Related resources
Issue 3.1 June 2006 13
ELECTROSTATIC ALERT:
ELECTROSTATIC ALERT: An ESD warning calls attention to situations that can result in ESD damage to electronic
components.
!SECURITY ALERT:
SECURITY ALERT: A security alert calls attention to a situation that can increase the potential for
unauthorized use of a telecommunications system.
Related resources
For more information on the Avaya G350 Media Gateway and related features, see the
following books:
Title Number
Overview for the Avaya G250 and Avaya G350 Media Gateways 03-300435
Quick Start for Hardware Installation: The Avaya G350 Media Gateway 03-300148
Administration for the Avaya G250 and Avaya G350 Media Gateways 03-300436
Avaya G250 and Avaya G350 CLI Reference 03-300437
Maintenance for the Avaya G250 and Avaya G350 Media Gateways 03-300438

About this book
14 Installation and Upgrades for the Avaya G350 Media Gateway
Technical assistance
Avaya provides the following resources for technical assistance.
Within the US
For help with:
●Feature administration and system applications, call the Avaya Technical Consulting
Support System at 1-800-225-7585
●Maintenance and repair, call the Avaya National Customer Care Support Line at
1-800-242-2121
●Toll fraud, call Avaya Toll Fraud Intervention at 1-800-643-2353
International
For all international resources, contact your local Avaya authorized dealer.
Trademarks
All trademarks identified by ® or ™ are registered trademarks or trademarks, respectively, of
Avaya Inc. All other trademarks are the property of their respective owners.

Sending us comments
Issue 3.1 June 2006 15
Sending us comments
Avaya welcomes your comments about this book. To reach us by:
●Mail, send your comments to:
Avaya Inc.
Product Documentation Group
Room B3-H13
1300 W. 120th Ave.
Westminster, CO 80234 USA
●E-mail, send your comments to:
●Fax, send your comments to:
1-303-538-1741
Ensure that you mention the name and number of this book, Installing and Upgrading the Avaya
G350 Media Gateway, 03-300394.

About this book
16 Installation and Upgrades for the Avaya G350 Media Gateway

Issue 3.1 June 2006 17
Chapter 1: Introduction
This guide explains how to install and upgrade the Avaya G350 Media Gateway and contains
the following chapters:
●Chapter 2: Before you install. Describes how to prepare for an installation of the G350.
●Chapter 3: Installing the Avaya G350 Media Gateway. Describes how to install the G350
chassis and media modules, install ground conductors, and connect power to the G350.
●Chapter 4: Connecting devices. Describes how to connect data and voice devices to the
G350.
●Chapter 5: Connecting and enabling a modem for remote access. Describes how to
connect a modem to the G350 to enable remote access.
●Chapter 6: Configuring the G350. Describes how to configure the G350.
●Chapter 7: After installation. Describes how to test an installation of the G350.
●Chapter 8: Upgrading media modules and devices. Describes how to add media modules
and devices to a G350 that is already installed.
●Chapter 9: Upgrading the Avaya Communication Manager software. Describes how to
upgrade the Avaya Communication Manager software that runs on the S8300 media
server.
●Chapter 10: Upgrading the G350 firmware. Describes how to upgrade the G350 firmware.
●Chapter 11: Upgrading IP phone configuration and firmware files. Describes how to
upgrade software and firmware on IP phones.
●Chapter 12: Troubleshooting. Provides basic troubleshooting information.
●Appendix A: Front panel description. Describes the G350 chassis front panel.
●Appendix B: Technical specifications. Provides the technical specifications of the G350.
●Appendix C: Running the Avaya Installation Wizard (Avaya IW). Describes the Avaya
Installation Wizard, which configures a G350 with an S8300.
●Appendix D: Running the Gateway Installation Wizard (GIW). Describes the Gateway
Installation Wizard, which configures a G350 without an S8300.

Introduction
18 Installation and Upgrades for the Avaya G350 Media Gateway

Issue 3.1 June 2006 19
Chapter 2: Before you install
Read this chapter carefully before you begin the installation. If you are installing the G350 at a
customer site, read this chapter before going to the customer site.
This chapter includes:
●Before going to the site on page 19
●Site requirements on page 24
●Unpacking on page 26
Before going to the site
Before going to the site, work through the following sections to prepare required information and
equipment.
Read the planning documentation
Before you begin the installation, read the planning documentation.
The planning documentation provides you with information about:
●Whether an S8300 Media Server module is included in the installation. The process of
installing the G350 is different depending on whether or not an S8300 is included.
●Which voice devices and data devices need to be connected to the G350.
●Whom to contact on site about delivery, system questions, or network concerns.
●Whom to contact at your home office in case of questions.
●Whether you need a special pass or an escort.
●How to gain entrance to the installation location if it is locked.
●Where to install equipment.
●Where to find a telephone near the installation location.

Before you install
20 Installation and Upgrades for the Avaya G350 Media Gateway
Prepare required equipment
You need the following equipment to assist you in the installation:
●One loop start analog trunk for connecting a modem
●A separate telephone line, if needed, for verbal communication during remote
configuration
You may also need some of the following equipment for mounting the G350:
●A crosspoint screwdriver if rack mounting or wall mounting the G350
●If you will mount the G350 on a flat wall: screws to fasten the G350 to the wall
●If you will mount the G350 on a non-flat wall:
●A 415 x 465 mm plywood board (US: 3/4 inch plywood), 20 mm (0.79 in) thick
●Wood screws to fasten the G350 to the plywood
●Screws to fasten the plywood board to the wall
If you are installing an S8300 media server in the G350, you also need:
●One USB modem. The only supported USB modem is the Multitech MultiModemUSB
MT5634ZBA-USB-V92.
●One USB CD-ROM drive.
●A laptop computer with MS Internet Explorer.
If you are not installing an S8300 media server in the G350, you also need:
●A PC on the local network with a CD-ROM drive.
●A laptop computer running Windows XP or Windows 2000 with a serial port recognized by
the operating system on the laptop. If the port is recognized, it is listed by the Device
Manager.
●A modem to connect to the G350 to enable dial-in configuration. The G350 supports the
Multitech MultiModemZBA MT5634ZBA-V-V92 serial modem and the Multitech
MultiModemUSB MT5634ZBA-USB-V92 USB modem.
Obtain the G350 serial number
You will need the serial number for the G350 to create the customer’s license file. To get this
number, look for the serial number sticker on the back of the G350 chassis. If the unit is
delivered directly to the customer and you will not have phone or LAN line access from the
customer site to access the rfa.avaya.com web site, this task will require a preliminary trip to the
customer site.
Other manuals for Media Gateway G350
11
Table of contents
Other Avaya Gateway manuals

Avaya
Avaya G860 Manual

Avaya
Avaya IG550 User manual

Avaya
Avaya G700 Quick start guide

Avaya
Avaya MCC1 Manual

Avaya
Avaya S\G203 Manual

Avaya
Avaya INDeX Media Gateway User manual

Avaya
Avaya G700 Installation guide

Avaya
Avaya G450 Manager User manual

Avaya
Avaya Media Gateway G350 User manual

Avaya
Avaya one-X G10 PSTN User manual

Avaya
Avaya BSGX4e User manual

Avaya
Avaya G700 Installation guide

Avaya
Avaya G700 User manual

Avaya
Avaya G450 Manager Instruction Manual

Avaya
Avaya G430 Quick start guide

Avaya
Avaya W310 Operating manual

Avaya
Avaya G700 User manual

Avaya
Avaya G450 Manager User manual

Avaya
Avaya G450 Manager User manual

Avaya
Avaya 3100 Quick setup guide