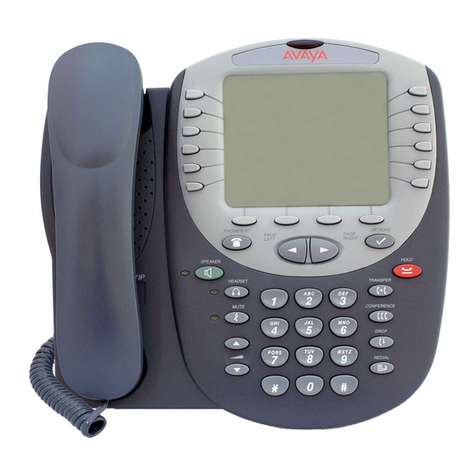
Avaya VPNremote 4600 Series Service manual

VPNremote for the 4600 Series IP
Telephones
Version 1.0
Administrator Guide
19-600753
Issue 1
December 2005

© 2006 Avaya Inc.
All Rights Reserved.
Notice
While reasonable efforts were made to ensure that the information in this
document was complete and accurate at the time of printing, Avaya Inc. can
assume no liability for any errors. Changes and corrections to the information
in this document may be incorporated in future releases.
Documentation disclaimer
Avaya Inc. is not responsible for any modifications, additions, or deletions to
the original published version of this documentation unless such modifications,
additions, or deletions were performed by Avaya. Customer and/or End User
agree to indemnify and hold harmless Avaya, Avaya's agents, servants and
employees against all claims, lawsuits, demands and judgments arising out of,
or in connection with, subsequent modifications, additions or deletions to this
documentation to the extent made by the Customer or End User.
Link disclaimer
Avaya Inc. is not responsible for the contents or reliability of any linked Web
sites and does not necessarily endorse the products, services, or information
described or offered within them. We cannot guarantee that these links will
work all of the time and we have no control over the availability of the linked
pages.
Warranty
Avaya Inc. provides a limited warranty on this product. Refer to your sales
agreement to establish the terms of the limited warranty. In addition, Avaya’s
standard warranty language, as well as information regarding support for this
product, while under warranty, is available through the following Web site:
http://www.avaya.com/support
Preventing toll fraud
"Toll fraud" is the unauthorized use of your telecommunications system by an
unauthorized party (for example, anyone who is not a corporate employee,
agent, subcontractor, or person working on your company's behalf). Be aware
that there may be a risk of toll fraud associated with your system and that, if toll
fraud occurs, it can result in substantial additional charges for your
telecommunications services.
Avaya fraud intervention
If you suspect that you are being victimized by toll fraud and you need technical
assistance or support, call Technical Service Center Toll Fraud Intervention
Hotline at +1-800-643-2353 for the United States and Canada. For additional
support telephone numbers, see the Avaya Web site:
http://www.avaya.com/support
Providing telecommunications security
Telecommunications security (of voice, data, and video communications) is the
prevention of any type of intrusion to (that is, either unauthorized or malicious
access to or use of) your company's telecommunications equipment by some
party.
Your company's "telecommunications equipment" includes both this Avaya
product and any other voice/data/video equipment that could be accessed via
this Avaya product (that is, "networked equipment").
An "outside party" is anyone who is not a corporate employee, agent,
subcontractor, or person working on your company's behalf. Whereas, a
"malicious party" is anyone (including someone who may be otherwise
authorized) who accesses your telecommunications equipment with either
malicious or mischievous intent.
Such intrusions may be either to/through synchronous (time-multiplexed and/or
circuit-based) or asynchronous (character-, message-, or packet-based)
equipment or interfaces for reasons of:
• Use (of capabilities special to the accessed equipment)
• Theft (such as, of intellectual property, financial assets, or
toll-facility access)
• Eavesdropping (privacy invasions to humans)
• Mischief (troubling, but apparently innocuous, tampering)
• Harm (such as harmful tampering, data loss or alteration,
regardless of motive or intent)
Be aware that there may be a risk of unauthorized intrusions associated with
your system and/or its networked equipment. Also realize that, if such an
intrusion should occur, it could result in a variety of losses to your company
(including, but not limited to, human and data privacy, intellectual property,
material assets, financial resources, labor costs, and legal costs).
Your responsibility for your company's telecommunications security
The final responsibility for securing both this system and its networked
equipment rests with you, an Avaya customer's system administrator, your
telecommunications peers, and your managers. Base the fulfillment of your
responsibility on acquired knowledge and resources from a variety of sources,
including, but not limited to:
• Installation documents
• System administration documents
• Security documents
• Hardware-/software-based security tools
• Shared information between you and your peers
• Telecommunications security experts
To prevent intrusions to your telecommunications equipment, you and your
peers should carefully program and configure:
• Your Avaya-provided telecommunications systems and their
interfaces
• Your Avaya-provided software applications, as well as their
underlying hardware/software platforms and interfaces
• Any other equipment networked to your Avaya products.
Trademarks
Avaya is a trademark of Avaya Inc.
All non-Avaya trademarks are the property of their respective owners.
Avaya support
Avaya provides a telephone number for you to use to report problems or to ask
questions about your contact center. The support telephone number
is 1-800-242-2121 in the United States. For additional support telephone
numbers, see the Avaya Web site:
http://www.avaya.com/support
Issue 1 December 2005 3
About this book . . . . . . . . . . . . . . . . . . . . . . . . . . . . . . . 5
What products are covered . . . . . . . . . . . . . . . . . . . . . . . . . . . . 5
Online Documentation. . . . . . . . . . . . . . . . . . . . . . . . . . . . . . . 5
Related Documentation . . . . . . . . . . . . . . . . . . . . . . . . . . . . . . 6
Chapter 1: Introduction . . . . . . . . . . . . . . . . . . . . . . . . . . . 7
VPNremote Phone overview . . . . . . . . . . . . . . . . . . . . . . . . . . . 7
VPNremote Phone features . . . . . . . . . . . . . . . . . . . . . . . . . . . . 8
Chapter 2: Administrator configuration . . . . . . . . . . . . . . . . . . 9
Configuration preparation. . . . . . . . . . . . . . . . . . . . . . . . . . . . . . . 9
Preparing Communication Manager for the VPNremote Phone . . . . . . . . 10
VPNremote Phone as a single extension on Communication Manager . . 10
VPNremote Phone as a bridged appearance on Communication Manager 11
Installing the VPNremote Phone in the enterprise network. . . . . . . . . . . 11
Preparing the Avaya Security Gateway for the VPNremote Phone. . . . . . . 11
Configuring VPNremote Phone users on the security gateway . . . . . . . . 11
Converting an IP Telephone to VPN IP Telephone . . . . . . . . . . . . . . . 12
Downloading the VPN firmware. . . . . . . . . . . . . . . . . . . . . . . . . . 13
Configuring the VPN Settings. . . . . . . . . . . . . . . . . . . . . . . . . . . 13
Deployment . . . . . . . . . . . . . . . . . . . . . . . . . . . . . . . . . . . . 15
Chapter 3: User installation and configuration . . . . . . . . . . . . . . 17
Avaya VPNremote for 4600 Series IP Telephone installation . . . . . . . . . . . . 17
Site power considerations . . . . . . . . . . . . . . . . . . . . . . . . . . . . 17
Equipment requirements . . . . . . . . . . . . . . . . . . . . . . . . . . . . . 17
Connecting the VPNremote Phone to the SOHO . . . . . . . . . . . . . . . . 18
Entering your User Name and Password . . . . . . . . . . . . . . . . . . . . 18
Appendix A: Avaya VPNremote for 4600 Series IP Telephones Installation
Checklist . . . . . . . . . . . . . . . . . . . . . . . . . . . . . . . . . . 19
Appendix B: Troubleshooting . . . . . . . . . . . . . . . . . . . . . . . 21
Error Conditions . . . . . . . . . . . . . . . . . . . . . . . . . . . . . . . . . . 21
Authentication Failures . . . . . . . . . . . . . . . . . . . . . . . . . . . . 21
TCP/IP Connection Failure . . . . . . . . . . . . . . . . . . . . . . . . . . 21
SSL Connection Failure . . . . . . . . . . . . . . . . . . . . . . . . . . . . 22
General Phone Errors and Behaviors . . . . . . . . . . . . . . . . . . . . 22
IKE and IPSec Negotiation Failures . . . . . . . . . . . . . . . . . . . . . 22
Phone fails to register . . . . . . . . . . . . . . . . . . . . . . . . . . . . . 22
Contents

Contents
4 Administrator Guide
Error and Status Messages . . . . . . . . . . . . . . . . . . . . . . . . . . . . 23
Syslog . . . . . . . . . . . . . . . . . . . . . . . . . . . . . . . . . . . . . . . 24
Appendix C: System Parameters Customization . . . . . . . . . . . . . 25
Index . . . . . . . . . . . . . . . . . . . . . . . . . . . . . . . . . . 29

Issue 1 December 2005 5
About this book
The guide provides network administrator and end-user configuration information for the Avaya
VPNremote for the 4600 Series IP Telephones. This document is to be used in conjunction with
the Avaya 4600 Series IP Telephone LAN Administrator Guide.
In the following pages, information is provided describing configuration of the Avaya VPNremote
for the 4600 Series IP Telephones (VPNremote Phone) from the Administrator’s perspective,
including items that should be noted as part of installation. For more information regarding
Administrator configuration, see Chapter 2: Administrator configuration.
In addition, end-user configuration information is provided to assist the end user in installing and
configuring the VPNremote Phone in their SOHO environment with minimal assistance from
corporate IT or Telephony groups. For more information regarding end-user installation and
configuration, see Chapter 3: User installation and configuration.
What products are covered
The following products is covered in this manual:
●Avaya VPNremote for the 4600 Series IP Telephones
The Avaya 4600 Series IP Telephones that support the VPNremote Phone firmware
includes the following devices:
- Avaya 4610SW IP Telephone
- Avaya 4620SW IP Telephone
- Avaya 4621SW IP Telephone
- Avaya 4622SW IP Telephone
- Avaya 4625SW IP Telephone
Online Documentation
The online documentation for the Avaya VPNremote for the 4600 Series IP Telephones is
located at the following URL:
http://www.avaya.com/support

About this book
6 Administrator Guide
Related Documentation
●Request For Comments (RFC)
The following RFCs have been implemented: 2401, 2407, 2408, 2409, 3715, 3947, 3948,
2406, 2411.
http://www.ietf.org/html.charters/OLD/ipsec-charter.html
The following documents are available on the Web site under Find Documentation and
Downloads by Name:
●Avaya Administrator Guide for Communication Manager (03-300509)
This document provides an overall reference for planning, operating, and administering
your Communication Manager solution.
●Avaya 4600 IP Series Telephone, Release 2.3, LAN Administrator Guide (555-233-207)
This document provides a description of Voice over IP and describes how to administer the
DHCP, TFTP, and HTTP servers. This guide also covers how to troubleshoot operational
problems with the 4600 Series IP Telephones and the servers.
●Avaya 4620SW/4621SW SIP IP Telephone, Release 2.2, User Guide (16-300474)
This document provides detailed information about using the 4620SW/4621SW SIP IP
Telephone.
●Avaya 4600 Series IP Telephone, Release 2.2.1, Installation Guide (555-223-128)
This document provides detailed information on how to install the 4600 Series IP Telephone
product line and troubleshoot problems with the telephones.
●Avaya VPNremote Client 4.1 Administrator Guide (June 2002)
This document provides a description of the VPNremote Client software and describes how
to administer the software.
●Avaya Security Gateway Configuration Guide for VPNos 4.6 (670-100-602)
This document provides configuration and administration information for the Avaya SG5,
SG5X, SG200, SG203, and SG208 Security Gateway that are upgraded to VPNos 4.6 and
Avaya VSU devices that are upgraded to VPNos 3.X.

Issue 1 December 2005 7
Chapter 1: Introduction
The Avaya VPNremote for 4600 Series IP Telephones (VPNremote Phone) is an Avaya H.323
IP Telephone with an integrated virtual private network (VPN) client and an advanced
web-enabled graphical display. The VPNremote Phone provides enterprise telephony service in
a remote or small office home office (SOHO) location by connecting to an Avaya
Communication Manager in the corporate network, over a secure VPN connection initiated by
the IP telephone.
VPNremote Phone overview
The VPNremote Phone provides enterprise telephony services at a remote or SOHO location
through a secure VPN connection to the user’s enterprise Communication Manager. The
connection uses a high-speed connection to the Internet and to the Avaya Security Gateway
VPN solution in the enterprise network.
The Avaya VPNremote for 4600 Series IP Telephones provides a significant improvement on
communications capabilities of small office and home (SOHO) users. The VPNremote Phone
provides users with an extension on an enterprise PBX over a secure VPN connection in a
single-box solution.
For additional information regarding the 4600 Series IP Telephones, see the Avaya 4600 Series
IP Telephone, Release 2.3, LAN Administrator Guide.
The VPNremote Phone is targeted to work with most SOHO network configurations. Figure 1
illustrates a possible corporate network configuration with an Avaya SG203 at the headend
device with three VPNremote Phones connected through secure VPN connections.
Figure 1: VPNphone in a corporate network with an Avaya SG203 as the headend device

Introduction
8 Administrator Guide
VPNremote Phone features
The following summarizes a number of significant feature, performance, and usability
enhancements provided by VPNremote Phone.
●H.323 IP Telephone – The VPNremote Phone is a fully featured Avaya H.323 IP
Telephone. The H.323 IP Telephone includes the following features:
- A large display area that allows up to 12 application-specific buttons to be presented and
labeled at one time.
- Twelve line/feature buttons
- Four softkeys
- Fixed buttons that provide access to powerful capabilities such as: local telephone and
call server-based features, speed dialing, a Call Log, and a Wireless Markup Language
(WML) browser.
●Integrated IPSec Client – The VPNremote Phone contains an integrated IPSec VPN
Client that supports the following IPSec protocols:
- Internet Protocol Security (IPSec)
VPNremote Phone supports IPSec. VPNremote Phone supports IPSec when
implemented under an existing implementation of an IP protocol. For additional
information regarding IPSec protocol support, see the Avaya Security Gateway
Configuration Guide for VPNos 4.6.
- Internet Key Exchange (IKE)
VPNremote Phone supports the standard IKE key management protocol for IPSec. For
additional information regarding IKE protocol support, see the Avaya Security Gateway
Configuration Guide for VPNos 4.6.
- Internet Security Association and Key Management (ISAKMP)
VPNremote Phone supports the standard IISAKMP protocol for IPSec. For additional
information regarding IS AK MP protocol support, see the Avaya Security Gateway
Configuration Guide for VPNos 4.6.

Issue 1 December 2005 9
Chapter 2: Administrator configuration
This section provides administrators with information on how to configure the Avaya
VPNremote for 4600 Series IP Telephone as a VPNremote Phone.
It is recommended that administrators configure the Avaya VPNremote for 4600 Series IP
Telephone (VPNremote Phone) for the end user. Administrators should load the VPNremote
Phone with the latest software, configure the VPNremote Phone to connect to the corporate
communications system, and provide the end users with information for configuration in their
small office home office (SOHO) environment.
The enterprise network must be configured with an Avaya SG security gateway. Corporate
firewalls and routers must be configured to allow tunnels from remote phones to the security
gateway through the internet, and must allow telephony traffic between the security gateway
and Communication Manager.
Note:
Note: For additional information regarding configuring a security gateway see, the
Avaya Security Gateway Configuration Guide for VPNos 4.6.
Configuration preparation
To insure that the end user is able to configure VPNremote Phone in their SOHO environment
and to connect to the enterprise network, administrators must preconfigure the IP telephone
prior to deployment.
The initial configuration is to be completed by the administrator while the IP telephone is
connected to the enterprise network, and prior to deployment to the end user. By using this
method, the administrator maximizes their configuration time; and minimizes end user
configuration requirements that are entered using the telephone keypad. This preconfiguration
method also protects the end user’s login ID and password.
Following is the recommended preconfiguration method, including the sequence and
procedures:
1. Prepare Communication Manager
Create and administer a new extension with Communication Manager. For additional
information see Preparing Communication Manager for the VPNremote Phone.
2. Install the Avaya 4600 Series IP Telephone
Install and test the IP telephone on the enterprise network. For additional information, see
the Avaya 4600 Series IP Telephone Installation Guide.

Administrator configuration
10 Administrator Guide
3. Prepare the Security Gateway
Allow access into and out of the corporate firewall through VPN tunnels, see Preparing the
Avaya Security Gateway for the VPNremote Phone.
4. Convert the Avaya 4600 Series IP Telephone to an Avaya VPNremote for 4600 Series IP
Telephone
Convert the 4600 Series IP Telephone, see Converting an IP Telephone to VPN IP
Telephone.
5. Download VPN firmware
Download the VPN firmware from the TFTP server, see Downloading the VPN firmware.
6. Configure the VPN Settings
Configure the VPN settings to meet the configuration parameters for each VPNremote
Phone site, see Configuring the VPN Settings.
7. Deployment
Ship preconfigured device to the end user.
Preparing Communication Manager for the VPNremote Phone
A VPNremote Phone is configured the same as other IP telephones on the Avaya Media Server
running Avaya Communication Manager. Even though the VPNremote Phone is physically
located outside of the corporate network, the VPNremote Phone will behave the same as other
Avaya IP telephones located on the LAN once the VPN tunnel has been established.
VPNremote Phone as a single extension on Communication Manager
The VPNremote Phone user can have a single extension on the Avaya Media Server running
Avaya Communication Manager. A single extension allows the user to be connected to the
Communication Manager from one location at a time - either the office or the SOHO.
If the desired configuration is to connect to Communication Manager from both the office and
the SOHO, you must configure VPNremote Phone as a separate extension that has a bridged
appearance of the office extension. For more information on a bridged appearance on
Communication Manager, see VPNremote Phone as a bridged appearance on Communication
Manager.
For additional information regarding Communication Manager configuration, see the
Administrator Guide for Avaya Communication Manager.

Configuration preparation
Issue 1 December 2005 11
VPNremote Phone as a bridged appearance on Communication Manager
The VPNremote Phone user can have a bridged appearance of the office extension on the
Avaya Media Server running Avaya Communication Manager. A bridged appearance allows the
user to be connected to the Communication Manager from two locations at the same time. As a
call comes in, both telephones ring. If a voicemail message is received and the message
indicator light is configured, the light appears on both telephones.
The bridged appearance configuration is the most common configuration for VPNremote Phone
users.
For additional information regarding Communication Manager configuration, see the
Administrator Guide for Avaya Communication Manager.
Installing the VPNremote Phone in the enterprise network
The Avaya VPNremote for 4600 Series IP Telephone is a standard Avaya 4600 Series IP
Telephone with an additional VPNremote Client capability. The installation of the VPNremote
Phone in the enterprise network is the same as the installation of any Avaya 4600 Series IP
Telephones.
For detailed instructions on how to install the VPNremote Phone into the enterprise network,
see the Avaya 4600 Series IP Telephone Installation Guide.
Preparing the Avaya Security Gateway for the VPNremote Phone
VPNremote Phone users who login to the VPN through the Avaya security gateway must have
their user authentication configured on that security gateway. The user authentication
configuration allows VPN traffic to flow through the corporate firewalls to the security gateway.
VPN traffic is remote traffic that has traversed the VPN tunnel.
As a minimum, you must configure a user name and the password for each remote user. User
names can be up to 128 characters long and can contain any character except a comma (,).
Note that once you add a user name, you cannot change the name.
For additional information regarding configuring the security gateway for the VPNremote Phone,
see the Avaya Security Gateway Configuration Guide for VPNos 4.6.
Configuring VPNremote Phone users on the security gateway
From the security gateway, you can add, modify and delete remote users. From Advanced
settings, you can make changes to the default IKE identity, the split tunneling option, and the
security option.

Administrator configuration
12 Administrator Guide
To add a VPNremote Phone user
1. Select the Configure>Users>Remote Users property. Click Add. The Add Remote User
screen is displayed.
2. Enter the user name and password.
The user name can be up to 255 characters long and can contain any character except a
comma (,).
3. (Optional) To change the default settings for IKE, split tunneling, or security, click
Advanced. The Remote User Advanced Settings dialog is displayed.
4. Change the advanced settings as required, including:
●From the list select either IP address, DNS name, directory name, or e-mail ID.
●Note that Enable Split Tunneling is checked.
●Select a security option.
5. Click OK to close the Advanced Settings screen and return to Add Remote User.
6. Click Save to add the remote user.
Converting an IP Telephone to VPN IP Telephone
Use the following procedure and the telephone key pad to convert a non-VPNremote IP
telephone into a VPNremote telephone:
1. Allow the telephone to boot and register with Communication Manager.
2. After the phone is registered, set the GROUP for each phone you want to upgrade to a VPN
IP telephone to 876. To initiate the GROUP command from the telephone key pad, press:
Mute 4-7-6-8-7 #
3. After the GROUP command is initiated, enter 8-7-6 # (V-P-N #) for the New value. Use
Page LEFT key to erase any errors.
4. Press #to save the new value.
Save new value?
* = no #=yes

Configuration preparation
Issue 1 December 2005 13
Downloading the VPN firmware
Prior to configuring the VPNremote Phone, you must firstinstall the VPNremote Phone firmware
on an existing internal TFTP server. Install the VPNremote Phone firmware files on the same
TFTP server that the existing IP telephones 2.3 firmware.
Note:
Note: The TFTP server should not be accessible from outside the enterprise network
without a VPN connection.
Upon download, the VPN firmware will replace the existing 46XXupgrade.scr file on the TFTP
server and add additional files for the VPNremote Phone firmware upgrades. The replacement
46XXupgrade.scr file preserves the existing IP Telephone 2.3 binaries and adds the VPNremote
Phone binaries, and upgrade and downgrade scripts. The script files also contains a
46XXvpnsettings.txt file that is used to set the VPN parameters for each VPNremote Phone,
and a 46vpnupgrade.scr file for telephones that have already been upgraded to VPNremote
telephones.
Upon completion of the download, the telephone will restart. Upon restart, the telephone will
attempt to establish a VPN connection. To complete the configuration, you must configure the
user VPN settings.
Configuring the VPN Settings
Once the firmware has successfully downloaded to the IP Telephone, you are now ready to
configure the VPN settings. The 46XXvpnsettings.txt file is populated with the settings that are
used by the VPNremote Phone to create the VPN tunnels. It is recommended that the
administrator edit the VPN settings files to set the configuration parameters for VPNremote
Phone users.
Note:
Note: For a detailed list of VPN settings in the 46XXvpnsetting.txt file, see Appendix
C: System Parameters Customization.
At startup, the phone will attempt to establish a VPN connection using the configured VPN
parameters. The user is given the option to change the VPN parameters. To change the VPN
parameters, the user can press the Edit button indicated on the VPN startup screen. The Edit
button gives the user a screen that can be used to change the VPN parameters.
If the phone is up and registered with Communication Manager, the user may also edit the VPN
parameters by entering the VPNMOD command as detailed below.

Administrator configuration
14 Administrator Guide
Use the following procedure and the telephone key pad to configure or edit the VPN Settings:
1. To initiate the VPNMOD command from the telephone key pad, press:
Mute V-P-N-M-O-D # or Mute 8-7-6-6-6-3 #
VPN Start Mode: BOOT
* = Modify # = OK
2. Press *to modify your VPN settings.
3. Select the VPN option to change by using the gray buttons on the left of the display. Press
the Server button, or the first gray button, to change the VPN server IP address.
4. Enter the IP address of your SOHO network. Press the Done button at the lower left corner
of the display to return to the configuration options.
5. Select the VPN option to change by using the gray buttons on the left of the display. Press
the User Name button, or second gray button, to change the VPN user name.
The user name is the same name used to login to the enterprise network using remote
client software.
6. Enter your user name using the telephone key pad. Press the alpha-numeric keys until the
desired letter appears. Use the Case button, or fifth gray button, to switch between
upper-case letters and lower-case letters. Use the left and right arrow keys at the bottom of
the display to move left or right in the user name. Press the Done button at the lower left
corner of the display to return to the configuration options.
7. Select the VPN option to change by using the gray buttons on the left of the display. Press
the Password button, or third gray button, to change the VPN password.
The password is the same password used to login to the enterprise network using
VPNremote Client.
8. Enter your password using the telephone key pad. Press the alpha-numeric keys until the
desired letter appears. Use the Case button, or fifth gray button, to switch between
upper-case letters and lower-case letters. Use the left and right arrow keys at the bottom of
the display to move left or right in the user name. Press the Done button at the lower left
corner of the display to return to the configuration options.
9. Select the VPN option to change by using the gray buttons on the left of the display. Press
the Authentication mode button, or forth gray button, to change the authentication mode.
10. Select the VPN option to change by using the gray buttons on the left of the display. Press
the Password Type button, or fifth gray button, to change the password type.
11. Press the fifth button on the right side of the display to scroll through the password type
options.
12. Select the VPN option to change by using the gray buttons on the left of the display. Press
the VPN Start Mode button, or sixth gray button, to change the VPN start mode.
13. Press the sixth button on the right side of the display to scroll through the VPN start mode
options. Select Boot and press #.

Configuration preparation
Issue 1 December 2005 15
14. Press the right arrow key to move to the next display.
15. Select the VPN option to change by using the gray buttons on the left of the display. Press
the Encapsulation button, or the first gray button, to change the encapsulation option.
16. Press the first button on the right side of the display to scroll through the encapsulation
options. Select Disable and press #.
17. The Syslog Server option is not configured.
18. Press Done to complete the configuration.
Deployment
Upon configuration completion, deploy the VPNremote Phone to the end user. When the end
user installs the VPNremote Phone in their home network, the telephone will boot and indicate a
user ID and password error. The end user must enter their user name and password that they
use to login to their enterprise network using remote client software.

Administrator configuration
16 Administrator Guide

Issue 1 December 2005 17
Chapter 3: User installation and configuration
This chapter provides instruction for installing and configuring the Avaya VPNremote for 4600
Series IP Telephone (VPNremote Phone) in the SOHO environment.
Avaya VPNremote for 4600 Series IP Telephone installation
The VPNremote Phone is intended for use in a normal small office home office (SOHO)
environment.
Site power considerations
Check the power at your site to ensure that you are receiving “clean” power (free of spikes and
noise).
Equipment requirements
You will need the following equipment:
●1 Avaya VPNremote for 4600 Series IP Telephone
●1 Cat5e cable to connect the telephone to power source
●1 Avaya power brick or PoE switch
●1 Ethernet cable, if necessary, to connect power brick to SOHO router or IP connection
To install and use the security gateway in a typical network, the customer must supply the
following:
●DSL or cable modem providing connectivity to the Internet.
It is strongly recommended that the SOHO office use a LAN router with NAT and firewall
capability that provides DHCP addresses for all SOHO devices. It is recommended that the
customer-supplied router provide QoS guarantees for the telephony tunnel.

User installation and configuration
18 Administrator Guide
Connecting the VPNremote Phone to the SOHO
Use the following procedure to connect the VPNremote Phone to the SOHO:
1. Connect the Ethernet cable to the right port on the back of the telephone.
2. Connect the other end of the Ethernet cable to the Avaya power brick phone jack or PoE
switch. The phone jack on the Avaya power brick is on the left side and is labeled Phone.
3. Connect the Ethernet cable to the Avaya power brick or PoE switch line in jack. The line in
jack on the Avaya power brick is on the right side and is labeled Line In.
4. Connect the other end of the straight through Ethernet cable to your SOHO.
5. Connect the Avaya power brick or PoE switch power cord to an AC outlet to power-up the
telephone.
Entering your User Name and Password
At startup, the phone will attempt to establish a VPN connection using the configured VPN
parameters. The user is given the option to change the VPN parameters. To change the VPN
parameters, press the Edit button indicated on the VPN startup screen to enter the user name
and password.
Use the following procedure and the telephone key pad to enter the user name and password:
1. Select the VPN option to change by using the gray buttons on the left of the display. Press
the User Name button, or second gray button, to change the VPN user name.
The user name is the same name used to login to the enterprise network using VPNremote
Client.
2. Enter your user name using the telephone key pad. Press the alpha-numeric keys until the
desired letter appears. Use the Case button, or fifth gray button, to switch between
upper-case letters and lower-case letters. Use the left and right arrow keys at the bottom of
the display to move left or right in the user name. Press the Done button at the lower left
corner of the display to return to the configuration options.
3. Select the VPN option to change by using the gray buttons on the left of the display. Press
the Password button, or third gray button, to change the VPN password.
The password is the same password used to login to the enterprise network using
VPNremote Client.
4. Enter your password using the telephone key pad. Press the alpha-numeric keys until the
desired letter appears. Use the Case button, or fifth gray button, to switch between
upper-case letters and lower-case letters. Use the left and right arrow keys at the bottom of
the display to move left or right in the user name. Press the Done button at the lower left
corner of the display to return to the configuration options.
5. Press Done to complete the configuration.

Issue 1 December 2005 19
Appendix A: Avaya VPNremote for 4600 Series IP
Telephones Installation Checklist
The checklist on the following page is provided for your convenience for supplying your users
with essential installation information.
Table 1: VPNremote Phone Installation Checklist
Item Value Description
VPNremote
Phone IP Address The default value is 0.0.0.0
when using DHCP. In the SOHO network uses
DHCP, set this value to
0.0.0.0 # (default value).
Otherwise, enter the IP
address used by the
VPNremote Phone in the
SOHO network.
Call Server Port
Address The default value is 1719
unless otherwise stated by
your administrator.
This IP address is the IP
address of the CLAN inside
the enterprise.
Gateway IP
Address If DHCP is being used, press
# to accept the default values.
Otherwise end user will
confirm address.
This IP address is the IP
address of the SOHO router.
Mask IP Address If DHCP is being used, press
# to accept the default values.
Otherwise end user will
confirm address.
This IP address is the
network mask for SOHO
network.
TFTP File Server This IP address is the TFTP
file server inside the
enterprise that contains the
configuration and update
files.
Extension of your
VPNremote
Phone
Depending on the telephony
configuration, this extension
may or may not be the same
extension as your office
telephone. Check with you
telephony administrator to
confirm your extension.
1 of 2

Avaya VPNremote for 4600 Series IP Telephones Installation Checklist
20 Administrator Guide
VPNremote
Phone password Depending on the telephony
configuration, this password
may or may not be the same
password as your office
telephone. Check with you
telephony administrator to
confirm your password.
VPN server This is the public IP address
of the security gateway.
VPN user name End user will enter.
VPN password End user will enter.
Table 1: VPNremote Phone Installation Checklist (continued)
Item Value Description
2 of 2
Table of contents
Other Avaya IP Phone manuals

Avaya
Avaya 4630 User manual

Avaya
Avaya IP Office 9611 User manual

Avaya
Avaya IP Office Phone Manager User manual

Avaya
Avaya one-X 9670G User manual

Avaya
Avaya B189 User manual

Avaya
Avaya Norstar M7310 User manual

Avaya
Avaya 1230 Safety guide

Avaya
Avaya 3616 Series Operator's manual

Avaya
Avaya one-X Deskphone SIP 9620 User manual

Avaya
Avaya one-X 9600 Series Product manual

Avaya
Avaya 3616 Series Operator's manual

Avaya
Avaya 1210 User manual

Avaya
Avaya Cloud Office-J189 User manual

Avaya
Avaya one-X 9611G User manual

Avaya
Avaya J129 User manual

Avaya
Avaya 3641 User manual

Avaya
Avaya 1120E User manual

Avaya
Avaya 9500 User manual

Avaya
Avaya 1408 User manual

Avaya
Avaya one-X Deskphone Value Edition 1608 User manual