AVOCOR WCD Series User manual

Revision Date: 5/31/2019
AVW-6555
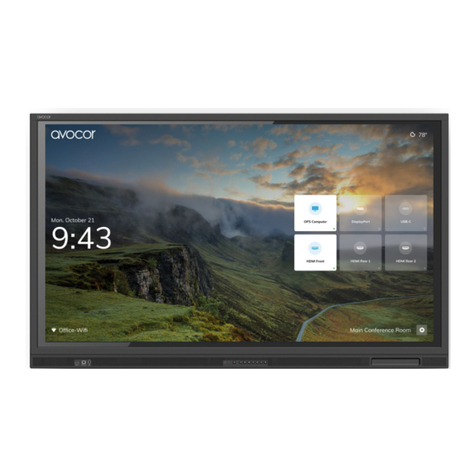
Windows Collaboration Display
Model AVW-6555 Installation and Operation Manual

Revision Date: 5/31/2019
2
© Copyright 2019. This document contains proprietary information protected by copyright, trademark and
other intellectual property laws. All rights are reserved. No part of this manual may be reproduced by any
mechanical, electronic or other means, in any form, without our prior written permission.
The trademarks reproduced in this document and used on the products are either owned or licensed by us, or
by their respective holders. You may not reproduc e or use the trademarks without our prior written consent.
COPYRIGHT AND TRADEMARKS:

Revision Date: 5/31/2019
3
Important Safety Instructions
Before using this display, please read this user manual thoroughly to help protect against property
damage and to ensure your personal safety and the safety of others.
Be sure to observe the following instructions.
For your safety, be sure to observe the warnings located in this manual.
For installation or adjustment, please follow the instructions in this manual and refer all servicing to
qualified service personnel.
Safety Precautions
If smoke or a peculiar smell comes from the display, remove the power plug from the outlet immediately.
Failure to do so may result in fire or electrical shock. Contact your dealer for inspection.
If the display has been turned on but there isn’t a picture, remove the power plug from the outlet
immediately.
Failure to do so may result in fire or electrical shock. Contact your dealer for inspection.
If water is spilled or objects are dropped inside the display, remove the power plug from the outlet
immediately.
Failure to do so may result in fire or electrical shock. Contact your dealer for inspection.
If the display is dropped or the cabinet is damaged, remove the power plug from the outlet immediately.
Failure to do so may result in fire or electrical shock. Contact your dealer for inspection.
To turn off the power of the display, press “O” on the main power switch at side of display.
The power standby/on indicator will go off and the display cannot to be turned on/off by using the
POWER button on the remote control. (To turn on/off the display by the remote control, press the main
power switch again and light the power standby/on indicator.)
◆
When turning off the display by pressing the POWER button on the remote control, the main
power of the display is not turned off completely.
◆
To disconnect power completely, remove the power plug from the outlet.
If the power cord or plug is damaged or becomes hot, turn off the main power switch of the display,
make sure the power plug has cooled down and remove the power plug from the outlet.
If the display is still used in this condition, it may cause fire or electrical shock. Contact your dealer for
replacement.

Revision Date: 5/31/2019
4
Installation
Don't install in a high-temperature environment.
◆
If the display is used in high-temperature or in direct sunlight, it may cause the case or other
parts to become distorted or damaged, resulting in overheating or electrical shock.
Don't install in a high-humidity environment.
◆
This may cause overheating or electrical shock.
Don't install near any heat sources such as radiators, heat registers, stoves, or othe r apparatus that
produce heat.
◆
This may cause fire or electrical shock.
Don't overload outlets or cables beyond electrical capacity.
Don't use extension cords as it may cause fire or electrical shock.
Don't insert the power plug into an outlet other than 100~240V AC.
◆
This may cause fire or electrical shock.
Don’t use a damaged power plug or worn outlet.
Don’t insert an improper power plug it may cause fire or electric shock.
Don't place the display on an unstable shelf or surface.
◆
The display may fall, causing injury. Please install on a horizontal, stable, level surface.
Don't place objects on the display.
◆
If the display is covered or the vents are blocked, the display could overheat and cause a fire.
◆
If metal or liquid gets into the display, it may cause fire or electrical shock.
◆
Do not put heavy objects on the display as they may fall, causing injury.
◆
Please keep a 10 cm minimum distance between the display and the wall for sufficient
ventilation.
Don't move the display when it is connected to the power cord and AV cables.
◆
When moving the display, make sure to remove the power plug and cables from the outlet or
source.
◆
When unpacking or carrying the display, at least 2 people are needed. Make sure the display
is carried upright.
◆
Transport the display upright. Avoid placing the display face up or down.
◆
Handle the display gently. Do not drop.

Revision Date: 5/31/2019
5
Use
If you encounter a problem during installation, please contact your dealer for assistance. Don’t repair or
open the display by yourself.
Failure to do so may result in fire or electrical shock. Contact your dealer for inspection.
Protect and correctly use the power cord/plug.
◆
Don't pinch the power cord/plug between hard surfaces.
◆
Don't step on the power cord/plug.
◆
Before inserting the power plug into the wall outlet, connect the power cord to the display.
◆
Don't operate the display with a damaged power cord or it may damage the display.
Using extension cords (not recommended)
◆
If an extension cord must be used, ensure the voltage rating exceeds the max power
consumption of the display. If the voltage rating is less than the display, it will cause the
extension cord to overheat.
If there is thunder or lightning, don’t touch the display or the power plug.
This may cause an electric shock.
Don’t use any kind of liquid on the display.
If liquid is spilled on the display, remove the power and ask qualified service personnel to check the
display.
If the liquid gets on the display’s screen, please clean it with a dry and soft cloth immediately.
Don’t use any harsh chemical on the display.
If metal or liquid gets into the display, it may cause a fire or an electrical shock.
Don’t install or remove the power plug with wet hands.
If the display will not be used for a long period of time, unplug the display.
This may cause premature wear of electrical components or fire.
Don't apply excessive pressure on the LCD panel. This may cause personal injury or panel damage.
Don't push or shake the display.
◆
This may cause damage or injury.
If the glass of the display panel is broken, liquid may escape. Please don't touch the liquid.
◆
If liquid get into your eyes or touches your skin, wash with the clean water and seek medical
attention immediately.
Precautions with the remote control batteries
◆
Please only use approved AAA type batteries.
◆
Please be sure to insert batteries by matching the + and -.
◆
Don’t recharge, heat, disassemble, short or throw batteries into a fire.
◆
Don’t mix a new battery with a used one.

Revision Date: 5/31/2019
6
◆
Don’t mix different types of batteries together (only use the specified type). it may cause burn
and injury.
Cleaning
If dust has collected on the power plug, remove the plug from the outlet and clean off the dust.
◆
Dust build-up may cause a fire.
Take off the power plug before cleaning.
◆
Failure to do so may result in electrical shock or damage.
Cleaning the surface of the display
◆
When the surface of the display becomes dirty, please wipe the surface lightly with a soft
clean cloth.
◆
If the surface requires additional cleaning, lightly moisten the cloth.
◆
Do not to let any kind of liquid enter the display as it may cause electrical shock or damage.
◆
Do not clean the display with alcohol, solvents or ammonia, as this could damage the display.

Revision Date: 5/31/2019
7
Warnings
Use
Do not use the display lying flat on its back.
Transport the display upright with proper packaging. Avoid placing the display face up or down. Be
careful not to bump into the display.
Do not send a static (non-moving) image to the display, or it may cause image ‘burn-in’ or image
retention.
“Burn in” and/or image retention is not covered under warranty.
Make sure to change the image on the display periodically. It is recommended to turn off the display for
at least 6 hours after 18 hours of usage in a 24 hour period to help avoid image retention
Exemptions
This product isn’t warranted for any damage caused by natural disaster (such as earthquake, thunder,
etc.), fire, acts by third parties, accidents, owner’s intentional misuse and fault, or use in other improper
conditions.
This product isn’t warranted for incidental damages (such as profit loss or interruption in business,
modification or erasure of record data, etc.) caused by use or inability to use of this product.
This product isn’t warranted for any damage caused by inappropriate operation, or from not following
the user manual.
This product isn’t warranted for any damage caused by misuse or malfunction through simultaneous use
of this product and the connected equipment or software.
This product isn’t warranted for any damage caused by neglect of the instructions described about
installation.
This product isn’t warranted for any damage caused by improper installation.
This product isn’t warranted for any damage caused by disassembly, modification or repair by non -
authorised service center or people.

Revision Date: 5/31/2019
8
Compliance Information
AVOCOR hereby declares that the Product's Model Numbers:
AVW-6555
Conform with the provisions of:
FCC:
FCC CFR Title 47 Part 15 Subpart B Class A, CISPR 22
ANSI C63.4
ICES-003
CE:
EN 55032
EN 55024
EN 61000-3-2
EN 61000-3-3
cTUVus:
UL 60950-1
CAN/CSA-C22.2 No. 60950-1
CB:
IEC 60950-1
CEC:
California Code of Regulations, Title 20:Division 2, Chapter 4, Article 4, Sections 1601-1609
PSB:
IEC60950-1
This equipment has been tested and found to comply with the limits for a Class A digital device, pursuant to
part 15 of the FCC Rules. These limits are designed to provide reasonable protection against harmful
interference when the equipment is operated in a commercial environment. This equipment generates, uses,
and can radiate radio frequency energy and, if not installed and used in accordance with the instructi on
manual, may cause harmful interference to radio communications. Operation of this equipment in a
residential area is likely to cause harmful interference in which case the user will be required to correct the
interference at his own expense.
CAUTION
Any changes or modifications not expressly approved by the grantee of this device could void the user's
authority to operate the equipment.
DECLARATION OF CONFORMITY:
FCCPART15:

Revision Date: 5/31/2019
9
CAN ICES-3 (A)/NMB-3(A)
The Product contains small amounts of tin, lead and / or mercury. Disposal of these materials maybe
regulated
due to environmental considerations.
This symbol found on your product or on its packaging, indicates that this product should not be
treated as household waste when you wish to dispose of it. Instead, it should be handed over to
an applicable collection point for the recycling of electric al and electronic equipment. By
ensuring this product is disposed of correctly, you will help prevent potential negative
consequences to the environment and human health, which could otherwise be caused by
inappropriate disposal of this product.
The recycling of materials will help to conserve natural resources. This symbol is only valid in the European
Union. If you wish to discard this product, please contact your local authorities or dealer an d ask for the
correct method of disposal.
DISPOSALOFOLDELECTRICALANDELECTRONICEQUIPMENT(ApplicablethroughouttheEuropeanUnion and
other European countries with separate collection programs)
PRODUCT DISPOSAL:
INDUSTRYCANADA(ICES-003):

Revision Date: 5/31/2019
10
Notes

Revision Date: 5/31/2019
11
Table of Contents
Important Safety Instructions
..................................................................................................................................... 3
Safety Precautions......................................................................................................................................................................... 3
Installation....................................................................................................................................................................................... 4
Use....................................................................................................................................................................................................... 5
Cleaning ............................................................................................................................................................................................ 6
Warnings ............................................................................................................................................................................ 7
Use....................................................................................................................................................................................................... 7
Exemptions ...................................................................................................................................................................................... 7
Compliance Information
............................................................................................................................................. 8
Table of Contents
..........................................................................................................................................................11
List of Figures..................................................................................................................................................................13
1. Introduction ...............................................................................................................................................................15
About This Manual
........................................................................................................................................................................15
Target Audience..........................................................................................................................................................................................15
Textual and Graphic Conventions ......................................................................................................................................................15
Using This Manual
.........................................................................................................................................................................16
Description, Features and Benefits
.........................................................................................................................................17
Key Features and Benefits .......................................................................................................................................................................17
Touch Capability...........................................................................................................................................................................................17
Parts List
.............................................................................................................................................................................................................17
2. Controls and Functions.........................................................................................................................................18
Display at a Glance .....................................................................................................................................................................18
Input Panel....................................................................................................................................................................................22
Remote Control Unit...................................................................................................................................................................24
3. Installation .................................................................................................................................................................26
Remote Control
............................................................................................................................................................................26
Notes onBatteries .......................................................................................................................................................................................26
Notes onRemoteControlOperation.....................................................................................................................................................26
Quick Setup
.....................................................................................................................................................................................27
Installation Considerations .....................................................................................................................................................27
Ambient Light................................................................................................................................................................................................27
Ambient Temperature ..............................................................................................................................................................................27
Ventilation ......................................................................................................................................................................................................28
MountingtheDisplay..................................................................................................................................................................28
ConnectionstotheDisplay ........................................................................................................................................................29
Connecting a Control System or PC......................................................................................................................................................29
ConnectingSourceComponentstotheDisplay..................................................................................................................................31
Turningon thePower.................................................................................................................................................................33
ChangingtheOSDLanguage ....................................................................................................................................................34
Enabling the Touch Screen ......................................................................................................................................................34
Software Installation..................................................................................................................................................................................35
4. Operation ...................................................................................................................................................................39
UsingtheOn-ScreenMenus ......................................................................................................................................................39
Input Menu......................................................................................................................................................................................................41
Display Settings ............................................................................................................................................................................................43
Audio Menu ....................................................................................................................................................................................................44
Basic Settings.................................................................................................................................................................................................45

Revision Date: 5/31/2019
12
Advanced Settings .......................................................................................................................................................................................46
Information ....................................................................................................................................................................................................49
5. Maintenance and Troubleshooting.............................................................................................................50
Maintenance..................................................................................................................................................................................50
Troubleshooting ..........................................................................................................................................................................50
6. External Control.......................................................................................................................................................53
Serial Communications ............................................................................................................................................................53
RS232 Connection and Port Configuration.....................................................................................................................................53
Command and Response Format.........................................................................................................................................................53
Command and Response Examples ....................................................................................................................................................54
Serial Command List ...................................................................................................................................................................................54
Using Discrete IR Codes
..............................................................................................................................................................59
IR Command Protocol...............................................................................................................................................................................59
IR Control Code List....................................................................................................................................................................................59
7. Specifications ...........................................................................................................................................................60
Supported Timings
........................................................................................................................................................................61
Overall Dimensions
......................................................................................................................................................................63
Appendix I: Moving and Carrying Notice ........................................................................................................66
Moving the Display......................................................................................................................................................................66
Carrying the Display...................................................................................................................................................................66
Appendix II: Installing a Wall Mount....................................................................................................................67
Appendix III: Installing a NUC VESA Adapter..................................................................................................68
Appendix IV: Wall Mount Safety Notes ..............................................................................................................69
Appendix V: Azure IoT Settings..............................................................................................................................71
Check the IP Address of IoT device ......................................................................................................................................................71
Log in to IoT Module...................................................................................................................................................................................72
Configure Network Settings .....................................................................................................................................................................72
Modify Admin Setup ...................................................................................................................................................................................73
Update IoT Module Firmware ................................................................................................................................................................74
Setup Azure IoT Service............................................................................................................................................................................75
View the Sensor Status ..............................................................................................................................................................................76
Configures Sensor Timer Setup .............................................................................................................................................................76

Revision Date: 5/31/2019
13
List of Figures
FIGURE 2-1. DISPLAY FRONT/SIDE /REAR VIEW.......................................................................................................... 18
FIGURE 2-2. DISPLAY INPUT PANEL VIEW ................................................................................................................... 22
FIGURE 2-3. DISPLAY REMOTE CONTROL UNIT ........................................................................................................... 24
FIGURE 3-1. VENTILATION REQUIREMENTS FOR ENCLOSURE MOUNTING........................................................................ 28
FIGURE 3-2. RS-232 CONTROL SYSTEM CONNECTION................................................................................................ 29
FIGURE 3-3. ETHERNET CONNECTION......................................................................................................................... 30
FIGURE 3-4. DISPLAYPORT SOURCE CONNECTION ..................................................................................................... 31
FIGURE 3-5. HDMI SOURCE CONNECTIONS .............................................................................................................. 32
FIGURE 3-6. TYPE CSOURCE CONNECTIONS............................................................................................................ 33
FIGURE 3-7. TOUCH SCREEN CONTROLLER (USB) CONNECTION ................................................................................. 34
FIGURE 4-1. OSD MENU STRUCTURE.......................................................................................................................... 40
FIGURE 7-1. AVW-6555 DISPLAY DIMENSIONS (INCH)............................................................................................... 63
FIGURE 7-2. AVW-6555 DISPLAY DIMENSIONS (MM)................................................................................................. 64

Revision Date: 5/31/2019
14
Notes

Revision Date: 5/31/2019
15
1. Introduction
About This Manual
This Owner’s Manual describes how to install, set up and operate the AVOCOR Series LED Display.
Throughout this manual, the AVOCOR Series LED Display is referred to as the “display”.
Target Audience
The manufacturer has prepared this manual to help installers and end users get the most out of the display.
The manufacturer has made every effort to ensure that this manual is accurate as of the date it was printed.
However, because of ongoing product improvements and customer feedback, it may require updating from
time to time.
Textual and Graphic Conventions
Text Conventions: The following conventions are used in this manual, in order to clarify the information and
instructions provided:
Remote and built-in keypad button identifiers are set in upper-case bold type; for example, “Press EXIT to
return to the previous menu.”
Computer input (commands you type) and output (responses that appear on-screen) is shown in
monospace (fixed-width) type; for example: “To change the aspect ratio to Letterbox, type 07 00 02 41
53 50 03 08 <OK>.”
All keys with functional names are initial-capped, set in bold type and enclosed in angle brackets. These
keys are the following: <OK>, <Spacebar>, <Control>, <Esc> and <Tab>. <OK> indicates that you may
press either the EXIT or OK key on your keyboard if it has both keys.
In addition to these conventions, underlining, bold face and / or italics are occasionally used to highlight
important information, as in this example:
NOTE A carriage return must be used after each command or string.

Revision Date: 5/31/2019
16
Graphic Conventions:
These symbols appear in numerous places throughout the manual, to emphasi se points that
you must keep in mind to avoid problems with your equipment or injury:
TIP
TIPS highlight time saving short cuts and helpful guidelines for using certain features.
NOTE
NOTES emphasize text with unusual importance or special significance. They also provide
supplemental information.
CAUTION
CAUTIONS alert users that a given action or omitted action can degrade performance or
cause a malfunction.
WARNING
WARNINGS appear when a given action or omitted action can result in damage to the
equipment, or possible non-fatal injury to the user.
DANGER!
DANGER appears when a given action can cause severe injury or death.
Using This Manual
Use the following table to locate the specific information you need in this manual.
If you need...
... Turn to page:
General information about the AVOCOR Series LED Display
17
Installation instructions
26
First-time configuration instructions
33
Advanced configuration instructions
46
Troubleshooting tips
50
Product specifications
60

Revision Date: 5/31/2019
17
Description, Features and Benefits
The AVOCOR AVW-6555 Display is an ultra-high definition touch display that supports a full 3840x2160
@60Hz(4K) resolution and can display 8 bits, 1.07 billion colors.
It combines ultra-high resolution and unparalleled image quality with configurable I/O in a large-format
display for room-scale collaboration.
Key Features and Benefits
The display offers these key features and benefits:
Up to 3840x2160 @60 Hz(4K) resolution
High-speed InGlass™ touch sensing for up to 20 points and 4 passive pens (for Windows system)
Single cable connectivity with Type C
Diverse video connectivity including (2) HDMI 2.0 inputs, DisplayPort 1.2 input with HDCP
Multiple control connectors including RS-232, USB 2.0/3.0, Touch USB and LAN connections
MIC array
Full-range stereo speaker module integrated with premium conference camera
Compliance with windows 7/8/10, and Mac OS
Azure IoT services support
Long lifetime with high reliability
Touch Capability
Precise, highly responsive touch technology optimized for Windows inking
High touch sensitivity –no pressure required
Any touch: finger, gloved hand or pointer
Calibrated easily by provided software tools
Compliant with Windows 7 Pro & Ultimate/8/10 and Mac OS 10.10, 10.11, 10.12.1
Supports 4 passive pens and 2 erasers in Windows system
One USB cable for easy Plug-and-Play operation
Parts List
Your display is shipped with the following items. If any items are missing or damaged, please contact your
dealer or Customer Service.
AVOCOR UHD LED Display
Remote Control Unit and Batteries
AC Power Cord (US, UK, Europe, AU&NZ)
2 Touch Stylus
5 Cable Clips
USB Cable - 3 Metres
HDMI Cable - 3 Metres
Type C Cable - 1.8 Metres
VESA Adapter Plate and screws - 75x75mm; 100x100mm
Quick User Guide (QSG)

Revision Date: 5/31/2019
18
2. Controls and Functions
Display at a Glance
Figure 2-1 shows the key display components, and the paragraphs that follow describe them.
Figure 2-1. Display Front/ Side /Rear View
1. MAIN POWER SWITCH
Connects or disconnects the display panel from the AC power source.
2. Status LED
Solid green: display on, input detected
Blinking orange: display on, no input detected
Solid orange: display in power saving mode
Off: main power switched off

Revision Date: 5/31/2019
19
3. KEYPAD
The keyboard allows the user to turn on the display, change sources, access the Windows start me nu and
adjust the audio settings. The keypad operates as follows:
POWER
Press the button to turn on/off the monitor screen.
SOURCE
Press the button to select a media source.
Press and hold the button to go through the input sources.
Release button when desired source is selected.
MICROPHONE MUTE
Press the button to mute/unmute the microphone.
(PC must be able to support this function)
WINDOWS
Press the button to activate Windows start menu
VOLUME MUTE
Press the button to mute/unmute the volume.
VOLUME DOWN / UP
Press these two buttons to lower or increase the volume.
Press and hold the button to continuously lower or increase the volume.

Revision Date: 5/31/2019
20
4. Temperature Sensor
Measures the room temperature and displays the data both in °C & °F on the OSD
–
information menu.
Temperature data is also reported to the Azure IoT service.
5. Light Sensor
Senses the ambient lighting condition and shows the illumination data on the OSD
–
information menu
Light sensor data is also reported to the Azure IoT servicel.
6. Presence Sensor
Detects movement in a scanned area, for angle coverage and detection range, see the following
figures:
X-direction
Sensing angle: 104.5 degrees
Sensing distance: 3.5 meters
Y-direction
Sensing angle: 44.2 degrees
Sensing distance: 3.5 meters
Temperature Sensor
Light Sensor
Presence Sensor
This manual suits for next models
1
Table of contents
Other AVOCOR Monitor manuals

AVOCOR
AVOCOR AVW-5555 User manual

AVOCOR
AVOCOR AVF- 6500 Series User manual

AVOCOR
AVOCOR AVF-8650 User manual

AVOCOR
AVOCOR AVG Series User manual

AVOCOR
AVOCOR F series User manual

AVOCOR
AVOCOR AVG Series User manual

AVOCOR
AVOCOR AVE Series User manual

AVOCOR
AVOCOR AVF-6510 User manual

AVOCOR
AVOCOR F series User manual

AVOCOR
AVOCOR VTF-6500 User manual

AVOCOR
AVOCOR AVE-40 Series User manual

AVOCOR
AVOCOR F10 Series User manual

AVOCOR
AVOCOR AVF-7510 User manual

AVOCOR
AVOCOR F series User manual

AVOCOR
AVOCOR AVF-6500 Series User manual

AVOCOR
AVOCOR E Series User manual

AVOCOR
AVOCOR E-30 Series User manual

AVOCOR
AVOCOR AVF-6550 User manual

AVOCOR
AVOCOR AVF-7550 User manual