AVOURY ONE User manual


EN
PAGE 25
TABLE OF CONTENTS
Table of Contents ................................................................................................................................25
Device overview ...................................................................................................................................26
General information.............................................................................................................................28
Reading and storing the user manual...................................................................................................................28
Explanation of symbols............................................................................................................................................28
Safety....................................................................................................................................................29
Proper use................................................................................................................................................................... 29
Safety instructions....................................................................................................................................................29
Start-up ................................................................................................................................................32
Checking the tea machine and package contents............................................................................................ 32
Use ........................................................................................................................................................33
Switching on the tea machine................................................................................................................................ 33
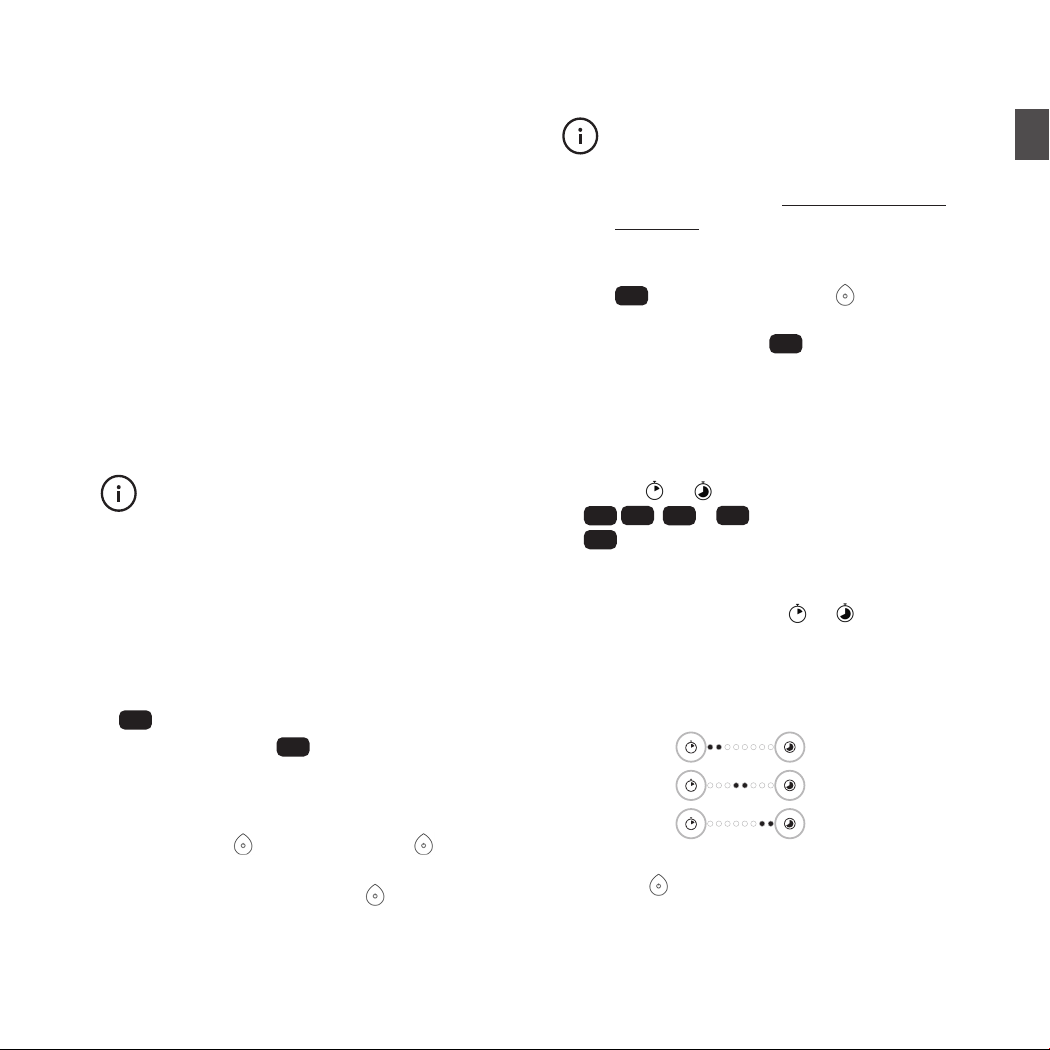
Setting the water hardness..................................................................................................................................... 33
Using a water lter.................................................................................................................................................... 34
Setting the water lter ............................................................................................................................................. 34
Making tea .................................................................................................................................................................. 34
Cancelling the tea preparation process............................................................................................................... 35
Pausing the tea dispensing process..................................................................................................................... 35
Switching o the tea machine................................................................................................................................36
Adding extra water....................................................................................................................................................36
Emptying the capsule container............................................................................................................................ 36
Emptying the drip drawer........................................................................................................................................ 36
Cleaning and Descaling.......................................................................................................................37
Rinsing the brewing chamber................................................................................................................................. 37
Activate care mode................................................................................................................................................... 37
Cleaning....................................................................................................................................................................... 37
Descaling..................................................................................................................................................................... 39
Control via Avoury App ........................................................................................................................ 41
Downloading the App and pairing the tea machine........................................................................................... 41
Register the tea machine .........................................................................................................................................41
Implementing an update ..........................................................................................................................................41
Troubleshooting...................................................................................................................................42
Error Codes................................................................................................................................................................. 43
Technical data ......................................................................................................................................45
Disposal................................................................................................................................................45
6000788 | EN | 04/23

EN
PAGE 26
DEVICE OVERVIEW
Filling level display (oat gauge)
Drip tray
Drip drawer with capsule container
and drip tray
Outlet
5
6
7
8
1
8
7
5
6
4
2
3
Control panel
Capsule compartment
Water lter
Water tank
1
2
3
4
Part name

EN
PAGE 27
DEVICE OVERVIEW
CONTROL PANEL
9
12
10
11
14
18
13
16
17
15
19
Part name
Button brewing time +
Button brewing time –
Display brewing time
Display lling capacity
Button filling capacity +
Button lling capacity –
14
15
16
17
18
19
Start-Button
LED “Fill water tank”
LED “Empty capsule container”
LED “Carry out cleaning”
LED “Carry out descaling”
9
10
11
12
13

EN
PAGE 28
GENERAL INFORMATION
General
information
Reading and storing the
user manual
This user manual relates to the Melitta
Avoury One tea machine (hereinafter simply
referred to as the “tea machine”). It contains
important information on start-up and opera-
tion. Read the user manual carefully, especially
the safety instructions, before using the tea
machine. Failure to comply with the instructions
provided in this user manual may result in severe
injuries or in damage to the tea machine. The
user manual is based on the standards and reg-
ulations in force in the European Union. When
abroad, you must also observe country-specific
guidelines and laws. Store the user manual for
future use. If you pass on the tea machine to
a third party, you must also pass on this user
manual.
Explanation of symbols
The following symbols and signal words are used
in this user manual, on the tea machine or on the
packaging.
WARNING!
This signal symbol/word designates a hazard
with a moderate degree of risk which may lead
to death or severe injury if not avoided.
CAUTION!
This signal symbol/word designates a hazard
with a low degree of risk that, if not avoided, may
result in minor or moderate injury.
NOTICE!
This signal word warns against potential damages
to property.
This symbol provides you with
useful information about using the
device.
Declaration of conformity:
Products marked with this symbol
meet all the applicable Commu-
nity regulations for the European
Economic Area.

EN
PAGE 29
SAFETY
Safety
Proper use
The tea machine is intended solely for preparing
hot tea with specially developed Avoury
capsules. It is intended for private use only and
is not suitable for commercial purposes. Use
the tea machine only as described in this user
manual. Any other use is deemed improper and
may result in damage to property or even injury.
The tea machine is not a child’s toy. The manu-
facturer accepts no liability for damage caused
by improper or incorrect use.
Safety instructions
WARNING!
Risk of electric shock!
A faulty electrical installation or
excessive mains voltage may result in
an electric shock.
• Connect the tea machine only if the
mains voltage of the socket corre-
sponds to the specification on the
rating plate.
• Connect the tea machine only to a
properly installed mains socket.
• Connect the tea machine only to an
easily accessible mains socket to al-
low you to quickly disconnect the tea
machine from the mains supply in the
event of a fault.
• Do not operate the tea machine if it
has any visible damage or if the mains
cable and/or mains plug is defective.
• If the mains cord of the tea machine is
damaged, it must be replaced by the
manufacturer, its After Sales Support
department or a similarly qualified
person to prevent risks.
• Do not open the housing yourself, but
leave the repairs to a qualified profes-
sional. Contact a specialist workshop

EN
PAGE 30
SAFETY
for this. Liability and warranty claims
are waived in the event of repairs per-
formed by the user, improper connec-
tion or incorrect operation.
• Only parts that comply with the
original device data may be used for
repairs. This tea machine contains
electrical and mechanical parts which
are essential for providing protection
against sources of danger.
• The tea machine may not be operated
with an external timer or a separate
telecontrol system.
• Do not use adapters, multiple sockets
or extension cables to connect the
tea machine. In the event these are
required, use only equipment that has
been tested and that corresponds
with the safety regulations and the
device data.
• Do not modify the tea machine in any
way.
• Do not immerse the tea machine,
the mains cable or the mains plug in
water or other liquids.
• Never touch the mains plug with wet
hands.
• Never pull the mains plug out of the
socket by the mains cable; instead,
always pull on the plug itself.
• Never use the mains cable as a carry-
ing handle.
• Keep the tea machine, mains plug
and mains cable away from open
flames and hot surfaces.
• Lay the mains cable so that it does not
pose a tripping hazard.
• Ensure there are no kinks in the
mains cable and do not lay it over
sharp edges.
• Use the tea machine indoors only.
• Never use the tea machine in damp
spaces or in the rain. Never store the
tea machine in such a way that it could
fall into a bathtub or sink.
• Never reach to retrieve an electrical
device that has fallen into water. In
such a case, immediately disconnect
the mains plug from the socket.
• Do not insert anything other than
Avoury capsules into the tea machine.
• Make sure that children do not insert
any objects into the tea machine.
• When cleaning, including cleaning the
outside of the tea machine, or if there
is a fault, always switch the tea ma-
chine off and pull the mains plug out
of the socket.

EN
PAGE 31
SAFETY
WARNING!
Danger for children and persons with
impaired physical, sensory or mental
capacities (e.g. older persons with
reduced physical and mental capaci-
ties) or lack of experience and know-
ledge (e.g. older children).
• This tea machine may be used by
children above the age of eight and
by persons with reduced physical,
sensory or mental abilities or by those
without experience and/or know-
ledge, only if they are supervised
or have been instructed in the safe
use of the tea machine and have an
understanding of the dangers that
are associated with using it. Children
may not play with the tea machine.
Cleaning and user maintenance must
not be performed by unsupervised
children.
• Keep children under eight years of age
away from the tea machine and the
connection cable.
• Never leave the tea machine unat-
tended during operation.
• Do not allow children to play with the
packaging material and small parts.
Children may get caught in the pack-
aging when playing or swallow small
parts and choke.
CAUTION!
Scalding hazard!
The tea machine releases hot water
during use. Parts of the tea machine
become hot and can cause scalding.
• Hot water is released from the outlet.
Keep all parts of the body away from
the outlet during the brewing pro-
cess.
• Do not touch the hot parts of the tea
machine at the outlet during opera-
tion. Ensure you remain a sufficient
distance away from the tea machine.
Clearly advise other users of the risks.
NOTICE!
Risk of damage!
Improper use of the tea machine may
damage the tea machine.
• Place the tea machine on an easily
accessible, level, dry, heat-resistant
and sufficiently stable work surface.
Do not place the tea machine on the
edge or lip of the work surface.

EN
PAGE 32
SAFETY + STARTUP
• Never place the tea machine on or
close to hot surfaces (e.g. hobs, etc.).
• Ensure that the mains cable does not
come into contact with hot compo-
nents.
• Never expose the tea machine to
high temperatures (heaters, etc.) or to
effects of the weather (rain, sun, etc.).
Never store the tea machine in a loca-
tion where the ambient temperature
falls below 0 °C.
• Never pour liquids into the tea machine,
except into the water tank.
• Only pour fresh, cold tap water into the
water tank.
• Never pour mineral water, milk or other
liquids into the water tank. The excep-
tion to this is the Avoury liquid descaling
agent for the descaling programme.
• Never use the tea machine when the
water tank is empty.
• Do not overfill the water tank. Fill the
water tank with water up to a maximum
level of two finger widths below the
upper edge.
• Do not continue to use the tea machine
if the plastic components of the tea
machine have any cracks or flaws or
have become warped. Replace
damaged parts only with corresponding
original spare parts.
Start-up
Checking the tea machine
and package contents
NOTICE!
Risk of damage!
Carelessness in opening the packaging
with a sharp knife or other pointed
objects may quickly damage the tea
machine.
• Open it very carefully.
1. Remove the tea machine from the
packaging.
2. Check to make sure that all of the
contents have been provided (see
chapter “Device overview“).
3. Check whether the tea machine or
the individual parts are damaged. If
this is the case, do not use the tea
machine. Contact the manufacturer
at the specified service address (via
Avoury.com or phone 00800 7000
6000).
4. Remove the packaging material and
the adhesive strips as well as the
sticker with the serial number on the
drip tray 6.

EN
PAGE 33
USE
Use
Avoury tea capsules contain ideal portions of tea
for use in the tea machine.
The size of the capsule is determined by the fact
that the tea needs space to develop during the
brewing process. A lid foil ensures that the tea
in the capsule is protected against loss of its
aroma. This lid foil must be removed before
the tea capsule can be used. There is a porous
net under the lid foil, which has either fine mesh
or coarse mesh depending on the fineness of the
loose tea. Each capsule has a code that tells the
tea machine which parameters the tea requires
to provide maximum enjoyment.
Download the free Avoury App directly
to update the machine software (see
chapter “Control via Avoury App“).
Switching on the tea
machine
1. Connect the mains plug with a properly
installed socket.
2. Ensure that the tea capsule compartment
2is closed.
3. Fill the Water tank 4with water up to
two finger widths under the upper edge of
the water tank.
4. To switch on the tea machine, press the
Start-Button . The Start-Button flashes
whilst it is starting up. Once the tea machi-
ne is ready, the Start-Button will show a
continuous light.
Before the rst use, the tea machine au-
tomatically rinses the brewing chamber
to remove any manufacturing residues
and contamination. This can take up to
3 minutes.
After rinsing the brewing chamber, the
water is dispensed into the drip drawer
7and the Start-Button shows a
continuous light. Empty the drip tray
of the drip drawer 7and reinsert all
parts into the tea machine.
Setting the water hardness
1. Switch on the tea machine.
2. Press the buttons for setting the brewing
time – /+ simultaneously. All info LEDs
10 ,11 , 12 & 13 ash red. The display
16 on the tea machine shows the level of
water hardness currently set.
3. To set the water hardness level, press the
brewing time buttons – /+ . If the LEDs
on the left of the display show a continuous
light, it is set for hard water. If the LEDs on
the right of the display show a continuous
light, it is set for soft water.
SOFT
MEDIUM
HARD
WEICH
MITTEL
HART
4. Conrm the settings by pressing the Start-
Button .

EN
PAGE 34
USE
Using a water filter
We recommend using a water filter in the water
tank 4
. It filters limescale and particles out of
the water. This enables optimal tea enjoyment
and extends the service life of the tea machine.
1. Fill the water tank 4halfway with fresh tap
water.
2. Take a water filter 3and hold it sideways
in the water tank 4. Move the water filter
in the water until no more air bubbles escape
from the water filter. If no more air bubbles
escape, the water filter has soaked up water
and is ready-to-use.
3. Place the water filter 3with one of the
two flat sides into the tea machine pointing
towards the valve in the water tank 4so
that the water filter sits tightly parallel to the
bottom.
4. Now fill the water tank 4with fresh tap
water up to a maximum level of two finger
widths under the upper edge of the water
tank.
The water lter must be changed every
two months to prevent excessive con-
tamination from microorganisms. The
water lter must be removed before
carrying out the descaling programme.
Remember to set the water hardness
to water lter (see chapter “Setting the
water lter“). If you are not going to use
the tea machine for a longer period of
time, please make sure that the water
lter is placed in a full water tank.
Setting the water filter
1. Switch on the tea machine.
2. Press the buttons for setting the brewing
time – /+ simutaneously. All info LEDs
10 ,11 , 12 & 13 ash red. The display
17 on the tea machine shows the usage of
the water filter currently set.
3. To set the water filter 3, press the buttons
for filling capacity + . If all LEDs show a
continuous light, you are using a water filter.
If all LEDs are extinguished, you are not
using a water filter.
water lter
no water lter
4. Confirm the setting by pressing the Start-
Button .
Making tea
1. Switch on the tea machine.
2. Wait until the Start-Button shows a
continuous light. Make sure that the capsu-
le compartment 2is closed and that the
drip drawer 7and the water tank 4are
seated straight in the tea machine.
3. Place a cup under the outlet 8.
The cup must be able to hold at least
250 ml.
4. Take a tea capsule and remove the lid foil
from the capsule.
5. Open the capsule compartment 2.

EN
PAGE 35
USE
6. Hold the capsule by the ab with the bottom
pointing downwards at a slight angle and
place the capsule on the right inner edge of
the capsule compartment 2. Then let the
capsule slide into the slot (See illustration).
7. Close the capsule compartment 2again.
The tea machine will automatically read the
preparation parameters provided by the tea
caspule.
8. If necessary, use the filling capacity buttons
–/+ to set the filling capacity of water.
Select a lower filling capacity for stronger tea
and a higher filling capacity for weaker tea.
Each press increases or decreases the filling
capacity by 15 ml (max. 210 ml, min. 150 ml).
The preset filling capacity is 180 ml.
9. If necessary, use the brewing time buttons
– /+ to set the desired brewing time
for the tea. Select a longer brewing time for
stronger tea and a shorter brewing time for
weaker tea. The brewing time will increase
or decrease by one minute with each press.
The preset brewing time is ideally adapted
for the 180 ml filling capacity.
10. Press the Start-Button to brew the tea.
The brewing time display 16 shows the
remaining time until the tea is completely
brewed. The LEDs on the filling capacity
display 17 will switch off one after another
until the tea has been dispensed in full.
After the brewing process, the tea cap-
sule will be ejected automatically and the
brewing chamber will be rinsed to prevent
any aroma mixing and to ensure that you can
enjoy the flavours of each type of tea. The
rinsing water runs into the drip tray and not
into the cup.
11. To prepare another cup, open the capsule
compartment 2, take a tea capsule, remo-
ve the lid foil and insert the new tea capsule.
Cancelling the tea
preparation process
Press and hold the Start-Button for approx.
3 seconds during the brewing process. The liquid
contained in the brewing container at the time
when the process is stopped is released into the
cup situated beneath the outlet 8.
Pausing the tea dispensing
process
Press the Start-Button during tea dispensing
to pause the process. Press the Start-Button
again if you want to continue the tea dispensing
process.
The pause ends automatically after 10 minutes
and tea dispensing continues.

EN
PAGE 36
USE
Switching off the tea
machine
Press and hold the Start-Button for approx.
3 seconds. The tea machine switches into standby
mode. After 10 minutes, the tea machine auto-
matically switches into standby mode if you do
not press any buttons.
Adding extra water
If there is not enough water in the water tank
4to complete another brewing process,
the LED “Fill water tank“ will show a
continuous light. You cannot carry out any
more brewing processes until you have refilled
the water tank.
1. Remove the water tank 4and fill it with
water up to a maximum level of two finger
widths below the upper edge of the water
tank.
2. Reinsert the water tank 4again.
The LED “Fill water tank“ will go out.
If the water level is too low, you should
add fresh water before the LED “Fill
water tank“ shows a continuous
light.
Emptying the capsule
container
After five brewing processes, the LED “Empty
capsule container” will show a continuous
light. The capsule container must be emptied,
before a further brewing process can be carried
out.
We recommend emptying the capsule
container, if you are not going to use
your tea machine for a longer period of
time.
1. Remove the drip drawer 7from the tea
machine and take out the capsule container.
2. Dispose the used capsules in the yellow re-
cycling bin or use the Avoury recycling bag.
3. Reinsert the capsule container and the drip
drawer 7back into the tea machine. The
LED “Empty capsule container“ will go
out and the tea machine is ready-to-use
again.
Emptying the drip drawer
1. Remove the drip drawer 7from the tea
machine and empty the capsule container.
2. Remove the metal cover of the drip tray 6.
3. Empty the drip drawer.
4. Then reinsert all the parts into the tea
machine.

EN
PAGE 37
CLEANING AND DESCALING
Cleaning and
Descaling
Rinsing the brewing
chamber
The brewing chamber must be rinsed after
longer periods of non-use to remove any con-
tamination. To do this, the tea machine must be
switched on.
1. Fill the water tank 4with fresh water up to
a maximum level of two finger widths under
the upper edge of the water tank.
2. Push the Start-Button and wait until the tea
machine is ready-to-use.
3. Press the filling capacity – /+ buttons
at the same time. The tea machine rinses the
brewing chamber and dispenses water into
the drip drawer 7. The tea machine is fully
rinsed when the Start-Button shows a
continuous light.
4. Empty the drip drawer 7.
5. Then reinsert all parts back into the tea
machine.
Activate care mode
1. Switch on the tea machine.
2. Activate the care mode by pressing the lling
capacity
–
and brewing time button
+
simultaneously for approx. 3 seconds. When
the rst LED at
–
and the last LED
at
+
show a continuous light
the care
mode is activated.
3. To deactivate the care mode, if necessary,
press and hold the lling capacity
–
and
brewing time button
+
simultaneously for
approx. 3 seconds.
Important: Care mode is deactivated when:
•the tea machine is turned o / turns o
automatically
•the cleaning/ descaling programme is
nished.
Cleaning
When the LED “Carry out cleaning” shows
a continuous light, the appliance should be
cleaned using an Avoury cleaning capsule. The
programme takes approximately 25 minutes.
The cleaning programme must be com-
pleted once started. Stopping this
process prior to completion, e.g. as a
result of an interruption in the power
supply, causes the programme to restart
or may lead to error notications in
exceptional cases (all info LEDs 10 , 11 ,
12 & 13 are ashing, see page 43).
Before putting in the Avoury cleaning
capsule, the care mode must be activa-
ted. If care mode is deactivated the
Avoury cleaning capsule will be ejected.
1. Switch on the tea machine and wait until the
Start-Button shows a continuous light.
2. Fill the water tank 4with fresh tap water
up to a maximum level of two finger widths
under the upper edge of the water tank and
insert it again.
3. Activate the care mode.

EN
PAGE 38
CLEANING AND DESCALING
4. Open the capsule compartment 2, remove
the lid foil from the Avoury cleaning capsule
and insert it. Then close the capsule com-
partment 2.
5. The LED “Carry out cleaning” starts to
flash red and the Start-Button shows a
continuous light.
The LED “Carry out cleaning” flashes
red throughout the whole cleaning
programme and goes off when the
programme is finished.
6. To start the cleaning programme, press the
Start-Button .
7. When the LED “Empty capsule container”
shows a continuous red light, remove the
drip drawer 7and empty the drip tray and
the capsule container (Removal must also be
performed if the capsule drawer is empty. If
the LED remains lit after removal, wipe the
inner housing dry so that the sensors are not
prevented by the moisture).
8. Insert the drip drawer 7again and place
a vessel with a volume of at least 300 ml
below the outlet 8.
9. The LED “Empty capsule container” goes
off and cleaning starts automatically.
Cleaning is carried out in two cycles. The LEDs
in the display 16 go o one after the other
during cleaning and indicate the time in which
the cleaning agent dissolves and takes eect.
When the LEDs are all o, the cleaning uid is
discharged into the collecting vessel.
First cycle
10. The first cycle is finished when the Start-
Button shows a continuous light.
11. Empty the collecting vessel and put it back
under the outlet 8.
Second cycle
12. Press the Start-Button to start the
second cycle.
13. The second cycle is nished when the LED
“Empty capsule container” shows a
continuous red light and the Start-Button
ashes.
14. Empty the collecting vessel. Remove the drip
drawer 7with the drip tray and the capsule
container to remove any liquids. Then put
everything back in place and place the
collecting vessel back under the outlet 8.
15. The LED “Empty capsule container“ goes
o and rinsing begins automatically.
The rinsing process rinses the brewing
chamber with fresh water at the end of the
process. The liquid that has run through is
discharged into the collecting vessel. At the
end of the rinsing process the Avoury clea-
ning capsule is ejected.
16. Rinsing is nished when the LED “Empty
capsule container” shows a continuous
red light and the Start-Button ashes.
17. Empty the collecting vessel. Remove the
drip drawer 7with the drip tray and the
capsule container to remove any liquids.
Then put everything back in place.
18. The LEDs “Empty capsule container” and
“Carry out cleaning” go o and the Start-
Button shows a continuous light.

EN
PAGE 39
CLEANING AND DESCALING
If necessary, rell the water tank 4up to
a maximum level of two nger widths under
the upper edge of the water tank.
The cleaning programme is nished.
Irrespective of how often the tea ma-
chine is used, we recommend cleaning
it at least once a month with an Avoury
cleaning capsule, even if the LED “Carry
out cleaning” does not show a con-
tinuous light. To clean the tea machine,
activate the care mode and place an
Avoury cleaning capsule in the capsule
compartment 2to be able to start the
cleaning programme.
Descaling
When the LED “Carry out descaling” shows
a continuous light the descaling programme
must be carried out with an Avoury descaling
capsule and the Avoury liquid descaler. The
programme takes approximately 15 minutes.
Important: Remove the water lter before
descaling!
The descaling programme must be
completed once started. Stopping this
process prior to completion, e.g. as a
result of an interruption in the power
supply, causes the programme to restart
or may lead to error notications in
exceptional cases (all info LEDs 10 , 11 ,
12 & 13 are ashing, see page 43).
Before putting in the Avoury descaling
capsule, the care mode must be activa-
ted. If care mode is deactivated the
Avoury descaling capsule will be ejected.
1. Switch on the tea machine and wait until the
Start- Button shows a continuous light.
2. Activate the care mode.
3. Open the capsule compartment 2and
insert an empty Avoury descaling capsule
(no lid foil needs to be removed). Then close
the capsule compartment 2.
4. The LED “Carry out descaling” starts to
ash red and the Start-Button shows a
continuous light.
The LED “Carry out descaling” flashes
red throughout the whole descaling
programme and goes off when the
programme is finished.
5. To start the descaling programme, press the
Start-Button .
6. The LEDs “Fill water tank” and “Empty
capsule container” show a continuous
red light.
7. Empty the water tank 4. If you use a water
lter, please remove it.
8. Fill the water tank 4with the entire con-
tents of the Avoury liquid descaler (250 ml)
and an additional 250 ml of fresh tap water.
9. Reinsert the water tank 4.
10. The LED “Fill water tank” goes o.
11. Remove the drip drawer 7to empty the
drip tray and the capsule container.
12. Put everything back in place and place a
heat-resistant collecting vessel with a capa-
city of at least 300 ml under the outlet 8.
Caution: The liquid is very hot!
13. The LED “Empty capsule container” goes
o and descaling begins automatically.

EN
PAGE 40
CLEANING AND DESCALING
Descaling is carried out in two cycles. The
descaling liquid that has run through the
machine ows into the collecting vessel.
First cycle
14. The rst cycle is nished when the Start-
Button shows a continuous light.
15. Empty the collecting vessel then put it back
under the outlet 8.
Second cycle
16. Press the Start-Button to start the second
descaling cycle.
17. The second cycle is nished when the LEDs
“Fill water tank” and “Empty capsule con-
tainer” show a continuous light and the
Start-Button ashes.
18. Remove the water tank 4and pour out any
remaining liquid.
19. Rinse the water tank 4with fresh tap
water.
20. If you are using a water lter 3, put the
water lter back into the water tank 4.
21. Fill the water tank 4with fresh tap water
up to a maximum level of two finger widths
under the upper edge of the water tank and
insert it again. The LED “Fill water tank“
goes off.
22. Empty the collecting vessel. Remove the
drip drawer 7with the drip tray and the
capsule container to remove any liquids.
23. Then put everything back in place and place
the collection vessel under the outlet 8
again.
24. The LED “Empty capsule container” goes
o and rinsing begins automatically.
Rinsing is also carried out in two cycles. The
liquid that has run through the tea machine
ows into the collecting vessel. When rinsing
is nished the Avoury descaling capsule is
ejected.
25. The rst cycle is nished when the Start-
Button shows a continuous light.
26. Empty the collecting vessel and put it back
under the outlet 8.
27. Then press the Start-Button to start the
second cycle.
28. When the second cycle is nished the
Avoury descaling capsule is ejected auto-
matically. The LED “Carry out descaling”
goes o and the Start-Button shows a
continuous light.
29. Empty the collecting vessel and, if neces-
sary, ll the water tank 4with fresh tap
water up to a maximum level of two nger
widths under the upper edge of the water
tank.
The descaling programme is nished.

EN
PAGE 41
CONTROL VIA AVOURY APP
Control via
Avoury App
The tea machine can be controlled via the con-
trol panel, as well as via your smartphone. To do
this, download the free Avoury App and register
your tea machine. In the Avoury App, you can
adjust the brewing time and the lling capacity
individually. Once the tea is brewed, a notication
appears on your smartphone. Furthermore, you
can order new tea, view your account details and
read the online magazine on the Avoury App. You
can also use the interactive cleaning and de-
scaling mode and download the latest machine
software.
Downloading the App and
pairing the tea machine
1. Download the Avoury App to your smart-
phone. Scan the QR code to access the
download directly:
Apple
App Store
Google
Playstore
2. Switch on the tea machine and wait until the
Start-Button shows a continuous light.
3. Activate Bluetooth in the smartphone
settings and open the Avoury App on your
smartphone.
4. Click on the icon “Prepare Tea“ to connect
the tea machine with the Avoury App.
5. When the Start-Button ashes, conrm
the connection by pressing the
Start-Button .
6. When the Start-Button shows a conti-
nuous light, the tea machine is connected
and ready-to-use.
Register the tea machine
In order to register your tea machine,
you need to create a new user account
or log in with an existing account.
1. Open the Avoury App on your smartphone.
2. Click on the icon “Machines“ at the bottom right.
3. Now click on “Register your tea machine“ and
follow the instructions of the Avoury App until
the tea machine is registered.
Implementing an update
1. Open the Avoury App on your smartphone.
2. Click on the icon “Machines“ at the bottom right.
3. Now all registered tea machines are displayed.
If a new update is available, a red exclamation
mark is displayed on the relevant machine. Click
on the machine in the Avoury App. The current
software version is displayed under “Firmware
version“.
4. Follow the instructions of the Avoury App until
the update has been carried out on your tea
machine.

EN
PAGE 42
TROUBLESHOOTING
Troubleshooting
Problem Possible cause Solution
The Start-Button ashes perman-
ently and the tea machine does not
start up.
The capsule compartment 2is
open when switching on/starting up.
Close the capsule compartment 2.
All 4 info LEDs 10 , 11 , 12 & 13
ash at the same time.
System error
(for further information regarding
system errors and related error codes
see page 43).
Press and hold the Start-Button
for approx. 3 seconds until the red
info LEDs 10 , 11 , 12 & 13 stop
ashing. The Start-Button ashes
and the tea machine restarts.
The LED “Carry out cleaning”
does not go out.
The cleaning programme was cancel-
led/was not completed.
Restart the cleaning programme and
allow it to be completed.
The LED “Carry out descaling”
does not go out.
The descaling programme was can-
celled/was not completed.
Restart the descaling programme
and allow it to be completed.
Only water (and no tea) is dispensed
from the tea machine.
The lid foil has not been removed
from the tea capsule.
Remove the lid foil and reinsert the
tea capsule.
In the event that the lid foil was not removed, the capsule has already been
inserted into the tea machine and this has been noticed before the brewing
process has started.
Press and hold the Start-Button
for approx. 3 seconds or open the
capsule compartment 2. The cap-
sule will be ejected without brewing
(as long as the brewing process has
not yet started).
The tea machine ejects the capsules
directly after being inserted. Tea
dispensing is not possible.
The cleaning or descaling program-
me was cancelled/was not comple-
ted.
If both LEDs for “Carry out cleaning”
or “Carry out descaling” show a
continuous light, carry out cleaning or
descaling (see page 3740). Alterna-
tively, rinse the brewing chamber (see
page 37).

EN
PAGE 43
TROUBLESHOOTING
If the 4 info LEDs “Fill water tank” 10 , “Empty capsule container” 11 , “Carry out cleaning”
12 and “Carry out descaling” 13 all ash at the same time, this indicates a system error. This
may have a number of dierent causes, some of which you can solve yourself. The error code indicates
the cause of the error. This code is shown in the “brewing time“ 16 display. Each LED that shows a
continuous white light stands for “0“. Each LED that ashes stands for “1“. The display should be read
from left to right.
Example: black = ashing ; white = shows a continuous white light
“00010010”
If an error code occurs, please rst check whether you have installed the latest machine
software. To do this, download the free Avoury App (see chapter “Control via Avoury App“).
If an error code occurs, the tea machine can be reset by pressing the Start-Button for
approximately 3 seconds. If this does not help and an error code occurs again, reboot the
system by unplugging the power supply. After about 30 seconds, plug the power back in and
press the Start-Button . Wait until the Start-Button shows a continuous light.
Error Codes
Other manuals for ONE
5
Table of contents
Other AVOURY Kitchen Appliance manuals
Popular Kitchen Appliance manuals by other brands

Scarlett
Scarlett SC-JE50C07 instruction manual

BonsenKitchen
BonsenKitchen MF3902 Operation instructions

Oliver
Oliver 797-32 CAPG User's operating and instruction manual

Harbor Freight Tools
Harbor Freight Tools 92049 Assembly and operating instructions

Tescoma
Tescoma Delicia quick start guide

Secura
Secura SWB-42 instruction manual