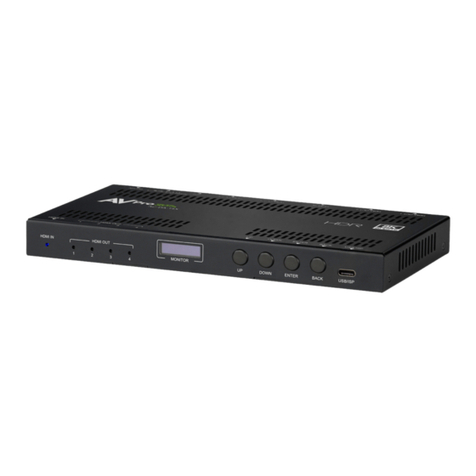
AVPro Edge ConferX AC-CX100-RAMP User manual

USER MANUAL
AC-CX100-RAMP
IP controllable 2 channel 25W Amplifier with
microphone, line, HDMI and HDBaseT inputs, Full
18Gbps throughout (100M HDBaseT 10.2 Gbps)
and On Screen Display
AC-CX100-RAMP
Page 1

The newest addition to the ConferX lineup is the AC-CX100-RAMP. This multi-purpose device
serves several functions in today's classroom, conference room and boardroom and includes an IP
controllable 2 channel 25W Amplifier with microphone, line, HDMI and HDBaseT inputs, Full
18Gbps throughout (100M HDBaseT 10.2 Gbps). Outputs are scalable from 2K to 4K and 4K to 2K
and there are additional audio outputs for recorders, additional amplifiers, audio matrices or other
devices. Full EDID management makes setup a breeze and the on-screen display (OSD) provides
critical information for the system operator and installer. The CX100-RAMP supports both ARC and
eARC so all high bitrate audio codecs are supported. A built-in circuit for eARC automatically
detects delay information from the display and corrects time delay up to 170 msec. All of these
functions support collaboration for large and small groups!
Whats In the Box
•
AC-CX100-RAMP
•
IR Emitter
•
IR Eye
•
24V/5A Power Supply
•
Rack Ears & Phoenix
Connectors
Features:
Product Overview
Model Number:
AC-CX100-RAMP ~ Controllable Class-D Amplifier with AV Functionality
*NOTE: Optional 5PIN to STEREO Audio Cables
available for purchase "AC-CABLE-5PIN-2CH"
•Single room solution for conference rooms and huddle spaces
•K-12 Classroom audio and video sharing
•Bring Audio to remote areas of your home
•Amplify any speaker
•HDMI 2.0 Input
•4K 30 4:4:4, 4K60 4:2:0 HDMI Support
•HDR 4:2:2 12 Bit Support
•HDCP 2.2 & Earlier Supported
•HDBaseT input port: 100M (330ft) 0n 1080P, Up to
70m (230ft) on 4K (Cat6a)
•CEC Pass Through
•Stable Power input
•Rugged, long-life chassis
•EDID management
•Designed for the conference/classroom room so
your customer can focus on their meetings, not
their audio/video system.
•Microphone input and control
•Audio channel overlay
•Inputs: 4K HDMI, 4K HDBaseT (100M), Microphone,
Line Audio
•Outputs: 2 4K HDMI ports 1 scalable and 1 eARC,
amplified (25 watts per channel) 2-channel audio,
line audio and digital line audio
•HDCP 2.2 & Earlier Supported
•Supports uncompressed PCM 2- Ch., 5.1, 7.1, Dolby
Digital, DTS, Dolby TrueHD, DTS HD-Master Audio,
Atmos.
Applications:
Compatible HDBaseT
Transmitters
•
AC-CXWP-HDMO-T
•
AC-CXWP-MDP-T
•
AC-CXWP-VGA-T
•
AC-EX100TT-UHD-T
AC-CX100-RAMP
Page 2

AC-CX100-RAMP
Page 3

AC-CX100-RAMP
Page 4

Device Feature Overview:
•
IP Controlled 25 Watt Per Channel Amplifier:
Use any control system or webOS to control the amplifier, very
easy to integrate into existing rooms and new builds.
•
Audio Delay up to 170 msec:
This is used for correcting latency associated with eARC. eARC from sink (TV) tells
how long video frames take to display in TV (maybe around 2-3 frames = 50msec) and feeds this info to CX100-RAMP
– The CX100-RAMP delays by this amount automatically.
•
OSD (Onscreen Display):
A robust OSD allows operator and installer see real time data on audio and video
signals.
•
Full SMART EDID Management:
Smart EDID management starts with the unit’s rotary switch. The rotary switch
default position 0 is “AUTO SDR”, position 1 is “AUTO HDR” and position 2 is “AUTO HDR 7.1”. All RAMP I/O is
automated with respect to one of these 3 positions. The input side is always given the max possible EDID capabilities.
Both outputs always scan the sink and optimize the signal for the given display separately.
•
Microphone Input:
The microphone Input jack is meant for a dynamic microphone and simultaneously for a
generic 3.5mm jack to connect an iPhone/Android/etc. for listening to music. The gain setting pot is next to the jack.
There is no 48V phantom power for microphone on this product – The CX100-RAMP is designed for a direct jack
connection for a dynamic/wireless mic.
•
Audio Line Input:
The audio line input is balanced or unbalanced depending on wiring the phoenix plug.
•
Gain and Voiceover:
The voice over button mixes the microphone input on top of any currently active audio
source. When the voice-over button is pressed you can talk in the microphone and the current audio (line input) will
be ducked so the microphone can be heard better. Once you stop talking on the microphone, the active audio will
return to full volume. The ducking depth is controlled by the pot next to the microphone jack.
•
Inputs:
One 4K HDMI, one 4K HDBaseT (100M), Microphone, Line Audio
•
Outputs:
Two 4K HDMI ports (one scalable and one eARC), amplified (25 watts per channel) 2-channel audio, line
audio and digital line audio
•
RS-232 and IR:
Bi-directional RS-232 and IR, with I-Pass for direct connection to a control processor
•
Web OS:
Web OS is provided for controlling all device functions
•
Remote Control:
IR Inputs and an IR window on the front of the unit for controlling
•
ARC / eARC Compatible:
AC-CX100-RAMP
Page 5

IR Receiving EYE Audio Select
AV Source Select
Audio DSP Controls
Power ON/OFF
•IR Window for control
IR:
Audio DSP Controls:
•Mute: Toggle ON/OFF to mute extracted audio ports
•Output Volume DOWN/UP: Increases/decreases, one button press equals 2dB
•Mic-Mix: ON Microphone audio will be mixed with the current active audio source. While
speaking into a microphone, the current audio (line input) will be ducked so the microphone
can be heard. Once you stop talking on the microphone the active audio will return to full
volume. This level is controlled by the VOICE-OVER adjustable pot on the back to the right of
the MIC INPUT
Audio Select:
•eARC: Extracted audio will come from the eARC channel on MAIN/eARC HDMI Port
•MIC: Extracted audio will come from the 3.5mm MIC INPUT
•LINE IN: Extracted audio will come from the Balanced L/R AUDIO INPUT
•HDMI: Extracted audio will come from the HDMI INPUT
AV Source Select:
•HDMI: Output video will come from the HDMI INPUT
•HDBT: Output video will come from the HDBaseT INPUT
Power:
•ON/OFF: When unit is powered on, all the front panel buttons will light up. After the power up
sequence, only the selected options will be lit up (see examples below).
Powering Up Powered Up
Front Panel
AC-CX100-RAMP
Page 6

IR
OUT
Power
Digital
Audio Out
IR
INPUTS
Rear Panel
RS-232
Control
LAN/IP
Control
HDBaseT
INPUT HDMI
INPUT HDMI
OUTPUTS Balanced
Audio OUT
Balanced
Audio IN
Gain
Controls
EDID
Select
Loudspeaker
Outputs
•HDMI IN:
oSupports up to 18Gbps HDMI Signals
•HDBT INPUT:
oThis is a 10.2Gbps HDBT receiver, it will support up to a 4k60 4:2:0 / 4k30 4:4:4 signal
•HDMI OUT: Both outputs always scan the sink and optimize the signal for the given display
separately.
oDownscaled Port: This port will downscale a 4k signal automatically if the connected
display is only1080pcapable
oMAIN/eARC PORT: This port will automatically upscale a 1080p signal to 4k if the
connecteddisplaysupports 4k
Video
*Incoming Video/Audio and Video Out information is displayed on the STATUS section of the WebOS
*And also shown on the OSD (On Screen Display) under VIDEO:
AC-CX100-RAMP
Page 7

Audio
•AUDIO IN: Balanced 2Ch Audio Input
•MIC INPUT: 3.5mm Audio Input, for use with a dynamic microphone or any 2Ch device
connected with a 3.5mm audio cable
oThere are two adjustable POTS for adjusting the GAIN
MIC GAIN: Adjust MIC-GAIN level
VOICE-OVER: Adjust VOICE-OVER level
•AUDIO OUT: Balanced 2Ch Audio Output
•SPDIF OUTPUT: Digital TOSLINK Output
•LOUDSPEAKER: 25W per channel
Audio DSP Controls
•In addition to the front panel buttons, there are additional audio adjustments that can be
changed via IP/RS232 commands (see command list on Pg. ?), or the WebOS (see below)
AC-CX100-RAMP
Page 8

On Screen Display
•From the Web Interface, you can turn the On Screen Display On, Off, and adjust the OSD DELAY
(how long the On Screen Display is visible on the display).
Top left of the OSD will show
•Video: Current INPUT selected along with Resolution and ColorSpace
•Amp Audio: Current AUDIO source selected, (eARC, Mic, Line In, and HDMI)
•Amp Volume: Current Volume Level (-100 to 10 dBs)
Bottom left of the OSD will show
•The Current Firmware Version
•The IP Address of the AC-CX100-RAMP
AC-CX100-RAMP
Page 9

The AC-CX100-RAMP supports both ARC and eARC on TX0 (MAIN/eARC) HDMI port. There are two status indicators
that will be either ON or OFF, depending on the connected displays capabilities
•EARC STATUS:
oACTIVE
oOFF
•LEGACY ARC STATUS: If the connected display supports ARC and it is enabled this will show as ON
oACTIVE
oOFF
•Note: ALLOW LEGACY ARC must be enabled (if this is changed the AC-CX100-RAMP must be rebooted)
EARC/ARC CHANNEL SWITCH: There are two options
•ON (Green): The INPUT will automatically switch to HDMI INPUT if the connected display supports
eARC/ARC
•OFF (Greyed out): The INPUT will not switch automatically
ALLOW LEGACY ARC: There are two options
•ON (Green): The INPUT will automatically switch to HDMI INPUT if the connected display supports
eARC/ARC
•OFF (Greyed out): The INPUT will not switch automatically
AC-CX100-RAMP
Page 10

SETUP AND CONTROL
From the Web Interface, you can turn view and change system information
•POWER: Turn the AC-CX100-RAMP ON/OFF
•SYSTEM ADDR: If utilizing more than one AC-CX100-RAMP each must have it's own unique address (01, 02, 03,
etc. default is 01)
•DHCP: Turn DHCP ON/OFF (default is off)
oDHCP can be Enabled/Disabled by pressing and holding the HDMI and ARC buttons on the front panel
under AUDIO SELECT at the same time for 3 seconds. The AUDIO SELECT lights will flash ONCE if DHCP
is enabled and TWICE if it is disabled (Static IP Address).
*NOTE: The device will REBOOT automatically after this setting is changed.
AC-CX100-RAMP
Page 11

UPDATE:
•FACTORY DEFAULTS will reset the AC-CX100-RAMP to it's factory settings
•REBOOT UNIT will reboot the AC-CX100-RAMP
•UPLOAD/Choose File is for updating the Firmware on the AC-CX100-RAMP
AC-CX100-RAMP
Page 12

■
IR Configuration
IR can be used in three ways:
From Rack (Control System Direct): Plug a MONO 3.5mm cable into an emitter port of any control system directly into
the "I-PASS" port on the AC-CX100-RAMP to pass IR signals directly to the remote end
From Rack (Using IR-EYE): Plug an IR-Receiver Eye into the "IR IN" of the AC-CX100-RAMP in order to pass infrared
signals generated from a device or IR Remote to the remote end
From Remote End: Use an IR-Emitter on the AC-CX100-RAMP (IR OUT Port) in order to get IR signals BACK to the rack
from the remote end
AC-CX100-RAMP
Page 13

■
RS-232 Configuration
RS-232 can be used to pass control signals bi-directionally to & from any RS-232 compatible device. This is commonly
1. Control System --> Display/Projector (ie, Power On/Off)
2. Display/Projector --> Control System (ie, Display Status, Volume Status etc...)
3. When ultra long-range serial communication is needed (think concerts, live events). Use the extender.
The unit comes with 3 pin connectors to allow
for any wire an integrator would like. The pin
out configuration Left=TX,
Center=Ground, Right=RX and looks like this:
This is how the cable should look. If using the
AC-CABLE-3.5-DB9F (Female) or AC-CABLE-3.5-
DB9M
(Male), the colors will be the same. With any
other cable, please follow Tx, G, Rx as shown
below. See RS-232 cable preparation diagram
below
*NOTE: There are two ports for RS-232 control
•HDBT: Use this port to send RS-232 to connected HDBaseT Transmitter
•SYSTEM: Use this port to send RS-232 to AC-CX100-RAMP
AC-CX100-RAMP
Page 14

oAll inquiries -
Troubleshooting
•Verify Power - Pg. 6
•Verify Connections - Check that all cables are properly connected
•Not passing video on HDBaseT, this is a 10.2Gbps HDBT receiver, it will support up to a 4k60
4:2:0 / 4k30 4:4:4 signal
•IR Issues - Verify correct connections - P. 13
oVisibly flashing Emitters may not function properly, try the IR Cables that come in the box if
you are experiencing issues
•Extracted Audio Issues - Pg. 12-13
oVerify Source is set to output 2ch if using the balanced 2ch port
+NOTE: This unit does NOT DOWNMIX
•Still having issues, contact us
oSupport Direct - +1-605-977-3477
+1-605-274-6055
oSubmit a support request ticket
https://support.avproedge.com/hc/en-us/requests/new
AC-CX100-RAMP
Page 15

Maintenance
To ensure reliable operation of this product as well as protecting the safety of any person using or handling
this device while powered, please observe the following instructions.
•Use the power supplies provided. If an alternate supply is required, check voltage, polarity and that it has
sufficient power to supply the device it is connected to.
•Do not operate these products outside the specified temperature and humidity range given in the above
specifications.
•Ensure there is adequate ventilation to allow this product to operate efficiently.
•Repair of the equipment should only be carried out by qualified professionals as these products contain
sensitive components that may be damaged by any mistreatment.
•Only use this product in a dry environment. Do not allow any liquids or harmful chemicals to come into contact
with these products.
•Clean this unit with a soft, dry cloth. Never use alcohol, paint thinner or benzene to clean this unit.
Damage Requiring Service
The unit should be serviced by qualified service personnel if:
•The DC power supply cord or AC adaptor has been damaged
•Objects or liquids have gotten into the unit
•The unit has been exposed to rain
•The unit does not operate normally or exhibits a marked change in performance
•The unit has been dropped or the housing damaged
AC-CX100-RAMP
Page 16

Support
Should you experience any problems while using this product, first, refer to the Troubleshooting section of this manual
before contacting Technical Support. When calling, the following information should be provided:
•Product name and model number
•Product serial number
•Details of the issue and any conditions under which the issue is occurring
Warranty
If your product does not work properly because of a defect in materials or
workmanship, AVProEdge (referred to as “the warrantor”) will, for the length of the period indicated as below, (Parts/
Labor (10) Years), which starts with the date of original purchase (“Limited Warranty period”), at its option either (a)
repair your product with new or refurbished parts, or (b) replace it with a new or a refurbished product. The decision to
repair or replace will be made by the warrantor. During the “Labor” Limited Warranty period there will be no charge
for labor. During the “Parts” warranty period, there will be no charge for parts. You must mail-in your product during
the warranty period. This Limited Warranty is extended only to the original purchaser and only covers product
purchased as new. A purchase receipt or other proof of original purchase date is required for Limited Warranty service.
This warranty extends to products purchased directly from AVPro or an authorized dealer. AVPro is not liable to honor
this warranty if the product has been used in any application other than that for which it was intended, has been
subjected to misuse, accidental damage, modification or improper installation procedures, unauthorized repairs or is
outside of the warranty period. Please direct any questions or issues you may have to your local dealer before
contacting AVPro.
AC-CX100-RAMP
Page 17

AC-CX100-RAMP
Page 18

AC-CX100-RAMP
Page 19

AVProEdge
2222 E 52nd St N ~ Sioux Falls, SD 57104
1-877-886-5112 ~ 605-274-6055
Thank you for choosing AVProEdge!
Please contact us with any questions, we are happily at
your service!
AC-CX100-RAMP
Page 20
Table of contents
Other AVPro Edge Amplifier manuals

AVPro Edge
AVPro Edge AC-DA18-AUHD User manual

AVPro Edge
AVPro Edge AC-FRESCO-DA116 User manual

AVPro Edge
AVPro Edge AC-DA14-AUHD User manual

AVPro Edge
AVPro Edge AC-AMP-2024 User manual

AVPro Edge
AVPro Edge AC-DA12-AUHD-GEN2 User manual

AVPro Edge
AVPro Edge AC-DA14-AUHD User manual

AVPro Edge
AVPro Edge AC-DA-14X User manual

AVPro Edge
AVPro Edge AC-DA18-AUHD-GEN2 User manual

AVPro Edge
AVPro Edge DANTE AC-DANTE-AMP-2CH User manual

AVPro Edge
AVPro Edge AC-DANTE-AMP-2CH User manual