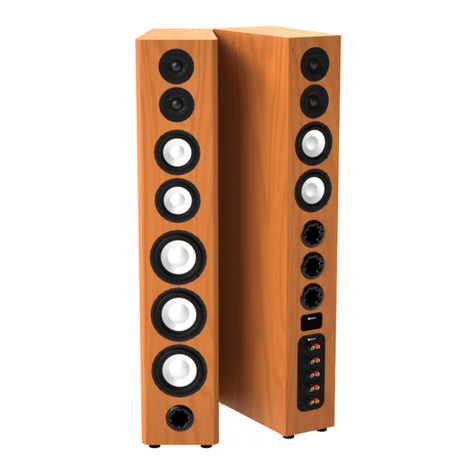
Axiom LFR660 v4 User manual

LFR660 v4 Omnidirectional

IMPORTANT SAFETY INSTRUCTIONS
CAUTION
1. Read these instructions.
2. Keep these instructions.
3. Heed all warnings.
4. Follow all instructions.
5. Do not use this apparatus near water.
6. Clean only with dry cloth.
7. Do not block any ventilation openings. Install in accordance with the manufacturer’s instructions.
8. Do not install near any heat sources such as radiators, heat registers, stoves, or other apparatus (including amplifiers)
that produce heat.
9. Do not defeat the safety purpose of the polarized or grounding-type plug. A polarized plug has two blades with one
wider than the other. Agrounding type plug has two blades and a third grounding prong. The wide blade or the third
prong are provided for your safety. If the provided plug does not fit into your outlet, consult an electrician for
replacement of the obsolete outlet.
10. Protect the power cord from being walked on or pinched particularly at plugs, convenience receptacles, and the
point where they exit from the apparatus.
11. Only use attachments/accessories specified by the manufacturer.
12.
Use only with the cart, stand, tripod, bracket, or table specified by the manufacturer, or sold with the
apparatus. When a cart is used, use caution when moving the cart/apparatus combination to avoid injury
from tip-over.
13. Unplug this apparatus during lightning storms or when unused for long periods of time.
14. Refer all servicing to qualified service personnel. Servicing is required when the apparatus has been damaged in any
way, such as power-supply cord or plug is damaged, liquid has been spilled or objects have fallen into the apparatus,
the apparatus has been exposed to rain or moisture, does not operate normally, or has been dropped.
15. Do not expose this apparatus to dripping or splashing and ensure that no objects filled with liquids, such as vases, are
placed on the apparatus.
16. To completely disconnect this apparatus from the AC Mains, disconnect the power supply cord plug from the
AC receptacle.
17. The mains plug of the power supply cord shall remain readily operable.
18. Do not expose batteries to excessive heat such as sunshine, fire or the like.
SAFETY PROCEDURES
• Ensure that you connect your DSP only to the type of power
supply indicated on the rear panel, and ensure that the power
cord cannot be walked on or otherwise damaged.
• To prevent electric shock, match wide blade of plug to wide slot, fully
insert.
• Ensure that objects or liquids are not allowed to penetrate the enclosure.
For any additional information or service, contact:
AXIOM, 2885 HWY 60 Phone: 1-866-244-8796
DWIGHT ON CANADA
P01 1H0
The lightning flash with arrowhead
symbol within an equilateral triangle, is
intended to alert the user to the presence
of uninsulated “dangerous voltage“ within
the product’s enclosure that may be of
sufficient magnitude to constitute a risk of electric shock
to persons.
The exclamation point within an equilateral
triangle is intended to alert the user to
the presence of important operating and
maintenance (servicing) instructions in the
literature accompanying the product.
WARNING : To reduce the risk of fire or electric shock, do
not expose this apparatus to rain or moisture.
Placement
e location of your new Axiom LFR660 speakers will signicantly aect the sound quality you experience in your particular room
so take care to position them correctly. Since the LFR660 is an omnidirectional speaker with active drivers located in both the
front and rear of the cabinet you will want to keep some space all around your LFR660s. Around twelve inches (300mm) would
be considered the neutral position. If you need to place them closer to or further from the wall or corner than this your DSP box
does have a switch on the rear panel labeled “Boundary Compensation”. Around 8” (200mm) from the wall would be “Near 1” and
6” (150mm) or closer would be “Near 2”. If you are more than 24” (600mm) from the wall “Far 1” should be used and more than
48” (1200mm) would be “Far 2”. e “Boundary Compensation” switch can also be used to adjust for highly reective or highly
damped rooms. A highly reective room may be more suited to the switch being in one of the “Near” positions and a highly damped
room one of the “Far” positions. Ultimately it is best to try various positions in your room and go with what you feel delivers the
best performance.
For a wide and spacious stereo or home theater soundstage, separate the front le and right speakers by 6 feet or more, up to 12 feet
apart, or by at least half the distance you sit from the speakers, e.g. if you sit 15 feet away from the speakers, separate them by at least
8 feet if possible. You can experiment with slightly angling the speakers in toward the listening area or having them face straight out
into the room. Each room is dierent, and toeing in the speakers toward your seating may improve the stereo soundstage. LFR660s
have the unique ability of removing the “sweet-spot”; a large 3-D soundstage can be enjoyed from many seating positions
Every member of our Axiom team is pleased that you have decided to purchase one of our products. We have all worked hard to
bring the highest level of satisfaction to your audio experience.
Axiom is deeply commied to ongoing audio research. It began in the early 1980s when I was involved with the world-class psycho-
acoustical research that was being conducted at the National Research Council in Oawa, Canada. Since that time we have built
one of the nest acoustical laboratories in the world at our facility in Dwight, Canada where we continue this research allowing
Axiom to provide the world’s most realistic-sounding loudspeakers.
At Axiom our goal is to provide you with a truly exciting and emotional experience every time you listen to your audio system. We
want you to feel part of our Axiom family and as such we stand at the ready to deliver personal, expert advice on any of your audio
needs.
Sincerely,
Ian Colquhoun
President and Founder
Axiom Audio

Front Left Speaker: White
Subwoofer: Purple
(line-level RCA output only)
Front Right: Red
Center: Green
Left Surround (side): Blue
Right Surround (side): Gray
Left Back Surround: Brown
Right Back Surround: Tan
Hookup
Turn your speakers around and look at
the back panel. You’ll see two sets of gold-
plated 5-way binding posts, to which you
are going to connect the speaker cables
from your amplier. Each gold binding
post is color coded - RED is POSITIVE,
BLACK is NEGATIVE. You will also see
a positive (+) sign engraved in the plastic
beneath the RED binding post, and a
negative (-) sign beneath the BLACK post.
It is important that the negative wires from
your amplier go to the negative inputs on
your speaker and the positive wires from
your amplier go to the positive inputs
on your speaker. e top set of binding
posts are for the speakers in the rear of
the LFR660. ese should be connected
to your amplier on the same channel as
OUT REAR on your DSP. e lower set
of binding posts are for the speakers in
the front of the LFR660. ese should be
connected to your amplier on the same
channel as OUT FRONT on your DSP.
If you purchased the bi-amp/bi-wire
option the front speaker section your
boom input will have two sets of 5-way
binding posts. e top set is always the
high frequency and the lower set the low
frequency. ese two sets of binding posts
are connected with bridging bars which
are required if you are only using one amp
and one speaker cable. To utilize the bi-
amp or bi-wire feature be sure to remove
these bridging bars.
Leveling
To level your speaker simply rotate the
outside of each foot until they reach the
desired height.
For detailed instructions on dual binding post inputs please visit
www.axiomaudio.com/dual-input-connections
Step 2
Leave washer down.
Step 1
Bare ends of
speaker wire.
Step 3
Insert bare end of wire
through exposed hole
on binding post. Ensure
positive wire from Amp is
in red connector.
Step 4
Tighten nuts with supplied
plastic wrench.
Step 1
Lift washer.
Step 2
Ensure positive wire from
Amp is in red connector.
Step 1
Tighten nuts with
supplied plastic wrench
Step 3
Insert banana plug.
Step 3
Tighten nuts with supplied
plastic wrench.
Spade Lug (1/4-inch spade)
Bare Wire
Banana Plug (3/4-inch spacing)
Step 2
Insert spade into slots in
binding post.
Ensure positive wire from
Amp is in red connector.

Connecting the DSP
Step 1 (Check your Voltage)
Look at the rear panel of your DSP. You will notice a voltage rating beside the power switch. Be sure this rating corresponds to
the voltage supplied in your country. If there is a dierence please do not proceed any further and contact AXIOM for assistance.
Failure to use the proper power supply will result in immediate and permanent damage.
Step 2 (DSP Inputs)
If you have a DSP-1 or DSP-3 you will see two possible input connections from your receiver or pre-amp; binding posts and RCA
connectors. If your receiver has pre-amp outputs use these to connect the front right and le channels to the DSP using RCA
cables. If your receiver does not have pre-amp outputs you can use a speaker wire to connect the speaker outputs of your receiver’s
front right and le channels to the binding posts on the DSP.
If you have a DSP-2 or DSP-4 you will see two possible input connections from your receiver or pre-amp; Balanced XLR and RCA
connectors. Whichever type of connector you use from your pre-amp outputs to your DSP-2 or DSP-4 you should also use going
from your DSP-2 or DSP-4 to your amplier.
Step 3 (DSP Outputs)
If you have a DSP-1 use RCA cables to connect each output (Right Front, Right Rear, Le Front, Le Rear) to the inputs of a
4-channel amplier.
If you have a DSP-2 use either RCA or XLR cables to connect each output (Right Front, Right Rear, Le Front, Le Rear) to the
inputs of a 4-channel amplier.
If you have a DSP-3 you should now follow the instructions for Wiring Your Speakers.
If you have a DSP-4 use either RCA or XLR cables to connect each output (Right Front, Right Rear, Le Front, Le Rear, Center
Front, Center Rear) to the inputs of a 6-channel amplier.
Step 4 (Power Cord)
Connect the power cord to your DSP and plug it into your power supply. Turn on the main power switch on the rear panel. e
front switch will now be active for turning your DSP on and o. e light on the front will glow blue to indicate your DSP is now
ready for use.

Axiom Audio Head Office: 2885 Highway 60
Dwight, ON Canada
P0A 1H0
Toll Free (North America): 1-888-352-9466
Worldwide: 1-705-635-2222
Email: info@axiomaudio.com
www.axiomaudio.com
Table of contents
Other Axiom Speakers manuals

Axiom
Axiom ED150A User manual

Axiom
Axiom ED23PMKII User manual

Axiom
Axiom AX2010AV2 User manual

Axiom
Axiom Architectural Series W22 Specification sheet

Axiom
Axiom M2 User manual

Axiom
Axiom AX4CL User manual

Axiom
Axiom AX6C User manual

Axiom
Axiom ED60P User manual

Axiom
Axiom Architectural W100 User manual

Axiom
Axiom AX2010P User manual
Popular Speakers manuals by other brands

Fluance
Fluance Ai41 quick start guide

B&C Speakers
B&C Speakers 6PS38 specification

Wilson Benesch
Wilson Benesch Bishop owner's manual

Fusion
Fusion MS-FR7021 User & installation manual

Harbor Freight Tools
Harbor Freight Tools ROAD SHOCK 95953 Set up and operating instructions

ION
ION Tiki Sounds quick start guide