manuals.online logo
Brands
  1. Home
  2. •
  3. Brands
  4. •
  5. Axiom
  6. •
  7. Speakers
  8. •
  9. Axiom W100 User manual

Axiom W100 User manual

Location: / Positionnement:
is is by far the most important step before we even begin the installation.
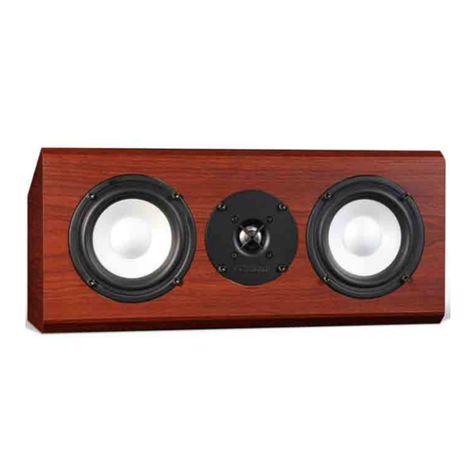
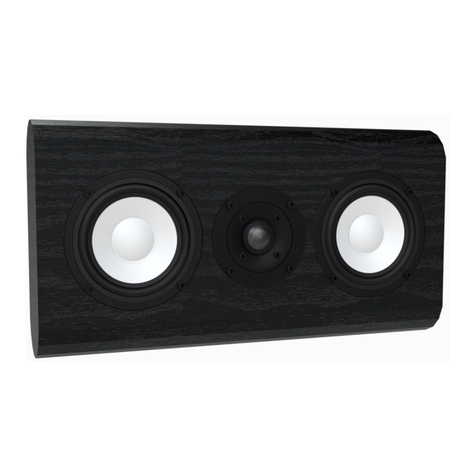
Mount the W100 or W150 center channel speaker above or below your TV
screen, properly centered and no farther than 2 feet away. e center speaker
anchors movie dialog and vocals at the TV screen, so keep it reasonably close
to the screen. Avoid corner locations if possible. Please make sure the speaker
wire has a clear path from your stereo or A/V receiver to the placement of
your speaker.
e Axiom Architectural Speakers are designed to be installed in the common
stud wall with drywall or some similar type wall board covering. For other
types of walls special installation procedures will need to be used.
+++
Ceci est de loin l’étape la plus importante avant même le début de l’installation.
Pour un positionnement optimal, les haut-parleurs centraux W100 et W150
devraient être équidistants de chaque côté de l’écran de télé et à une distance
maximale de 2’ de ce dernier. Le haut-parleur central a pour but de fusionner les
dialogues des lms et les voix à l’écran, une proximité immédiate favorisera cet
eet. Veuillez vous assurer qu’il n’y ait pas d’obstacle qui obstrue le passage des ls
de haut-parleurs jusqu’ à votre récepteur stéréophonique ou Audio/Vidéo.
Les haut-parleurs Architecture d’Axiom sont conçus pour être installés sur un
mur avec colombage et gypse communs ou sur une surface de même type. Pour
d’autres types, il faudra recourir à une procédure spéciale.
Step-by-step instructions on conguring your in-wall/on-wall speakers.
Instructions, étape par étape, pour la mise en fonction de vos enceintes “encastrées - en surface”
W100 & W150 Architectural Series
Owners Manual
e Axiom Warranty
All our speaker models; towers, bookshelves, surrounds, centers, subwoofers and
all our ampliers; subwoofer and multichannel ampliers are warrantied against
manufacturer’s defects for 5 years.
AXIOM CANADA INC. warrants this audio loudspeaker system (the “Product”)
to be free from original manufacturing defects in materials and workmanship for
ve years from date of purchase from an authorized Axiom dealer. This warranty
extends only to the original consumer purchaser. AXIOM CANADA INC. does
not warrant goods used in commercial or industrial applications. This warranty
does not cover any expenses incurred in any removal or re-installation of the
product.
If the product should prove so defective within the warranty period, return the
product by prepaid delivery to AXIOM CANADA INC., along with the original
sales invoice or other proof of purchase, which establishes eligibility for warranty
service. AXIOM CANADA INC. will, at its option, replace or repair the product
free of charge and return the product by prepaid delivery. This warranty does not
apply to any product, which has been damaged, misused, altered or repaired by
anyone other than an AXIOM CANADA INC. authorized service facility.
Any implied warranties including tness for use and merchantability are limited
in duration to the period of the express warranties set forth above, and no person
is authorized to assume for Axiom Canada Inc. any other liability in connection
with the sale of the product. Axiom Canada Inc. expressly disclaims liability for
any incidental and consequential damages caused by the product. The remedies
provided under this warranty are exclusive and in lieu of all others.
This warranty gives specic legal rights. In addition, there may be other legal
rights arising from the sale of the product, which vary from province to province
or state to state. Some provinces / states do not allow the exclusion or limitation
of incidental or consequential damages, so the above limitation or exclusion may
not apply in some areas.
Model: W100 W150 Modèle :
Max Rec. Amp Power: 200 Watts 400 Watts Puissance maximale admissible :
Min Amp Power: 10 Watts 10 Watts Puissance minimale :
Response +/- 3dB: 95 Hz – 22 kHz 85 Hz – 22 kHz Réponse en freq. +/- 3dB :
Response + 3dB/- 9dB: 65 Hz – 22 kHz 50 Hz – 22 kHz Réponse en freq. + 3dB/- 9dB :
Impedance: 8 Ohms 6 Ohms Impédance :
SPL In Room 1w/1m: 93 dB 95 dB Sensibilité en salle 1w/1m :
SPL Anechoic 1w/1m: 89 dB 91 dB Sensibilité Anéchoïque 1w/1m :
X-Over: 2.7 kHz 2.7 kHz Filtre :
Tweeter: Single 1” Dual 1” Transducteur d’aigu :
Woofer: Dual 5¼” Triple 5¼” Transducteur de grave :
On-wall Dimensions HWD mm: 225 x 431 x 91 225 x 677 x 91 Dimensions en saillie HLP mm :
In-wall Dimensions HWD mm: 79 x 340 x 86 79 x 340 x 86 Dimensions encastrées HLP mm:
On-wall Dimensions HWD inches: 8.85 x 16.95 x 3.6 8.85 x 26.65 x 3.6 Dimensions en saillie HLP inches :
In-wall Dimensions HWD inches: 3.1 x 13.37 x 3.4 3.1 x 13.37 x 3.4 Dimensions encastrées HLP :
Weight kg each: 5 kg 9 kg Poids en Kilo chacun :
Weight lbs each: 11.05 lbs 17.6 lbs Poids en lb chacun :
Rev: 2.0 v9
4.5”
114.3 mm
13.875”
352.423 mm
Step 1 / Étape 3:
Using the supplied template and a level (not included) mark
an outline of the wall cutout to place the Architectural
Speakers. en carefully cut the selected area using a jigsaw
or handsaw.
Warning: Make sure there aren’t any other wires, pipes, or
other xtures that might be in the wall before cutting.
+++
À l’aide du gabarit inclus et d’un niveau (non-inclus) tracez
sur le mur le contour de l’emplacement du haut-parleur
Architecture. Par la suite, découpez l’endroit marqué à l’aide
d’une scie sauteuse ou à gypse.
Avertissement: Assurez-vous qu’il n’y ait pas de ls, tuyaux ou
autres accessoires qui sont à l’intérieur du mur avant de couper
ce dernier.
Step 2 / Étape 2:
Place the wall-mount frame in the wall cutout from Step
1. e W100 / W150 wall-mount frame is placed with the
inner indent on the RIGHT side for proper locking in Step 6.
+++
Placez le cadre de xation murale dans la section de mur
découpée à l’étape 1. Le cadre de xation mural W100 / W150
est placé avec le tiret intérieure sur le côté droit du cadre, pour
un verrouillage sécuritaire dans l’étape 6.
Step 3 / Étape 3:
Set your level on top of the frame. As you tighten the screws,
the metal frame should push out behind the wall to create a
clamp. is can be helped along by pushing it out with your
ngers. Tighten each of the screws to clamp the frame to the
wall (the screws should be snug but not forced).
+++
Positionnez votre niveau sur le cadre. À mesure que vous
serrez les vis, le cadre devrait s’enfoncer dans le mur pour créer
un attache. Vous pouvez faciliter cette opération en poussant
avec les doigts. Vissez chaque vis pour xer le cadre au mur to
the wall (ne pas trop serrer les vis).
Step 4 / Étape 4:
If your speaker wire is not already installed in the wall you
will need to run it down inside your wall to your baseboard
and then around the room to your amplier or receiver.
+++
Si votre l de haut-parleur n’est pas déjà installé à l’Intérieur
du mur; il faudra le descendre à l’intérieur du mur jusqu’à la
plinthe et de là, autour de la pièce jusqu’à votre amplicateur
ou récepteur Audio/Vidéo.
Step 5 / Étape 5:
Insert the speaker wire into the hole in the binding posts of
the Architectural Speaker, keeping the red and black (positive
and negative) connections consistent. Use the supplied
wrench to tighten down each nut to hold the wires in place.
+++
Insérez le l d’haut-parleur à l’intérieur de l’orice du bornier
du haut-parleur Architecture en prenant bien soin de respecter
l’uniformité de la polarité rouge et noir (positif et négatif). À
l’aide de la clé fournie, serrez chaque écrou pour immobiliser
les ls en place.
Step 6 / Étape 6:
Finally, mount the Architectural Speaker by sliding the
speaker into the wall-mount frame using the middle indents
as a guide. When the speaker contacts the wall, push in and
slide LEFT to lock it in place.
If you have any further questions or concerns please contact
one of our audio experts. 1-866-244-8796
+++
Enn, montez le haut-parleur Architecture en faisant glisser
le haut-parleur dans le cadre de xation murale en utilisant
les tirets au milieu du cadre comme guides. Lorsque le haut-
parleur fait contact avec le mur, poussez à fond et faites glisser
le haut-parleur vers la gauche pour le verrouiller en place.
En cas de doute ou pour toute autre question, s’il vous plaît
communiquer avec l’un de nos spécialistes de l’audio au 1-866-
244-8796.

This manual suits for next models

3

Other Axiom Speakers manuals

Axiom AX2065AV2 User manual

Axiom

Axiom AX2065AV2 User manual

Axiom EP600 User manual

Axiom

Axiom EP600 User manual

Axiom M50 v3 User manual

Axiom

Axiom M50 v3 User manual

Axiom M80 v4 User manual

Axiom

Axiom M80 v4 User manual

Axiom MILLENNIA M2 Technical manual

Axiom

Axiom MILLENNIA M2 Technical manual

Axiom AX4CL User manual

Axiom

Axiom AX4CL User manual

Axiom Architectural W2 User manual

Axiom

Axiom Architectural W2 User manual

Axiom M3 v3 User manual

Axiom

Axiom M3 v3 User manual

Axiom QS8 v3 User manual

Axiom

Axiom QS8 v3 User manual

Axiom Millennia M50 User manual

Axiom

Axiom Millennia M50 User manual

Axiom Architectural Series W22 Specification sheet

Axiom

Axiom Architectural Series W22 Specification sheet

Axiom FMS QS User manual

Axiom

Axiom FMS QS User manual

Axiom ED80P User manual

Axiom

Axiom ED80P User manual

Axiom M80 User manual

Axiom

Axiom M80 User manual

Axiom Quadpolar QS4 v2 User manual

Axiom

Axiom Quadpolar QS4 v2 User manual

Axiom LFR1100 User manual

Axiom

Axiom LFR1100 User manual

Axiom AX2065A User manual

Axiom

Axiom AX2065A User manual

Axiom Architectural Series W100 Specification sheet

Axiom

Axiom Architectural Series W100 Specification sheet

Axiom ED150A User manual

Axiom

Axiom ED150A User manual

Axiom ED120A User manual

Axiom

Axiom ED120A User manual

Axiom VP100 User manual

Axiom

Axiom VP100 User manual

Axiom AX2010P User manual

Axiom

Axiom AX2010P User manual

Axiom MILLENNIA M50 v2 Technical manual

Axiom

Axiom MILLENNIA M50 v2 Technical manual

Axiom EP500 v2 User manual

Axiom

Axiom EP500 v2 User manual

Popular Speakers manuals by other brands

Braven 440 owner's guide

Braven

Braven 440 owner's guide

RBH Sound SI-663 owner's manual

RBH Sound

RBH Sound SI-663 owner's manual

Philips HTL2183B quick start guide

Philips

Philips HTL2183B quick start guide

Monacor TM-15 instruction manual

Monacor

Monacor TM-15 instruction manual

Samsung HW-N950 Full manual

Samsung

Samsung HW-N950 Full manual

Electro-Voice Eliminator Monitor Brochure & specs

Electro-Voice

Electro-Voice Eliminator Monitor Brochure & specs

Gogen PSU 103 installation manual

Gogen

Gogen PSU 103 installation manual

AUSTRALIAN MONITOR XRS8 B Installation and operation manual

AUSTRALIAN MONITOR

AUSTRALIAN MONITOR XRS8 B Installation and operation manual

Martin Audio SCREEN4P - SCHEMATICS manual

Martin Audio

Martin Audio SCREEN4P - SCHEMATICS manual

Sonos PLAY:1 Product guide

Sonos

Sonos PLAY:1 Product guide

Comelit 49TRM130 Technical manual

Comelit

Comelit 49TRM130 Technical manual

SpeakerCraft AccuFit CRS7 Three owner's manual

SpeakerCraft

SpeakerCraft AccuFit CRS7 Three owner's manual

Sylvania SP770 instruction manual

Sylvania

Sylvania SP770 instruction manual

Cerwin-Vega CVHF-A21S brochure

Cerwin-Vega

Cerwin-Vega CVHF-A21S brochure

Ground Zero Competition Series owner's manual

Ground Zero

Ground Zero Competition Series owner's manual

Schwaiger WKLS100 511 instruction manual

Schwaiger

Schwaiger WKLS100 511 instruction manual

Niles StageFront IW2670LCR datasheet

Niles

Niles StageFront IW2670LCR datasheet

Renkus-Heinz iConyx IC8 owner's manual

Renkus-Heinz

Renkus-Heinz iConyx IC8 owner's manual

manuals.online logo
manuals.online logoBrands
  • About & Mission
  • Contact us
  • Privacy Policy
  • Terms and Conditions

Copyright 2025 Manuals.Online. All Rights Reserved.