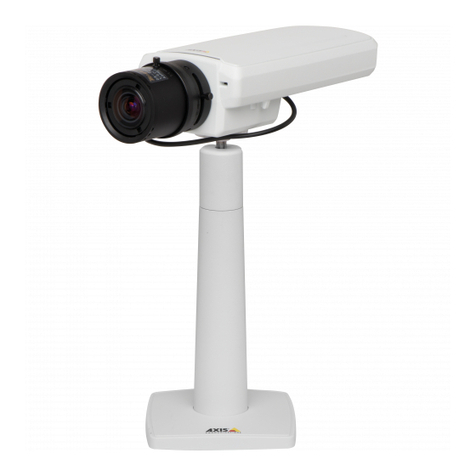
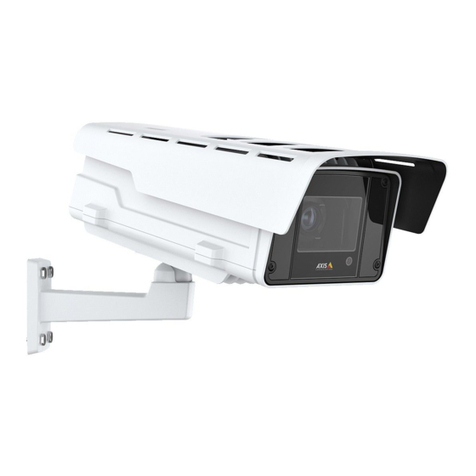
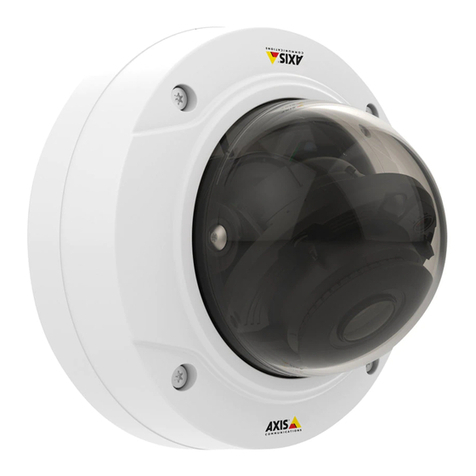
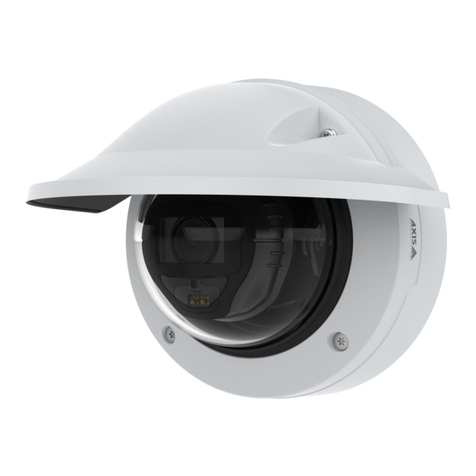
Axis AXIS 206M User manual

AXIS 206/206M Network Camera Quick Installation Guide. . . . . . . . . . . . . . . . . . . . . . . . 3
Guide d’installation rapide de la caméra réseau AXIS 206/206M . . . . . . . . . . . . . . . . . . . 9
AXIS 206/206M Netzwerkkamera Schnellinstallation. . . . . . . . . . . . . . . . . . . . . . . . . . . . 15
Guía de instalación rápida de la cámara de red AXIS 206/206M . . . . . . . . . . . . . . . . . . 23
Guida all'installazione rapida della videocamera di rete AXIS 206/206M . . . . . . . . . . . 29
AXIS 206/AXIS 206M Megapixel
Network Camera
Contents


AXIS 206/206M Quick Installation Guide Page 3
AXIS 206/206M Network Camera
Quick Installation Guide
Package Contents
Item Notes
Network Camera AXIS 206/206M.
Power adapter The adapter is country-specific. Please check that the adapter is correct for your location.
Camera stand Supplied with 3 mounting screws. The extension section is ready fitted.
Cable clip Fixes to back panel for holding power cable.
CD Documentation and software.
Printed Materials • AXIS 206/206M Quick Installation Guide
•AxisWarrantyDocument
Front
Focus
ring
Status
indicator
(outer ring)
Rear
Mounting
Network
connector
Power
connector
Power
indicator
Control
button Network
indicator
lock ring
Power Cable
clip
Serial number
label
Follow these steps to install the AXIS 206/206M on your local network (LAN):
1. Familiarize yourself with the camera (this page).
2. Connect the camera - see Cable Connections, on page 4.
3. Assign an IP address - see Installation Methods, on page 4.
For more information, please see the User’s Manual, which is available on the CD
included in this package. Updated versions can be obtained from www.axis.com

Page 4 AXIS 206/206M Quick Installation Guide
Mounting
1. If required, use the 3 supplied screws to fix the base plate to a
flat surface.
2. To use the shorter stand, unscrew the lock ring to release the
camera, and remove the extension section.
3. Re-attach the camera, adjust the angle and gently tighten the
lock ring.
Important!
Cable Connections
1. Using the self-adhesive strip, attach the supplied cable clip to the rear panel and fasten the
power cable to it. This will prevent accidental cable disconnection.
2. Connect the power adapter to the camera.
3. Connect the AXIS 206/206M to the network using a standard RJ-45 network cable.
Installation Methods
The AXIS 206/206M is designed for installation on an Ethernet network. This involves
assigning it an IP address, automatically (via e.g. DHCP) or manually. Several installation
methods are available. The one to use depends on how your network is configured. If unsure of
the method to use, please consult your network administrator, or see the documentation for
your network.
• If you are using e.g. a home broadband router, you may find it convenient to view the router’s
administration pages to discover which IP address has been assigned to your AXIS 206/206M.
Please consult the router’s documentation for further information.
• If your network has an Internet connection (with no HTTP proxy) and uses a DHCP server to
assign IP addresses, use the One-Click installation procedure. See page 5.
• If your network uses automatic IP addressing (DHCP) and your computer uses the UPnPTM
service, the AXIS 206/206M will automatically be detected and displayed on your screen. See
page 6 for more information.
•UsetheAXIS IP Utility (see page 6) to discover the IP address. This can also be used to set the
IP addess manually.
• Set the IP address manually with the ARP/Ping method, as described on page 7.
The AXIS 206/206M is designed for indoor use only, and must always be positioned where it is not exposed
to direct sunlight or strong halogen light, which can cause permanent damage to the camera’s image sen-
sor. Damage as a result of exposure to strong light is not covered by the Axis warranty.
Lock ring
Wall mounting

AXIS 206/206M Quick Installation Guide Page 5
One-click Installation
Requirements:
The AXIS Internet Dynamic DNS Service
Follow these instructions:
1. Once the network and power cables have been connected, wait for the Status indicator to
show a steady green.
2. Now press the Control button on the rear of the camera once. The Status indicator on the
front of the camera will blink green while it connects to the AXIS Internet Dynamic DNS
Service.
3. Wait for the Status indicator to go back to showing a steady green.
4. To complete the installation, now visit www.axiscam.net from an Internet connected PC.
This must be done within 60 minutes of pressing the Control button.
5. Follow the on-screen instructions provided by the AXIS Internet Dynamic DNS Service.
6. Please see page 7 for instructions on how to set the language and the password.
Notes:
7.
• You will need the camera’s serial number (S/N) to perform the installation. This is found on the label on
the rear panel. See page 3.
• If this installation was unsuccessful, try one of the other methods described on the following pages.
Broadband router/modem
providing automatic IP
addressing Internet
Computer
on a LAN AXIS 206/206M
• The One-click installation procedure uses the AXIS Internet Dynamic DNS Service. This free service allows you to quickly
and simply install your camera, which then receives a static name (DNS name). More information about the AXIS
Internet Dynamic DNS Service is available at www.axiscam.net
• Please note that this procedure will send the AXIS 206/206M’s IP address, firmware version, product type and serial
number to the Axis Internet Dynamic DNS Service. No personal information is transferred.
• To remove the DNS name and unregister from the Axis Internet Dynamic DNS Service, open the Setup pages in the
AXIS 206/206M, click System Options > Network > TCP/IP, click the Settings button for the AXIS Internet Dynamic
DNS Service and finally, click the Remove button.

Page 6 AXIS 206/206M Quick Installation Guide
UPnPTM
UPnPTM functionality is enabled by default in the AXIS 206/206M. If also enabled on your
computer (Windows ME or XP), the camera will automatically be detected and a new icon will
be added to “My Network Places.” Click this icon to access the AXIS 206/206M. See page 7 for
instructions on how to set the language and password.
Notes:
AXIS IP Utility
AXIS IP Utility 2.0 is a free
Windows application that discovers
and displays Axis devices on your
network. The application can also
be used to manually set a static IP
address. AXIS IP Utility 2.0 is available on the CD supplied with this package.
Automatic discovery
1. Check that the network and power cables are connected to the AXIS 206/206M.
2. Insert the CD into your computer’s CD drive.
3. Start AXIS IP Utility. When the AXIS 206/206M appears in the window, double-click it to
open its home page.
Set the IP address manually
1. If the AXIS 206/206M does not appear in the window, click the Refresh button to try
again. If the camera still does not appear, you can set the IP address manually. Acquire an
unused IP address on the same subnet as your computer.
2. Click the button “Set IP address using serial number” and enter the serial number (see
page 3) and IP address for the AXIS 206/206M. Follow the on-screen instructions.
Note:
• To install the UPnPTM service on your computer, open the Control Panel from the Start Menu and select
Add/Remove Programs. Select Add/Remove Windows Components and open the Networking Services
section. Click Details and then select UPnP as the service to add.
• Once the AXIS 206/206M is accessible from your computer, it is then possible to use the One-click
installation method to provide the camera with a DNS name. See the previous page.
After using the AXIS IP Utility, the One-click installation method can be used to obtain a DNS name for the
AXIS 206/206M.
UPnPTM is a certification mark of the UPnPTM Implementers Corporation.
AXIS 206/206M
Computer
on a LAN Hub/Switch
Requirements:

AXIS 206/206M Quick Installation Guide Page 7
Manual Installation with ARP/Ping
1. Acquire an unused IP address for the AXIS 206/206M. This IP address must be on the same
subnet as your computer.
2. Locate the serial number (S/N) on the camera’s rear label.
3. From a computer on your network, open a Command Prompt (in Windows: from the Start
menu, select Run... and type cmd in the field. Click OK).
4. As appropriate for your operating system, enter the following commands:
5. Check that the network cable is connected. Start/restart the camera by disconnecting and
reconnecting the power cable.
6. Close the Command prompt when you see ‘Reply from 192.168.0.125: ...’
7. The IP address has been set when the Power indicator is permanently lit and the Network
indicator flashes intermittently.
8. Start your browser, enter the IP address of the camera in the Location/Address field and
press Enter on your keyboard. See below for further instructions.
Note:
Set the language and password
When accessing the AXIS 206/206M for the first time,
the language can be changed and the “root” password
must be configured.
1. Select the language from the available options, by clicking the appropriate flag.
2. Now enter a password and then re-enter it to confirm the spelling. Click OK.
3. The ‘Enter Network Password’ dialog will appear. Enter the user name: root
Note: The default administrator user name root is permanent and cannot be deleted.
Windows syntax:Windows example:
arp -s <IP Address> <Serial Number>
ping -l 408 -t <IP Address>
arp -s 192.168.0.125 00-40-8c-18-10-00
ping -l 408 -t 192.168.0.125
UNIX/Linux/Mac syntax:UNIX/Linux/Mac example:
arp -s <IP Address> <Serial Number> temp
ping -s 408 <IP Address>
arp -s 192.168.0.125 00:40:8c:18:10:00 temp
ping -s 408 192.168.0.125
After installation, the One-click installation method can be used to obtain a DNS name for the AXIS
206/206M.

Page 8 AXIS 206/206M Quick Installation Guide
4. Enter the password as set in step 2 above, and click OK. If the password is lost, the AXIS
206/206M must be reset to the factory default settings. See below.
5. If required, click Yes to install the AXIS Media Control (AMC). You will need administrator
rights on the computer to do this.
6. The Live View page of the AXIS 206/206M is displayed, with links to the Setup tools that
enable you to customize the camera to your specific needs.
Accessing the AXIS 206/206M from the Internet
Resetting to the Factory Default Settings
This will reset all parameters, including the IP address, to the Factory Default settings:
1. Disconnect the power cable.
2. Press and hold the Control button (rear panel) and reconnect the power cable.
3. Keep the button pressed until the Status Indicator displays yellow (this may take up to 15
seconds), then release the button.
4. When the Status indicator displays green (which can take up to 1 minute) the camera is
reset to the factory default settings.
5. Re-install the AXIS 206/206M using one of the methods described in this document.
Live View - Shows live video from the
camera.
Setup - Provides all the tools needed to
set up the camera to your requirements.
Help - Displays online help on all as-
pects of using the camera.
Once installed, your AXIS 206/206M is accessible on your local network (LAN). To access the camera from the Internet
you must configure your broadband router to allow incoming data traffic. For security reasons this is usually done on
a specific port. Please refer to the documentation for your broadband router for further instructions.
For more information, please visit the AXIS Internet Dynamic DNS Service at www.axiscam.net or, for Technical notes
on this and other topics, visit the Axis Support Web at www.axis.com/techsup

Guide d’installation rapide AXIS 206/206M Page 9
Guide d’installation rapide
de la caméra réseau AXIS 206/206M
Contenu de l’emballage
Article Remarques
Caméra réseau AXIS 206/206M.
Transformateur Le transformateur varie d’un pays à l’autre. Vérifiez que le transformateur est adapté à votre
pays.
Pied de la caméra Fourni avec 3 vis de montage. La section télescopique est déjà montée.
Clip pour câble Servant à immobiliser le câble d’alimentation au niveau de la face arrière.
CD Documentation et logiciel.
Documentation imprimée • Guide d’installation rapide AXIS 206/206M
• Document de garantie d’Axis
Face avant
Bague de
mise au point
Voyant
d’état
(bague
extérieure)
Face arrière
Bague de blocage
Connecteur
réseau
Connecteur
d’alimentation
V
oyant
d’alimentation
Voyant
réseau
pour montage
Clip du
câble d’alimentatio
Etiquette du
numéro de série
Bouton de
commande
Procédez comme suit pour installer la caméra AXIS 206/206M dans votre réseau local
(LAN):
1. Familiarisez-vous avec la caméra (cette page).
2. Connectez la caméra - consultez Connexion des câbles, à la page 10.
3. Attribuez-lui une adresse IP – consultez Méthodes d’installation, à la page 10.
Pour davantage d’informations, consultez le Manuel de l’utilisateur disponible sur le
CD fourni. Des versions mises à jour sont disponibles sur www.axis.com

Page 10 Guide d’installation rapide AXIS 206/206M
Montage
1. Si nécessaire, utilisez les 3 vis fournies pour attacher la plaque
de base sur une surface plane.
2. Pour raccourcir le pied, dévissez la bague de blocage afin de
libérer la caméra, puis retirez la partie télescopique.
3. Remontez la camera, ajustez l’angle et serrez la bague de
blocage sans trop forcer.
Important!
Connexion des câbles
1. Fixez le clip pour câble fourni sur la face arrière à l’aide de la bande adhésive, puis
attachez le câble d’alimentation. Ceci évitera toute déconnexion intempestive.
2. Connectez le transformateur à la caméra.
3. Connectez la caméra AXIS 206/206M à votre réseau à l’aide d’un câble de réseau RJ-45
standard.
Méthodes d’installation
La caméra AXIS 206/206M est conçue pour une installation dans un réseau Ethernet. Une
adresse IP doit donc lui être attribuée automatiquement (via par ex. DHCP) ou manuellement.
Il existe plusieurs méthodes d’installation. La méthode à utiliser dépend de la manière dont
votre réseau est configuré. En cas de doute quant à la méthode à utiliser, consultez votre
administrateur de réseau ou la documentation de votre réseau.
• Si vous utilisez, par exemple, un routeur à large bande, consultez les pages d’administration
du routeur pour découvrir quelle adresse IP a été attribuée à votre caméra AXIS 206/206M.
Consultez la documentation du routeur pour davantage d’informations.
• Si votre réseau comporte une connexion à Internet (sans proxy HTTP) et utilise un serveur
DHCP pour attribuer les adresses IP, utilisez la Méthode d’installation en un clic.
Reportez-vous à la page 11.
• Si votre réseau utilise un adressage IP automatique (DHCP) et si votre ordinateur supporte
UPnPTM, la caméra AXIS 206/206M est détectée automatiquement et s’affiche sur votre écran.
Reportez-vous à la page 12 pour plus d’informations.
• Utilisez l’application AXIS IP Utility (consultez la page 12) pour trouver l’adresse IP. Celle-ci
permet également de définir manuellement l’adresse IP.
• Pour l’attribution manuelle de l’adresse IP selon la méthode
ARP/Ping
, reportez-vous à la page 13.
La caméra AXIS 206/206M est conçue pour une utilisation intérieure seulement et ne doit jamais être
exposée directement aux rayons du soleil ou à une forte lumière halogène pouvant endommager de façon
permanente le capteur d’image de la caméra. La garantie d’Axis ne couvre pas les dommages suite à une
exposition à une forte lumière.
Bague de blocage
Montage mural
Guide d’installation rapide AXIS 206/206M Page 11
Installation en un clic
Matériel nécessaire:
AXIS Internet Dynamic DNS Service
Procédez comme suit:
1. Une fois les câbles d’alimentation et de réseau connectés, attendez que le voyant d’état
émette une lumière verte fixe.
2. Appuyez alors une fois sur le bouton de commande à l’arrière de la caméra. Le voyant
d'état de la face avant de la caméra émet une lumière verte clignotante lors de la
connexion à AXIS Internet Dynamic DNS Service.
3. Attendez que le voyant d’état cesse de clignoter (vert).
4. Pour terminer l’installation, visitez le site www.axiscam.net depuis un PC connecté à
Internet. Ceci doit être effectué dans les 60 minutes suivant la pression sur le bouton de
commande.
5. Suivez les instructions indiquées sur l’écran par l’AXIS Internet Dynamic DNS Service.
6. Veuillez consulter la page 13 pour savoir comment définir la langue et le mot de passe de
la caméra.
Remarques:
7.
• Le numéro de série (S/N) de votre produit sera nécessaire pour terminer l’installation. Celui-ci se trouve
sur l’étiquette en face arrière. Reportez-vous à la page 9.
• Si l’installation a échoué, essayez une des autres méthodes décrites aux pages suivantes.
Routeur/modem à large
bande fournissant un adres-
sage IP automatique Internet
Ordinateur sur
réseau LAN AXIS 206/206M
• La procédure d’installation en un clic utilise AXIS Internet Dynamic DNS Service. Ce service gratuit vous permet
d’installer facilement et rapidement la caméra par l’attribution d’un nom statique (nom DNS). Davantage d’informations
sur l’AXIS Internet Dynamic DNS service sont disponibles sur le site www.axiscam.net.
• Remarquez que cette procédure enverra l’adresse IP de la caméra AXIS 206/206M, la version du logiciel
microprogrammé et le numéro de série à Axis Internet Dynamic DNS Service. Aucune information personnelle n’est
transmise.
• Pour retirer le nom DNS et se désinscrire d’Axis Internet Dynamic DNS Service, ouvrez les pages Setup de AXIS
206/206M, cliquez sur System Options > Network > TCP/IP, puis sur le bouton Settings d’AXIS Internet Dynamic DNS
Service et enfin, cliquez sur le bouton Remove.

Page 12 Guide d’installation rapide AXIS 206/206M
UPnPTM
La fonction UPnPTM est activée par défaut dans la caméra AXIS 206/206M. Si elle est aussi
activée sur votre ordinateur (Windows ME ou XP), la caméra sera automatiquement détectée et
une nouvelle icône sera ajoutée à « Mes emplacements réseau ». Cliquez sur cette icône pour
accéder à la caméra AXIS 206/206M. Consultez la page 13 pour savoir comment définir la
langue et le mot de passe de la caméra.
Remarques:
AXIS IP Utility
L’utilitaire AXIS IP Utility 2.0 est
une application Windows gratuite
servant à détecter et afficher les
périphériques Axis de votre réseau.
Cette application peut également
être utilisée pour définir
manuellement une adresse IP statique. L’application AXIS IP Utility 2.0 figure sur le CD fourni.
Détection automatique:
1. Vérifiez que les câbles d'alimentation et de réseau sont bien raccordés à votre caméra
AXIS 206/206M.
2. Insérez le CD dans le lecteur de CD de votre ordinateur.
3. Démarrez AXIS IP Utility. Double-cliquez sur AXIS 206/206M lorsqu’elle apparaît dans la
fenêtre de façon à ouvrir la page d’accueil.
Définissez manuellement l’adresse IP:
1. Si AXIS 206/206M ne s’affiche pas, cliquez sur le bouton Actualiser pour réessayer. Si la
caméra n’apparaît toujours pas, vous devrez définir manuellement l'adresse IP. Trouvez
une adresse IP inutilisée dans le même sous-réseau que votre ordinateur.
2. Cliquez sur le bouton « Paramétrer l’adresse IP en utilisant le numéro de série... » puis
saisissez le numéro de série (consultez la page 9) ainsi que l’adresse IP de la caméra AXIS
206/206M. Suivez les instructions affichées à l’écran.
Remarque:
• Pour installer le service UPnPTM sur votre ordinateur, ouvrez le Panneau de configuration depuis le menu
Démarrer et sélectionnez Ajout/suppression de programmes. Sélectionnez Ajouter/Supprimer des
composants Windows et ouvrez la section Services de mise en réseau. Cliquez sur Détails, puis sélec-
tionnez UPnP comme service à ajouter.
• Une fois que la caméra AXIS 206/206M est accessible depuis votre ordinateur, il est possible d'utiliser la
méthode d'installation en un clic pour lui attribuer un nom DNS. Reportez-vous à la page précédente.
Après utilisation de l’application AXIS IP Utility, vous pouvez recourir à la méthode d’installation en un clic
pour obtenir le nom DNS la caméra AXIS 206/206M.
UPnPTM est une marque de certification de UPnPTM Implementers Corporation.
AXIS 206/206M
Ordinateur
sur réseau
LAN
Nœud/commutateur
M
at
é
riel n
é
cessaire:

Guide d’installation rapide AXIS 206/206M Page 13
Installation manuelle avec ARP/Ping
1. Trouvez une adresse IP inutilisée pour la caméra AXIS 206/206M. Cette adresse IP doit être
dans le même sous-réseau que votre ordinateur.
2. Repérez le numéro de série (S/N) sur l’étiquette située à l’arrière de la caméra.
3. Depuis un ordinateur du réseau, ouvrez une invite de commande (dans Windows : dans le
menu Démarrer, sélectionnez Exécuter… et tapez cmd. Cliquez sur OK).
4. En fonction de votre système d’exploitation, entrez les commandes suivantes :
5. Contrôlez que le câble de réseau est branché. Démarrez/redémarrez la caméra en
déconnectant puis reconnectant le câble d’alimentation.
6. Fermez l’invite de commande lorsque vous voyez ‘Reply from 192.168.0.125: ...’
7. L’adresse IP est définie lorsque le voyant d’alimentation s’allume de manière fixe et que le
voyant du réseau clignote.
8. Démarrez votre navigateur et entrez l’adresse IP de la caméra dans le champ
Emplacement/Adresse puis appuyez sur la touche Entrée de votre clavier. Reportez-vous
ci-dessous pour des instructions complémentaires.
Remarque:
Définition de la langue et du
mot de passe
Il est possible, lors du premier accès à la caméra AXIS
206/206M, de changer la langue et de configurer le
mot de passe administrateur.
1. Sélectionnez la langue parmi les options présentées en cliquant sur le drapeau adéquat.
2. Entrez un mot de passe, puis saisissez-le de nouveau pour en confirmer l’orthographe.
Cliquez sur OK.
3. La boîte de dialogue « Enter Network Password » s’affiche. Entrez le nom d’utilisateur:
root.
Remarque: Le nom d’utilisateur par défaut de l’administrateur, à savoir root, est permanent
et ne peut pas être supprimé.
Syntaxe pour Windows: Exemple pour Windows:
arp -s <adresse IP> <numéro de série>
ping -l 408 -t <adresse IP> arp -s 192.168.0.125 00-40-8c-18-10-00
ping -l 408 -t 192.168.0.125
Syntaxe pour UNIX/Linux/Mac: Exemple pour UNIX/Linux/Mac:
arp -s <adresse IP> <numéro de série> temp
ping -s 408 <adresse IP> arp -s 192.168.0.125 00:40:8c:18:10:00 temp
ping -s 408 192.168.0.125
Après l’installation, vous pouvez recourir à la méthode d'installation en un clic pour obtenir le nom DNS la
caméra AXIS 206/206M.

Page 14 Guide d’installation rapide AXIS 206/206M
4. Entrez le mot de passe comme expliqué à l’étape 2 et cliquez sur OK. Si vous avez oublié
votre mot de passe, vous devrez rétablir les paramètres d’usine de la caméra AXIS
206/206M. Reportez-vous aux instructions ci-dessous.
5. Si nécessaire, cliquez sur Yes pour installer AXIS Media Control (AMC). Pour ce faire, vous
devrez être connecté à votre ordinateur avec des droits d’administrateur.
6. La page Live View de la caméra AXIS 206/206M s’affiche, avec des liens vers les outils de
configuration qui vous permettent d’adapter la caméra à vos propres besoins.
Accès à la caméra AXIS 206/206M depuis Internet
Retour aux paramètres par défaut définis en usine
Procédez comme suit pour revenir aux paramètres par défaut définis en usine et réinitialiser
l’adresse IP:
1. Déconnectez le câble d’alimentation.
2. Maintenez enfoncé le bouton de commande (à l’arrière de la caméra) et rebranchez le câble
d’alimentation.
3. Maintenez le bouton enfoncé jusqu’à ce que le voyant d’état émette une lumière jaune
(cela peut prendre jusqu’à 15 secondes) puis relâchez le bouton.
4. Quand le voyant d’état émet une lumière verte (ce qui peut prendre jusqu’à 1 minute), la
caméra est revenue aux paramètres par défaut définis en usine.
5. Réinstallez la caméra AXIS 206/206M à l’aide d’une des méthodes d’installation décrite
dans ce document.
Live View - permet de voir en direct la
vidéo de la caméra.
Setup - contient tous les outils néces-
saires pour adapter la caméra à vos
besoins.
Help - affiche une aide en ligne sur
toutes les manières d’utiliser la
caméra.
Une fois installée, votre caméra AXIS 206/206M est accessible depuis votre réseau local (LAN). Pour pouvoir accéder à la
caméra depuis Internet, vous devez configurer votre routeur à large bande afin d’autoriser l’entrée de données. Pour des rai-
sons de sécurité, cela s’effectue généralement sur un port spécifique. Consultez la documentation de votre routeur à large
bande pour obtenir davantage d’instructions.
Pour davantage d’informations, visitez AXIS Internet Dynamic DNS Service sur www.axiscam.net ou, pour des informations
techniques, le site de support d’Axis à l’adresse www.axis.com/techsup

AXIS 206/206M Schnellinstallation Seite 15
AXIS 206/206M Netzwerkkamera
Schnellinstallation
Lieferumfang
Komponente Hinweise
Netzwerkkamera AXIS 206/206M.
Netzadapter Der Adapter ist landesspezifisch. Überprüfen Sie, ob der Adapter für Ihren Standort geeignet
ist.
Kameraständer Wird mit 3 Schrauben geliefert. Die Ständerverlängerung ist bereits montiert.
Kabelklemme Wird auf der Rückseite zum Halten des Netzkabels angebracht.
CD Dokumentation und Software
Dokumentation • AXIS 206/206M-Schnellinstallation
• Axis-Garantieerklärung
Vorderseite
Fokussier-
ring
Status-
anzeige
(äußerer
Ring)
Rückseite
Montage-
Netzwerk-
anschluss Netz-
anschluss
Netz-
anzeige
Steuer-
taste Netzwerk-
anzeige
Verschlussring
Netzkabel-
klemme
Seriennummern-
etikett
Führen Sie die folgenden Schritte zur Installation der AXIS 206/206M in Ihrem
lokalen Netzwerk (LAN) durch:
1. Machen Sie sich mit der Kamera vertraut (siehe Abbildungen).
2. Schließen Sie die Kamera an - siehe Kabelverbindungen, auf Seite 16.
3. Weisen Sie eine IP-Adresse zu - siehe Installationsverfahren, auf Seite 16.
Weitere Einzelheiten entnehmen Sie dem Benutzerhandbuch auf der mitgelieferten

Seite 16 AXIS 206/206M Schnellinstallation
Montage
1. Befestigen Sie ggf. die Bodenplatte mit den 3 mitgelieferten
Schrauben an einer ebenen Fläche.
2. Wenn Sie den kürzeren Ständer verwenden möchten, öffnen
Sie den Verschlussring der Kamera und entfernen Sie die
Verlängerung.
3. Setzen Sie anschließend die Kamera wieder auf, stellen Sie den
gewünschten Winkel ein, und schließen Sie vorsichtig den
Verschlussring.
Wichtig!
Kabelverbindungen
1. Bringen Sie mit Hilfe des Klebebandes die Kabelklemme an der Rückseite des Gerätes an,
und fixieren Sie damit das Netzkabel. Dadurch wird das unbeabsichtigte Lösen des
Netzkabels verhindert.
2. Schließen Sie den Netzadapter an die Kamera an.
3. Schließen Sie die AXIS 206/206M mit einem serienmäßigen RJ-45-Netzkabel an Ihr
Netzwerk an.
Installationsverfahren
Die AXIS 206/206M ist für die Installation in einem Ethernet-Netzwerk vorgesehen. Dazu
gehört die automatische (z. B. per DHCP) oder manuelle Zuweisung einer IP-Adresse. Es stehen
verschiedene Installationsverfahren zur Verfügung, wobei die Wahl von der Konfiguration
Ihres Netzwerks abhängt. Wenn Sie sich nicht sicher sind, welches Verfahren Sie verwenden
sollen, kontaktieren Sie Ihren Netzwerkadministrator, oder sehen Sie in den Handbüchern zu
Ihrem Netzwerk nach.
• Wenn Sie z. B. einen eigenen Breitband-Router benutzen, sollten Sie sich die
Administrationsseiten des Routers durchlesen, um in Erfahrung zu bringen, welche IP-Adresse
Ihrer AXIS 206/206M zugewiesen wurde. Weitere Angaben hierzu finden Sie in der
Router-Dokumentation.
Die AXIS 206/206M ist nur für Benutzung in Innenräumen vorgesehen und muss grundsätzlich so
aufgestellt werden, dass sie keiner direkten Sonneneinstrahlung oder starkem Halogenlicht ausgesetzt ist,
da dieses zu dauerhaften Schäden am Bildsensor führen kann. Die Garantie von Axis erstreckt sich nicht auf
Beschädigungen infolge zu starker Lichteinstrahlung.
Verschlussring
Wandmontage

AXIS 206/206M Schnellinstallation Seite 17
• Wenn Ihr Netzwerk einen Internetanschluss (ohne Proxyserver für HTTP-Zugang) hat und einen
DHCP-Server zur Zuweisung von IP-Adressen benutzt, gehen Sie nach dem
One-Click-Verfahren vor. Siehe Seite 17.
• Falls Ihr Netzwerk mit dynamischer IP-Adressierung (DHCP) arbeitet und Ihr Computer den
UPnPTM -Service unterstützt, wird die AXIS 206/206M automatisch erkannt, und es wird eine
entsprechende Meldung auf dem Bildschirm angezeigt. Weitere Informationen hierzu finden
Sie auf Seite 18.
• Ermitteln Sie die IP-Adresse mit Hilfe der AXIS IP Utility (siehe Seite 19). Mit diesem Tool
können Sie die IP-Adresse ggf. auch manuell festlegen.
• Weisen Sie die IP-Adresse manuell mit dem ARP/Ping-Verfahren zu. Die Anleitung hierzu
finden Sie auf Seite 20.
One-Click-Verfahren
Voraussetzungen:
Der AXIS Internet Dynamic DNS-Service
Vorgehensweise:
1. Nach dem Anschluss des Netzwerk- und Stromkabels sollte die Statusanzeige grün
leuchten.
2. Betätigen Sie nun einmal die Steuertaste auf der Kamerarückseite. Die Statusanzeige auf
der Vorderseite der Kamera blinkt daraufhin grün, während eine Verbindung mit dem AXIS
Internet Dynamic DNS-Service hergestellt wird.
Breitband-Router/Modem
für automatische
IP-Adressierung Internet
Computer in
einem LAN AXIS 206/206M
• Beim One-Click-Verfahren kommt der AXIS Internet Dynamic DNS-Service zum Einsatz. Mit diesem kostenlosen Service
können Sie Ihre Kamera schnell und einfach installieren, indem ihr ein statischer Name (DNS-Name) zugewiesen wird.
Weitere Einzelheiten zum AXIS Internet Dynamic DNS-Service erhalten Sie unter www.axiscam.net.
• Hinweis: Bei diesem Verfahren werden die IP-Adresse, Firmware-Version, Seriennummer sowie der Produkttyp der AXIS
206/206M an den Axis Internet Dynamic DNS-Service übermittelt. Es werden keine persönlichen Daten übertragen.
• Gehen Sie zum Löschen des DNS-Namens sowie zum Entfernen des Axis Internet Dynamic DNS-Service wie folgt vor:
Öffnen Sie die Setup-Seiten der AXIS 206/206M, wählen Sie Systemoptionen > Netzwerk > TCP/IP, klicken Sie dann
auf die Schaltfläche Einstellungen für den AXIS Internet Dynamic DNS-Service, und klicken Sie abschließend auf die
Schaltfläche Entfernen.

Seite 18 AXIS 206/206M Schnellinstallation
3. Warten Sie, bis die Statusanzeige wieder durchgehend grün leuchtet.
4. Beenden Sie die Installation, indem Sie von einem PC mit Internetanschluss die Site
www.axiscam.net besuchen. Diesen Schritt müssen Sie innerhalb von 60 Minuten nach
Betätigung der Steuertaste ausführen.
5. Folgen Sie den Bildschirmanweisungen des AXIS Internet Dynamic DNS-Service.
6. Informationen zum Einstellen der Sprache und des Kennworts finden Sie auf Seite 21.
Hinweise:
7.
UPnPTM
Die UPnPTM-Funktionalität ist standardmäßig für die AXIS 206/206M aktiviert. Sofern diese
auch auf Ihrem Computer (Windows ME oder XP) aktiviert ist, wird die Kamera automatisch
erfasst, und unter "Netzwerkumgebung" wird ein entsprechendes Symbol hinzugefügt. Klicken
Sie auf dieses Symbol, um auf die AXIS 206/206M zuzugreifen. Hinweise zum Einstellen der
Sprache und des Kennworts finden Sie auf Seite 21.
Hinweise:
• Sie benötigen die Seriennummer (S/N) der Kamera, um die Installation durchführen zu können. Die
Nummer finden Sie auf dem Etikett auf der Geräterückseite. Siehe Seite 15.
• Falls die Installation so nicht erfolgreich beendet werden konnte, wählen Sie ein anderes der
nachfolgend beschriebenen Verfahren.
• So installieren Sie den UPnPTM-Service auf Ihrem Computer: Öffnen Sie vom Startmenü aus die
Systemsteuerung und wählen Sie Software. Wählen Sie Windows-Komponenten
hinzufügen/entfernen, und wechseln Sie zum Bereich Netzwerkdienste. Klicken Sie auf Details, und
wählen Sie dann UPnP als hinzuzufügenden Dienst aus.
• Sobald eine Verbindung zwischen der AXIS 206/206M und dem Computer hergestellt ist, können Sie der
Kamera mit dem One-Click-Verfahren einen DNS-Namen zuweisen. Siehe vorherige Seite.
UPnPTM ist eine Zertifizierungsmarke der UPnPTM Implementers Corporation.

AXIS 206/206M Schnellinstallation Seite 19
AXIS IP Utility
AXIS IP Utility 2.0 ist eine
kostenlose Windows-Anwendung,
mit der Axis-Geräte in Ihrem
Netzwerk erkannt und angezeigt
werden. Die Anwendung dient
außerdem zum manuellen Festlegen einer statischen IP-Adresse. AXIS IP Utility 2.0 befindet
sich auf der mit dieser Kamera mitgelieferten CD.
Automatische Erkennung
1. Prüfen Sie, ob die Netzwerk- und Netzkabel mit der AXIS 206/206M verbunden sind.
2. Legen Sie die CD in das CD-Laufwerk des Computers ein.
3. Starten Sie AXIS IP Utility. Klicken Sie auf das Symbol der AXIS 206/206M, um die
entsprechende Homepage zu öffnen.
IP-Adresse manuell einstellen
1. Wenn das Symbol der AXIS 206/206M nicht im Fenster angezeigt wird, klicken Sie auf die
Schaltfläche Aktualisieren, um erneut nach dem Gerät zu suchen. Wenn die Kamera immer
noch nicht angezeigt wird, müssen Sie die IP-Adresse manuell zuweisen. Wählen Sie eine
nicht zugewiesene IP-Adresse für das gleiche Subnetz, in dem sich Ihr Computer befindet.
2. Klicken Sie auf die Schaltfläche IP-Adresse mit Seriennummer festlegen... und geben Sie
die Seriennummer (siehe Seite 15) und IP-Adresse der AXIS 206/206M ein. Folgen Sie den
Bildschirmanweisungen.
Hinweis:
Nach der Verwendung von AXIS IP Utility können Sie der AXIS 206/206M mit dem One-Click-Verfahren
einen DNS-Namen zuweisen.
AXIS 206/206M
Computer
in einem
LAN
Hub/Switch
Voraussetzungen:

Seite 20 AXIS 206/206M Schnellinstallation
Manuelle Installation mit ARP/Ping
1. Wählen Sie eine unbenutzte IP-Adresse für die AXIS 206/206M. Diese IP-Adresse muss
dem gleichen Subnetz wie Ihr Computer zugeordnet sein.
2. Suchen Sie die Seriennummer (S/N) auf dem Etikett auf der Rückseite der Kamera.
3. Öffnen Sie von einem Computer im Netzwerk aus eine Befehlszeile (wählen Sie hierzu im
Windows-Startmenü "Ausführen..."), und geben Sie cmd ein. Klicken Sie auf OK.
4. Je nach verwendetem Betriebssystem geben Sie nun die folgenden Befehle ein:
5. Prüfen Sie, ob das Netzkabel angeschlossen ist. Starten Sie die Kamera erneut, indem Sie
das Netzkabel lösen und wieder anschließen.
6. Schließen Sie die Befehlszeile, sobald "Antwort von 192.168.0.125:" angezeigt wird.
7. Die IP-Adresse wurde erfolgreich zugewiesen, wenn die Netzanzeige durchgehend leuchtet
und die Netzwerkanzeige blinkt.
8. Starten Sie den Browser, geben Sie die IP-Adresse der Kamera im Feld "Position/Adresse"
ein, und drücken Sie die Eingabetaste auf der Tastatur. Weitere Hinweise finden Sie
nachfolgend.
Hinweis:
Windows-Syntax:Beispiel für Windows:
arp -s <IP-Adresse> <Seriennummer>
ping -l 408 -t <IP-Adresse>
arp -s 192.168.0.125 00-40-8c-18-10-00
ping -l 408 -t 192.168.0.125
UNIX-/Linux-/Mac-Syntax:Beispiel für UNIX/Linux/Mac:
arp -s <IP-Adresse> <Seriennummer> temp
ping -s 408 <IP-Adresse>
arp -s 192.168.0.125 00:40:8c:18:10:00 temp
ping -s 408 192.168.0.125
Nach der Installation können Sie der AXIS 206/206M mit dem One-Click-Verfahren einen DNS-Namen
zuweisen.
This manual suits for next models
2
Table of contents
Languages:
Other Axis Security Camera manuals