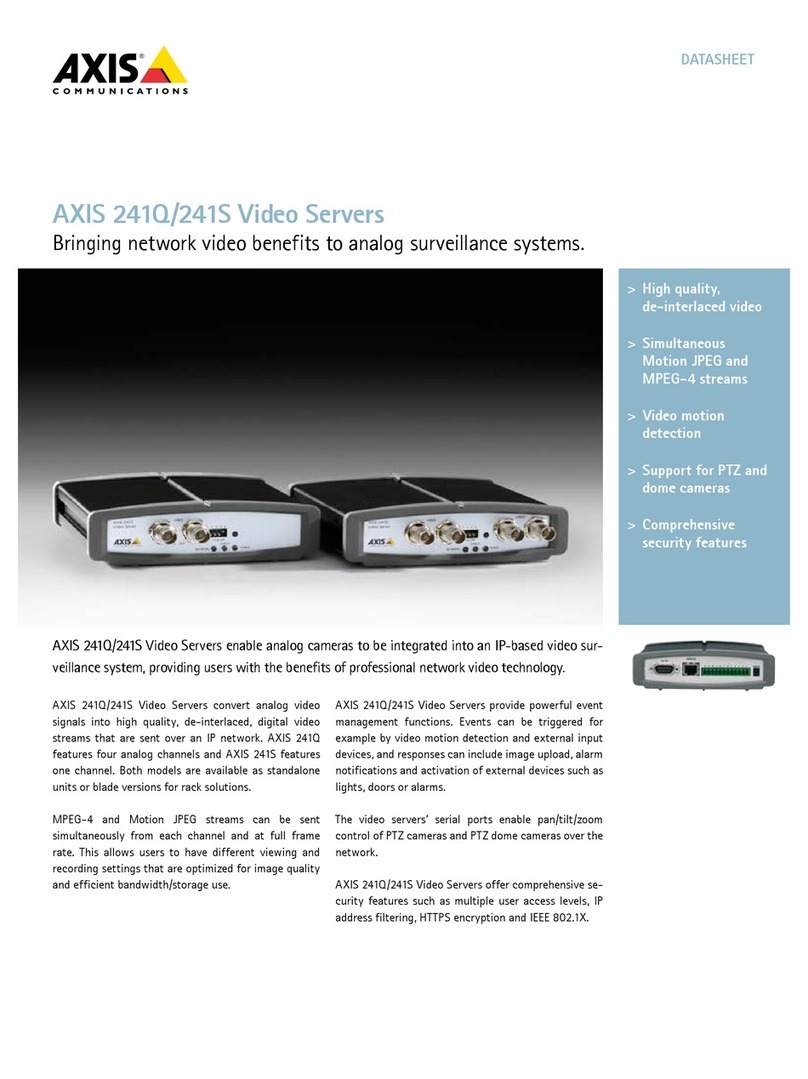
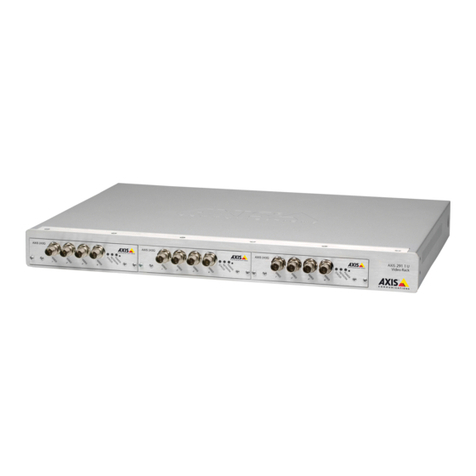
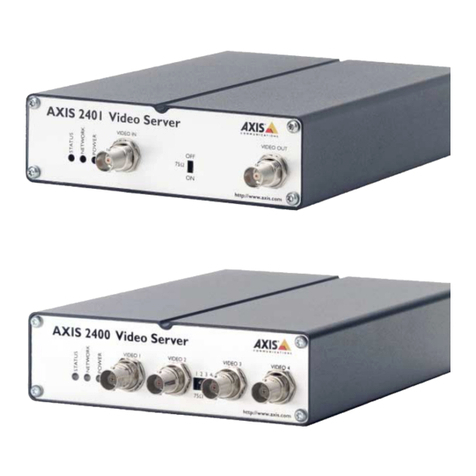
Axis 200+ User manual


AXIS 200+ Users Manual
AXIS 200+
Network Camera Server
Users Manual

AXIS 200+ Users Manual
2
Safety Notices
Please observe all safety markings and instructions when
using this product.
Caution! - potential hazard that can damage the product.
Important - potential hazard that can seriously impair
operation.
Do not proceed any of the above notices until you have fully
understood the implications.
Legal Considerations
Camera surveillance can be prohibited by laws that vary
from country to country. Check out the laws in your
country before using the AXIS 200+ for surveillance.
Electromagnetic Compatibility (EMC)
USA - This equipment generates, uses, and can radiate
radio frequency energy and if not installed and used in
accordance with the instruction manual, may cause
interference to radio communications. It has been tested
and found to comply with the limits for a Class A
computing device pursuant to Subpart B of Part 15 of FCC
rules, which are designed to provide reasonable protection
against such interference when operated in a commercial
environment. Operation of this equipment in a residential
area is likely to cause interference in which case the user at
his/her own expense will be required to take whatever
measures may be required to correct the interference.
Shielded cables should be used with this unit to ensure
compliance with the Class A limits
Europe - This digital equipment fulfils the
requirements for radiated emission according to limit B of
EN55022/1994, and the requirements for immunity
according to EN50082-1/1992 residential, commercial, and
light industry (Compliance is not valid for unshielded
network and printer cables).
Liability
Every care has been taken in the preparation of this manual;
if you detect any inaccuracies or omissions, please inform us
at an address which can be found in the last appendix of the
manual. Axis Communications cannot be held responsible
for any technical or typographical errors and reserves the
right to make changes to the product and manuals without
prior notice. Axis Communications makes no warranty of
any kind with regard to the material contained within this
document, including, but not limited to, the implied
warranties of merchantability and fitness for a particular purpose.
Axis Communications AB shall not be liable nor responsible for
incidental or consequential damages in connection with the
furnishing, performance or use of this material.
Year 2000 Compliance
Axis Communications warrants that the AXIS 200+ is Year 2000
compliant.
Trademark Acknowledgments
Acrobat, Adobe, Apple, Chimera, Ethernet, IBM, Internet,
Internet Explorer, LAN Manager, LAN Server, Macintosh,
Microsoft, NCSA Mosaic, Netscape Navigator, Novell NetWare,
Oracle Power Browser, OS/2, UNIX, Windows, WWW are
registered trademarks of the respective holders.
AXIS 200+ Users Manual
Revision 1.12
Part No: 15855
Dated: December 1998
Copyright © Axis Communications AB,
1996 - 1998
AXIS 200+ Users Manual Preface 3
Preface
Thank you for purchasing the AXIS 200+ Network Camera Server. This product has been
developed to connect your cameras anywhere in your network, allowing all users to take high
quality snapshot pictures around the globe over Internet and intranet networks.
About This Manual
The manual provides introductory information as well as detailed instructions on how to set up
and manage the AXIS 200+ in various network environments. It is intended for everyone
involved in installing and managing the AXIS 200+. To fully benefit from the manual, you
should be familiar with basic networking principles.
This manual applies to the AXIS 200+, with software release 1.41.
About Axis
Axis Communications is dedicated to providing innovative solutions for network-connected
computer peripherals. Since the start in 1984, Axis has been one of the fastest growing companies
in the market and is now a leader in its field.
ThinServer Technology Being the core of all Axis products, the ThinServer technology
enables them to act as intelligent file server independent ThinServer devices. A ThinServer
device is a network server which includes thin embedded server software capable of
simultaneous multiprotocol communication, scalable RISC hardware and a built-in Web server
which allows easy access and management via any standard Web browser. The ThinServer
technology makes it possible to connect any electronic device to the network, thus providing
Access to everything.
Today, Axis Communications is offering the ThinServer technology as well as six major
ThinServer product lines consisting of:
Network Print Servers offer you a powerful and cost-efficient method for sharing printer
resources in your network. They connect to any standard printer, featuring high performance,
simple management and easy upgrading across the network. The print servers are available in
Ethernet, Fast Ethernet and Token Ring versions.
IBM Mainframe and S/3x - AS/400 Print Servers and Protocol Converters includes a
wide range of LAN, coax and twinax attached print servers for the IBM host environment. By
emulating IBM devices, these servers provide conversion of the IPDS, SCS and 3270DS data
streams to the major ASCII printer languages.

Preface AXIS 200+ Users Manual
4
Network Attached Optical Media Servers provide you with a flexible and cost-efficient
solution for sharing CD-ROMs, DVD-ROMs and other optical media across the network. They
are available in Ethernet, Fast Ethernet and Token Ring versions.
Network Attached Storage Servers offer network connectivity for re-writable media such as
hard disks and Iomega Jaz cartridges, which, via the storage server, can be backed up on DAT
tapes. They are only available in Ethernet versions.
Network Camera Servers provide live images using standard Internet technology, thus
enabling access to live cameras via any standard Web browser. They offer a perfect solution for
remote surveillance over the Internet and their sharp images can bring life into any web site.
These servers support Ethernet as well as PSTN and GSM phone lines.
Network Scan Servers enable easy distribution of paper-based information across workgroups
and the enterprise. By sending the scanned documents to your destination via the
Internet/intranet, you will reduce your faxing/mailing costs, as well as save time, thus improving
your organization efficiency.
Support Services
Should you require any technical assistance, please contact your local dealer. If your questions
cannot be answered immediately, your local dealer will forward your queries through the
appropriate channels to ensure you a rapid response.
WWW: http://www.axis.com If you are connected to Internet, you can find online
manuals, technical support, firmware updates,
application software, company information, on any of
the addresses listed to the left.
FTP server: ftp://ftp.axis.com/pub/axis
Support
e-mail address: tech-sup@axis.com

AXIS 200+ Users Manual Table of Contents 5
Table of Contents
Section 1 Introduction . . . . . . . . . . . . . . . . . . . . . . . . . . . . . . . . . . . . . . . . . . . . . . . . . . 7
The AXIS 200+ Camera Server . . . . . . . . . . . . . . . . . . . . . . . . . . . . . . . 7
Features and Benefits . . . . . . . . . . . . . . . . . . . . . . . . . . . . . . . . . . . . . . . 8
Section 2 Installing the AXIS 200+ . . . . . . . . . . . . . . . . . . . . . . . . . . . . . . . . . . . . . . . . 11
Installation Summary . . . . . . . . . . . . . . . . . . . . . . . . . . . . . . . . . . . . . . . 11
Stage 1. Unpacking and Checking the Hardware . . . . . . . . . . . . . . . . 12
Stage 2. Identifying the Connectors and Indicators . . . . . . . . . . . . . . 13
Stage 3. Installing the Hardware . . . . . . . . . . . . . . . . . . . . . . . . . . . . . 15
Stage 4. Assigning an Internet Address . . . . . . . . . . . . . . . . . . . . . . . . 16
Stage 5. Verifying the Installation . . . . . . . . . . . . . . . . . . . . . . . . . . . . . 16
Stage 6. Adjusting the Focus . . . . . . . . . . . . . . . . . . . . . . . . . . . . . . . . 18
Stage 7. Adjusting the Image Parameters . . . . . . . . . . . . . . . . . . . . . . 19
Stage 8. Replacing the Lens . . . . . . . . . . . . . . . . . . . . . . . . . . . . . . . . . 19
Section 3 Assigning an IP Address . . . . . . . . . . . . . . . . . . . . . . . . . . . . . . . . . . . . . . . . 21
Downloading the IP Address . . . . . . . . . . . . . . . . . . . . . . . . . . . . . . . . 21
Section 4 Configuring the AXIS 200+ . . . . . . . . . . . . . . . . . . . . . . . . . . . . . . . . . . . . . . 31
Section 5 Using the AXIS 200+ . . . . . . . . . . . . . . . . . . . . . . . . . . . . . . . . . . . . . . . . . . 43
Automatic Picture Updating . . . . . . . . . . . . . . . . . . . . . . . . . . . . . . . . . 47
External Web Sites . . . . . . . . . . . . . . . . . . . . . . . . . . . . . . . . . . . . . . . . 50
Point to Point Protocol . . . . . . . . . . . . . . . . . . . . . . . . . . . . . . . . . . . . 61
Zmodem . . . . . . . . . . . . . . . . . . . . . . . . . . . . . . . . . . . . . . . . . . . . . . . . 64
Appendix A Troubleshooting . . . . . . . . . . . . . . . . . . . . . . . . . . . . . . . . . . . . . . . . . . . . . . 65
Symptoms, Possible Causes and Remedial Actions . . . . . . . . . . . . . . . 67
Appendix B The Parameter List . . . . . . . . . . . . . . . . . . . . . . . . . . . . . . . . . . . . . . . . . . . 71
The Configuration File . . . . . . . . . . . . . . . . . . . . . . . . . . . . . . . . . . . . . 71
Factory Default Settings . . . . . . . . . . . . . . . . . . . . . . . . . . . . . . . . . . . . 73
Section 6 Updating the Software . . . . . . . . . . . . . . . . . . . . . . . . . . . . . . . . . . . . . . . . . 75
Obtaining Updated Software . . . . . . . . . . . . . . . . . . . . . . . . . . . . . . . . 75
Upgrading the Software . . . . . . . . . . . . . . . . . . . . . . . . . . . . . . . . . . . . 76

Table of Contents AXIS 200+ Users Manual
6
Appendix C Technical Specifications . . . . . . . . . . . . . . . . . . . . . . . . . . . . . . . . . . . . . . . . . 79
Appendix D The Auxiliary IO Port . . . . . . . . . . . . . . . . . . . . . . . . . . . . . . . . . . . . . . . . . . 83
Physical Connection . . . . . . . . . . . . . . . . . . . . . . . . . . . . . . . . . . . . . . . 83
Controlling and Monitoring . . . . . . . . . . . . . . . . . . . . . . . . . . . . . . . . . 84
Appendix E The RS232 Serial Port . . . . . . . . . . . . . . . . . . . . . . . . . . . . . . . . . . . . . . . . . . 89
Physical Connector . . . . . . . . . . . . . . . . . . . . . . . . . . . . . . . . . . . . . . . . 89
Setting Up the AXIS 200+ Modem Server . . . . . . . . . . . . . . . . . . . . . . 90
Appendix F Camera Applications . . . . . . . . . . . . . . . . . . . . . . . . . . . . . . . . . . . . . . . . . . . 99
Application Ideas . . . . . . . . . . . . . . . . . . . . . . . . . . . . . . . . . . . . . . . . . . 99
Application Examples . . . . . . . . . . . . . . . . . . . . . . . . . . . . . . . . . . . . . 100
Appendix G CRON Script Command Reference . . . . . . . . . . . . . . . . . . . . . . . . . . . . . . 101
Script Format . . . . . . . . . . . . . . . . . . . . . . . . . . . . . . . . . . . . . . . . . . . 101
Commands . . . . . . . . . . . . . . . . . . . . . . . . . . . . . . . . . . . . . . . . . . . . . 102

AXIS 200+ Users Manual Section 1: Introduction 7
Section 1 Introduction
The AXIS 200+ Camera Server
The AXIS 200+ Camera Server is a digital snapshot camera with a
built-in web server. It connects directly to Ethernet networks and
provides a source for live color pictures over the Internet.
The AXIS 200+ Camera Server
In the past, network imaging solutions have required cumbersome,
complicated systems involving PCs or workstations with specific video
cabling. The AXIS 200+ eliminates the cost, management and
maintenance issues commonly associated with those types of solutions.
Traditional surveillance systems often limit camera access to a specific
monitor i.e. the control room. However, the AXIS 200+ can be used
for both industrial and security operations over a secure intranet
system, or allow open access via the Internet. This means that you can
monitor operations remotely from within the comfort of your own
home, headquarters, or indeed from any workstation of your choosing
that supports a Web browser.

Section 1: Introduction AXIS 200+ Users Manual
8
Technically, the AXIS 200+ is a microprocessor-based device that
includes:
A digital color camera
Optimised hardware for image compression
Standalone web server functionality
Physical Ethernet connection for modem
Features and Benefits
Easy Installation Connecting the AXIS 200+ to the network is easy. It does not require
the use of a PC frame grabber card or interaction with any other
server. No additional software or hardware is needed. You can actually
install it in a single minute - all you need to do is assign a valid
Internet address.
Cost-effective With all necessary features included, the AXIS 200+ provides a reliable
and low cost alternative for publication of pictures on the network.
Standard Image
Format
The AXIS 200+ generates pictures in standard JPEG format which
means that users can take and view pictures over the network using
any standard Web browser. Pictures taken by the AXIS 200+ can be
displayed in your web pages by creating HTML links.
The AXIS 200+ provides high-quality snapshot pictures for any
Internet/intranet client that cares to visit it. Primarily designed to
produce a live snapshot for each occasion it is accessed, it can also
broadcast recently generated pictures upon request.
Fast JPEG
Compression
The AXIS 200+ has hardware support for the JPEG compression as
well as a 32-bit high speed RISC CPU. This results in fast JPEG
compression. The AXIS 200+ provides JPEG images directly, without
the need for manual conversion between image formats. A full size
JPEG image is compressed in less than one second.

AXIS 200+ Users Manual Section 1: Introduction 9
Operating
Environments
The AXIS 200+
supports TCP/IP and
Internet-related
protocols. It can
therefore be used in
mixed operating system
environments such as
Windows, Macintosh,
UNIX and OS/2.
Using a standard Web
browser, the AXIS 200+
can be configured and
managed directly from
its own web pages.
The AXIS 200+ also supports FTP so that snapshots can be taken and
saved locally.
Dial-up Connection The Point to Point Protocol (PPP) support allows you to use your
AXIS 200+ remotely over a serial link, just as if it were located on your
local network. By connecting the AXIS 200+ to a modem, snapshot
images can be downloaded to remote computers using standard
modem equipment.
External Device
Connection
The auxiliary input makes it possible to control the AXIS 200+ from
external devices, i.e. IR-sensors, switches, alarm relays etc.
Security The AXIS 200+ is a self-contained web server. This means that the
camera server is secured like any other Internet host. The Network
Administrator can decide whether individuals, groups, the whole
company or the whole world may access your camera server. Normally
this is done in your company's Internet firewall.

Section 1: Introduction AXIS 200+ Users Manual
10
Web Forum
Discussions
Axis Communications will be running a web forum for ideas and
suggestion notes for possible camera applications. Axis will also
maintain a link collection where you can insert your own link to your
application and keep lists of application notes, FAQ:s and other
related information.

AXIS 200+ Users Manual Section 2: Installing the AXIS 200+ 11
Section 2 Installing the AXIS 200+
This section provides a brief description of the unit connectors and
indicators, and describes the AXIS 200+ installation procedures.
Installation Summary
The AXIS 200+ is installed in these stages:
Stage 1. Unpacking and Checking the Hardware.
Stage 2. Identifying the Connectors and Indicators
Stage 3. Installing the Hardware
Stage 4. Assigning an Internet Address
Stage 5. Verifying the Installation
Stage 6. Adjusting the Focus
Stage 7. Adjusting the Image Parameters
Stage 8. Replacing the Lens

Section 2: Installing the AXIS 200+ AXIS 200+ Users Manual
12
Stage 1. Unpacking and Checking the Hardware
Unpack and check all the items against the list below. Contact your
dealer if anything is missing or damaged. All packing material is
recyclable.
AXIS Online CD The AXIS Online CD provides an easy-to-use electronic catalogue,
that includes all of the latest AXIS product software, utilities software,
white papers, user documents, technical references etc. It can be used
within all of the supported Axis computing environments.
Startup Procedures
for Windows
The AXIS Online CD will autostart from a local CD drive on
Windows 95/98 and NT platforms. Windows 3.1 users are required
to navigate to the CD root directory and click on the setup31.exe
file from within the Windows File Manager.
Startup Procedures
for Macintosh, UNIX
and OS/2
Navigate to the CD root directory and click on the start.pdf file
from within your preferred file manager application.
Hardware Model Variants Part Numbers
Camera Server AXIS 200+ 0064-2
Mounting Assembly 15104
Power Supply Europe 14233
UK 14234
Australia 14255
USA 14253
Japan 14254
Extension Cord 10 feet (3 m) 15187
Media Title Part Numbers
CD-ROM AXIS Online CD 15926
Printed Material AXIS 200+ Quick Installation Guide 15846
Product Brochure 14412
AXIS User Group Registration Leaflet 15119

AXIS 200+ Users Manual Section 2: Installing the AXIS 200+ 13
Note: ❏If the Adobe Acrobat Reader 3.0 is not installed on your system,
locate and run the appropriate installer from the
tools/Acrobat/ folder. Refer to the readme.txt file for full
path name details.
HTML Interface You can access a Web browser interface to the contents of the AXIS
Online CD by clicking the HTML button from within the main
installation dialog. This interface allows Network Administrators to
distribute the CD contents over intranet networks by simply
broadcasting a URL reference.
Stage 2. Identifying the Connectors and Indicators
Please read the following information to familiarize yourself with the
AXIS 200+, making particular note of where the connectors and
indicators are located. This information provide a useful reference
when performing the remaining stages of the installation.
Connectors
Auxiliary I/O
Connector
A Mini-DIN 8-pole external connector for auxiliary connection to the
AXIS 200+. The functionality of this connector is fully discussed in
Appendix D - The Auxiliary IO Port.
NetPower
Control Ethernet RS232 serialPower supplySnapshot Auxiliary I/O
Camera lens
Serial number
connector
10baseTindicator
button
indicatorLock ring CS ring indicator

Section 2: Installing the AXIS 200+ AXIS 200+ Users Manual
14
RS232 Serial
Connector
A 9 pin D-sub connector provides the physical RS232 serial interface
to a modem server within the AXIS 200+. This connector is discussed
in detail in Appendix E - The RS232 Serial Port.
Ethernet 10BaseT
Connector
10BaseT (RJ-45) twisted pair Ethernet connector for connection to
the network.
Power Supply
Connector
Jack socket for connection of AXIS 200+ power supply.
Caution! The power supply delivered with your AXIS 200+ is country specific.
Please check that the type of power supply you are using is correct
against the checklist.
Indicators
Snapshot Indicator The Snapshot indicator will flash on every occasion the AXIS 200+
takes a snapshot.
Power Indicator The Power indicator is normally lit while power is applied. If it is not
lit, or it flashes, there is problem with the AXIS 200+ power supply.
Net Indicator The Net indicator flashes to indicate network activity.
Camera Lens Wide angle lens with rotational-focus control. Refer to Appendix C -
Technical Specifications for complete specification. Possible to mount
standard C/CS lenses. See Stage 8. Replacing the Lens, on page 19.
Serial Number The serial number is located on the underside label of the AXIS 200+.
Please note that the serial number of your AXIS 200+ is identical to
the Ethernet address of the unit.

AXIS 200+ Users Manual Section 2: Installing the AXIS 200+ 15
Control Button The Control button is used for multiple purposes, e.g. restoring the
factory default settings, adjusting the white balance, triggering CRON
scripts. Refer to the appropriate sections of the manual.
Stage 3. Installing the Hardware
To connect your AXIS 200+ to the network, follow these instructions:
1. Note the serial number of your AXIS 200+ for future reference
during the installation procedure. This is located on the underside
label of the AXIS 200+.
2. Fasten the AXIS 200+ to the mounting assembly and position it
appropriately for your application.
Note: ❏The intermediate part of the
mounting assembly is
detachable. If more convenient,
you can take the mounting
assembly apart and attach the
camera holder directly to the
foot. See the picture.
Caution! ❏Please note that the CCD (charged coupled device) within the
AXIS 200+ can become permanently damaged if the camera lens
is exposed to too much direct sunlight!
If you operate the AXIS 200+ in very bright light, we recommend
that you use a lens with adjustable iris (auto or manual). If your
application demands prolonged exposure to sunlight, you should
consider the purchase of a visor. Refer to this link for further
information:
http://www.axis.com/products/camera_servers/applic/housing.
htm

Section 2: Installing the AXIS 200+ AXIS 200+ Users Manual
16
3. Connect your AXIS200+ to the network using an Ethernet 10baseT
connector.
4. Connect the power supply to the AXIS 200+.
5. Check that the Power indicator is constantly lit.
Stage 4. Assigning an Internet Address
To access the AXIS 200+ from a Web browser, you must first assign a
valid Internet address.
Refer to Section 3 - Assigning an IP Address on how to do this.
Stage 5. Verifying the Installation
After assigning an Internet address, verify the connection between
your AXIS 200+ and the network. Follow these steps:

AXIS 200+ Users Manual Section 2: Installing the AXIS 200+ 17
1. Start your Web browser and enter the name or Internet address:
or
The AXIS 200+ Home Page that includes a snapshot just taken is
displayed:
2. To further test your AXIS 200+, take some more pictures. Simply
click Refreh/Reload in your Web browser to do that.
http://cameraname/
http://172.16.253.80/

Section 2: Installing the AXIS 200+ AXIS 200+ Users Manual
18
Notes: ❏If you are using Netscape Navigator, you can click the Server
push link to start automatic picture updating. If you are using
Internet Explorer, you must first download an ActiveX
component from the AXIS 200+ web site to enable automatic
picture updating. Then click ActiveX on the Server push page.
The automatic updating functions are described in
Automatic Picture Updating, on page 47.
❏Web pages are kept locally for fast browsing. Thus, in some
instances your AXIS 200+ may display a cached image as opposed
to a newly taken snapshot. In these circumstances, simply reload
your Web browser.
Stage 6. Adjusting the Focus
The AXIS 200+ is delivered in approximate focus position, with focus
set to infinity.
The AXIS 200+ lens has rotational focus control. To fine adjust to
close focus, carefully turn the smaller lens.
If you cannot obtain a sharp picture, screw the smaller lens to its end
and loosen the lock ring. Direct the camera towards a distant object
and bring the camera into focus by turning the entire lens mount.
Remember to tighten the lock ring afterwards.
Note: ❏The lens assembly rotates on a screw fitting and can be completely
removed if taken to the end of its thread. Should you need to
remove the lens, take care not to let any dust enter the lens as this
will adversely effect the quality of your snapshots.
smaller lens
Lock ring Lens mount

AXIS 200+ Users Manual Section 2: Installing the AXIS 200+ 19
Test the results of the adjustments by taking some new pictures. To do
this, simply reload the URL in your Web browser. Use one of the
automatic updating functions to monitor the changes to focus.
The installation is complete and you can now include pictures into
your own applications.
Optionally, you can replace the basic lens delivered with the AXIS
200+ with another lens. See Stage 8. Replacing the Lens, on page 19.
Stage 7. Adjusting the Image Parameters
To automatically adjust the image parameters, click the Image Wizard
link. Screen by screen, the wizard will display a number of samples and
ask you to choose the best picture with respect to brightness, white
balance, color etc. You can also set a time period for automatically
adjusting the color in the image to the environment.
Stage 8. Replacing the Lens
You can replace the basic lens with any industry standard C or CS
lens.
Note: ❏To mount a C lens, you will need a C/CS ring adapter.
Follow these steps to replace the lens:
1. Unscrew the AXIS 200+ lens assembly.
2. Detach the plastic lens fitting from the CS ring.
3. C lens only: Attach the new lens to a C/CS ring adapter.
Other manuals for 200+
2
Table of contents
Other Axis Server manuals

Axis
Axis 25281R1 User manual

Axis
Axis 241Q Blade User manual

Axis
Axis AXIS 243Q Blade User manual

Axis
Axis 700 User manual

Axis
Axis 7000 FX User manual

Axis
Axis AXIS 243Q Blade User manual

Axis
Axis 240Q Blade User manual

Axis
Axis exacqVision Edge User manual

Axis
Axis Video Server User manual

Axis
Axis 700 User manual
Popular Server manuals by other brands

Advanced Industrial Computer
Advanced Industrial Computer RMC-2QD-2 Quick install guide

Supermicro
Supermicro SUPERSERVER 6027R-CDNRT+ user manual

LG
LG Cloud Device CL601W owner's manual

Siemens
Siemens 3VA9987-0TA10 operating instructions

Gigabyte
Gigabyte H273-Z81-AAN1 user manual

Lenovo
Lenovo ThinkServer RD330 Garantie en ondersteuning