Axis StorPoint NAS 100 User manual

StorPoint NAS 100 User’s Manual 1
StorPoint NAS 100
Network Hard Disk Server
User’s Manual

AXIS COMMUNICATIONS
<Product Name> Quick User’s Guide
Notices StorPoint NAS 100 User’s Manual2
Safety Notices
Please observe all safety markings and instructions when
using this product.
Caution! - potential hazard that can damage the product.
Important - potential hazard that can seriously impair
operation.
Do not proceed any of the above notices until you have fully
understood the implications.
Electromagnetic Compatibility (EMC)
USA - This equipment generates, uses, and can radiate
radio frequency energy and if not installed and used in
accordance with the instruction manual, may cause
interference to radio communications. It has been tested and
found to comply with the limits for a Class A computing
device pursuant to Subpart B of Part 15 of FCC rules, which
are designed to provide reasonable protection against such
interference when operated in a commercial environment.
Operation of this equipment in a residential area is likely to
cause interference in which case the user at his/her own
expense will be required to take whatever measures may be
required to correct the interference. Shielded cables should be
used with this unit to ensure compliance with the Class A
limits.
Europe - This digital equipment fulfils the requirements
for radiated emission according to limit B of EN55022/1994,
and the requirements for immunity according to
EN50082-1/1992 residential, commercial, and light industry
(Compliance is not valid for unshielded network cables).
Liability
Every care has been taken in the preperation of this manual;
if you detect any inaccuraries or omissions, please inform us
at an address which can be found in the last appendix of the
manual. Axis Communications cannot be held responsible for
any technical or typographical errors and reserves the right to
make changes to the product and manuals without prior
notice. Axis Communications makes no warranty of any kind
with regard to the material contained within this document,
including, but not limited to, the implied warranties of
merchantability and fitness for a particular purpose. Axis
Communications shall not be liable nor responsible for
incidental or consequential damages in connection with the
furnishing, performance or use of this material.
Year 2000 Compliance
Axis Communications warrants that the StorPoint NAS is
Year 2000 compliant.
Axis’ Trademarks
StorPoint, ThinServer
Trademark Acknowledgments
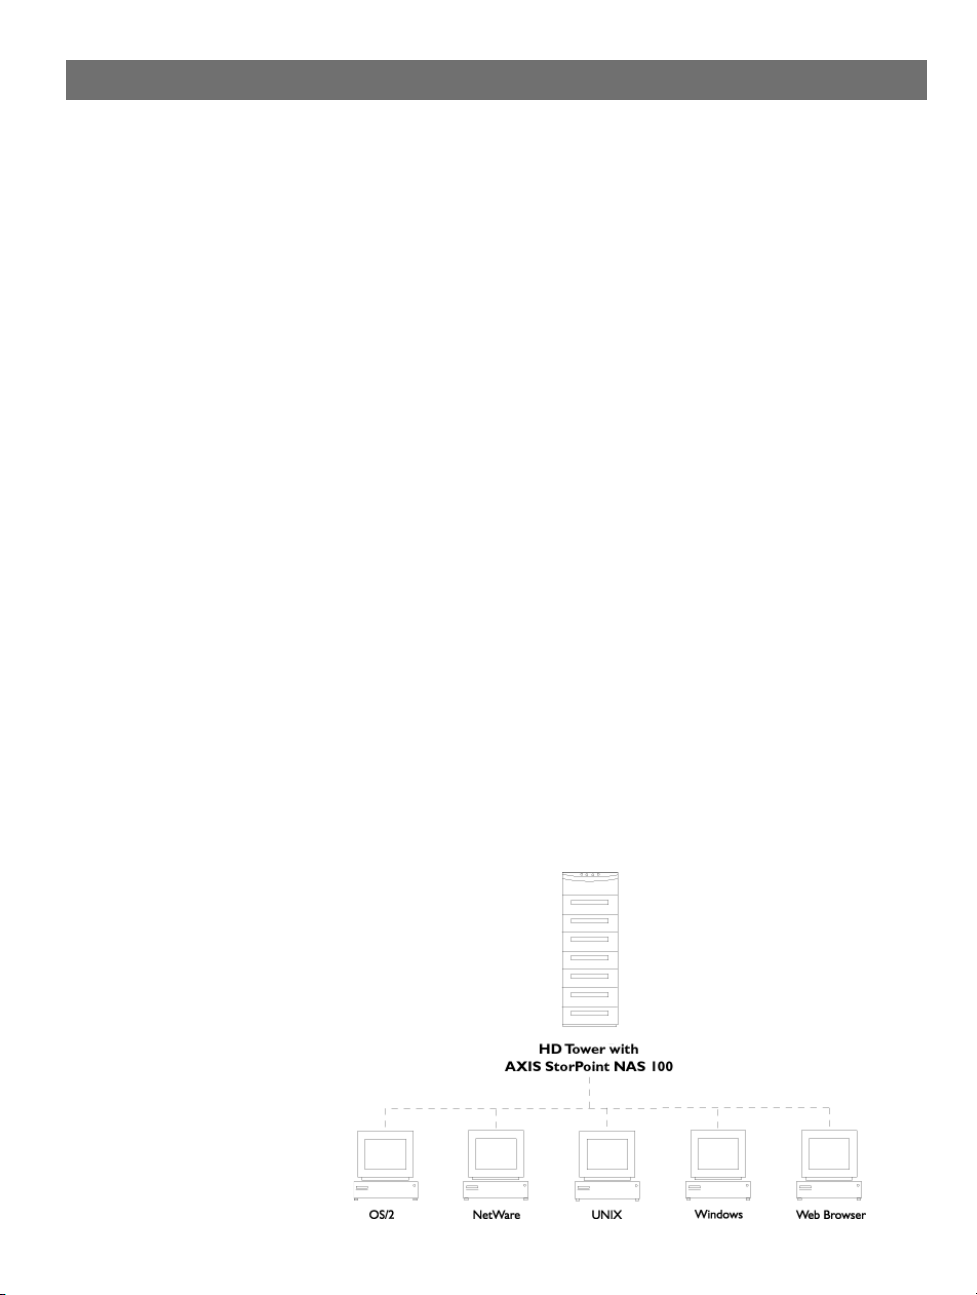
AIX, DOS, Ethernet, IBM, Internet Explorer, Microsoft,
Netscape, Netscape Navigator, NetWare, OS/2, UNIX,
Windows, Windows for Workgroups, Windows 95/98 and
Windows NT are registered trademarks of the respective
holders.
AXIS StorPoint NAS 100 User’s Manual
Revision 1.0
Part No: 16939
Dated: September 1999
Copyright ©
Axis Communications AB, 1999

StorPoint NAS 100 User’s Manual Preface 3
Preface
Thank you for purchasing the AXIS StorPoint NAS 100 Network Hard Disk Server. This product
is developed to be a storage appliance for network file sharing and data storage.
About This Manual
The manual provides introductory information as well as detailed instructions on how to set up
and manage the StorPoint NAS in various network environments. It is intended for everyone
involved in installing and managing the StorPoint NAS. To fully benefit from the manual, you
should be familiar with basic networking principles.
This manual applies to the AXIS StorPoint NAS 100 with software release 1.00 and subsequent
releases until otherwise notified.
About Axis
Axis Communications is dedicated to providing innovative solutions for network-connected
computer peripherals. Since the start in 1984, it has been one of the fastest growing companies in
the market and is now a leader in its field.
ThinServer™Technology Being the core of all Axis’products, the ThinServer™technology
enables them to act as intelligent file server independent ThinServer™devices. A ThinServer™
device is a network server which includes “thin”embedded server software capable of simultaneous
multiprotocol communication, scalable RISC hardware and a built-in Web server which allows
easy access and management via any standard Web browser. The ThinServer™technology makes
it possible to connect any electronic device to the network, thus providing “Access to everything”.
Today, Axis Communications is offering the ThinServer™technology as well as six major
ThinServer™product lines consisting of:
Network Print Servers offer you a powerful and cost-efficient method for sharing printer resources
in your network. They connect to any standard printer, featuring high performance, simple
management and easy upgrading across the network. The print servers are available in Ethernet,
Fast Ethernet and Token Ring versions.
IBM Mainframe and S/3x - AS/400 Print Servers and Protocol Converters includes a wide range
of LAN, coax and twinax attached print servers for the IBM host environment. By emulating IBM
devices, these servers provide conversion of the IPDS, SCS and 3270DS data streams to the major
ASCII printer languages.
Network Attached Optical Media Servers provide you with a flexible and cost-efficient solution
for sharing CD-ROMs, DVD-ROMs and other optical media across the network. They are
available in Ethernet, Fast Ethernet and Token Ring versions.

Preface StorPoint NAS 100 User’s Manual
4
Network Attached Hard Disk Servers make it possible to easily make hard disk storage
available in Ethernet networks. Through direct access by clients, yet integrating into existing
security schemes, and requiring a minimum of maintenance they also provide a low total cost of
ownership for network storage.
Network Camera Servers provide live images using standard Internet technology, thus enabling
access to live cameras via any standard Web browser. They offer a perfect solution for remote
surveillance over the Internet and their sharp images can bring life into any Web site. These servers
support Ethernet as well as PSTN and GSM phone lines.
Network Scan Servers enable easy distribution of paper-based information across workgroups
and the enterprise. By sending the scanned documents to your destination via the
Internet/intranet, you will reduce your faxing/mailing costs, as well as save time, thus improving
your organization efficiency.
Support Services
Should you require any technical assistance, please contact your local dealer. If your questions
cannot be answered immediately, your local dealer will forward your queries through the
appropriate channels to ensure you a rapid response.
WWW: http://www.axis.com If you are connected to Internet, you can find online
manuals, technical support, firmware updates,
application software, company information, on any of
the addresses listed to the left.
FTP server: ftp://ftp.axis.com/pub/axis
Support

StorPoint NAS 100 User’s Manual Table of Contents 5
Table of Contents
Section 1 Introduction . . . . . . . . . . . . . . . . . . . . . . . . . . . . . . . . . . . . . . . . . . . . . . . . . . 7
AXIS StorPoint NAS 100 . . . . . . . . . . . . . . . . . . . . . . . . . . . . . . . . . . . . 7
Features and Benefits . . . . . . . . . . . . . . . . . . . . . . . . . . . . . . . . . . . . . . . . 8
The AXIS Online CD. . . . . . . . . . . . . . . . . . . . . . . . . . . . . . . . . . . . . . . 10
Section 2 Basic Installation . . . . . . . . . . . . . . . . . . . . . . . . . . . . . . . . . . . . . . . . . . . . . . 11
Connecting the StorPoint NAS to the Network . . . . . . . . . . . . . . . . . 12
Assigning an IP Address . . . . . . . . . . . . . . . . . . . . . . . . . . . . . . . . . . . . . 13
Basic System Settings . . . . . . . . . . . . . . . . . . . . . . . . . . . . . . . . . . . . . . . 21
Section 3 Microsoft & IBM Networks (SMB) . . . . . . . . . . . . . . . . . . . . . . . . . . . . . . . . 27
Network Settings . . . . . . . . . . . . . . . . . . . . . . . . . . . . . . . . . . . . . . . . . . 28
Access Control . . . . . . . . . . . . . . . . . . . . . . . . . . . . . . . . . . . . . . . . . . . 30
Section 4 NetWare (NCP) . . . . . . . . . . . . . . . . . . . . . . . . . . . . . . . . . . . . . . . . . . . . . 35
Network Settings . . . . . . . . . . . . . . . . . . . . . . . . . . . . . . . . . . . . . . . . . . 36
Access Control . . . . . . . . . . . . . . . . . . . . . . . . . . . . . . . . . . . . . . . . . . . 43
Section 5 UNIX (NFS) . . . . . . . . . . . . . . . . . . . . . . . . . . . . . . . . . . . . . . . . . . . . . . . . . 47
Network Settings . . . . . . . . . . . . . . . . . . . . . . . . . . . . . . . . . . . . . . . . . . 48
Access Control . . . . . . . . . . . . . . . . . . . . . . . . . . . . . . . . . . . . . . . . . . . 49
Section 6 FTP . . . . . . . . . . . . . . . . . . . . . . . . . . . . . . . . . . . . . . . . . . . . . . . . . . . . . . . . . 51
Network Settings . . . . . . . . . . . . . . . . . . . . . . . . . . . . . . . . . . . . . . . . . . 52
Section 7 Web Browser (HTTP) . . . . . . . . . . . . . . . . . . . . . . . . . . . . . . . . . . . . . . . . . 54
Network Settings . . . . . . . . . . . . . . . . . . . . . . . . . . . . . . . . . . . . . . . . . . 55
Access Control . . . . . . . . . . . . . . . . . . . . . . . . . . . . . . . . . . . . . . . . . . . 57
Section 8 RAID 1 (Mirroring) . . . . . . . . . . . . . . . . . . . . . . . . . . . . . . . . . . . . . . . . . . . . 59
Enabling RAID 1 –New Installation . . . . . . . . . . . . . . . . . . . . . . . . . . . 59
Adding Disks for RAID 1 . . . . . . . . . . . . . . . . . . . . . . . . . . . . . . . . . . . 60
Removing a RAID 1 Volume . . . . . . . . . . . . . . . . . . . . . . . . . . . . . . . . . 60
Section 9 Format Hard Disk . . . . . . . . . . . . . . . . . . . . . . . . . . . . . . . . . . . . . . . . . . . . . 62
Section 10 Using an External SCSI-to-SCSI RAID Controller . . . . . . . . . . . . . . . . . . . . 63

Table of Contents StorPoint NAS 100 User’s Manual
6
Section 11 Monitoring the StorPoint NAS 65
Event Log . . . . . . . . . . . . . . . . . . . . . . . . . . . . . . . . . . . . . . . . . . . . . . . . 66
Statistics . . . . . . . . . . . . . . . . . . . . . . . . . . . . . . . . . . . . . . . . . . . . . . . . . 67
E-mail (SMTP). . . . . . . . . . . . . . . . . . . . . . . . . . . . . . . . . . . . . . . . . . . . . 68
SNMP . . . . . . . . . . . . . . . . . . . . . . . . . . . . . . . . . . . . . . . . . . . . . . . . . . . 69
AXIS ThinWizard. . . . . . . . . . . . . . . . . . . . . . . . . . . . . . . . . . . . . . . . . . 71
Appendix A Parameter List . . . . . . . . . . . . . . . . . . . . . . . . . . . . . . . . . . . . . . . . . . . . . . . . 74
The Configuration File . . . . . . . . . . . . . . . . . . . . . . . . . . . . . . . . . . . . . 74
Directory Structure . . . . . . . . . . . . . . . . . . . . . . . . . . . . . . . . . . . . . . . 79
Editing the Configuration Parameters . . . . . . . . . . . . . . . . . . . . . . . . . . 81
Appendix B Troubleshooting . . . . . . . . . . . . . . . . . . . . . . . . . . . . . . . . . . . . . . . . . . . . . . 85
The Front Panel Indicators . . . . . . . . . . . . . . . . . . . . . . . . . . . . . . . . . . 86
Restoring Factory Default Settings . . . . . . . . . . . . . . . . . . . . . . . . . . . . 88
Running a Diagnostic Test . . . . . . . . . . . . . . . . . . . . . . . . . . . . . . . . . . . 90
Errors when Accessing the StorPoint NAS or an Inserted Attached Hard Disk
91
Difficulties Locating the StorPoint NAS in NetWare . . . . . . . . . . . . . . 92
Insufficient Access Rights in NetWare NDS. . . . . . . . . . . . . . . . . . . . . 93
Problems Locating the Domain Controller in Windows (SMB). . . . . . 94
Appendix C Upgrading the StorPoint NAS . . . . . . . . . . . . . . . . . . . . . . . . . . . . . . . . . . . . 95
Obtaining New Software . . . . . . . . . . . . . . . . . . . . . . . . . . . . . . . . . . . . 96
Upgrading the Firmware . . . . . . . . . . . . . . . . . . . . . . . . . . . . . . . . . . . . 97
Extending the RAM Memory . . . . . . . . . . . . . . . . . . . . . . . . . . . . . . . . 101
Appendix D Tower and Drive Installation . . . . . . . . . . . . . . . . . . . . . . . . . . . . . . . . . . . 104
Hardware Inventory . . . . . . . . . . . . . . . . . . . . . . . . . . . . . . . . . . . . . . 104
Physical Description. . . . . . . . . . . . . . . . . . . . . . . . . . . . . . . . . . . . . . . 105
Installing the StorPoint NAS in a Tower . . . . . . . . . . . . . . . . . . . . . . . 107
Connecting the Hard Disks to the StorPoint NAS. . . . . . . . . . . . . . . 109
Appendix E Technical Specifications . . . . . . . . . . . . . . . . . . . . . . . . . . . . . . . . . . . . . . . . 111
Appendix F Glossary . . . . . . . . . . . . . . . . . . . . . . . . . . . . . . . . . . . . . . . . . . . . . . . . . . . . 113
. . . . . . . . . . . . . . . . . . . . . . . . . . . . . . . . . . . . . . . . . . . . . . . . . . . . . . . . . . . . . . . . . Index 117

StorPoint NAS 100 User’s Manual Section 1: Introduction 7
Section 1 Introduction
AXIS StorPoint NAS 100
The AXIS StorPoint NAS 100 connects hard disks to 10/100 MBit
Ethernet networks. All users on the network can make use of the hard
disk storage and share the information on any connected hard disk.
The enclosure and
connectors are designed
for installation into a
standard 51/4"tower.
The StorPoint NAS
supports mirroring which
means that any data
written to a hard disk is
automatically and
simultaneously written to
a second hard disk.
The StorPoint NAS is
server independent,
which means that no
software has to be loaded
on any server, and no
additional software has to be installed on any client.
The maximum number of hard disks that can be used with a single unit
is 15.
Note: ❏Throughout this manual, the AXIS StorPoint NAS 100 is referred
to as simply StorPoint NAS.

Section 1: Introduction StorPoint NAS 100 User’s Manual
8
Features and Benefits
File Server
Independence
The StorPoint NAS is connected as a node in a 10 or 100 Mbit
Ethernet network. To the network the StorPoint NAS acts as a file
server. This means that it is independent of other file servers, i.e. the
communication takes place directly between the network client and the
StorPoint NAS. This results in high performance, reliability and
independence of other equipment.
Plug and Play The file server independent approach makes the installation quick and
convenient. In most environments the physical connection to the
network is the only installation required prior to starting work with the
StorPoint NAS. No software needs to be installed on clients or file
servers. Your computer will see the StorPoint NAS as another network
file server, and you access it using the standard commands used in your
network operating system.
Environments The StorPoint NAS can be used simultaneously from NetWare,
Windows, OS/2, DOS, UNIX and Internet/intranet clients. It supports
basic messaging and network protocols:
•NCP over IPX and IP
•SMB over NetBIOS/NetBEUI
•SMB over NetBIOS/TCP/IP
•NFS over UDP/IP
•HTTP over TCP/IP.

StorPoint NAS 100 User’s Manual Section 1: Introduction 9
Internet/intranet
Web Server
The built-in Web server makes it possible to access data via any standard
Web browser, such as Netscape Navigator or Microsoft Internet
Explorer. The support includes configuration, management and disc
access.
Speed By using a 32-bit RISC processor and cache memory expandable up to
160 Mbytes, data throughput of up to 1000 kB/sec on a single client.
Security Disk access can be restricted by setting up native access control in all
network environments.
Maintenance New software can easily be downloaded to the StorPoint NAS’s Flash
memory over the network using FTP or drag-and-drop in the Windows
Explorer. All updates are free of charge.
Network
Management
The StorPoint NAS supports the Simple Network Management
Protocol, SNMP.
Year 2000 The StorPoint NAS is year 2000 compliant.
Mirroring (RAID 1) The StorPoint NAS has a built-in RAID 1 option. When enabled, any
data written to a hard disk is automatically and simultaneously written
to a second hard disk. The purpose of this is to assure that if one hard
disk should fail, the data is still intact on the other one.

Section 1: Introduction StorPoint NAS 100 User’s Manual
10
The AXIS Online CD
The AXIS Online CD provides an electronic catalogue that includes all
of the Axis product software, utilities software, white papers, user
documents, technical references etc. It can be used within all of the
supported Axis computing environments.
Startup Procedures
for Windows
The AXIS Online CD will autostart from a local CD drive on Windows
95/98 and NT platforms. Windows 3.x users are required to navigate to
the CD root directory and click on the setup31.exe file from within
the Windows File Manager.
Startup Procedures
for Macintosh, UNIX
and OS/2
Navigate to the CD root directory and click on the start.pdf file from
within your preferred file manager application.
Note: ❏If the Adobe Acrobat Reader 3.0 is not installed on to your system,
locate and run the appropriate installer from the tools/Acrobat/
folder. Refer to the readme.txt file for full path name details.
HTML Interface By clicking the HTML button from within the main installation dialog,
you access a Web browser interface to the contents of the AXIS Online
CD.

StorPoint NAS 100 User’s Manual Section 2: Basic Installation 11
Section 2 Basic Installation
This section includes the basic setup procedures for getting your
StorPoint NAS up and running:
•Connecting the StorPoint NAS to the network
•Assigning an IP address
•Setting basic system parameters
You should then proceed to the relevant sections of the manual
depending on your network environment:
•“Section 3 - Microsoft & IBM Networks (SMB) ”
•“Section 4 - NetWare (NCP) ”
•“Section 5 - UNIX (NFS) ”
•“Section 7 - Web Browser (HTTP) ”
Note: ❏Typically, your StorPoint NAS will already be installed in an
enclosure when delivered. However, if required:
•Refer to “Installing the StorPoint NAS in a Tower ” on page 107
on how to install the StorPoint NAS in a 51/4"tower.
•Refer to “Connecting the Hard Disks to the StorPoint NAS ”on
page 109 on how to connect hard disks to the StorPoint NAS.

Section 2: Basic Installation StorPoint NAS 100 User’s Manual
12
Connecting the StorPoint NAS to the Network
Before you begin Always consult the Network Administrator before making changes to
the network configuration.
Procedure To connect the StorPoint NAS to your network, follow these steps:
1. Turn off the power.
2. Connect the network cable to the appropriate connector, i.e. RJ-45
for 100baseTX and 10baseT.
3. Switch on the tower.
The StorPoint NAS front panel indicators will flash during power-on
and self-test. When the Status indicator stops flashing and turns solid
green, the StorPoint NAS is ready for use.
Network hub
Network cables
StorPoint NAS
installed in a tower
with hard disk drives

StorPoint NAS 100 User’s Manual Section 2: Basic Installation 13
Assigning an IP Address
The StorPoint NAS supports HTTP over TCP/IP, which means that it
works as a Web server available on the Internet and intranets. To
establish communication with the TCP/IP network, you must assign an
appropriate IP address to your StorPoint NAS. For example, this is
needed in order to access the StorPoint NAS Web interface.
Note: ❏If you are not using IP addressing in your network environment, i.e.
if you are using the StorPoint NAS in Windows (SMB over
NetBEUI) or NetWare (pure IPX), you do not need to set the IP
address. You can then proceed directly to the description of the
NetWare NDS installation “Installation as an NDS Server ”on page
36.
Before you begin Make sure the StorPoint NAS is powered up and attached to the
network.
IP Address Unless you are using DHCP, you must acquire an unused IP address
from the Network Administrator.
System Privileges You will require root privileges on your UNIX system and administrator
privileges on the Windows NT servers.
Ethernet Address Depending on the method you are using, you will need to know the
Ethernet address of your StorPoint NAS. The Ethernet address is based
upon the serial number found on the labels at the underside of the unit
and at the back of the tower.
Important! ❏Do not use the default or example IP address when installing your
StorPoint NAS. Always consult the Network Administrator before
assigning an IP address.

Section 2: Basic Installation StorPoint NAS 100 User’s Manual
14
Methods for Setting
the IP Address
You can set the IP address using one of these methods, depending on
your network operating environment:
Note: ❏The ARP and RARP methods operate on single network segments
only, i.e. they cannot be used over routers.
Procedures Download the IP address to your StorPoint NAS using a method
appropriate for your system.
Axis IP Installer AXIS IP Installer is an application that allows you to assign IP addresses
to your StorPoint NAS, find IP addresses of already installed StorPoints
and access the StorPoint NAS internal Web pages for easy
configuration.
By assigning IP addresses to your StorPoint NAS, you can easily manage
and configure it directly from any standard Web browser. The Web
browser can be launched from the AXIS IP Installer application.
The required utility software is available on the AXIS Online CD. It can
also be downloaded from the Axis Web Site at http://www.axis.com
Method Network environments See ...
AXIS IP Installer Windows 95/98 and NT, NetWare page 14
ARP
Windows 95/98 and NT, NetWare page 16
UNIX, OS/2 page 17
DHCP Windows NT, UNIX page 18
BOOTP UNIX page 19
RARP UNIX page 20

StorPoint NAS 100 User’s Manual Section 2: Basic Installation 15
Follow these steps:
1. Locate the setup file, Setup.exe, and choose the Run option from
the Windows Start Menu.
2. Follow the instructions on the screen.
When finished, AXIS IP Installer will be available from your Start
menu. To run the program, select Programs | Axis Communications |
AXIS IP Installer.
For help on how to use the AXIS IP Installer, click the Help button
from the application to start the AXIS IP Installer help file.

Section 2: Basic Installation StorPoint NAS 100 User’s Manual
16
ARP in
Windows 95/98
and Windows NT
Perform the following commands to download the IP address and verify
correct Internet communication in Windows 95/98 and Windows NT:
Start a DOS window and type the following command:
Syntax Windows 95
Example Windows 95
Syntax Windows 98 and Windows NT
Example Windows 98 and Windows NT:
The host will return ‘Reply from 192.16.253.80 ...’or some
similar message. This indicates that the address has been set and the
communication is established.
Notes: ❏Once the StorPoint NAS has established communication using an
appropriate IP address, the arp command cannot be used to change
the address. This is to avoid accidental or unauthorized changes.
However, if you restart the StorPoint NAS, you can change the IP
address within one hour.
❏Please note that when you execute the ping command for the first
time, you will experience a significantly longer response time than
usual.
arp -s <IP address> <Ethernet address> <w95host IP
address>, where <my PC IP address> is the IP address of
your Windows 95 PC.
ping <IP address>
arp -s 192.16.253.80 00-40-8c-10-00-86 171.16.6.40
ping 192.16.253.80
arp -s <IP address> <Ethernet address>
ping <IP address>
arp -s 192.16.253.80 00-40-8c-10-00-86
ping 192.16.253.80

StorPoint NAS 100 User’s Manual Section 2: Basic Installation 17
❏If you are using host names, you can map a unique host name to the
acquired IP address. Refer to your system manuals or to the
Network Administrator for instructions on how to perform the
name mapping on your particular system.
ARP in
UNIX and OS/2
Follow these steps to download the IP address and verify the
communication in UNIX and OS/2:
1. Type the following command:
2. Ping the unit as follows:
Example:
The host will return ‘192.16.253.80 is alive’, or some similar
message to indicate that the address has been set and the
communication is established.
Notes: ❏Once the StorPoint NAS has established communication using an
appropriate IP address, the arp command cannot be used to change
the address. This is to avoid accidental or unauthorized changes.
However, if you restart the StorPoint NAS, you can change the IP
address within one hour.
❏Please note that when you execute the ping command for the first
time, you may experience a significantly longer response time than
is usual.
❏If you are using host names, you can map a unique host name to the
acquired IP address. Refer to your system manuals or to the
Network Administrator for instructions on how to perform the
name mapping on your particular system.
arp -s <IP address> <Ethernet address> temp
ping <IP address>
arp -s 192.16.253.80 00:40:8c:10:00:86 temp
ping 192.16.253.80

Section 2: Basic Installation StorPoint NAS 100 User’s Manual
18
❏The arp -s command may vary from system to system. Some
BSD-type systems expect the IP address and Ethernet address in
reverse order, whereas IBM AIX systems require the additional
argument ether. For example:
DHCP in Windows
NT and UNIX
Follow these steps to use the DHCP method:
1. Edit or create a scope in the DHCP manager of the DHCP
daemon. For Windows NT servers, refer to the “Windows NT
Resource Kit”on how to do this.
The entries made in this scope typically include the following
parameters:
•Range of IP addresses
•Subnet mask
•Default router IP address
•Lease duration
•Mail server IP address
•DNS server IP address
•WINS server IP address(es)
•Domain name
•NTP server IP address
2. Activate the scope.
DHCP is enabled by default. The IP address and all the other settings
will be downloaded automatically.
Note: ❏To fully benefit from DHCP, it is recommended that you use the
WINS name resolution protocol available in Windows NT. If you
intend to use WINS, at least one WINS server IP address must be
included in the scope. Once the IP address is received, the
StorPoint NAS will register its host name and IP address on the
WINS server.
arp -s ether <IP address> 00:40:8c:10:00:86 temp

StorPoint NAS 100 User’s Manual Section 2: Basic Installation 19
BOOTP
in UNIX
Follow these steps to use BOOTP in UNIX:
1. Append the following entry to your boot table (typically
/etc/bootptab):
where:
Example:
2. Make sure a unique host name is mapped to the acquired IP address.
Refer to your system manuals or to the Network Administrator for
instructions on how to perform the name mapping on your particular
system.
3. Start the BOOTP daemon (if not already running), typically by the
command: bootpd -a
4. Restart the StorPoint NAS to download the IP address, default router
address and subnet mask.
<host name>:ht=<hardware type>:vm=<vendor magic>:\
:ha=<hardware address>:ip=<IP address>:\
:sm=<subnet mask>:gw=<gateway field>
ht = ether for Ethernet
vm = rfc1048
ha = The Ethernet or node address, i.e. the StorPoint NAS serial
number
ip = The IP address of the StorPoint NAS
sm = The subnet mask
gw = The default router address
hdserv:ht=ether:vm=rfc1048:\
:ha=00408c110086:ip=192.36.253.80:\
:sm=255.255.255.0:gw=192.36.253.254

Section 2: Basic Installation StorPoint NAS 100 User’s Manual
20
RARP in UNIX Follow these steps to use the RARP method in UNIX:
1. Append the following line to your Ethernet address table. This is
typically performed using the command /etc/ethers:
Example:
2. If you are using host names, you can map a unique host name to the
acquired IP address. Refer to your system manuals or to the Network
Administrator for instructions on how to perform the name mapping
on your particular system.
3. If it is not already running, start the RARP daemon. This is typically
done using the command rarpd -a.
4. Restart the StorPoint NAS to download the IP address.
<Ethernet address> <IP address>
00:40:8c:10:00:86 192.16.253.80
Other manuals for StorPoint NAS 100
2
Table of contents
Other Axis Server manuals

Axis
Axis 291 1U User manual

Axis
Axis Camera Station S1216 Tower User manual

Axis
Axis 7000 User manual

Axis
Axis AXIS 243Q Blade User manual

Axis
Axis 2400AM Instruction Manual

Axis
Axis 700 User manual

Axis
Axis 7000 User manual

Axis
Axis 200+ User manual

Axis
Axis Camera Station S12 Series User manual

Axis
Axis 250S Blade User manual

Axis
Axis AXIS StorPoint CD User manual

Axis
Axis 241Q Blade User manual

Axis
Axis 7000 FX User manual

Axis
Axis 7100 User manual

Axis
Axis 247S User manual

Axis
Axis S1296 User manual

Axis
Axis 7100 User manual

Axis
Axis 27756R1 User manual

Axis
Axis Camera Station S1116 Racked Recorder User manual

Axis
Axis 241Q Blade User manual