manuals.online logo
Brands
  1. Home
  2. •
  3. Brands
  4. •
  5. Axminster
  6. •
  7. Accessories
  8. •
  9. Axminster Woodturning Stylish Twist Pen Kit User manual

Axminster Woodturning Stylish Twist Pen Kit User manual

PROJECT PEN KITS
Continues over...
For more info and
videos scan here
WHAT’S REQUIRED
Preparing a wooden or acrylic/polyester
blank for a pen mandrel.
1. Cut a blank to the length of the tube
plus approximately 2.5mm to allow for
trimming and squaring off the ends.
2. Mark the centre on the end of the blank.
3. Using the recommended drill bit, drill a
hole lengthwise through the blank.
4. Apply epoxy glue, Polyurethane glue or
gap filling cyanoacrylate (super glue) to
the tubes.
5. Insert the tube into the blank with a
twisting motion to spread the glue
evenly inside the hole.
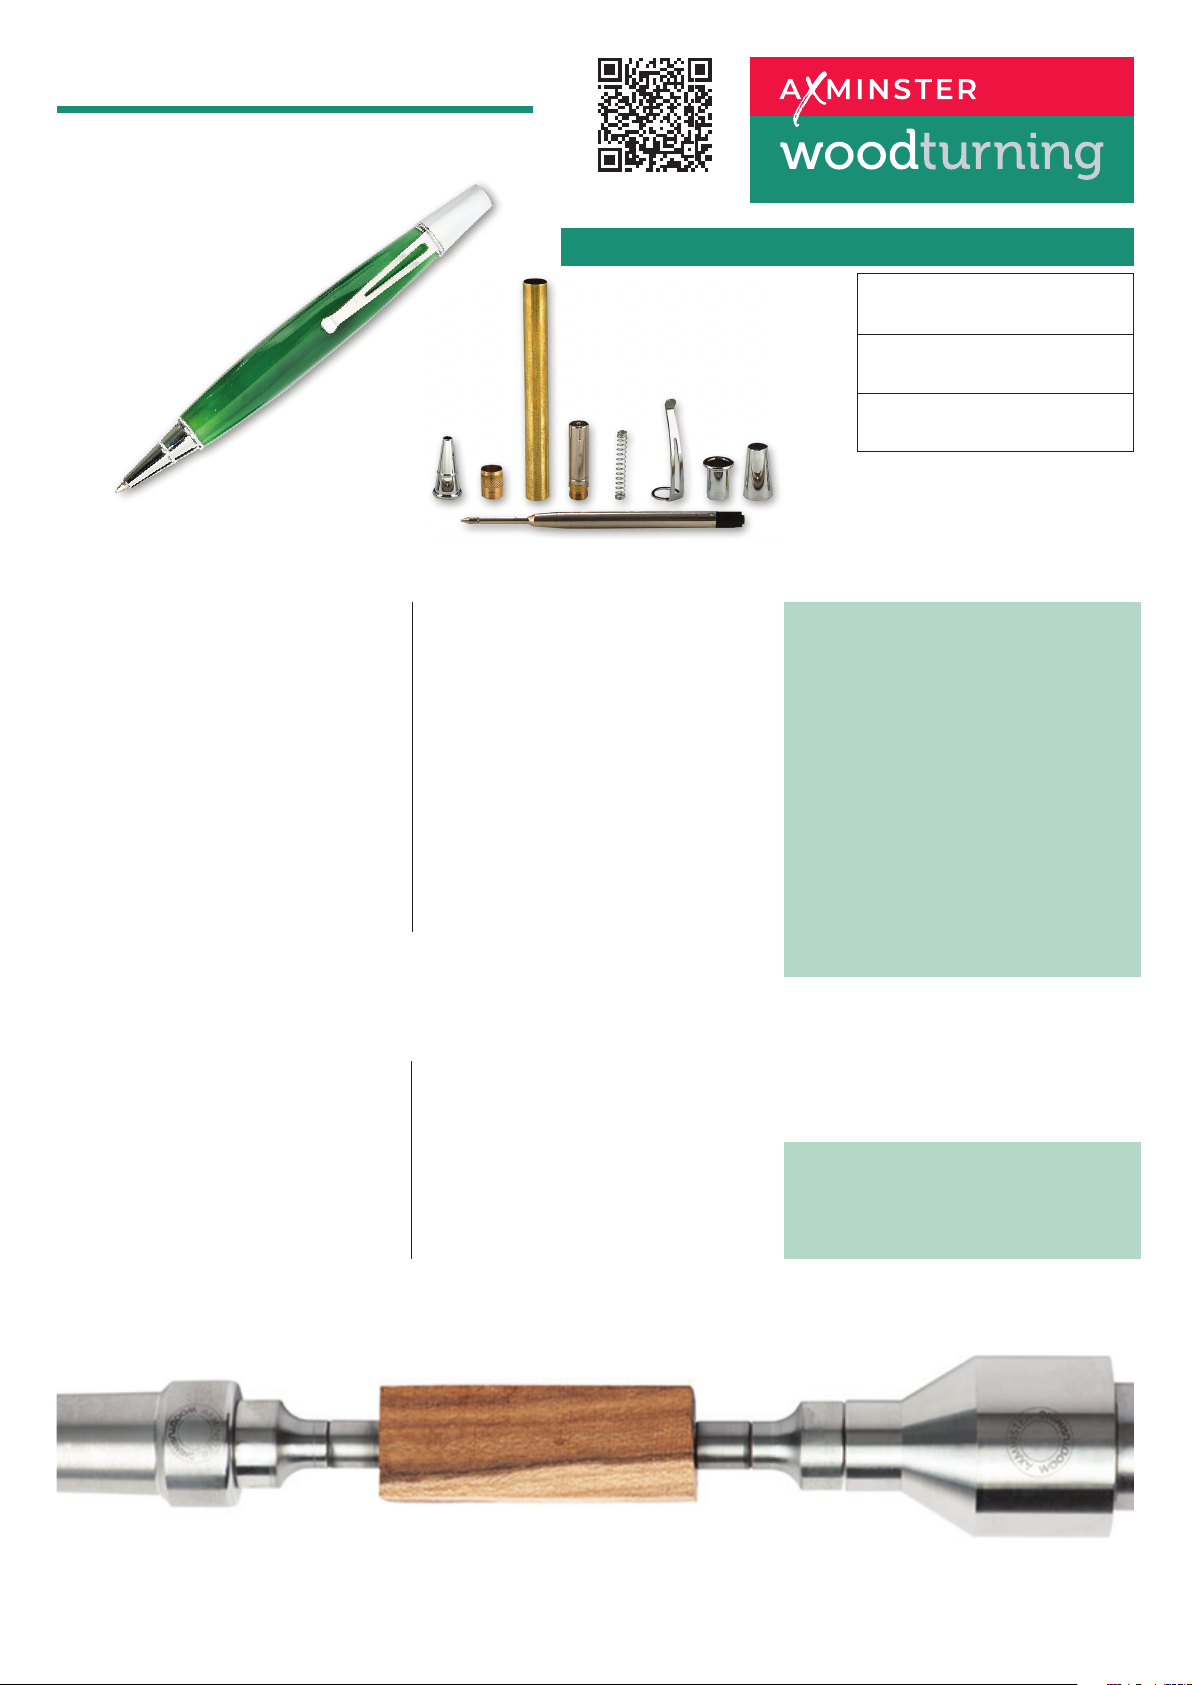
1. Mount the bushings and blank onto a
pen mandrel according to the diagram.
2. Secure the bushings and blank onto the
mandrel.
3. Slide the tailstock with a live centre into
place against the mandrel and lock in
position. This is for support; only slight
pressure is required.
Bushing Set:
701605
Drill Bit Size:
8.5 mm
Minimum Blank Size:
16 mm x 16 mm x 85 mm
6. Centre the tube lengthwise inside
the blank.
7. Allow the adhesive to cure.
8. When cured, square the ends of the
blank. Using a barrel trimmer with a
guide matching the inner diameter
of the tube or a universal pen blank
squaring jig with a disc sander.
9. Take the excess material down flush
with the ends of the brass tube. (do
not trim beyond the length of the tube
since this may interfere with operation
of the mechanism and assembly).
Tips/Hints
•Excessive pressure may cause the drill
bit to wander and/or split the blank.
Slow the feed rate and back the drill bit
out repeatedly for chip removal.
•Roughen the brass tube slightly with
abrasive for better adhesion.
•Certain acrylic blanks are more
transparent than others, especially
lighter colors or blanks with light
colored swirls. To avoid the risk of the
brass tube showing through the pen
blank, paint the tubes white or black
before gluing them in.
•The barrel trimmer guide also cleans
any adhesive that may have gotten
inside of the tube.
4. Using sharp tools, turn the blank down
to become the Pen Barrel with the
profile of your choice.
5. Turn the blank very slightly oversize,
then sand and polish the ends down
to the same diameter as the bushings.
6. Using successively finer abrasives
gradually sand and polish the Pen
Barrel.
7. Finish the Pen Barrel with your
preferred choice of polish.
Tips/Hints
•Don’t be afraid to sharpen frequently
especially when turning acrylics.
Stylish Twist Pen Kit - Chrome
Code: 600749
PREPARING THE BLANKS, HINTS & TIPS
TURNING THE BLANK, HINTS & TIPS
AXMINSTERTOOLS.COM
Visit the Knowledge blog ‘How To Make A Pen’ for hints, tips and videos
knowledge.axminstertools.com/pen-turning
Axminster Tools, Axminster, Devon, EX13 5PH
VIEW OUR FULL RANGE OF
PEN CASES AND DISPLAY BOXES ONLINE
1. Layout the parts according to diagram
A.
2. Align the top of the Pen Barrel with the
Pen Clip/Retaining Bush (Internally
threaded), and gently but firmly, press
the Bush home.
3. Screw the Twist Mechanism into
the Pen Clip/Retaining Bush, and
gently overtighten (to hold the Twist
Mechanism in firmly).
4. Carefully align the Top Cap over the
Twist Mechanism and press firmly
together.
Note: It may help if a piece of paper is
put between the Clip flange and the Top
Cap when they are pressed together to
maintain a minute clearance and prevent
the twist action from binding. Leave the
paper in situ, pro tem.
5. Screw the Threaded Brass Bush and the
Nib together.
5. Align the assembly carefully with the
bottom of the Pen Barrel and gently
but firmly press together.
Note: It may help if the Threaded Insert
Bush is unscrewed a half turn, before
pressing in that way, the Nib will always
be able to be tightened up to the body.
6. Unscrew the Nib, insert the refill,
overcome the spring pressure and
screw the Nib back onto the body.
Note: If as in Note one. a paper spacer
was put between the Top Cap and the
Clip flange, gentle exercising of the
twisting action should allow the paper
spacer to be worked free.
Tips/Hints
•Use a woodworking vice, one handed bar
clamp, arbor press or a dedicated pen
press.
•Press parts together slowly and steadily
•When pressing the parts together,
CHECK the parts are correctly aligned
with each other and straight. If the part
is crooked or misaligned, it will result in
a poor fit or render the pen unuseable.
•When laying out your pen barrel with
the parts, pay careful attention to keep
the pen barrels in the same orientation
as when on the mandrel. i.e. a pen
barrel may have a “top” and “bottom”,
now is the time to be certain of the
orientation.
ASSEMBLY, HINTS & TIPS
DIAGRAM A

This manual suits for next models

1

Other Axminster Accessories manuals

Axminster 504635 User manual

Axminster

Axminster 504635 User manual

Axminster 24ct Americana Pen User manual

Axminster

Axminster 24ct Americana Pen User manual

Axminster 10 & 24ct Twist Pen User manual

Axminster

Axminster 10 & 24ct Twist Pen User manual

Axminster Woodturning D-SW Series User manual

Axminster

Axminster Woodturning D-SW Series User manual

Axminster 10 & 24ct Click Pencil User manual

Axminster

Axminster 10 & 24ct Click Pencil User manual

Axminster Stylish Twist Pen Kit User manual

Axminster

Axminster Stylish Twist Pen Kit User manual

Axminster Letter Opening kit User manual

Axminster

Axminster Letter Opening kit User manual

Axminster woodturning 310404 User manual

Axminster

Axminster woodturning 310404 User manual

Axminster Rialto Rhodium Roller ball User manual

Axminster

Axminster Rialto Rhodium Roller ball User manual

Axminster Tooling Stylus Tip Ballpoint Pen Kit User manual

Axminster

Axminster Tooling Stylus Tip Ballpoint Pen Kit User manual

Axminster woodturning Elegance Pen Kit User manual

Axminster

Axminster woodturning Elegance Pen Kit User manual

Axminster Euro Twist Pen Kits User manual

Axminster

Axminster Euro Twist Pen Kits User manual

Popular Accessories manuals by other brands

Carlson BRx6 Calibration

Carlson

Carlson BRx6 Calibration

turck RU40-AP Series manual

turck

turck RU40-AP Series manual

Omron F3SG-PG Series Quick installation manual

Omron

Omron F3SG-PG Series Quick installation manual

STEINEL IS 2180 ECO installation instructions

STEINEL

STEINEL IS 2180 ECO installation instructions

Ventura Prenox FREESTANDER 2009 Erection Instructions

Ventura

Ventura Prenox FREESTANDER 2009 Erection Instructions

Movisens EcgMove 4 Operating and safety instructions

Movisens

Movisens EcgMove 4 Operating and safety instructions

Domyos TL 530 Assembly

Domyos

Domyos TL 530 Assembly

netvox R313K user manual

netvox

netvox R313K user manual

camry CR 4475 user manual

camry

camry CR 4475 user manual

Intec CI-24 installation guide

Intec

Intec CI-24 installation guide

Earwear EW 1103 User information

Earwear

Earwear EW 1103 User information

Endress+Hauser Dipfit W CLA111 operating instructions

Endress+Hauser

Endress+Hauser Dipfit W CLA111 operating instructions

Esco Medical MIRI TL 6 user manual

Esco Medical

Esco Medical MIRI TL 6 user manual

ring VIDEO DOORBELL Setup and installation guide

ring

ring VIDEO DOORBELL Setup and installation guide

Infineon SP37 Function guide

Infineon

Infineon SP37 Function guide

Adventure Developments FOX IN A BOX Product guide

Adventure Developments

Adventure Developments FOX IN A BOX Product guide

Rave Sports Inflatable Ice Rink owner's manual

Rave Sports

Rave Sports Inflatable Ice Rink owner's manual

HP Scanjet 5370C Series user guide

HP

HP Scanjet 5370C Series user guide

manuals.online logo
manuals.online logoBrands
  • About & Mission
  • Contact us
  • Privacy Policy
  • Terms and Conditions

Copyright 2025 Manuals.Online. All Rights Reserved.