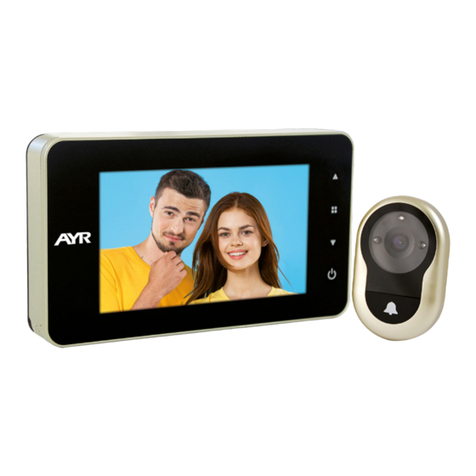
AYR 761DD User manual

2
Timbre
Útil
Base
1. Descripción Agujero desmontaje
Fotosensor
Lente
Sensor movimiento
Micrófono
Botón timbre
Altavoz
Utiliza el útil insertándolo
en el agujero superior del
timbre y presiona al mismo
tiempo que deslizas la
placa trasera hacia abajo
para separar el timbre de
la base.
2. Antes de instalar
ES

3
1- NO instales el timbre sobre una
superficie metálica. El metal puede actuar
de escudo con la señal inalámbrica,
produciendo que la señal sea débil o
inutilizable.
2- La colocación del timbre no debe
estar alejada del router inalámbrico, ya que
podrían producirse fallos de conexión.
Instalación sin tornillos
1- Despega el soporte del adhesivo de
la plantilla de instalación y pégala en el
lugar elegido para situar el timbre (cristal,
baldosa, etc...)
2- Cuelga el cuerpo principal del timbre a
la base deslizándolo de arriba a abajo.
3. Instalación timbre
Timbre
Muro
Base
Instalación con tornillos
1- Pega el adhesivo de
posicionamiento en la pared.
2- Haz los 4 taladros de ø2,6
en la pared de acuerdo con la
etiqueta de posicionamiento y
coloca los tacos
3- Fija la base en la pared con
tornillos.
4- Cuelgua el timbre de arriba a
abajo a la base para completar la
instalación.
Timbre
Muro
Plantilla
adhesiva
Taco
Base Tornillo
ES

4
Usa el útil incluído para presionar el orificio de desmontaje en la parte
superior del timbre, y luego retira el timbre de abajo hacia arriba.
Ten cuidado al extraer el cuerpo del timbre, para no romper las
lengüetas posteriores de la placa trasera.
4. Instrucciones de desmontaje
Timbre
Muro
Útil
1
2

5
5. Encendido y conguración
1- Retira el timbre de la base y abre la junta de silicona negra de la parte
posterior del timbre.
2- Coloca el interruptor de alimentación a "ON" y el timbre de vídeo se
encenderá. Después de encenderlo, mantén pulsado el botón de reinicio
"RESET" durante 8 segundos hasta que oigas "System reset", entonces el
timbre se reiniciará automáticamente. La luz indicadora se apagará, la luz
roja se encenderá, luego la luz azul parpadeará. Cuando veas que la luz azul
parpadea, oirás el tono de aviso "The camera is ready to begin pairing" y el
timbre entrará en el estado de configuración de red.
Tapa de silicona
Botón reset
Tecla encendido
Slot para SD
Puerto de carga
ES

7
7. Cómo vincular el timbre al teléfono móvil
Paso 1:
En el teléfono móvil, abra la APP, inicia sesión en la cuenta, haz clic en el
botón "Añadir dispositivo" en la interfaz principal de la APP (Figura1) y la interfaz
(figura2) aparecerá, selecciona y haz clic en "Seguridad y videovigilancia" en
la barra de categorías de la izquierda, y luego selecciona y haz clic en "Timbre
inteligente" en la categoría de la derecha.
Paso 2:
Saca el timbre, retira la base, descubre la tapa de silicona negra de la parte
posterior del timbre, enciende el interruptor de alimentación, mantén pulsado
el botón de "reset" durante 8 segundos, y entonces oirás el aviso "System
reset". Después de 5 segundos, el timbre se reinicia y entra en el estado de
configuración de la red, escucharás el aviso de voz "The camera is ready to
begin pairing" (para el funcionamiento detallado, consulta el artículo 5 de este
manual).
Paso 3:
Después de escuchar el tono de aviso, confirma que el timbre entra en el
estado de configuración de la red, selecciona y haz clic en "Asegúrese de
que el indicador parpadea rápidamente o se escucha un tono de aviso" en la
APP (figura 3), y luego haz clic en "Siguiente" para que aparezca una nueva
interfaz (figura 4).
Paso 4:
Introduce el nombre de usuario WIFI y la contraseña en (figura 5), Nota:
1- Este timbre sólo se puede utilizar en la red de 2,4Ghz. Si tu red es de
5Ghz, por favor, cámbiala a 2,4Ghz.
21
ES

8
2-La red WIFI introducida debe coincidir con la red WIFI utilizada por
el teléfono móvil. Después de confirmar la información anterior, haz clic en
"Siguiente", la interfaz aparece (figura 6).
Paso 5:
Apunta la cámara del timbre al código QR (figura 6), mantén la cámara y el
código QR a unos 10 cm de distancia, y escanea el código para vincular el
timbre y el teléfono móvil. Cuando oigas el tono de aviso "Pairing information
received", haz clic en el botón "I heard a Prompt" para entrar en la interfaz para
añadir el dispositivo (figura 7).
65
43

9
8 97
8. Introducción a las principales funciones de la APP
Funciones comunes
1- Escuchar: Pulsa en el icono del altavoz para recibir el sonido transmitido
por el timbre de la puerta y escuchar el habla del visitante.Vuelve a pulsar para
cerrar la comunicación.
2- Resolución de vídeo: haz clic para cambiar entre las imágenes SD y HD
(cuando la señal de la red es pobre, por favor, selecciona el modo SD).
3- Zoom de la interfaz: haz clic para cambiar entre media pantalla y pantalla
completa.
4- Captura de pantalla: haz clic para hacer una captura de pantalla de la
imagen del vídeo y guardarla en el álbum de fotos de la APP.
5- Hablar: Pulsa en el icono de hablar para establecer la comunicación con
el visitante.Vuelve a pulsar para cerrar la comunicación.
6- Grabar: haz clic para abrir en el icono de grabar. El vídeo de la pantalla se
almacena en el álbum de fotos. Vuelve a pulsar para parar.
7- Reproducción: Necesitas insertar una tarjeta SD para utilizar esta función.
8- Almacenamiento en la nube: es necesaria una suscripción para
activarlo. Cuando se activa, el contenido de la detección de movimiento se
almacena aquí.
9- Álbum de fotos: comprueba las fotos y los vídeos grabados.
10- Ajustes: pulsa el símbolo de ajustes en la esquina superior derecha para
entrar en la configuración.
Paso 6:
Espera unos 2 minutos y cuando aparezca una nueva interfaz (figura 8),
significa que la configuración de la red se ha realizado. Si la configuración de
la red falla, comprueba si la situación de la red y la información introducida son
correctas, y repite la operación desde el paso 1 al 6.
ES

10
11
10
Otros ajustes de funciones
1-La posición del círculo rojo superior de la (figura 9) es para modificar el
nombre y el icono del dispositivo.
2-La posición del rectángulo rojo inferior de la (figura 10) es para modificar la
sensibilidad del sensor de infrarrojos.
3-La posición del rectángulo rojo superior de la (figura 11) es para ajustar el
ratio de almacenamiento de energía de la batería para determinar el umbral de
alarma de batería baja.
4- La posición del rectángulo rojo central de la (figura 11) es para compartir
esta cámara con otros miembros.
5- La posición del rectángulo rojo inferior de la (figura 11) es para eliminar la
fijación del dispositivo.
9. Nota
1- Este dispositivo se alimenta de una batería de litio, y la vida útil de la batería
se verá afectada por el tiempo de activación y el número de activaciones.
Se recomienda desactivar la función PIR en un entorno con mucha gente, o
establecer una sensibilidad baja para reducir el número de activaciones del
dispositivo y alargar la vida de la batería. Por favor, cárgalo a tiempo cuando
la batería esté baja.
2- Durante la instalación, por favor, confirma si la situación de la red es buena
o el dispositivo está cubierto por la red WIFI, especialmente para la instalación
al aire libre. Si la señal es débil, por favor, utiliza algún dispositivo para mejorar
la señal de la red WIFI para la instalación.
3-Este dispositivo es un producto inteligente de bajo consumo de energía
que puede soportar la activación remota de la APP, la activación por detección
de cuerpo humano PIR y la activación por pulsación de teclas. Después
de cada activación, entrará automáticamente en el estado de inactividad
después de trabajar por un corto período de tiempo.

11
10. Timbre USB
11. Características técnicas
1- Enchufa el timbre en el puerto
USB de un cargador estándar
con conexión a enchufe y mantén
pulsada la tecla de volumen durante
unos 6 segundos hasta que la luz azul
parpadee para entrar en el modo de
emparejamiento.
2- Cuando el timbre esté en el modo
de emparejamiento, pulsa el botón
de llamada del timbre exterior para
activar el enlace. Cuando la luz LED
del timbre USB deje de parpadear y
el timbre emita un sonido ding-dong,
significa que el emparejamiento se ha
realizado con éxito.
3-Una unidad exterior puede emparejar varias unidades USB (vendidas por
separado). Si adquieres más timbres USB vendidos por separado) y deseas un
emparejamiento múltiple, repite los pasos 1 y 2.
4-Pulsa brevemente la tecla de melodías para seleccionar la música cíclicamente.
Hay 20 opciones diferentes.
5-Presiona brevemente la tecla de volumen para ajustar el volumen del timbre. Hay
4 opciones de volumen.
Vo
lumen
LED
Melodías
Resolución cámara 720 (1024x720 / 15 fps)
Ángulo de visión 120º horizontal
Visión nocturna SI
Conectividad WIFI 2,4 GHz inalámbrica 802.11 B/G/N
Fuente de Alimentación 4400mAH 3,7V 16,28 Wh (2 baterías)
Detección de movimiento SI
Audio bidireccional
Temperatura de funcionamiento -10º < 50º
ES

12
Base Doorbell
Pin
1. Product outline
Disassemble hole
Photosensitive
Lens
Motion sensor
Mic
Doorbell button
Speaker
Use the pin to press the
disassembly hole on the
top of the doorbell, and
then slide the base of the
doobell down to remove
the base.
2. The base disassembled instructions
EN

13
1- Do not install the doorbell on a metal
object. The metal object will shield the
wireless signal, resulting in a signal weak or
product unusable.
2- The installation location of the doorbell
should not be too far away from the wireless
router at home, otherwise it may cause Wifi
connection failure.
Paste installation
1- Tear off the sticker at the bottom of the
hanging board base doorbell, and paste it
on the smooth wall (glass, ceramic tile, latex
paint wall)
2- buckle the main body of the doorbell to
the hanging board base from top to bottom.
3. Video Doorbell installation
Doorbell
Wall
Base
Punch hole installation
1- Paste the positioning sticker
on the wall.
2- Drill the 4 ø2.6 holes in the
wall according to the positioning
label and insert the expansion
rubber plug into the wall.
3- Fix the base on the wall with
screws.
4- Hang the doorbell from top
to bottom to the base to complete
the installation.
Doorbell
Wall
Sticker
Rubber plug
Base Screw
EN

14
Use the pin to press the disassembly hole on the top of the doorbell, and then
remove the doobell from bottom to top.
Take care when you extract the doorbell body, in order to preserve
and not broke the rear tongues on the backplate.
4. Removal instructions
Doorbell
Wall
Pin
1
2

15
5. Turn on and enter network conguration status
1-Remove the base of the doorbell and open the black silicone gasket on
the back of the doorbell.
2-Turn the power switch key to "ON" and the video doorbell turns on. After
powering on, press and hold the reset button "RESET" for 8 seconds until the
doorbell sounds "System reset", Then the doorbell will restart automatically,
and the indicator light will go out, red light turn on, then blue light flashes. When
you see the blue light flashing, you will hear the prompt tone "The camera is
ready to begin pairing" and the doorbell enters network configuration status.
Silicone cap
Reset button
Power key
TF card interface
Charging port
EN

17
7. How to bind Doorbell to mobile phone
Step1:
On the mobile phone, open the APP, login to the account, click the "Add
device" button on the main interface of the APP (Figure1), the interface
(gure2) will pop up, select and click "Security & Video surveillance" in the
category bar on the left, end then select and click "Smart Doorbell" in the
category on the right.
Step 2:
Take out doorbell, remove the base, uncover the black silicone cap on the
back of the doorbell, turn on the power switch, press and hold the "reset"
button for 8 seconds, and then you will hear the prompt sound "System reset".
After 5 seconds, the doorbell restarts and enters the network configuration
state, you will hear the voice prompt "The camera is ready to pairing" (for
detailed operation, please refer to article 5 of this manual).
Step 3:
After hearing the prompt tone, confirm that the sdoorbell enters the network
configuration state, select and click "Make sure the indicator is ashing
quickly or a prompt tone in heard" on the APP (figure 3), and then click
"Next" to pop up a new interface (figure 5).
Step 4:
Input the WIFI user name and password in (gure 5), Note:
1- This doorbell only can be used on 2,4Ghz network. If your network is 5Ghz,
please, change it to 2.4Ghz.
21
EN

18
2-The WIFI network input should be consistent with the WIFI network used
by the mobile phone. After confirming the above information, click "Next", the
interface pops up (gure 6).
Step 5:
Aim the doorbell camera at the QR code (figure 6), keep the camera and
the QR code about 10 cm away, scan the code to bind the video doorbell
and mobile phone. When you hear the prompt tone "Pairing information
received", click the "I heard a Prompt" button to enter the interface for adding
device (gure 7).
43
65

19
Step 6:
Wait for about 2 minutes, when a new interface (gure 8) pops up, it means
that the network configuration is successful. If the network configuration fails,
please check whether the network situation and the input information are
correct, and repeat the operation from step 1 to step 6.
8 97
8. Introduction for main functions of APP
Common functions
1- Voice switch: click to open, then click to close, you can receive the sound
transmitted by the doorbell, and you can hear the speaking of th visitor.
2- Video resolution switching: click to switch between SD and HD images
(when the network signal is poor, please select SD mode).
3- Interface zoom: click to switch between half screen and full screen.
4- Screeshot: click to take a screenshot of the picture in the video and save
it in the APP photo album.
5- Speak: click to open, then click to close. When the APP speak is opened,
you can hear the sound transmitted by the APP.
6- Record: click to open, then click to close. The recorded screen video is
stored in the photo album.
7- Playback: You need to insert an SD card to use this function.
8- Cloud storage: youy need to pay to activate. When activated, the content
of motion detection is stored here.
9- Photo album: check the stored pictures and recorded videos.
10- Settings: click the settings symbol in the upper right corner to enter the
function setting.
EN

20
11
10
Other function settings
1-Top red circle position of (gure 10) is to modify the device name and
device icon.
2- Bottom red rectangle position of (gure 10) is to modify infrared sensor
sensitivity.
3-Top red rectangle position position of (gure 11) is to set the battery power
storage ratio to determine the low battery alarm threshold.
4- Middle red rectangle position position of (gure 11) is to share this camera
with other members.
5- Bottom red rectangle position position of (gure 11) is to remove the device
binding.
9. Note
1- This device is power supply by Li-battery, and the battery usage lifetime
will be affected by the wake-up time and number of wake-ups. The PIR function
is recommended to be turned off in a crowded environement, or set the low
sensitivity to reduce the number of wake-ups of the device and extent the
battery life. Please, charge it in time when the battery is low.
2- During the installation, please confirm whether the network situation
is good or the device is covered by WIFI network, especially for outdoor
installation. If the signal is weak, please use some device to improve the signal
of the WIFI network for installation.
3-This device is a low power consumption smart product that can be support
APP remote wake-up, PIR human body detection wake-up, and key press
wake-up. After each wake-up, it will automatically enter the dormant state after
working for a short period of time.
This manual suits for next models
1
Table of contents
Languages:
Other AYR Intercom System manuals