BAFANG DP C13.CAN User manual

1
BF-UM-C-DP C13-EN November 2019
USER MANUAL FOR DISPLAY
CONTENT
7.1 Important Notice
7.2 Introduction of Display 2
7.3 Product Description 3
7.3.1 Specifications 3
7.3.2 Functions Overview 3
7.4 Display 4
7.5 Key Definition 4
7.6 Normal Operation 5
7.6.1 Switching the System ON/OFF 5
7.6.2 Selection of Support Levels 5
7.6.3 Headlights / backlighting 5
7.6.4 Walk Assistance 5
7.6.5 Selection mode 5
7.6.6 ”Service Tip” 6
7.6.7 ”Error code” indication 6
7.6.8 Battery capacity indication 6
7.7 Settings 7
7.7.1 Setting 7
7.7.2 View Information 8
7.8 Error Code Definition 12
7 USER MANUAL FOR
DP C13.CAN

2BF-UM-C-DP C13-EN November 2019
7.2 INTRODUCTION OF DISPLAY
• Model: DP C13.CAN BUS
• The liquid crystal display is made of hard-
ened PMMA, the key button is made of
silicone rubber.
• The label marking is as follows:
Note: Please keep the QR code label attached
to the display cable. The information from the
Label is used for a later possible software
update.
7.1 IMPORTANT NOTICE
• If the error information from the display
cannot be corrected according to the inst-
ructions, please contact your retailer.
• The product is designed to be waterproof. It
is highly recommended to avoid submerging
the display under water.
• Do not clean the display with a steam jet,
high-pressure cleaner or water hose.
• Please use this product with care.
• Do not use thinners or other solvents to
clean the display. Such substances can
damage the surfaces.
• Warranty is not included due to wear and
normal use and aging.

3
BF-UM-C-DP C13-EN November 2019
USER MANUAL FOR DISPLAY
7.3 PRODUCT DESCRIPTION
7.3.1 Specifications
• Operating temperature: -20℃~45℃
• Storage temperature: -20℃~50℃
• Waterproof: IP65
• Bearing humidity: 30%-70% RH
7.3.2 Functional Overview
• Speed display (switching between km and
miles).
• Battery capacity indication.
• The lighting system.
• Indication of performance support.
• Kilometer stand (including single-trip dis-
tance, total distance).
• Time display for single journeys.
• Walk assistance.
• Energy consumption indicator CALORIES
(Note: If the display has this function)
• Display for the remaining distance.(Depends
on your riding style)
• Indication of error messages.

4BF-UM-C-DP C13-EN November 2019
7.4 DISPLAY
1
8
7
4
2
3
6
1Display of battery capacity in real time
2Speed display in real-time
3Data: Display data, which corresponds to the
current mode
4The display shows , if the light is on.
5Speed display in real-time
6Support level
7Speed unit
8Unit indicator
7.5 KEY DEFINITION
Up
Mode/System On/Off
Down

5
BF-UM-C-DP C13-EN November 2019
USER MANUAL FOR DISPLAY
7.6 NORMAL OPERATION
7.6.1 Switching the System ON/OFF
Press and hold (>2S) on the display to
turn on the system. Press and hold (>2S)
again to turn off the system.
If the "automatic shutdown time" is set to 5
minutes (it can be reset with the "Auto Off"
function, See "Set Auto Off"), the display
will automatically be turned off within the
desired time when it is not in operation.
7.6.2 Selection of Support Levels
When the display is turned on, press the
or button (>2S) to switch to the support
level, the lowest level is 0, the highest level
is 5 (the amount of support level can be
set). When the system is switched on, the
support level starts in level 1. There is no
support at level 0.
7.6.3 Headlights / backlighting
Hold the button (>2S) to activate the
frontlight and taillights.
Hold the button (>2S) again to turn off
the frontlight and taillights. The brightness
of the backlight can be set in the display
settings "Brightness".
7.6.4 Walk Assistance
The Walk assistance can only be activated
with a standing pedelec.
Activation: Press the continuously until
this symbol appears. Next hold down
the button whilst the symbol is
displayed, now the Walk assistance will
activate. The symbol will blink and
the pedelec moves approx. 5 km/h. After
releasing the button, the motor stops
automatically and switches back to level 0.
7.6.5 Selection mode
Briefly press (0.5s) to view the different
Kilometer stand: total kilometers (ODO) -
daily kilometers (TRIP) - Remaining distance
(go) - Time (TIME) - Power Output (W) -
Energy consumption (SC) - Maximum speed
(MAX) - Average speed (AVG).
NOTE: Energy consumption is fitted only
with torque sensor.
5

6BF-UM-C-DP C13-EN November 2019
7.6.6 ”Service Tip”
If the “Service" function switch on, every 5000 km (the mileage of more than 5000 km) the indicator
"mA" is displayed every time at switch on.
The “Service" function can be turned off and on in the setting interface. See details for operation in
“Setting” part.
7.6.7 ”Error code” indication
When the the pedelec is at failure, the display will automatically show the error code and the screen
will flash. Please refer to the detailed error code in “ERROR CODE DEFINITION” part.
NOTE: Only when the fault is eliminated can you exit the fault interface. The pedelec will not be able
to continue work at failure.
7.6.8 Battery capacity indication
The battery capacity is displayed in real time as 100% to 0% (as shown in the figure below).
<5% 5%-20% 20%-40% 40%-60% 60%-80% 60%-100%

7
BF-UM-C-DP C13-EN November 2019
USER MANUAL FOR DISPLAY
7.7 SETTINGS
After the display is turned on, press and hold
(>2S) the and button at same time to
access the “Setting” interface. pressing the
or button, you can select and reset
the items.
Briefly press (<0.5S) the button your can
confirm your selected option or access the
next “Setting” interface, you can also press
and hold (>2S) the and button at
the same time to save them and exit to the
“Setting” interface.
If no button is pressed within 1 minute
in “Setting” interface, the display will
automatically exit setting and no data will be
saved.
7.7.1 Setting
7.7.1.1 Reset mileage
When the system is on, press and hold (>2S)
the and button at same time to ac-
cess the “Setting” interface and “tC” appears
on the display (as shown below). Now using
the or button, choose between “y”
or “n”. If choose “y”, will the Daily kilome-
ters (TRIP), Maximum speed (MAX), Average
speed (AVG) and time(TIME) be reset.
Once you have chosen your desired selec-
tion, press (<0.2S) the button to save
and to enter next item "Selections in km/
Miles".
7.7.1.2 Selections in km/Miles
When the system is on, press and hold (>2S)
the and button at same time to ac-
cess the “Setting” interface, repetitively press
the button until the “U” appears on the
display (as shown below). Now using the
or button, choose between “mile/h”
or “km/h” (U-1 or U-2).
Once you have chosen your desired selec-
tion, press (<0.2S) the button to save
and to enter next item "Set light sensitivity".
7.7.1.3 Set display brightness
When the system is on, press and hold (>2S)
the and button at same time to
access the “Setting” interface, repetitively
press the button until the “bLE” appears
on the display (as shown below). And then
press to increase or to reduce
(brightness for 1-8).
Once you have chosen your desired selec-
tion, press (<0.3S) the button to save
and to enter next item "Set Auto Off".

8BF-UM-C-DP C13-EN November 2019
7.7.1.4 Set Auto Off
When the system is on, press and hold (>2S)
the and button at same time to
access the “Setting” interface, repetitively
press the button until the “oFt” appears
on the display (as shown below). And then
press to increase or to reduce (Auto
Off for 1-9 minute).
Once you have chosen your desired selec-
tion, press (<0.3S) the button to save
and to enter next item "Service Tip".
7.7.1.5 Set support level
When the system is on, press and hold (>2S)
the and button at same time to ac-
cess the “Setting” interface, repetitively press
the button until the “dH” appears on the
display (as shown below). And then press
or to select support level (3,5,9), The
level is 5 in default.
Once you have chosen your desired selec-
tion, press (<0.2S) the button to save
and to enter next item "Wheel Size".
7.7.2 View Information
All data in this item cannot be changed, only to
be viewed.
7.7.2.1 Wheel Size
When the system is on, press and hold (>2S)
the and button at same time to ac-
cess the “Setting” interface, repetitively press
the button until the “LUd” appears on
the display (as shown below). And you can
press and hold (>2S) the and button
together exit to the main interface.
Once you have viewed your desired informa-
tion, press (<0.2S) the button to enter
next item "Speed Limit".
7.7.2.2 Speed Limit
When the system is on, press and hold (>2S)
the and button at same time to ac-
cess the “Setting” interface, repetitively press
the button until the “SPL” appears on
the display (as shown below). And you can
press and hold (>2S) the and button
together exit to the main interface.
Once you have viewed your desired informa-
tion, press (<0.2S) the button to enter
next item "Controller software info".

9
BF-UM-C-DP C13-EN November 2019
USER MANUAL FOR DISPLAY
7.7.2.3 Controller Software info
When the system is on, press and hold (>2S)
the and button at same time to ac-
cess the “Setting” interface, repetitively press
the button until the “CSc” (Controller
Software check) appears on the display (as
shown below). And you can press and hold
(>2S) the and button together exit
to the main interface.
Once you have viewed your desired informa-
tion, press (<0.2S) the button to enter
next item "Controller hardware info".
7.7.2.4 Controller Hardware info
When the system is on, press and hold (>2S)
the and button at same time to ac-
cess the “Setting” interface, repetitively press
the button until the “CHc” (Controller
Hardware check) appears on the display (as
shown below). And you can press and hold
(>2S) the and button together exit
to the main interface.
Once you have viewed your desired informa-
tion, press (<0.2S) the button to enter
next item "Display software info".
7.7.2.5 Display Software info
When the system is on, press and hold (>2S)
the and button at same time to
access the “Setting” interface, repetitively
press the button until the “dSc” (Display
Software check) appears on the display (as
shown below). And you can press and hold
(>2S) the and button together exit
to the main interface.
Once you have viewed your desired informa-
tion, press (<0.2S) the button to enter
next item "Display hardware info".
7.7.2.6 Display Hardware info
When the system is on, press and hold (>2S)
the and button at same time to
access the “Setting” interface, repetitively
press the button until the “dHc” (Display
Hardware check) appears on the display (as
shown below). And you can press and hold
(>2S) the and button together exit
to the main interface.
Once you have viewed your desired informa-
tion, press (<0.2S) the button to enter
next item "Sensor Software info".

10 BF-UM-C-DP C13-EN November 2019
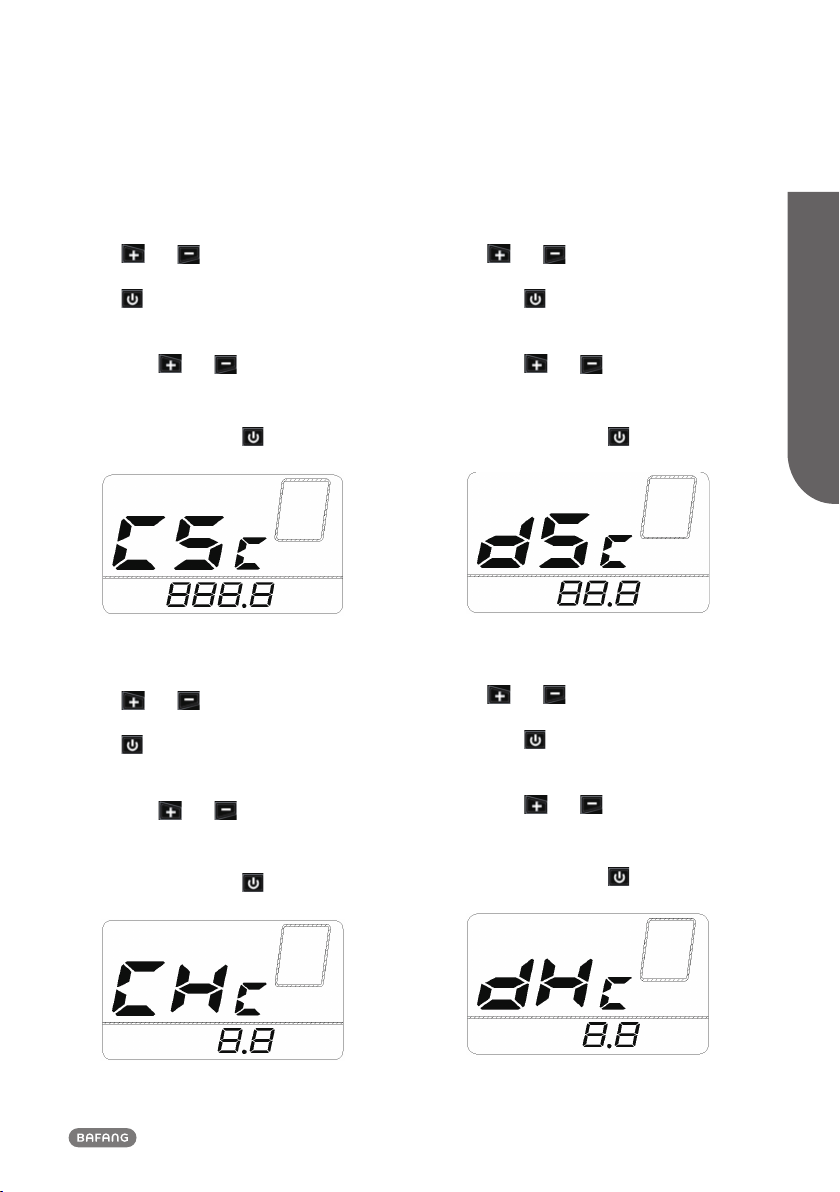
7.7.2.7 Sensor Software info
When the system is on, press and hold (>2S)
the and button at same time to
access the “Setting” interface, repetitively
press the button until the “SSc” (Sensor
Software check) appears on the display (as
shown below). And you can press and hold
(>2S) the and button together exit
to the main interface.
Once you have viewed your desired informa-
tion, press (<0.2S) the button to enter
next item "Sensor Hardware info".
7.7.2.8 Sensor Hardware info
When the system is on, press and hold (>2S)
the and button at same time to
access the “Setting” interface, repetitively
press the button until the “SHc” (Sensor
Hardware check) appears on the display (as
shown below). And you can press and hold
(>2S) the and button together exit
to the main interface.
Once you have viewed your desired informa-
tion, press (<0.2S) the button to enter
next item “Service Tip”.
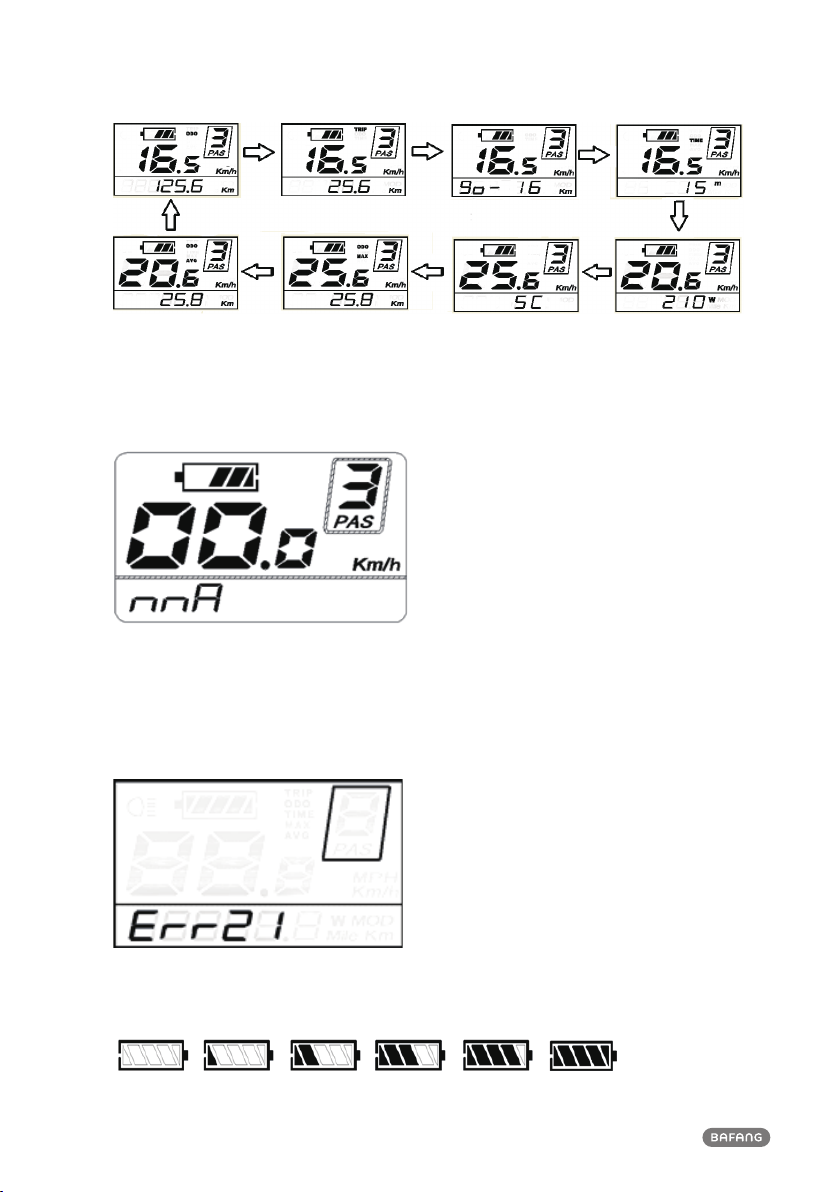
7.7.2.9 “Service Tip”
When the system is on, press and hold (>2S)
the and button at same time to ac-
cess the “Setting” interface, repetitively press
the button until the “nn A” appears on
the display (as shown below). And then
press or to select “0” or “1”. Chose
0 means turn off the notification.
You can also press and hold (>2S) the
and button together exit to the main
interface.
Once you have chosen your desired selec-
tion, press (<0.2S) the button to save
and to enter next item "Message of Error
Code".
7.7.2.10Message of Error Code
When the system is on, press and hold (>2S)
the and button at same time to ac-
cess the “Setting” interface, repetitively press
the button until the “E0-00” appears
on the display (as shown below). And then
press or to view “E0-00” to “E9-00”.
Chose 0 means turn off the notification.
You can also press and hold (>2S) the
and button together exit to the main
interface.
Once you have viewed your desired selec-
tion, press (<0.2S) the button to enter
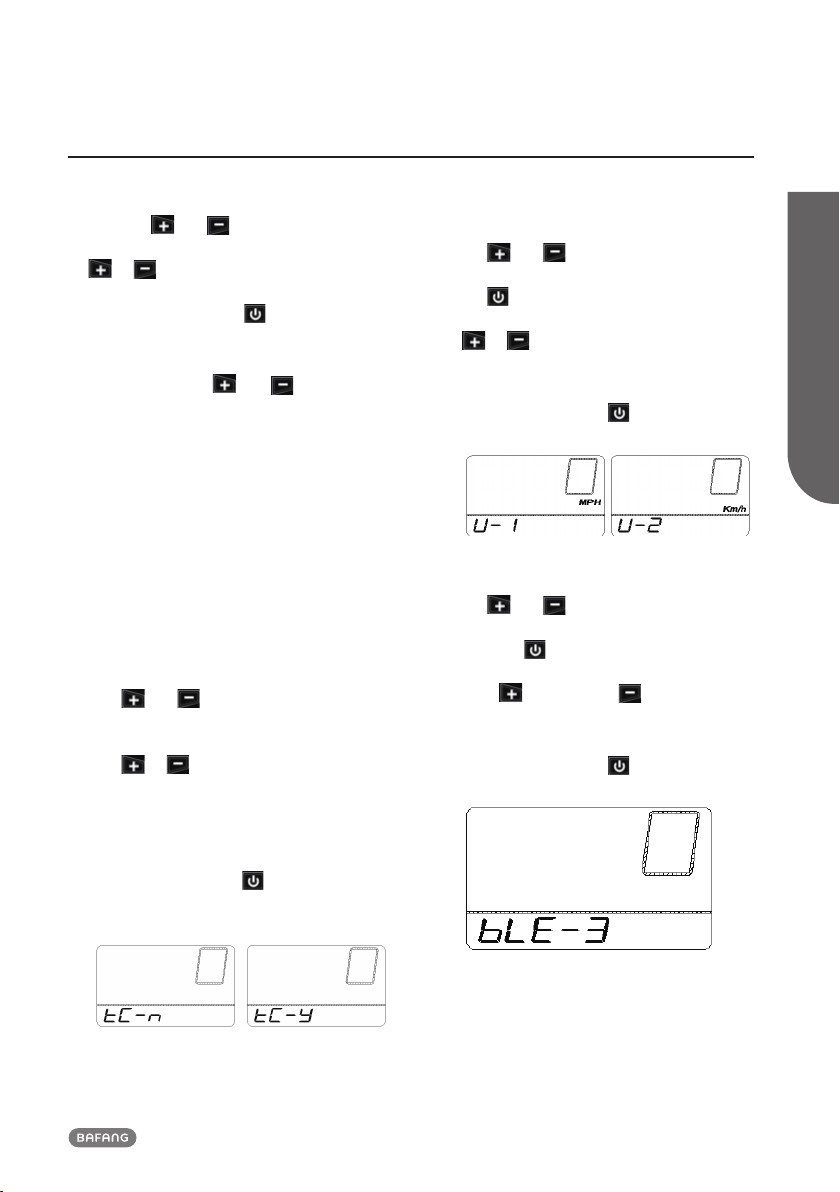
next item "Battery info".

11
BF-UM-C-DP C13-EN November 2019
USER MANUAL FOR DISPLAY
7.7.2.11Battery Information
When the system is on, press and hold (>2S)
the and button at same time to
access the “Setting” interface, repetitively
press the button until the “b01” appears
on the display (as shown below). And then
press or to view “Battery info”.
You can also press and hold (>2S) the
and button together exit to the main
interface.
Once you have viewed your desired selec-
tion, press (<0.2S) the button to the
main interface.
Content Explanation
b01 Current temperature (°C)
b04 Voltage (mV)
b06 Discharge (mA)
b07 Remaining Capacity (mAh)
b08 Total Capacity (mAh)
b09 Default Loader Status (%)
b10 Instant charge (%)
b11 Charging cycles (number)
b12 Maximum time in which no char-
ge was made (Hour)
b13 Time since last charge (Hour)
d00 Amount of battery cells (number)
d01 Cell Voltage 1 (mV)
d02 Cell Voltage 2 (mV)
dn Cell Voltage n (mV)
bSc Software version
bHc Hardware version
NOTE: If no data is detected, "--" is displayed.
Hardware version of battery
Software version of battery

12 BF-UM-C-DP C13-EN November 2019
7.8 ERROR CODE DEFINITION
The display can show the errors of a pedelec. If an error is detected, one of the following error codes will be
displayed.
Note: Please read carefully the description of the error code. When the error code appears, please first restart the
system. If the problem is not eliminated, please contact your dealer or technical personnel.
Error Declaration Troubleshooting
04 The throttle is not back in its correct
position.
Check the throttle can adjust back into its
correct position, if the situation does not
improve, please change to a new throttle.(only
with this function)
05 The throttle has fault.
1. Check the connector of throttle whether
they are correctly connected.
2. Disconnect the throttle, If the problem still
occurs, please contact your retailer.
(only with this function)
07 Overvoltage protection
1. Remove the battery.
2. Re-Insert the battery.
3. If the problem persists, please contact your
retailer.
08 Error with the hall sensor signal
inside the motor Please contact your retailer.
09 Error with the Engine phase’s Please contact your retailer.
10
The temperature inside the engine
has reached its maximum protection
value
1. Turn off the system and allow the Pedelec
to cool down.
2. If the problem persists, please contact your
retailer.
11 The temperature sensor inside the
motor has an error Please contact your retailer.
12 Error with the current sensor in the
controller Please contact your retailer.
13 Error with the temperature sensor
inside of the battery Please contact your retailer.

13
BF-UM-C-DP C13-EN November 2019
USER MANUAL FOR DISPLAY
Error Declaration Troubleshooting
14
The protection temperature inside
the controller has reached its maxi-
mum protection value
1. Turn off the system and let the pedelec cool
down.
2. If the problem persists, please contact your
retailer.
15 Error with the temperature sensor
inside the controller Please contact your retailer.
21 Speed sensor Error
1. Restart the system
2. Check that the magnet attached to the
spoke is aligned with the speed sensor and
that the distance is between 10 mm and 20
mm.
3. Check that the speed sensor connector is
connected correctly.
4. If the error persists, please contact your
retailer.
25 Torque signal Error
1. Check that all connections are connected
correctly.
2. If the error persists, please contact your
retailer.
26 Speed signal of the torque sensor has
an error
1.Check the connector from the speed sensor
to make sure it is connected correctly.
2.Check the speed sensor for signs of damage.
3.If the problem persists, please contact your
retailer.
27 Overcurrent from controller Please contact your retailer.
30 Communication problem
1. Check all connections are correctly con-
nected.
2. If the error persists, please contact your
retailer.
33 Brake signal has an error
(If brake sensors are fitted)
1. Check all connectors.
2. If the error continues to occur, please con-
tact your retailer.

14 BF-UM-C-DP C13-EN November 2019
Error Declaration Troubleshooting
35 Detection circuit for 15V has an error Please contact your retailer.
36 Detection circuit on the keypad has
an error Please contact your retailer.
37 WDT circuit is faulty Please contact your retailer.
41 Total voltage from the battery is too
high Please contact your retailer.
42 Total voltage from the battery is too
low Please contact your retailer.
43 Total power from the battery cells is
too high Please contact your retailer.
44 Voltage of the single cell is too high Please contact your retailer.
45 Temperature from the battery is too
high Please contact your retailer.
46 The temperature of the battery is
too low Please contact your retailer.
47 SOC of the battery is too high Please contact your retailer.
48 SOC of the battery is too low Please contact your retailer.
61 Switching detection defect Please contact your retailer. (only with this
function)
62 Electronic derailleur cannot release Please contact your retailer. (only with this
function)
71 Electronic lock is jammed Please contact your retailer. (only with this
function)
81 Bluetooth module has an error Please contact your retailer. (only with this
function)
Table of contents
Other BAFANG Bicycle Accessories manuals

BAFANG
BAFANG DP C15.UART User manual

BAFANG
BAFANG DP C07.UART User manual

BAFANG
BAFANG BT C01.340.UART Reference guide

BAFANG
BAFANG DP C18.UART User manual

BAFANG
BAFANG H310 User manual

BAFANG
BAFANG C965 User manual

BAFANG
BAFANG BT C01.340.UART Reference guide

BAFANG
BAFANG DP E170.CAN User manual

BAFANG
BAFANG C965 User manual

BAFANG
BAFANG DP C181.CAN User manual

BAFANG
BAFANG H500F User manual

BAFANG
BAFANG DP E161.CAN User manual

BAFANG
BAFANG DP C171.UART User manual

BAFANG
BAFANG DP C230.CAN User manual

BAFANG
BAFANG DP C15.CAN User manual

BAFANG
BAFANG UB600 User manual

BAFANG
BAFANG C961 User manual

BAFANG
BAFANG DP C240.CAN User manual

BAFANG
BAFANG DP C231.CAN User manual

BAFANG
BAFANG C961 User manual