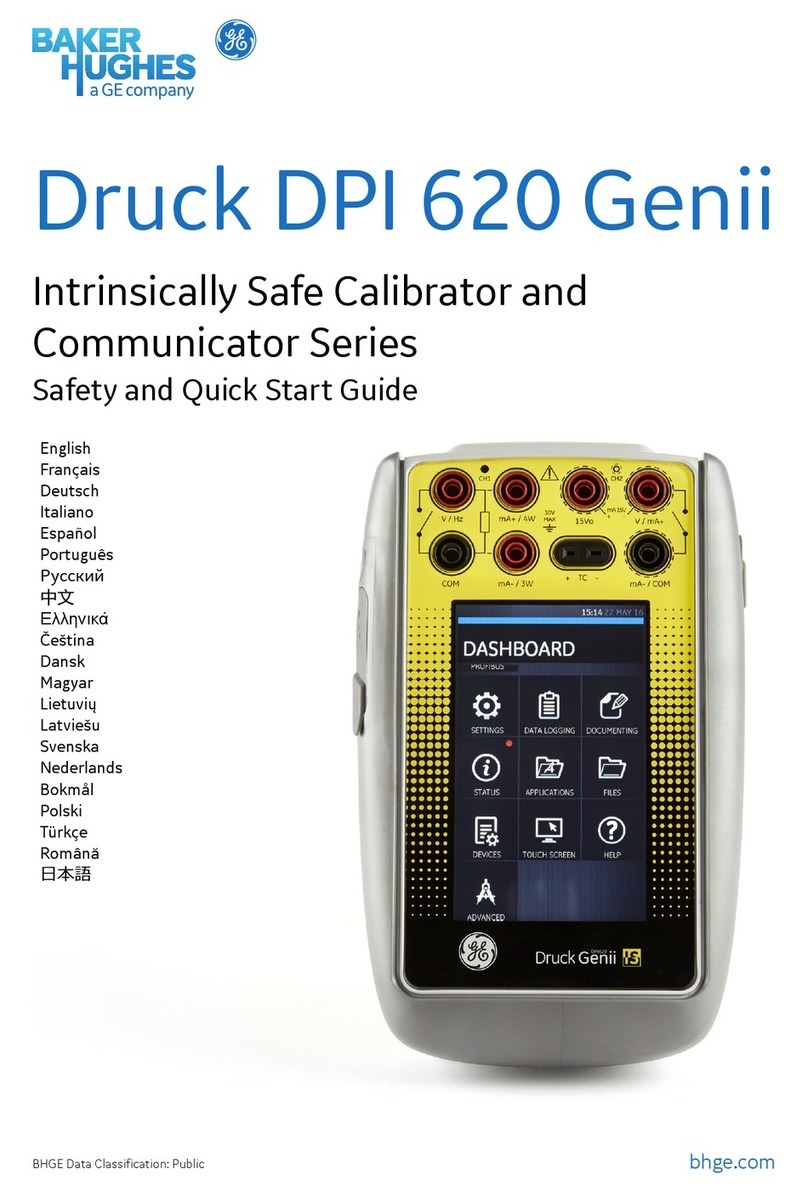
Baker Hughes Druck DPI 620 Genii User manual


Copyright 2013 Baker Hughes Company.
English–DPI 620G Instruction Manual | i
Introduction
Druck multifunction calibrators provide an all-in-one solution for your pressure measurement and
generation needs. The DPI 620 Genii multifunction process calibrator and HART® /
FOUNDATION™ Fieldbus / Profibus® communicator features a modular design that enables
expansion over time. With designs for both safe and hazardous area use, you can perform a wide
variety of tasks from reading and sourcing voltage, current, frequency, and resistance signals, to
documenting data and automating calibration procedures, equipping you to test and calibrate
electrical equipment, pressure sensors, gauges, switches, thermocouples, RTDs, and more.
Safety
The manufacturer has designed this equipment to be safe when operated using the procedures
detailed in this manual. Do not use this equipment for any other purpose than that stated, the
protection provided by the equipment may be impaired.
This publication contains operating and safety instructions that must be followed to make sure of
safe operation and to maintain the equipment in a safe condition. The safety instructions are
either warnings or cautions issued to protect the user and the equipment from injury or damage.
Use qualified technicians* and good engineering practice for all procedures in this publication.
Maintenance
The equipment must be maintained using the procedures in this publication. Further
manufacturer’s procedures should be done by an authorized service agents or the manufacturer’s
service departments.
Technical Advice
For technical advice contact the manufacturer.
WARNING Do not apply pressure greater than the maximum safe working
pressure.
It is dangerous to attach an external source of pressure to a PV 62XG pressure
generation stations. Use only the internal mechanisms to set and control
pressure in the pressure calibrator.
* A qualified technician must have the necessary technical knowledge, documentation, special test
equipment and tools to carry out the required work on this equipment.

Copyright 2013 Baker Hughes Company.
ii | DPI 620G Instruction Manual–English
Symbols
Symbol Description
This equipment meets the requirements of all relevant European safety directives. The
equipment carries the CE mark.
This equipment meets the requirements of all relevant UK Statutory Instruments. The
equipment carries the UKCA mark.
This symbol, on the equipment, indicates that the user should read the user manual.
This symbol, on the equipment, indicates a warning and that the user should refer to the
user manual.
Ce symbole, sur l'appareil, est un avertissement qui indique que l'utilisateur doit consulter
le manuel d'utilisation.
USB ports: Type A; Mini Type B connector.
Ground (Earth)
DC adaptor polarity: the Centre of the plug is negative.
Druck is an active participant in Europe’s Waste Electrical and Electronic Equipment
(WEEE) take-back initiative (directive 2012/19/EU).
The equipment that you bought has required the extraction and use of natural resources
for its production. It may contain hazardous substances that could impact health and the
environment.
In order to avoid the dissemination of those substances in our environment and to diminish
the pressure on the natural resources, we encourage you to use the appropriate take-back
systems. Those systems will reuse or recycle most of the materials of your end life
equipment in a sound way. The crossed-out wheeled bin symbol invites you to use those
systems.
If you need more information on the collection, reuse, and recycling systems, please
contact your local or regional waste administration.
Please visit the link below for take-back instructions and more information about this
initiative.
https://qrco.de/dsweee

Copyright 2013 Baker Hughes Company.
English–DPI 620G Instruction Manual | iii
Abbreviations
The following abbreviations are used in this manual. Abbreviations are the same in the singular
and plural.
Abbreviation Description
a Absolute
ac Alternating Current
avg Average
CH Channel
CJ Cold Junction
COSHH Control of Substances Hazardous to Health
dc Direct current
DD Device Description
DPI Digital Pressure Instrument
DUT Device Under Test
etc. And so on
e.g. For example
FF FOUNDATION™ Fieldbus
FS Full Scale
ft Foot
g Gauge
H2O Water
Hz Hertz
IDOS Intelligent Digital Output Sensor (Druck product)
i.e. That is
in Inch
kg kilogram
m Metre
mA milliampere
max Maximum
mbar millibar
min Minute or minimum
MSDS Material Safety Data Sheet
NPT National Pipe Thread
PA Process Automation
P/N Part Number
psi Pounds per square inch
RH Relative Humidity
RS-232 Serial communications standard

Copyright 2013 Baker Hughes Company.
iv | DPI 620G Instruction Manual–English
TC Thermocouple
USB Universal Serial Bus
V Volts
°C Degrees Celsius
°F Degrees Fahrenheit
Abbreviation Description

Copyright 2013 Baker Hughes Company.
English–DPI 620G Instruction Manual | v
Contents
1. Introduction 1
1.1 Overview 1
1.2 What’s in the Box 1
1.3 Optional Items 1
1.4 Observance of the User Manual 2
1.5 General Safety Precautions 2
1.6 Warnings 3
1.7 Electrical Safety 3
1.8 Pressure Warnings 4
1.9 Overvoltage Category 4
1.10 Receiving the Instrument 4
1.11 Installing the Battery 4
1.12 Charging the Battery 5
1.13 Power On 6
1.14 Power Off 6
1.15 Maintenance 6
1.15.1 Cleaning 6
1.16 Instrument Return 7
1.16.1 Return Goods/Material Procedure 7
1.16.2 Safety Precautions 7
1.16.3 Important Notice 7
1.16.4 For More Information Contact 7
1.17 Packaging for Storage or Transportation 7
1.18 Environment 7
2. Instrument Operation 9
2.1 DPI 620 Genii Modes 9
2.2 Dashboard Navigation 9
2.2.1 Settings 11
2.2.2 Help 13
2.2.3 Status 14
2.2.4 Software Build 15
2.2.5 Applications 18
2.2.6 Advanced Menu 19
2.2.7 Devices 22
2.2.8 Files 23
2.2.9 Touchscreen 25
3. Calibrator 27
3.1 Basic Calibrator Operation 27
3.1.1 Layout 27
3.1.2 Calibrator Screen Information 29
3.2 Error Indications 29
3.3 Task Menu 30
3.3.1 Pressure Tasks 30
3.3.2 Electrical Tasks 31
3.3.3 Saving Tasks 31
3.3.4 Favourites 32
3.3.5 Custom Task 33

Copyright 2013 Baker Hughes Company.
vi | DPI 620G Instruction Manual–English
3.4 Channel Function 35
3.4.1 Automation 35
3.5 Utility Options 36
3.5.1 Max/Min/Avg 36
3.5.2 Switch Test 36
3.5.3 Relief Valve 37
3.6 Process Options 38
4. Electrical Tasks 39
4.1 Measure or Source Current 39
4.2 Measure DC Voltage 40
4.3 Measure AC Voltage (CH1) – 20 VRMS Maximum 40
4.4 Measure AC Voltage (CH1) – 300 VRMS Maximum 41
4.5 Source DC Voltage (CH1) 41
4.6 Measure or Source Current with Loop Power 42
4.7 Measure Frequency on CH1 43
4.8 Source Frequency on CH1 44
4.9 Measure or Simulate a Resistance Temperature Detector (RTD) 45
4.10 Measure or Simulate a Thermocouple (TC) 47
4.11 Switch Test 48
5. Pressure Tasks 51
5.1 Introduction 51
5.2 Module Carrier and PM 620 / PM 620T Pressure Modules 52
5.2.1 Assembly Instructions 53
5.3 Pressure Connections 53
5.4 Measure Pressure – PM 620 or PM 620T 54
5.5 Measure Pressure – IDOS 56
5.5.1 IDOS Option Instructions 56
5.5.2 IDOS Function Procedures 56
5.6 Measure Pressure – TERPS USB 57
5.6.1 TERPS Option Instructions 57
5.6.2 TERPS Function Procedures 57
5.7 Leak Test 58
5.8 Set the Pressure Module to Zero 59
6. Temperature Tasks (RTD Interface) 61
6.1 Setup 61
6.2 Utilities 62
6.3 Settings 63
6.4 User Profiles 64
7. Data Logging 65
7.1 Set-up 66
7.2 Operation 66
7.3 File Review 67
7.4 Data Log File Management 69
7.4.1 Transfer 69
7.4.2 Delete 70
7.4.3 Data Format 70

Copyright 2013 Baker Hughes Company.
English–DPI 620G Instruction Manual | vii
8. Documenting 73
8.1 Analysis 73
8.1.1 Setup 73
8.1.2 Define Reference Channel 74
8.1.3 Define Input Channel(s) 74
8.1.4 Analysis Function 75
8.2 Run Procedure 75
8.2.1 Sequence to Upload and Download File 76
9. HART® Operations 77
9.1 HART® Menu Operations 77
9.2 Start-up 77
9.3 HART® Connections 77
9.3.1 Power Supply from the Calibrator 77
9.3.2 External Loop Power 78
9.3.3 Communicator Attached to a Network 79
9.3.4 Use of Test Connections 79
9.4 Viewing HART® Primary Variables 80
9.5 HART® Offline 80
9.5.1 Introduction 80
9.5.2 Device Polling 80
9.5.3 Connected Device Configuration 83
9.5.4 Change Device 83
9.5.5 View Device Summary 83
9.5.6 Open Device Configuration 84
9.5.7 Create a New HART® Configuration 87
9.5.8 Open a HART® Offline Configuration 88
9.5.9 File Management 89
9.6 HART® Online 89
9.6.1 HART® SDC Application 89
9.6.2 HART® SDC Data Display 92
9.6.3 Editing Device Data Values 92
9.7 Executing HART® Methods 93
9.7.1 HART® Method Example – Self-Test 94
9.7.2 HART® Method Example – Analog Trim 94
9.8 HART® SDC Application Preferences 95
9.9 HART® Device Connection Failure 96
9.10 HART® Configurations 96
9.10.1 HART® – Uploading the Configuration 96
9.10.2 HART® – Working with Saved Configurations 96
9.10.3 Copy HART® Configuration to USB 97
9.10.4 Delete HART® Configuration 97
9.10.5 Delete All HART® Configuration Files 97
9.10.6 Import Configuration Files from USB Flash Drive 97
10. FOUNDATION™ Fieldbus 99
10.1 Introduction 99
10.2 Start up 99
10.3 FOUNDATION™ Fieldbus Toolbar 100
10.4 Scanning for Devices 100
10.5 Context Sensitive Menu 102
10.6 Troubleshooting 103

Copyright 2013 Baker Hughes Company.
viii | DPI 620G Instruction Manual–English
10.7 Device Focus View 103
10.8 The Navigation Menu Tree 104
10.8.1 Block Header bar 105
10.9 Functional Group View 105
10.9.1 Displaying Parameter Help 106
10.9.2 Refreshing Data 106
10.9.3 Editing Values 107
10.9.4 Methods 108
10.10 Fieldbus Function Finder 108
10.11 Exporting Data to Main DPI 620 Genii Application 109
10.12 Viewing Exported Variables in Channel Window 110
10.13 Fieldbus Application – My Block 111
10.14 Application Settings 112
10.14.1 Device Library 112
10.14.2 Options 113
10.14.3 Advanced 113
11. Profibus® PA 115
11.1 Introduction 115
11.2 Profibus® Configurations 115
11.3 Start-up 115
11.4 Profibus® Connections 115
11.5 Profibus® Application – Connecting to a Network 117
11.6 Profibus® Toolbar 117
11.7 Scanning for Devices 118
11.8 Context Sensitive Menu 119
11.9 Troubleshooting Connection Problems 120
11.10 Profibus® Application – Communication 120
11.10.1 Device Focus View 120
11.10.2 Block Navigation Tree 122
11.10.3 Block Header Bar 123
11.10.4 Folder Variables 124
11.10.5 Displaying Parameter Help 125
11.10.6 Refreshing Data 125
11.10.7 Editing Variables 126
11.11 Profibus® Application – My Block 126
11.12 Profibus® Application – Exporting Variables 127
11.12.1 Viewing Exported Variables in Channel Window 127
11.13 Profibus® Application Settings 128
11.13.1 Device Library 128
11.13.2 Application Options 129
11.13.3 Advanced 129
11.14 Profibus® Function Finder 129
12. Calibration Procedures 131
12.1 Before Starting 131
12.2 Procedures (CH1/CH2): Current (Measure) 133
12.3 Procedures (CH1/CH2): Current (Source) 134
12.4 Procedures (CH1/CH2): DC mV/Volts (Measure) 135
12.5 Procedures (CH1): DC mV/Volts (Source) 137
12.6 Procedures (CH1): Frequency (Measure or Source) 138
12.6.1 Frequency Calibration (Measure Function) 138

Copyright 2013 Baker Hughes Company.
English–DPI 620G Instruction Manual | ix
12.6.2 Frequency Calibration (Source Function) 139
12.6.3 Frequency Calibration Check 140
12.7 Procedures (CH1): Frequency Amplitude (Source) 141
12.8 Procedures (CH1): Resistance (Measure) 141
12.9 Procedures (CH1): True Ohms (Measure) 142
12.10 Procedures (CH1): Resistance (Source) 143
12.11 Procedures (CH1): TC mV (Measure or Source) 144
12.12 Procedures (CH1): Cold Junction (TC Method) and CJ (Measure) 145
12.12.1 Cold Junction (TC Method) 145
12.12.2 Cold Junction (Alternative Method) 146
12.13 Procedures (CH1): AC mV/Volts (Measure) 146
12.14 Procedures: Pressure Module 147
12.15 Procedures: TERPS USB 148
12.16 Procedures: RTD-INTERFACE 148
13. General Specification 151

Copyright 2013 Baker Hughes Company.
x | DPI 620G Instruction Manual–English

Copyright 2013 Baker Hughes Company.
English–DPI 620G Instruction Manual | 1
Overview
1. Introduction
1.1 Overview
The Druck DPI 620 Genii is a battery powered instrument for electrical measure, source
operations and HART® communications. The DPI 620 Genii also supplies the power and user
interface options for all supported functions. The touchscreen displays up to six different
parameters in individual channel windows.
This version of the manual is applicable to software revisions DK420 v3.19 and above.
1.2 What’s in the Box
The following items are supplied with the DPI 620 Genii (standard option):
• Druck DPI 620 Genii multifunction calibrator.
• Li-polymer battery.
• DC power supply.
• Stylus
• AC probe.
• Set of six test leads.
• Quick start guide.
1.3 Optional Items
The items that follow are optional items which can be used with the Druck DPI 620 Genii:
Optional Item Description
Pressure Module Carrier, MC 620G – this
attaches directly to the DPI 620 Genii to allow
pressure to be applied to it. The MC 620G also
houses pressure sensing modules to make a fully
integrated pressure instrument when combined
with the PM 620 / PM 620T pressure module.
Pressure Module, PM 620 / PM 620T – this is a
pressure sensing module that attaches to the
pressure module carrier (MC 620G) or a Pressure
Station (PV 62XG) to enhance the pressure
measurement functionality. There are several
pressure ranges available with the PM 620 /
PM 620T pressure modules.
Pressure Station, PV 62XG – if the DPI 620 Genii
is installed in a Pressure Station with a pressure
module, it becomes a fully integrated pressure
calibrator.

Copyright 2013 Baker Hughes Company.
2 | DPI 620G Instruction Manual–English
Chapter 1. Introduction
Figure 1-1: DPI 620 Genii with MC 620G Module Carrier and PM 620 Pressure Modules
Figure 1-2: DPI 620 Genii with PV 62XG Pressure Station and PM 620 Pressure Module
1.4 Observance of the User Manual
This manual contains safety and battery installation information for the Druck DPI 620 Genii. It is
the responsibility of the customer, to make sure that all personnel operating and maintaining the
equipment are correctly trained and qualified. Before operating or using the equipment, read and
obey all sections, including all WARNINGS and CAUTIONS given in the ‘Safety & Quick Start
Guide’ (K0542).
1.5 General Safety Precautions
Read and obey all the operator's local health and safety regulations and safe working procedures
or practices when doing a procedure or task.
• Use only the approved tools, consumable materials and spares to operate and maintain the
equipment.
• Use equipment only for the purpose for which it is provided.
• Wear all applicable Personal Protective Equipment (PPE).
• Do not use sharp objects on the touch-screen.

Copyright 2013 Baker Hughes Company.
English–DPI 620G Instruction Manual | 3
Warnings
• Observe absolute cleanliness when using the instrument.
• Severe damage can be caused if equipment connected to this instrument is contaminated.
• Connect only clean equipment to the instrument. To avoid any contamination, an external
Dirt Moisture Trap is recommended.
• Some liquid and gas mixtures are dangerous. This includes mixtures that occur because of
contamination. Make sure that the equipment is safe to use with the necessary media.
• Read and obey all applicable WARNING and CAUTIONS signs.
• Make sure that:
i. All work areas are clean and clear of unwanted tools, equipment and materials.
ii. All unwanted consumable materials are disposed in accordance with local health and
safety and environmental regulations.
iii. All equipment is serviceable.
1.6 Warnings
1.7 Electrical Safety
WARNING Do not ignore the specified limits for the instrument or its related
accessories. This can cause injuries.
If the equipment is used in a manner not specified by the manufacturer, the
protection provided by the equipment may be impaired.
Do not use the instrument in locations with explosive gas, vapor or dust. There
is a risk of an explosion.
WARNING The DC input to the DPI 620G is rated at 5 Vdc ± 5% 4 Amps.
External circuits should have appropriate insulation to the mains.
To prevent electrical shocks or damage to the instrument, do not connect more
than 30 V CAT I between the terminals or between the terminals and the ground
(earth).
This instrument uses a rechargeable Lithium Polymer (Li-ion) battery pack. To
prevent an explosion or fire do not short circuit.
The power supply input range to the optional power supply unit is 100 –260Vac,
50 to 60 Hz, 250 mA, installation category CAT II.
When using the optional power supply unit, position the power supply so as not
to obstruct the supply disconnecting device.
Note that the operating and storage temperature range of the optional PSU does
not match that of the DPI 620G. Mains PSU operating temperature range 0°C to
+40°C, storage temperature range -40°C to +70°C.
To make sure the display shows the correct data, disconnect the test leads
before power is set to ON or changing to another measure or source function.
Keep the leads free from all contaminants.

Copyright 2013 Baker Hughes Company.
4 | DPI 620G Instruction Manual–English
Chapter 1. Introduction
1.8 Pressure Warnings
1.9 Overvoltage Category
The following summary of installation and measurement overvoltage categories are derived from
IEC 61010-1. The overvoltage categories indicate the severity of overvoltage transients.
1.10 Receiving the Instrument
On receipt of the instrument, check the contents in the box listed in Section 1.2. It is
recommended to retain the box and packaging for future use.
1.11 Installing the Battery
1. Remove the five Pozidriv screws A, see Figure 1-3.
2. Remove the battery cover.
3. Check the connections on the battery line up with the connections in the battery
compartment.
4. Place the battery in the battery compartment.
5. Replace the battery cover.
WARNING It is dangerous to attach an external source of pressure to a
PV 62XG pressure generation station. Use only the internal mechanisms to set
and control pressure in the pressure calibrator.
To prevent a dangerous release of pressure, isolate and bleed the system before
disconnecting a pressure connection.
To prevent a dangerous release of pressure, make sure that all the related pipes,
hoses and equipment have the correct pressure rating, are safe to use and are
correctly attached.
To prevent damage to the PV 62XG, MC 620G, PM 620 or PM 620T, only use it
within the specified pressure limits.
Do not exceed the maximum pressures stated in the appropriate component
manual for the unit under test.
Reduce pressure at a controlled rate when venting to atmosphere.
Carefully de-pressurize all pipes to atmospheric pressure before disconnecting
and connecting to the unit under test.
Always wear appropriate eye protection when working with pressure.
Table 1-1: Overvoltage Categories
Overvoltage Category Description
CAT I
Overvoltage category I has the least severe overvoltage transients. Generally
CAT I equipment is not designed to be directly connected to the mains supply.
Examples of CAT I equipment are process loop powered devices.
CAT II
Overvoltage category II describes an electrical installation where typically single
phase equipment is connected. Examples of such equipment are appliances
and portable tools.

Copyright 2013 Baker Hughes Company.
English–DPI 620G Instruction Manual | 5
Charging the Battery
6. Secure the cover with the five Pozidriv screws.
Figure 1-3: Installing the Battery
1.12 Charging the Battery
1. Connect the DC power supply into the + 5V DC connection on the side of the unit, see
Figure 1-4.
2. The unit can be on or off when charging. Charging times may be longer if charging when the
unit is switched on or in standby.
Figure 1-4: DPI 620 Genii Power Button and Ports

Copyright 2013 Baker Hughes Company.
6 | DPI 620G Instruction Manual–English
Chapter 1. Introduction
1.13 Power On
If the unit is off, momentarily press the power button (Figure 1-4) until the display flashes and the
splash screen appears.
1.14 Power Off
To power off the unit, press and release the power button. The POWERDOWN OPTIONS window
will be displayed as shown in Figure 1-5.
Figure 1-5: Power Down Options
1.15 Maintenance
The DPI 620 Genii instrument contains no user serviceable parts and should be returned to a
Druck service center for repair.
1.15.1 Cleaning
Clean the case and display with a lint free cloth and a weak detergent solution.
Table 1-2: Battery Charging Times
Charging Connection Charge Time
DC Power Supply 6.5 hours
External Battery Charger 6.5 hours
Option Description
SWITCH OFF Initiates full power down of DPI 620 Genii and is recommended if unit is not
going to be used for several hours. It requires full reboot on next power up. Full
power down can also be achieved by pressing and holding the power button
until the screen goes blank.
STANDBY Places the DPI 620 Genii in standby mode and reduces power consumption
from operating mode. It is recommended if unit is to be inactive for short periods.
(DPI 620 Genii has fast turn on from standby mode).
When powered up from standby mode the instrument always opens the last
screen shown before going into standby mode.
CAUTION Do not use solvents or abrasive materials.

Copyright 2013 Baker Hughes Company.
English–DPI 620G Instruction Manual | 7
Instrument Return
1.16 Instrument Return
1.16.1 Return Goods/Material Procedure
If the unit requires calibration or is unserviceable, return it to the nearest Druck Service Centre
listed at: https://qrco.de/bcPHml.
Contact the Service Department to obtain a Return Goods/Material Authorization (RGA or RMA).
Provide the following information for a RGA or RMA:
• Product (e.g. DPI 620G)
• Serial number.
• Details of defect/work to be undertaken.
• Calibration traceability requirements.
• Operating conditions.
1.16.2 Safety Precautions
Provide information if the product has been in contact with any hazardous or toxic substances
and, the relevant MSDS and or COSHH references and precautions to be taken when handling.
1.16.3 Important Notice
Do not use unauthorized sources to service this equipment as this will affect the warranty and
may not guarantee further performance.
When discarding used equipment and batteries, obey all the local health and safety procedures.
1.16.4 For More Information Contact
Druck customer service department: Druck.com
1.17 Packaging for Storage or Transportation
To store the unit or to return the unit for calibration or repair carry out the following procedures:
1. Pack the Instrument.
2. To return the instrument for calibration or repair, complete the return goods procedure. See
Section 1.16.
3. Return the instrument to the manufacturer or an approved service agent for all repairs.
1.18 Environment
The following conditions apply for both shipping and storage:
• Temperature Range -20°C to +70°C (-40°F to +158°F)
• Altitude up to 15,000 feet (4,570 meters).

Copyright 2013 Baker Hughes Company.
8 | DPI 620G Instruction Manual–English
Chapter 1. Introduction
Other manuals for Druck DPI 620 Genii
2
Table of contents
Other Baker Hughes Test Equipment manuals
Baker Hughes
Baker Hughes Druck DPI 610 IS User manual

Baker Hughes
Baker Hughes Druck Dry PTC 200 User manual

Baker Hughes
Baker Hughes Druck PACE Series Use and care manual

Baker Hughes
Baker Hughes Druck PACE Use and care manual

Baker Hughes
Baker Hughes Druck DPI 612 User manual

Baker Hughes
Baker Hughes Druck DPI 620 Genii Instruction Manual

Baker Hughes
Baker Hughes Druck DPI 880 User manual

Baker Hughes
Baker Hughes Druck DPI 620 Genii User manual

Baker Hughes
Baker Hughes Druck DPI 880 User manual

Baker Hughes
Baker Hughes Druck DPI 610E-PC User manual