Baker Hughes Druck DPI 610E-PC User manual

Druck.com
DPI 610E
DPI 610E - IS
Portable Pressure Calibrator
Quick Start & Safety Manual
English
Čeština
Dansk
Deutsch
Español
Français
Hrvatski
Italiano
Latviešu
Lietuvių
magyar
Nederlands
Norsk
Polski
Português
Română
Svenska
Türkçe
Ελληνικά
العربية
中文
한국어
日本語
1 - 10
11 - 20
21 - 30
31 - 40
41 - 50
51 - 60
61 - 70
71 - 80
81 - 90
91 - 100
101 - 110
111 - 120
121 - 128
129 - 138
139 - 148
149 - 158
159 - 168
169 - 178
179 - 188
189 - 198
199 - 208
209 - 216
217 - 224
DPI 610E-PC
DPI 610E-HC
DPI 610E-SPC
DPI 610E-SHC


Copyright 2022 Baker Hughes Company.
Quick Start & Safety Manual| i
A1
A2
DPI610E-S*********
Pressure Range:
**** bar **** psi **** Pa
Max Working Pressure 1.2x
S/N ********
DoM: MM-YYYY
11-16Vdc 36W max
Made in the UK
DRUCK LTD, LEICESTER
LE6 0FH, UK
Service / Spares:
Druck.com/expert
0598
SGS21ATEX0009X
II 1G
([LD,,&7*D&7D&
IECEx BAS 21.0005X
BAS21UKEX0638X
CHARGER INPUT Um=18V 1180 Contains FCC ID: SQGBL652
Contains IC: 3147A-BL652
7KHHQFORVHGGHYLFHFRPSOLHVZLWK3DUWRIWKH)&&5XOHV2SHUDWLRQLVVXEMHFWWRWKHIROORZLQJWZRFRQGLWLRQV7KLVGHYLFHPD\QRWFDXVH
KDUPIXOLQWHUIHUHQFHDQG7KLVGHYLFHPXVWDFFHSWDQ\LQWHUIHUHQFHUHFHLYHGLQFOXGLQJLQWHUIHUHQFHWKDWPD\FDXVHXQGHVLUHGRSHUDWLRQ
7
1
3
2
4
5
9
6
10
8
11
15
14
13
12
16
18
19
17
2
1
5
4
7
1
6
8
9
2
3

Copyright 2022 Baker Hughes Company.
ii | Quick Start & Safety Manual
10
12 13
11
14
1
15 19
20
16
17
18

Copyright 2022 Baker Hughes Company.
Quick Start & Safety Manual| iii
Ui No connection permitted to
devices with an independent
power source
Uo 6.3V
Li Io 748mA
Pi Po 0.98W
Ci 35.2nF Co 15.4μF
Li 0μH Lo 17μH
Ui 30V Uo 6.3V
Li 450mA Io 49mA
Pi 1W Po 77mW
Ci 3.00nF Co 30.00nF
Li 0μH Lo 7.40mH
Ui 30V Uo 25.2V
Li 450mA Io 142mA
Pi 1W Po 858mW
Ci 11.22nF Co 21.80nF
Li 0μH Lo 834μH

Copyright 2022 Baker Hughes Company.
iv | Quick Start & Safety Manual

Copyright 2022 Baker Hughes Company.
English–DPI 610E Quick Start & Safety Manual | 1
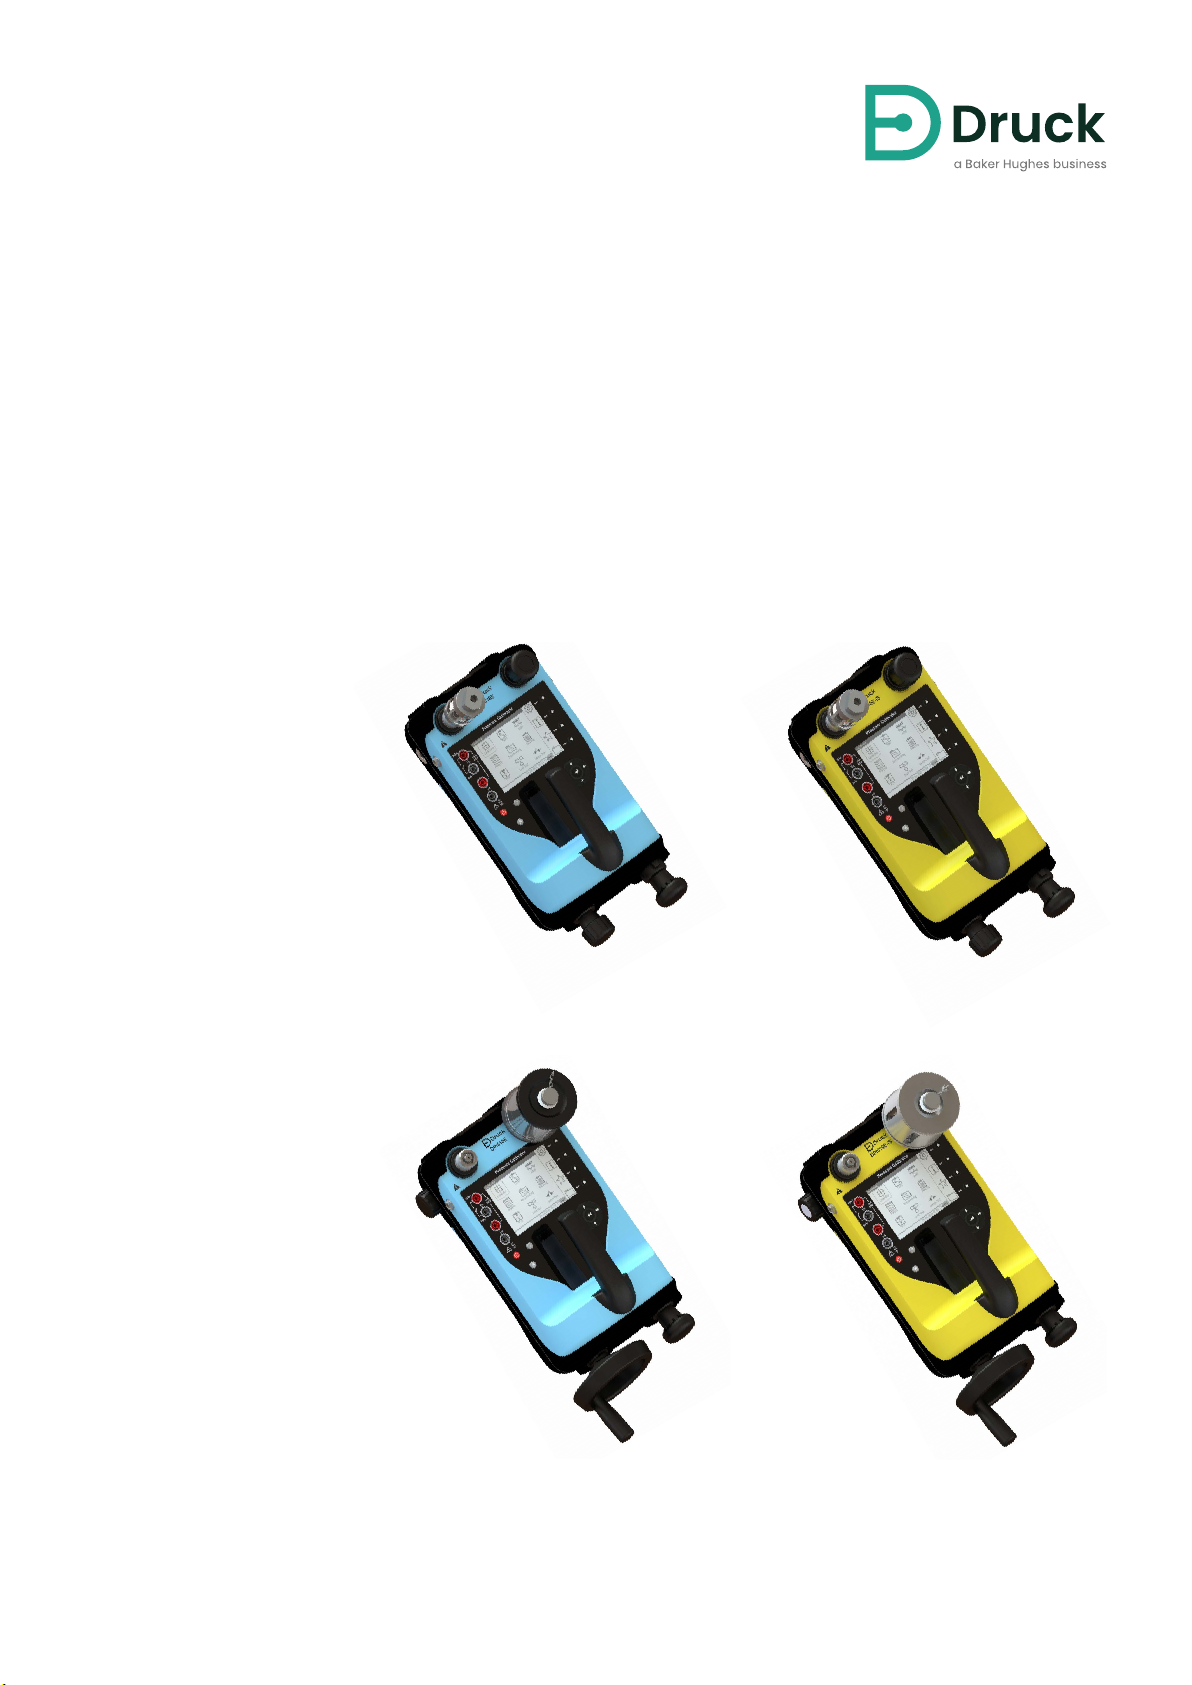
The DPI 610E (Table 1) is a handheld pressure calibrator
with an in-built pressure generation manual pump and
electrical measurement and simulation. The instrument is
available in Intrinsically safe (IS) and non-intrinsically safe
(Non-IS) variants (See Table 1). It is intended to be used to
calibrate pressure sensors and transmitters by service or
maintenance engineers.
Unless otherwise stated in the section heading, the
following content relates to all models listed above.
Before using this instrument, read and understand
the Safety section, user manual and all instructions.This
includes: applicable local safety procedures and
installation standards, and this document.
Installation should be carried out by qualified plant
installation technicians in compliance with all local safety
procedures and installation standards. For example:
IEC/EN 60079-14, US National Electrical Code NFPA 70 or
Canadian Electrical Code (CEC).
The DPI 610E has been designed to be safe when
operated using the procedures detailed in this manual. It is
dangerous to ignore the specified warnings. Do not use this
equipment for any other purpose than that stated otherwise
the protection provided by the equipment may be impaired.
External circuits should have appropriate isolation to
mains voltages.
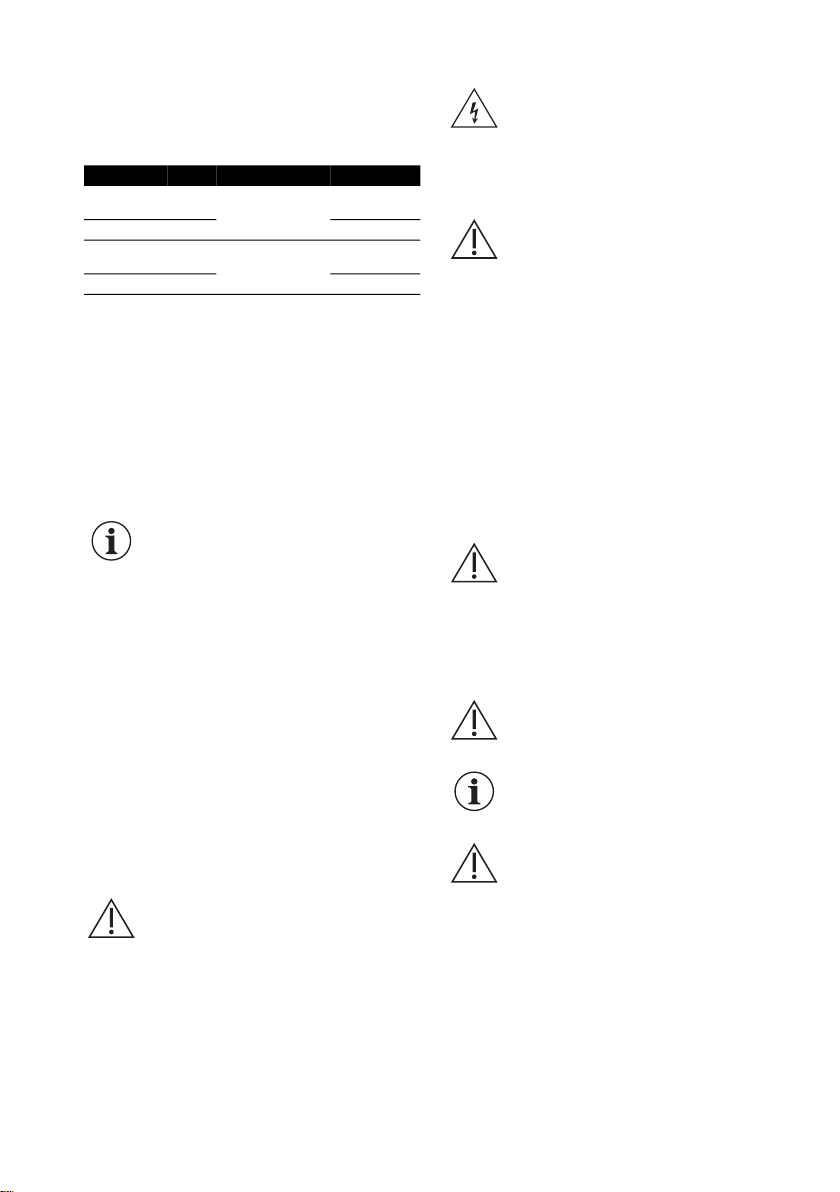
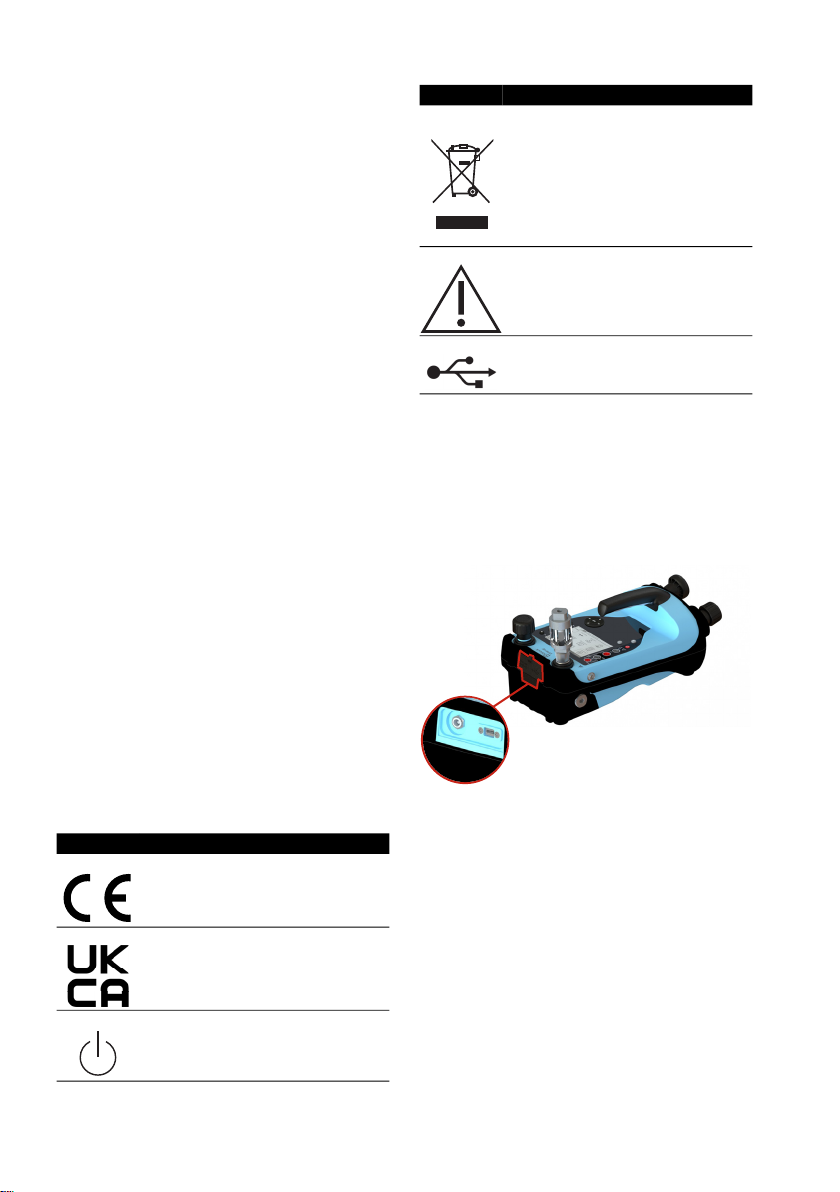
Maximum Operating Pressure (MWP) is stated on
the label on the underside of DPI610E. Over pressure to be
limited to 1.2 × MWP.
DPI 610E-HC Blue 70 - 1000 bar
(1000 - 15000 psi)
(7 - 100 MPa)
Hydraulic
(Non-IS)
DPI 610E-SHC Yellow Hydraulic (IS)
DPI 610E-PC Blue 0.35 - 35 bar
(5 - 500 psi)
(0.035 - 3.5 MPa)
Pneumatic
(Non-IS)
DPI 610E-SPC Yellow Pneumatic (IS)

Copyright 2022 Baker Hughes Company.
2 | DPI 610E Quick Start & Safety Manual–English
These instructions detail the requirements for using the
Intrinsically Safe DPI 610E pressure calibrators (DPI 610E-
SHC and DPI 610E- SPC) in a hazardous area. Read the
whole publication before using the instrument.
1. Part Number
2. Pressure Range
3. Maximum Working Pressure
4. Serial Number
5. Date of Manufacture (Month-Year)
6. Product Rating Information
7. ATEX Certificate Number
8. EU Directive 2014/34/EU Marking
9. EU Hazardous Area Marking
10. IECEx Certificate Number
11. UKEX Certificate Number
12. Charger Rating Information
13. Manufacturer’s Name and Address
14. UKCA Marking
15. CE Marking
16. Canada ISED Radio Approval ID (Bluetooth)
17. US FCC Radio Approval ID (Bluetooth)
18. China ROHS
19. WEEE (Recycling) Marking
Installation should be carried out by qualified plant
installation technicians in compliance with all local safety
procedures and installation standards. For example:
IEC/EN 60079-14, US National Electrical Code NFPA 70 or
Canadian Electrical Code (CEC).
Provide additional protection for indicators that may
be damaged in service.
1. The equipment must be charged in a non-hazardous
area with an ambient temperature equivalent to 0°C ≤
Tamb ≤ +45°C.
2. The RS485 connection must only be connected to
certified passive accessories i.e. power derived from
the DPI610E-SPC/DPI610E-SHC only.
3. The USB connection is only for use in a non-hazardous
area.
4. Where an alternative internal pressure sensor is used
it must be a certified device and installed in accordance
with the terminal parameters and any conditions of safe
use applied to them.
5. Where a remote sensor is connected to Channel 2, the
remote sensor must be disconnected from all other
power sources.
This equipment is designed and
manufactured to meet the essential health and safety
requirements not covered by 'EU' Type Examination
Certificate SGS21ATEX0009X when installed as detailed
in this guide.
- This equipment is designed and
manufactured to meet the essential health and safety
requirements not covered by UK Type Examination
Certificate BAS21UKEX0638X when installed as detailed
in this guide
This symbol, on the equipment, indicates a
warning and that the user should refer to the user
manual.
Ce symbole, sur l'appareil, est un avertissement
qui indique que l'utilisateur doit consulter le
manuel d'utilisation

Copyright 2022 Baker Hughes Company.
English–DPI 610E Quick Start & Safety Manual | 3
The product should be periodically inspected for signs of
damage (e.g. case cracking, pressure connector damage)
or pressure leakage prior to use to ensure continued safe
working.
Clean the surface of the instrument should using a damp
cloth with water and mild detergent. Do not submerge the
instrument in water.
For more information contact one of:
• Our Customer Service Department:
• Your local government office
Sensors rated up to 3.5 bar (including differential)
are exposed. Sensors rated between 7 and 1400 bar are
diaphragm isolated.
Only fluids that are compatible as per above table
should be used. This is to ensure the integrity of the
pressure sensor and avoid fluid leakage.
CAT I
This is the least severe over-voltage transient.
CAT I equipment cannot be directly connected
to the mains power. An example of CAT I
equipment is a process loop powered device.
CAT II This is for single phase electrical installation.
Examples are appliances and portable tools.
Do not dispose of this
product as household
waste.
Use an approved
organization that collects
and/or recycles waste
electrical can electronic
equipment.
Outdoor Use Not for permanent
installation outdoors For indoor use only
IP Rating IP54 IP20
Operating
Temperature -10 to 50°C 0 to 45°C
Storage and
Shipping
Temperature -20 to 70°C -20 to 70°C
Altitude -300 to 2000m -300 to 2000m
Operating humidity 0 to 95% relative
humidity (RH) non-
condensing
0 to 95% relative
humidity (RH) non-
condensing
Over-voltage
category 2 2
Pollution degree 1 1
0 to 3.5 bar
Fluids compatible with stainless
steel 316L, pyrex, silicon, gold,
aluminum and structural
adhesive
Differential sensor reference
port
Fluids compatible with Stainless
Steel 316L and 304, Pyrex,
Silicon and Structural Adhesive
7 to 1000 bar Fluids compatible with stainless
steel 316L and Hastelloy C276

Copyright 2022 Baker Hughes Company.
4 | DPI 610E Quick Start & Safety Manual–English
See Figure A1
2. Pressure Range
3. Maximum Working Pressure
4. Serial Number
5. Date of Manufacture
6. Product Rating Information
13. Manufacturer's Name & Address
14. UKCA Marking
15. CE Marking
16. Canada ISED Radio Approval ID (Bluetooth)
17. US FCC Radio Approval ID (Bluetooth)
18. China ROHS
19. WEEE directive
See Figure A2
1. Pressure Release Knob
2. Pressure Connection Port
3. Reservoir
4. Volume Adjuster Wheel
5. Priming Pump
6. Handle
7. Volume Adjuster
8. Pressure-Vacuum Selector
9. Pump
10. Carry Strap Rivet
11. External Sensor Port
12. Battery Status Indicator
13. Dirt Trap
14. Carry Strap Rivet
15. Electrical Ports
16. Power
17. Help
18. Home
19. Soft Keys
20. Navigation Pad
The instrument contains a rechargeable Li-ion battery. To
charge the battery, plug the power supply into the DC
charging port located under the protection flap, at the top of
the instrument (see Figure 1). The battery status indicator
should illuminate to indicate that charging has started.
The instrument can be charged while switched on or when
powered off. The battery charge time is around 2 hours
from empty to fully charged.
The instrument can also be charged from any vehicle (with
a standard 12 V accessory socket) using a IO610E-CAR
CHARGER (optional accessory).
During charging, the Battery Status Indicator (Figure 2) will
illuminate.
Each LED represents approximately 25% battery
capacity.
Complies with European Union Directives
Complies with UK legislation
ON / OFF
Do not dispose of this product as household
waste. See Chapter 1.7 on page 3
Warning
USB port: Micro B connector

Copyright 2022 Baker Hughes Company.
English–DPI 610E Quick Start & Safety Manual | 5
The pushbutton next to the Battery Status indicator can be
used to check the battery capacity at any time (whether the
instrument is on or off).
The instrument battery operation time from fully charged
battery varies according to use
The instrument battery operating time should be ≥ 30
hours under normal operation.
The instrument is supplied with a 100 cc (3 oz) reservoir
tank. Before filing the pressure reservoir, ensure that the
pressure medium is compatible with your test device.
Step 1
Screw the reservoir into the
reservoir port. Turn the
reservoir clockwise, until it is
hand tight.
Step 2
Unscrew the reservoir locknut
by turning it anti-clockwise
and remove the reservoir
cover.
Step 3
Use a squeeze bottle to fill the
reservoir with pressure
medium.
Step 4
Replace the reservoir cover
and screw on the locknut
finger tight (clockwise) and
then unscrew (anti-clockwise)
a quarter of a turn.
Step 1
Turn the pressure
release knob half a
turn anti-clockwise.

Copyright 2022 Baker Hughes Company.
6 | DPI 610E Quick Start & Safety Manual–English
Step 2
Connect the
reservoir to the
reservoir port and fill
the reservoir. See
Chapter 2.2.1 on
page 5
Step 3
Power ON the
instrument by
holding down the
power button for 2
seconds until the
Druck splash screen
appears.
Step 4
Select from
the Channel
Function screen.
From the dashboard
select:
>>
or >>
>>
>> >>
Step 5
Select the required
units.
From the dashboard
select:
CALIBRATOR >>
or >>
UNITS
Step 6
Turn the volume
adjuster wheel
clockwise until it
stops.
Step 7
Turn the pressure
release knob fully
clockwise, hand
tight.
Step 8
Slowly operate the
priming pump until
the pressure
reaches 5-10 bar.
Step 9
Turn the volume
adjuster wheel fully
anti-clockwise until it
stops.
Step 10
Slowly operate the
priming pump until
the pressure
reaches 5-10 bar.

Copyright 2022 Baker Hughes Company.
English–DPI 610E Quick Start & Safety Manual | 7
Step 11
Turn the pressure
release knob a
quarter of a turn
anti-clockwise to
release the
pressure.
Step 12
Slowly operate the
priming pump until
there are no air
bubbles visible in
the reservoir.
It should
take 10-15
strokes to remove
trapped air from
the system.
Step 13
Remove the
blanking plug from
the test port.
Step 14
Turn the pressure
release knob fully
clockwise, hand
tight.
Step 15
Turn the volume
adjuster wheel 2-5
turns clockwise to
remove any trapped
air.
The user
may notice air
bubbles at the
opening of the
test port.
Step 16
Secure the device
under test and
connect the device
under test to the test
port by turning the
connector anti-
clockwise.
Use
adapters provided
with the
instrument or an
AMC adapter(s)
and the
corresponding
seal(s).
Secure the device
under test.
Step 17
Use the priming
pump to prime the
system to a
maximum of 10-20
bar.

Copyright 2022 Baker Hughes Company.
8 | DPI 610E Quick Start & Safety Manual–English
Check instrument pressure range on rear label
before proceeding
Step 1
After priming the
instrument, turn the
volume adjuster wheel
clockwise until the
required pressure is
achieved and allow the
pressure to settle.
If the required
pressure is not
achieved or not
stable, release the
pressure in the
instrument and
repeat the priming
sequence
To vent the system to atmospheric
pressure, slowly turn the pressure
release knob fully anti-clockwise until
the sensor returns to zero (gauge
sensor) or 1 bar (absolute sensor).
To attach a dirt and moisture trap to
the test port, screw the connector fully
anticlockwise until it is hand tight.
Make sure that the device under test
has a male G ⅜ Quickfit adapter
thread or use a suitable adapter rated
to 35 bar.
Step 1
Release all of the pressure in
the instrument by opening the
pressure release knob fully anti-
clockwise.
Step 2
To remove the device under
test/dirt trap, unscrew the
connector by rotating it fully
clockwise.
Step 1
Power ON the
instrument by holding
down the power
button for 2 seconds
until the Druck splash
screen appears.
Step 2
Select the required
pressure function
from the Channel
Function screen.
From the dashboard
select:
CALIBRATOR >>
or >>
FUNCTION
Step 3
Select the required
units.
From the dashboard
select:
CALIBRATOR >>
or >>
UNITS
Step 4
Screw the device
under test into the test
port
When connecting
the device under
test, secure the
connector attached
to the instrument.

Copyright 2022 Baker Hughes Company.
English–DPI 610E Quick Start & Safety Manual | 9
The DPI610E can be used as a calibrator with independent
functions which are displayed over 2 channels.
The user interface can be operated via the touchscreen
or/and the navigation keypad and soft keys.
The Home button acts as a shortcut key which enables
quick navigation to the Dashboard home screen from
anywhere in the user menu.
On power up, the instrument displays the Dashboard. The
Dashboard is the home screen through which all functions,
tasks and settings can be accessed directly or indirectly.
The Dashboard has a 3 x 3 array of icons which represent
different applications. The Calibrator, Tasks, Data Log and
Analysis icons are fixed and always present.
Documenting/Procedures functions is permanently
displayed on the dashboard license permitting.
Any dashboard icon spaces can be filled with task shortcuts
by pressing the “Add to Home” icon on the required task
from the task list.
Select the General Settings icon on the Dashboard to
access Date, Time and Language menus.
The Help button acts as a shortcut key to information
about tasks that relate to electrical connection e.g a
Current-Measure task.
Step 1
Seal the system by turning the
pressure release knob fully
clockwise.
Step 2
Adjust the pressure-vacuum
selector to pressure mode (+)
or vacuum mode (-) depending
on the desired operation.
To adjust the selector from
pressure mode to vacuum
mode, turn it clockwise. To
adjust the selector from
vacuum mode to pressure
mode, turn it anti-clockwise.
Step 3
Use the pump to achieve the
desired pressure/vacuum.
Step 4
Wind the volume adjuster to
make fine adjustments to the
pressure/vacuum.
Optional
To decrease pressure/vacuum,
open and close the pressure
release knob slowly.
The navigation pad consists of Up, Down, Left, Right
and Enter buttons which allow quick and easy navigation
when using the user interface.
There are four soft keys on the right side of the LCD
display. These soft keys are context-sensitive and their
use varies from screen to screen depending on the
menu or task being accessed. Each soft key has a
corresponding on-screen icon button which provides a
visual display of the purpose of that specific button. The
on-screen icons also act as touch-screen buttons for the
same purpose as the corresponding soft key.

Copyright 2022 Baker Hughes Company.
10 | DPI 610E Quick Start & Safety Manual–English

Copyright 2022 Baker Hughes Company.
Česky–DPI 610E Stručný návod k uvedení do provozu a bezpečnosti | 11
Kalibrátor DPI 610E (Tabulka 1) je ruční kalibrátor tlaku
s vestavěným ručním čerpadlem pro generování tlaku
a elektrickým měřením a simulací. Zařízení je k dispozici ve
variantě s vnitřním zajištěním jiskrové bezpečnosti (IS) a bez
vnitřního zajištění jiskrové bezpečnosti (bez IS) (viz
Tabulka 1). Je určen ke kalibraci snímačů tlaku a převodníků,
kterou provádějí servisní technici nebo technici údržby.
Pokud není v záhlaví oddílu uvedeno jinak,
vztahuje se následující obsah na všechny výše uvedené
modely.
Před použitím tohoto zařízení si přečtěte
kapitolu o bezpečnosti, uživatelskou příručku a všechny
pokyny, včetně platných místních bezpečnostních postupů
a instalačních norem, a také včetně tohoto dokumentu.
Montáž by měli provádět kvalifikovaní technici
v souladu se všemi místními bezpečnostními postupy
a montážními normami. Například: IEC/EN 60079-14,
národní elektrotechnické předpisy USA NFPA 70 nebo
Kanadské elektrotechnické předpisy (CEC).
Zařízení DPI 610E je určeno pro bezpečný
provoz při dodržování postupů podrobně popsaných v této
příručce. Je nebezpečné ignorovat uvedená varování. Toto
zařízení nepoužívejte pro žádný jiný účel, než je uvedeno,
jinak by mohlo dojít k porušení ochrany, kterou zařízení
poskytuje.
Externí obvody by měly být vhodně
odizolovány od síťového napájení.
Maximální provozní tlak (MWP) je uveden na
štítku na spodní straně zařízení DPI610E. Přetlak by měl
být omezen na maximálně 1,2 × MWP.
DPI 610E-HC Modrá 70–1000 barů
(1000–15000 psi)
(7–100 MPa)
Hydraulický (bez IS)
DPI 610E-SHC Žlutá Hydraulický (s IS)
DPI 610E-PC Modrá 0.35–35 barů
(5–500 psi)
(0,035–3,5 MPa)
Pneumatický (bez IS)
DPI 610E-SPC Žlutá Pneumatický (s IS)

Copyright 2022 Baker Hughes Company.
12 | DPI 610E Stručný návod k uvedení do provozu a bezpečnosti–Česky
Tento návod podrobně popisuje požadavky na používání
kalibrátorů tlaku se zajištěním jiskrové bezpečnosti DPI
610E (DPI 610E- SHC a DPI 610E- SPC) v prostředí
s nebezpečím výbuchu. Před použitím kalibrátoru si
přečtěte celou příručku.
1. Číslo dílu
2. Tlakový rozsah
3. Maximální pracovní tlak
4. Sériové číslo
5. Datum výroby (měsíc-rok)
6. Informace o ratingu výrobku
7. Číslo osvědčení ATEX
8. Evropská směrnice 2014/34/EU o označování výrobků
9. Evropské označování nebezpečných oblastí
10. Číslo osvědčení IECEx
11. Číslo osvědčení UKEX
12. Informace o ratingu nabíječky
13. Název a adresa výrobce
14. Označení UKCA
15. Značka CE
16. Číslo kanadského schválení ISED pro
vysokofrekvenční zařízení (Bluetooth)
17. Číslo schválení FCC pro vysokofrekvenční zařízení pro
Spojené státy severoamerické (Bluetooth)
18. ROHS Čína
19. Značka likvidace elektrických a elektronických zařízení
WEEE (recyklační značka)
Montáž by měli provádět kvalifikovaní technici
v souladu se všemi místními bezpečnostními postupy
a montážními normami. Například: IEC/EN 60079-14,
národní elektrotechnické předpisy USA NFPA 70 nebo
Kanadské elektrotechnické předpisy (CEC).
Pro ukazatele, které se mohou v provozu
poškodit, zajistěte doplňkovou ochranu.
1. Zařízení musí být nabíjeno v prostoru bez nebezpečí
výbuchu s teplotou prostředí v tomto rozsahu: 0 °C ≤ T
prostředí ≤ +45 °C.
2. Přípojka RS485 smí být připojena pouze
k certifikovanému pasivnímu příslušenství, tj. napájení
pouze z DPI610E-SPC/DPI610E-SHC.
3. USB přípojka je výhradně určena k použití v prostředí
bez nebezpečí výbuchu.
4. Pokud je použit alternativní snímač vnitřního tlaku,
musí se jednat o certifikované zařízení instalované
v souladu s parametry svorky a všemi podmínkami
bezpečného použití, které se na ně vztahují.
5. Pokud je vzdálený snímač připojen ke kanálu 2, musí
být tento snímač odpojen od všech ostatních zdrojů
napájení.
Tento symbol uvedený na zařízení označuje
varování, že by uživatel měl nahlédnout do
uživatelské příručky.
Ce symbole, sur l'appareil, est un avertissement
qui indique que l'utilisateur doit consulter le
manuel d'utilisation

Copyright 2022 Baker Hughes Company.
Česky–DPI 610E Stručný návod k uvedení do provozu a bezpečnosti | 13
Toto zařízení je
navrženo a vyrobeno tak, aby splňovalo základní
požadavky týkající se bezpečnosti a ochrany zdraví při
práci neobsažené v osvědčení EU o typové zkoušce
SGS21ATEX0009X za předpokladu, že montáž je
provedena tak, jak je uvedeno v této příručce.
– Toto zařízení je navrženo a vyrobeno
tak, aby splňovalo základní požadavky týkající se
bezpečnosti a ochrany zdraví při práci neobsažené
v osvědčení UK o typové zkoušce BAS21UKEX0638X za
předpokladu, že montáž je provedena tak, jak je uvedeno
v této příručce
Výrobek by měl být před použitím pravidelně kontrolován,
zda nevykazuje známky poškození (např. prasknutí
pouzdra, poškození tlakového konektoru) nebo úniku tlaku,
aby byla trvale zajištěna jeho bezpečná funkce.
Povrch zařízení čistěte hadříkem navlhčeným vodou
s šetrným čisticím prostředkem. Zařízení neponořujte do
vody.
Potřebujete-li další informace, obraťte se na jednu
z následujících institucí:
• Naše oddělení zákaznických služeb:
• Váš místní státní úřad
KAT I
Toto je nejméně závažné krátkodobé přepětí.
Zařízení KAT I nelze přímo připojit ke zdroji
napájení. Příkladem zařízení kategorie KAT I je
zařízení napájené v rámci obsluhovaného obvodu.
KAT II Toto je elektrická instalace s jedinou fází.
Příkladem jsou spotřebiče a přenosné nástroje.
Tento výrobek nelikvidujte jako
domovní odpad.
Využijte služeb schválené
organizace, která se zabývá
sběrem, případě recyklací
odpadních elektrických
a elektronických zařízení.
Venkovní použití Zařízení není určeno
k trvalé instalaci ve
venkovním prostředí
Pouze pro vnitřní
použití
IP rating IP54 IP20
Provozní teplota -10 až 50 °C 0 až 45 °C
Teplota při přepravě
a skladování -20 až 70 °C -20 až 70 °C
Nadmořská výška -300 až 2000 m -300 až 2000 m
Provozní vlhkost Relativní vlhkost
(RH) 0 až 95 %,
nekondenzující
Relativní vlhkost
(RH) 0 až 95 %,
nekondenzující
Kategorie přepětí 2 2
Stupeň znečištění 1 1
0 až 3,5 baru
Kapaliny nebo plyny kompatibilní
s nerezovou ocelí 316L, pyrexem,
křemíkem, zlatem, hliníkem
a konstrukčním lepidlem
Referenční port
diferenciálního snímače
Kapaliny nebo plyny kompatibilní
s nerezovou ocelí 316L a 304, pyrexem,
křemíkem a strukturálním lepidlem
7 až 1000 baru Kapaliny nebo plyny kompatibilní
s nerezovou ocelí 316L a Hastelloy C276

Copyright 2022 Baker Hughes Company.
14 | DPI 610E Stručný návod k uvedení do provozu a bezpečnosti–Česky
Kapalině nebo plynu jsou přímo vystaveny
snímače se jmenovitým tlakem až 3,5 baru (včetně
diferenciálního tlaku). Snímače se jmenovitým tlakem 7 až
1400 barů jsou izolovány membránou.
Je nutno používat pouze kompatibilní kapaliny
nebo plyny podle tabulky výše. To má zajistit integritu
tlakového snímače a zabránit úniku média.
Viz Obrázek A1
2. Tlakový rozsah
3. Maximální pracovní tlak
4. Sériové číslo
5. Datum výroby
6. Informace o ratingu výrobku
13. Název a adresa výrobce
14. Označení UKCA
15. Značka CE
16. Číslo kanadského schválení ISED pro
vysokofrekvenční zařízení (Bluetooth)
17. Číslo schválení FCC pro vysokofrekvenční zařízení pro
Spojené státy severoamerické (Bluetooth)
18. ROHS Čína
19. Směrnice WEEE o likvidaci odpadních elektrických
a elektronických zařízení
Viz Obrázek A2
1. Kolečko pro uvolnění tlaku
2. Port tlakové přípojky
3. Nádržka
4. Kolečko pro nastavení objemu
5. Plnicí čerpadlo
6. Rukojeť
7. Ovladač nastavení objemu
8. Přepínač tlaku a vakua
9. Čerpadlo
10. Nýt nosného popruhu
11. Port na připojení externího snímače
12. Ukazatel stavu nabití baterie
13. Lapač nečistot
14. Nýt nosného popruhu
15. Elektrické přípojky
16. Výkon
17. Nápověda
18. Hlavní stránka
19. Softwarové klávesy
20. Navigační panel
Zařízení obsahuje dobíjecí lithium-iontovou baterii. Chcete-
li baterii nabít, zapojte napájecí zdroj do stejnosměrného
nabíjecího portu umístěného pod ochranným krytem na
horní straně zařízení (viz Obrázek 1). Indikátor stavu
baterie by měl svítit a signalizovat, že bylo zahájeno
nabíjení.
Splňuje směrnice Evropské unie
Splňuje zákony Velké Británie
ON / OFF (ZAP/VYP)
Tento výrobek nelikvidujte jako domovní odpad.
Viz Kapitola 1.7 na straně 13
Výstraha
Přípojka USB: Mikro konektor B
This manual suits for next models
3
Table of contents
Languages:
Other Baker Hughes Test Equipment manuals

Baker Hughes
Baker Hughes Druck DPI 612 User manual

Baker Hughes
Baker Hughes Druck DPI 610 IS User manual

Baker Hughes
Baker Hughes Druck DPI 620 Genii User manual

Baker Hughes
Baker Hughes Druck DPI 610A User manual

Baker Hughes
Baker Hughes Druck DPI 880 User manual

Baker Hughes
Baker Hughes Druck DPI 880 User manual

Baker Hughes
Baker Hughes Druck Dry PTC 200 User manual

Baker Hughes
Baker Hughes Druck DPI 620 Genii Instruction Manual

Baker Hughes
Baker Hughes Druck PACE Series Use and care manual

Baker Hughes
Baker Hughes Druck DPI 620 Genii User manual