BANWOOD Classic User manual

www.banwood.com
CLASSIC

The box
WHAT’S IN
Tools Herramientas
Contenido de la caja
A. Assembled alloy frame&rear wheel
Cuadro de alumino con rueda trasera
montada
B. Handlebar
Potencia
C. Tools
Herramientas
D. Mudguards
Guardabarros
E. Front wicker basket
Cesta
F. Pedal
Pedal
G.Reector
Reector
H. Wheelreector
Reector de rueda
I. Front wheel
Rueda delantera
J. Saddle with seat post
Sillín acolchado
K. Training wheels
Ruedas de apoyo
L. Bell
Timbre

Before assembled Antes de montar
A
E
J
K L
B
D
FH
G I
C

After assembled Montada

Step 1Fitting the stem
Insert the stem into the headset and make sure the headset is over the safety line of
the stem. Using the provided Allen key, fasten the bolt on the top of the stem.
Introduzca la potencia en el tubo de dirección y asegúrese de que quede colocada
por encima de la línea de seguridad de la potencia. Utilice la llave Allen incluida para
jar el perno en la parte superior de la potencia.
Paso 1
Montar la potencia

Step2Fitting the front mudguards
Paso 2
Montar el guardabarros delantero

• Firstly, take out the screw and
spacer.
• Install the fender, then put back
thespacerandthescrewnally
xit.
• Place the fender stand within the fork
dropouts,thenusethescrewtoxthe
fender stand.
• Enprimerlugar,extraigael
tornillo y el separador.
• Monte el guardabarros, vuelva a
colocar el separador y el tornillo y
nalmentefíjelo.
• Coloque el soporte del
guardabarros en las punteras de
la horquilla y utilice el tornillo para
jarlo.
How to assemble
the front mudguards?
¿Cómo se monta el
guardabarros delantero?

Step3Fitting the front wheel
Paso 3
Montar la rueda delantera

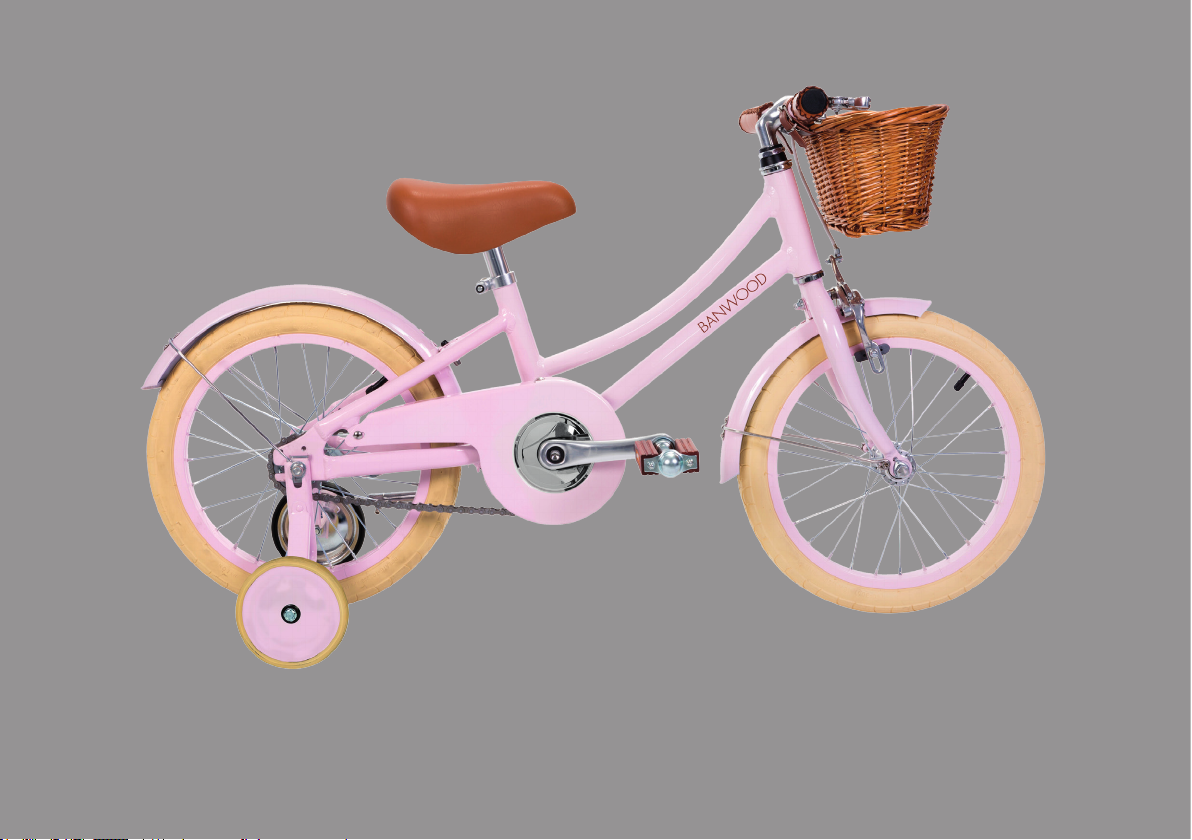
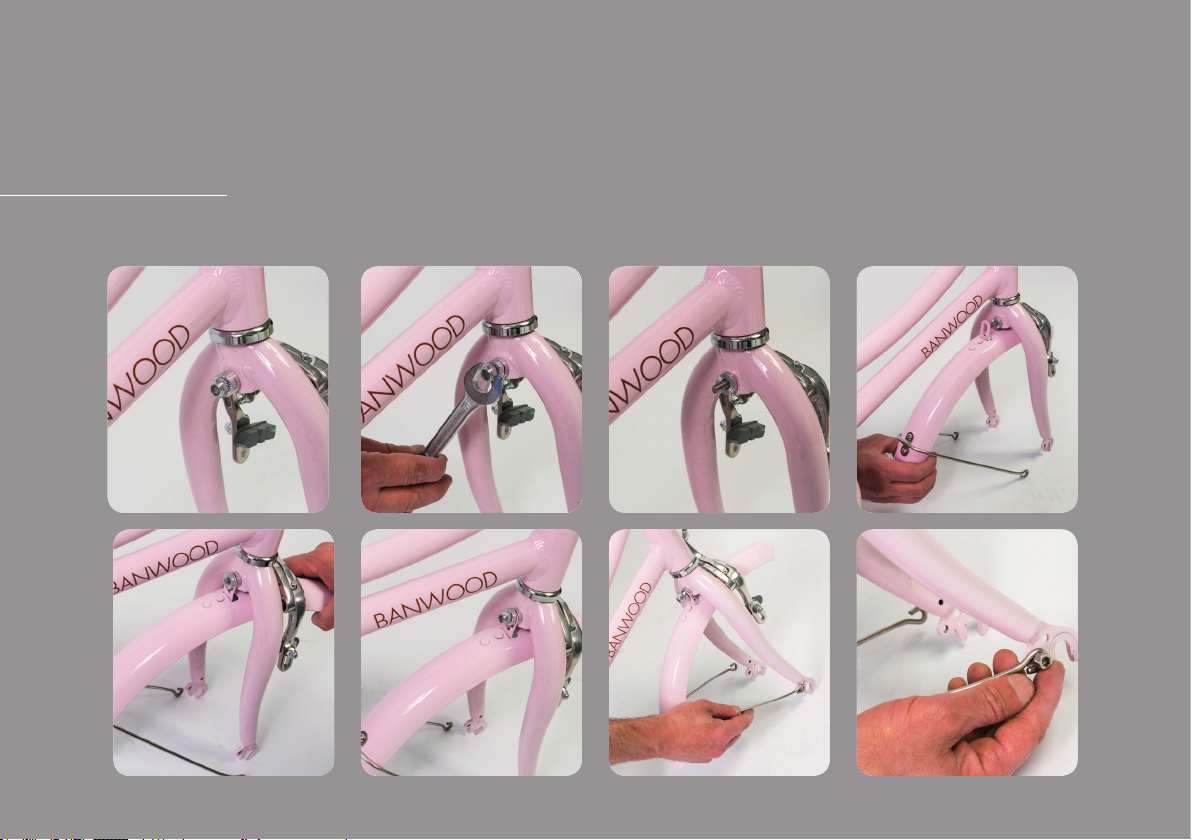
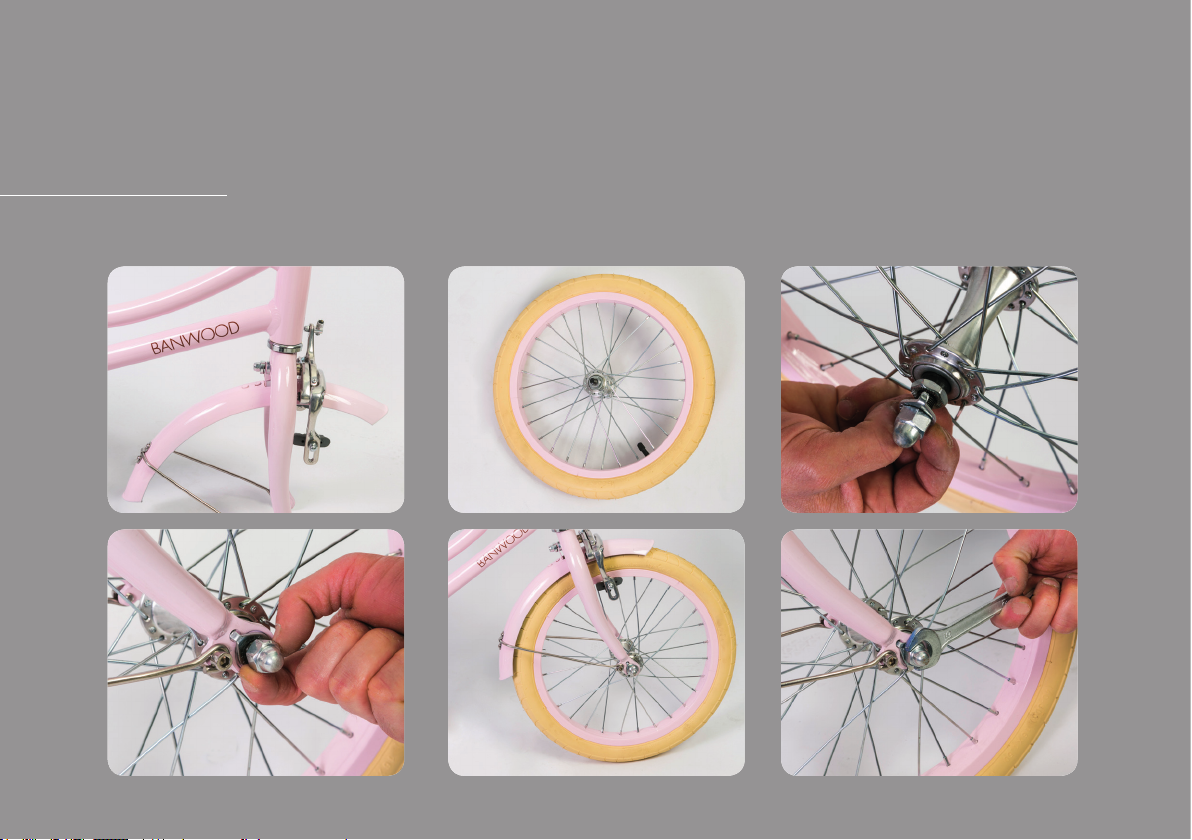
• Firstly,placethewheelaxlewithin
the fork dropouts.
• Secondly, slide a large washer
over each of the bolts and locate
theaxletosecure.Pleasenote
that the large washers should be
pressed in the lowest security hole
on the fork dropouts and between
the bolt head and the fork.
• Enprimerlugar,coloqueelejede
la rueda dentro de las punteras de
la horquilla.
• A continuación, coloque una arandela
grande encima de cada uno de los pernos
ylocaliceelejeparaasegurarlo.Tengaen
cuenta que las arandelas grandes deben
colocarseenelagujerodeseguridad
inferior de las punteras de la horquilla,
entre la cabeza del perno y la horquilla.
How to t
the front wheel?
¿Cómo se monta
la rueda delantera?

Step4
Paso 4
Fitting the saddle
Montar el sillín
Loosenthehexheadboltontheseatpostclamptoallowmovementofthesaddle.
Adjusttheheightsothatyourchild’sfeetrestcomfortablyontheground,atand
slightly bending the knee.
Aoje el perno de cabeza hexagonal en la tija de sillín para poder moverlo.
Ajuste la altura de tal manera que el niño pueda apoyar los pies cómodamente en el
suelo, con las rodillas ligeramente dobladas.

Step5
Paso 5
Basket installation
Colocar la cesta
Attachthetapeonthebaskettothehandlebarandadjustittothedesiredposition.
Amarre la cinta de la cesta al manillar y ajústela a la posición deseada.

Step6
·Pleasenotethatthereisaletterattheendoftheaxle.“L”standsforleft,“R”stands
for right.
·Usethespanner13/15mmtoxthe“L”pedalontheleftsideand“R”pedalonthe
right side
. Tenga en cuenta que al nal del eje encontrará una letra. La «L» signica izquierda,
mientras que la «R» signica derecha.
· Utilice la llave de 13/15 mm para montar el pedal «L» en el lado izquierdo y el pedal
«R» en el lado derecho.
Paso 6
Pedal installation
Colocar los pedales

• Firstly, take out the nuts and
fender stand.
• Secondly,tthetrainingwheel,
mount the fender stand, and put
the nut back on.
• Fixthenutswiththespanner
13/15mm.
• Enprimerlugar,extraiga
las tuercas y el soporte del
guardabarros.
• A continuación, coloque la rueda
de apoyo, monte el soporte del
guardabarrosyvuelvaajarla
tuerca.
• Fijelastuercasconlallavede
13/15 mm.
How to assemble
the training wheel?
¿Cómo se monta
la rueda de apoyo?

Step 7
Paso 7
Fitting the training wheel to keep balance
Montar la rueda de apoyo

· YourClassicisttedwithpill
bottle safety valve caps. To
remove, press down and turn
in anti-clockwise direction.
· Store the bike inside
and never leave your
Classic outside for long
periods of time.
· After riding, remove
any water or mud
with a clean cloth.
· Keep your Classic in a dry
place when not in use.
· Check your tyre
pressure regularly.
· Make sure that the tyres are
kept at the correct pressure
(please see tyre for details).
· Regularly check and
securely tighten all bolts.
· Apply a periodic coat
ofbeeswaxtomaintain
and protect the life
of your Classic.
· This toy is designed for
young children and will
not withstand use by
teenagers or adults.
· Las válvulas de su bicicleta
Classic están equipadas
con tapones de seguridad.
Para quitarlas, presione y
gire en sentido contrario
alasagujasdelreloj.
· Guarde su bicicleta Classic
enelinteriorynoladeje
fuera durante largos
períodosdetiempo.
· Después de utilizarla,
elimine restos de agua y
barro con un trapo limpio.
· Mantenga su bicicleta
Classic en un lugar seco
cuando no la utilice.
· Compruebe con regularidad
la presión de las ruedas.
· Asegúrese de que las
ruedas mantengan la presión
adecuada (obtenga más
detalles en la rueda).
· Compruebeyjetodoslos
pernos con regularidad.
· Aplique periódicamente una
capadeceradeabejaspara
mantener y proteger la vida
de su bicicleta Classic.
· Estejugueteestá
desarrollado para
niños pequeños y no
soporta el peso de
adolescentes o adultos.
· Adult assembly required.
· Adult supervision is strongly
recommended at all times.
· Keep small parts away from
children during assembly.
· When unpacking the
Classic, properly dispose
of all plastic wrappings.
· Protectyourchild’s
head with an approved
safety helmet as well as
appropriate clothing and
closed-toe shoes when
riding your Classic.
· Serequiereelmontajepor
parte de un adulto.
· Se recomienda
encarecidamente la
supervisión por parte de un
adulto en todo momento.
· Duranteelmontaje,
mantenga las piezas
pequeñas fuera del alcance
de los niños.
· Despuésdeldesembalajede
la bicicleta Classic, deseche
adecuadamente todos los
envoltorios de plástico.
· Protejalacabezadelniño
con un casco de seguridad
aprobado.Vístalocon
ropa adecuada y zapatos
cerrados a la hora de montar
en su bicicleta Classic.
CARE AND MAINTENANCE CUIDADO Y MANTENIMIENTO
SAFETY NOTICE AVISO DE SEGURIDAD
Other manuals for Classic
1
Table of contents
Other BANWOOD Bicycle manuals