manuals.online logo
Brands
  1. Home
  2. •
  3. Brands
  4. •
  5. Baumer
  6. •
  7. Digital Camera
  8. •
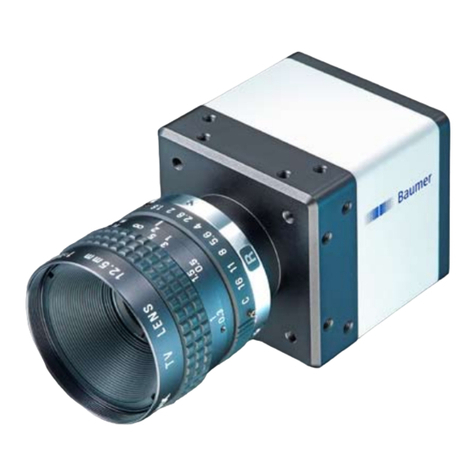
  9. Baumer LXC-120M User manual

Baumer LXC-120M User manual

Quick Start Guide
LXC cameras (Camera Link®)
Product Specication
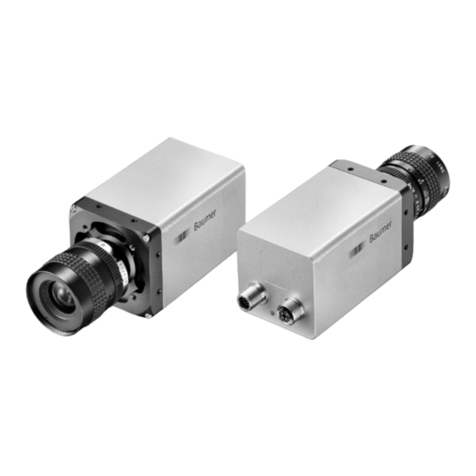
LXC cameras – Extremely high resolution and speed
▪Camera Link®progressive scan CMOS camera
▪Excellent image quality
▪Global shutter architecture for minimized motion blur
▪Binning and true partial scan function (ROI) for increased frame rates
▪High Dynamic Range (HDR) image acquisition
▪External synchronization via industrial compliant process interface (trigger / flash)
▪Power over Camera Link®(PoCL) support
▪Two standard 26 pin Mini-Camera Link®connectors
▪Support for Camera Link®Base, Medium, Full and EightyBit configurations
▪Camera parameter programmable via GenCP protocol
Notice
Further technical details are available in the respective data sheet.
Lens Adapter for M58-Mount
▪Adapter M58 / F-mount (Art. No.: 11117852)
▪Adapter M58 / M42x1-mount (26.8mm) (Art. No.: 11127232)
▪Adapter M58 / M42x1-mount (45.5 mm) (Art. No.: 11137781)
Notice
suitable for Zeiss (e.g. Distagon T* 2/25 Z-M42-I, Planar T* 1.4/50 Z-M42-I,
Makro-Planar T* 2/50 Z-M42-I) and KOWA M42 lenses (e.g. LM28LF P-Mount,
LM35LF P-Mount)
▪Adapter M58 / C-mount (Art. No: 11115198)
Dimensions Camera with C-Mount
60
47
47
60
4 x M3 x 6
26
8
8 x M3 x 6
47,95
38,45
43,05
17,5
17,5
20
19,2
48,8
14,7
18,035 ±0,025
8
26 26
8
Pixel 0,0
1"-32 UN
30
4,9
6 (LXC-40C)
Dimensions Camera with M58-Mount
60
47
47
60
4 x M3 x 6
26
8
8 x M3 x 6
47,95 /
*)
50,02
38,45 /
*)
40,52
43,05 /
*)
45,12
17,5
17,5
20
19,2
48,8
14,7
12 ±0,025
8
26 26
8
Pixel 0,0
M58 x 0,75
38,3
*) LXC-250
Conformity / Safety
Saety Precautions
▪Protect the sensor from dirt and
moisture.
▪Never open the camera housing.
▪Avoid camera contamination by foreign
objects.
Environmental requirements:
Storage temp. -10 °C ... +70 °C
Operating temp. +5 °C ... +50 °C
Housing temp. max. +50 °C
Humidity 10 % ... 90 %
Non-condensing
Further Information
For further information about our products, please visit www.baumer.com
For technical issues, please contact our technical support:
support.cameras@baumer.com · Phone +49 (0)3528 4386-845 · Fax +49 (0)3528 4386-86
© Baumer Optronic GmbH · Badstrasse 30 · DE-01454 Radeberg, Germany
Technical data has been fully checked, but accuracy of printed matter is not guaranteed.The
information in this document is subject to change without notice.
Printed in Germany 08/21. v18 11160606
Download latest camera software:
www.baumer.com/vision/software
Download latest technical documentation:
www.baumer.com/cameras/docs
Conformity
We declare, under our sole responsibility, that the
described Baumer LXC cameras conform with the
directives of the CE.
Several of the described Baumer LXC cameras con-
form with the directives of the Korean Conformity.
Please refer for the User’s guide or technical
documentation.
Installation
Installation using
Camera Link® Base:
▪Connect the camera using
an appropriate cable to the
framegrabber board on your
PC using the lower sdr-26
jack on the camera side
▪If required, connect a strobe
to the connector
▪Connect the camera to
power supply
Installation using
Camera Link®Medium / Full
/ EightyBit:
▪Connect the camera using
two appropriate cables to
the framegrabber board on
your PC.
▪If required, connect a strobe
to the connector
▪Connect the camera to
power supply
Installation sample
1 - Framegrabber board; 2 - CameraLink®cable;
3 - Process interface cable; 4 - Power cable
Installation sample
1 - Framegrabber board; 2 - CameraLink®cable;
3 - Process interface cable; 4 - Power cable
LED Signaling
LED
Signal Meaning
LED
green on Power on, link good
green blinking Power on, no link
red on Error / Overtemperature
red blinking Boot process or Warning
(update in progress, don’t switch off)
yellow Readout active
General Description
123
4
5
No. Description No. Description
1
C-Mount
C-mount only
M58-Mount
lens mount (M58), adapter for
other lens mounts available
4Signaling-LED
2Camera Link®socket
(Base) 5Camera Link®socket
(Medium / Full / EightyBit)
3Power Supply / Digital-IO
Heat Transmission
Caution
Provide adequate dissipation of heat, to ensure that the temperature
does not exceed +50 °C (+122 °F).
The surface of the camera may be hot during operation and immediately
after use. Be careful when handling the camera and avoid contact over a
longer period.
As there are numerous possibilities for installation, Baumer do not speci-
y a specic method for proper heat dissipation, but suggest the following
principles:
▪operate the cameras only in mounted condition
▪mounting in combination with forced convection may provide proper
heat dissipation
T
T
Measure Point Maximal Temperature
T +50 °C (122 °F)
Camera Link® sockets
Notice
Baumer
Type: XXXXXx
(xxxxxxx)
CL FULL
CL BASE
The camera has two Camera Link®sockets. To differentiate bet-
ween Camera Link®socket, please look at the label. You can not
use the CL Medium / Full / EightyBit socket alone!
Notice
To use Power over Camera Link®(PoCL, 12V DC ± 20%), both Camera Link®
sockets must be used.
Camera Link®
(Base)
Camera Link®
(Medium / Full / EightyBit)
Pin Signal Pin Signal Pin Signal Pin Signal
1GND 14 GND 1GND 14 GND
2X0- 15 X0+ 2Y0- 15 Y0+
3X1- 16 X1+ 3Y1- 16 Y1+
4X2- 17 X2+ 4Y2- 17 Y2+
5XCLK- 18 XCLK+ 5YCLK- 18 YCLK+
6X3- 19 X3+ 6Y3- 19 Y3+
7SERTC+ 20 SERTC- 7100 Ω term. 20 100 Ω term.
8SERTFG- 21 SERTFG+ 8Z0- 21 Z0+
9CC1- 22 CC1+ 9Z1- 22 Z1+
10 CC2+ 23 CC2- 10 Z2- 23 Z2+
11 CC3- 24 CC3+ 11 ZCLK- 24 ZCLK+
12 CC4+ 25 CC4- 12 Z3- 25 Z3+
13 GND 26 GND 13 GND 26 GND
Power Supply and Process Interface
Caution
A power supply with electrical isolation is required for proper operation of
the camera. Otherwise the device may be damaged!
Power Supply / Digital-IO
M8 / 8 pins wire colors of the connecting cable
8
5
7
3
1
42
6
1 white not in use
2 brown Power VCC+
3 green IN 1 (line 0)
4 yellow IO GND
5 grey IO Power VCC
6 pink OUT 1 (line 1)
7 blue Power GND
8 red not in use
Power Supply
Power VCC 12 VDC ... 24 VDC ± 20%
General notes for electrical Installation
Caution
Follow the instructions in the chapter „Hardware installation Procedure“
of the User´s Guide.
Failure to follow the instructions may result in problems during operation
and defects in the camera!
ESD precautions:
▪Wear ESD appropriate clothing and shoes.
▪Perform the installation in an ESD-compliant working environment (conductive
floors, grounding strap, ...).
▪Never handle the Camera Link connectors without ESD discharge!
▪Control the humidity in your environment. Low humidity can cause ESD problems.
Notes on cable routing and avoiding ground loops:
▪To avoid ground loops, the power supply cable and the Camera Link cables should
be routed in parallel if possible.
▪All electrical connections must be brought together at a ground point.
▪The ground point should be as close as possible to the frame grabber of the PC.
The PC must be included in the grounding.
▪Avoid laying power supply cables of devices with high current peaks, e.g. motors
or inverters, parallel to the camera cables.
This manual suits for next models

6

Other Baumer Digital Camera manuals

Baumer VEXG User manual

Baumer

Baumer VEXG User manual

Baumer VCXG .I User manual

Baumer

Baumer VCXG .I User manual

Baumer SXC10 User manual

Baumer

Baumer SXC10 User manual

Baumer VLXT.I User manual

Baumer

Baumer VLXT.I User manual

Baumer VEXU Series User manual

Baumer

Baumer VEXU Series User manual

Baumer VLXT.FO User manual

Baumer

Baumer VLXT.FO User manual

Baumer EXG User manual

Baumer

Baumer EXG User manual

Baumer EX Series User manual

Baumer

Baumer EX Series User manual

Baumer VeriSens ID Series Guide

Baumer

Baumer VeriSens ID Series Guide

Baumer VAX-32M.I.NVN User manual

Baumer

Baumer VAX-32M.I.NVN User manual

Baumer TXG User manual

Baumer

Baumer TXG User manual

Baumer Camera Link HXC20 User manual

Baumer

Baumer Camera Link HXC20 User manual

Baumer Camera Link HXC Series User manual

Baumer

Baumer Camera Link HXC Series User manual

Baumer Camera Link LX Series User manual

Baumer

Baumer Camera Link LX Series User manual

Popular Digital Camera manuals by other brands

Sony Cyber-Shot DSC-KW11 Startup guide

Sony

Sony Cyber-Shot DSC-KW11 Startup guide

Vivitar ViviCam XX128 user manual

Vivitar

Vivitar ViviCam XX128 user manual

Hitachi DZ-HD90 Quick operation

Hitachi

Hitachi DZ-HD90 Quick operation

Nikon CoolPix 3100 Quick reference guide

Nikon

Nikon CoolPix 3100 Quick reference guide

HP Photosmart M527 Warranty and Regulatory Information

HP

HP Photosmart M527 Warranty and Regulatory Information

Medion LIFE X44038 instruction manual

Medion

Medion LIFE X44038 instruction manual

Olympus SP-560 instruction manual

Olympus

Olympus SP-560 instruction manual

Olympus FE-5030 Specfications

Olympus

Olympus FE-5030 Specfications

Medion MD 87028 instruction manual

Medion

Medion MD 87028 instruction manual

Sony SLT-A57 &alpha instruction manual

Sony

Sony SLT-A57 &alpha instruction manual

Kogan KAS8C4W1TBB user guide

Kogan

Kogan KAS8C4W1TBB user guide

ZWO ASI071 Series manual

ZWO

ZWO ASI071 Series manual

ON Semiconductor RSL10 Getting started guide

ON Semiconductor

ON Semiconductor RSL10 Getting started guide

Panasonic Lumix DMC-GF6X Basic operating instructions

Panasonic

Panasonic Lumix DMC-GF6X Basic operating instructions

LW Scientific MiniVID RCA quick start guide

LW Scientific

LW Scientific MiniVID RCA quick start guide

Vigilate VIGIFC user guide

Vigilate

Vigilate VIGIFC user guide

Honeywell 2450Cm Series Quick installation guide

Honeywell

Honeywell 2450Cm Series Quick installation guide

Sanyo Xacti VPC-J1 instruction manual

Sanyo

Sanyo Xacti VPC-J1 instruction manual

manuals.online logo
manuals.online logoBrands
  • About & Mission
  • Contact us
  • Privacy Policy
  • Terms and Conditions

Copyright 2025 Manuals.Online. All Rights Reserved.