manuals.online logo
Brands
  1. Home
  2. •
  3. Brands
  4. •
  5. Bayco
  6. •
  7. Flashlight
  8. •
  9. Bayco 2236 User manual

Bayco 2236 User manual

Bayco Products, Inc. • 640 South Sanden Blvd. • Wylie, TX 75098 • 1-800-233-2155 • 1-469-326-9400 • www.mybayco.com
INS-2236-2266-18
Instruction Manual
Rechargeable Task Light
Models 2236 / 2266
LED Spotlight - Floodlight
CAUTION: DO NOT USE THIS TASK LIGHT IN EXPLOSIVE ATMOSPHERES,
NEAR FLAMMABLE LIQUIDS, OR WHERE EXPLOSION-PROOF LAMPS ARE
REQUIRED. DO NOT IMMERSE IN WATER.
CAUTION: FOR LIGHT DUTY WORK ONLY.
Thank you for purchasing this Bayco task light. Save these instructions.
Please read these instructions before using your task light. Be sure to charge the task
light before the  rst use.
OPERATION
Initial Use
Fully charge the task light before the  rst use. If the battery is new or has been unused
for several months, several charge and discharge cycles may be needed to reach full
battery capacity. To reach maximum performance, run the light to completely discharge
the battery and then recharge. Each charge cycle will extend the operation time until
maximum capacity is achieved. The charge time for maximum capacity is approximately
4 - 6 hours.
Regular Use
Use only the supplied AC charging adapter.
• For best performance, charge the task light when the LED’s start to dim.
• Connect the AC power adapter to the light. The red indicator will light.
• The red light indicates the task light is being charged. The red light remains on until
the battery is fully charged. At full charge, the light turns off. The total time to full charge
varies depending on the remaining charge in the battery pack.
• Keep the task light plugged into the charger to maintain a trickle charge.
IF THE RED INDICATOR LIGHT ON THE TASK LIGHT BLINKS, UNPLUG FROM
THE WALL AND PLUG THE LIGHT BACK IN. THE LIGHT SHOULD REMAIN ON
STEADY FOR CHARGING.
• Do not cover the task light while operating or during charging.
• Do not charge a hot battery. Allow the light to cool before charging
• Unplug the task light from the power source when charging is complete.
• The task light will become warm while charging.
The task light has a 2 position rocker switch to control the spotlight, fl oodlight and off
functions.
The hanging hook allows hands-free lighting.
SAFETY
CAUTION BRIGHT LED RADIATION: AVOID DIRECT EYE EXPOSURE. THE LIGHT
IS A CLASS 2 LED PRODUCT PER IEC 60825-1 EDITION 1.2.2001.
• Do not use or charge this task light in explosive or hazardous areas.
• Do not attempt to repair or disassemble the task light or the charger power supply.
• Use only the supplied AC charger.
TIPS TO EXTEND BATTERY LIFE
The task light NiMH internal battery pack does not have a memory effect. Charging the
task light often helps extend its useful life.
• A new task light or one that has not been used for a long period of time may not
accept a full charge initially. This is normal and does not indicate a problem. Fully
discharge and then charge the unit several times to condition the battery pack for full
capacity. As the battery pack capacity increases the charge time shortens.
• Charge the unit after each use, whether the task light is fully discharged or not.
• Store the task light at room temperature
WARRANTY
1 YEAR WARRANTY
Bayco Products, Inc. warrants this product to be free from defects in workmanship and
materials to the original purchaser for 1 year from the date of purchase, and includes
the LEDs, housing, lenses, electronics, switches, rechargeable batteries and chargers.
Bulbs (other than LEDs) are covered for 90 days from the date of purchase.
We will repair or replace this product should we determine it to be defective. This is the only
warranty, expressed or implied, including any warranty of merchantability or  tness for a
particular purpose.
For a complete copy of the warranty, go to www.baycoproducts.com/bayco-product-support/
warranties. Retain your receipt for proof of purchase.
Mode d’emploi
Modèle 2236 / 2266
Projecteur - Projecteur à faisceau large DEL
ATTENTION: NE PAS UTILISER CETTE LUMIÈRE TÂCHE DANS DES
ATMOSPHÈRES EXPLOSIVES, PRÈS DE LIQUIDES INFLAMMABLES, OU
LORSQUE L’ÉPREUVE DES EXPLOSIONS LAMPES SONT NÉCESSAIRES. NE
PAS PLONGER DANS L’EAU.
ATTENTION: POUR TRAVAUX LÉGERS SEULEMENT.
Merci d’avoir acheté cette lumière tâche Bayco. Conservez ces instructions.
S’il vous plaît lire ces instructions avant d’utiliser votre lampe de travail. Veillez à
recharger la lumière tâche avant la première utilisation.
L’EXPLOITATION
Première utilization
Recharger complètement la baladeuse avant la première utilisation. Si la pile est neuve
ou n’a pas été utilisée depuis longtemps, plusieurs cycles de charge et de décharge
peuvent être nécessaires pour charger la pile à bloc. Pour un rendement optimal, la
pile doit être complètement déchargée avant la charge. Tous les cycles de charge
prolongeront le temps d’utilisation jusqu’à ce que la capacité maximum de la pile soit
atteinte. Le temps de charge requis pour atteindre le niveau de charge maximum est
d’environ 4 - 6 heures.
Utilisation normale
Utilisez seulement le chargeur AC inclus.
• Pour un rendement optimal, rechargez la baladeuse lorsque les ampoules DEL
commencent à faiblir.
• Branchez le chargeur AC sur la baladeuse. Le témoin rouge s’allumera.
• Le témoin rouge indique que la charge de la baladeuse est en cours. Le témoin
rouge restera allumé jusqu’à ce que la baladeuse soit chargée à bloc. À charge pleine,
le témoin s’éteindra. Le temps de charge pour une charge complète varie en fonction
de la charge résiduelle de la pile.
• Laissez la baladeuse branchée a n de conserver une charge de maintien.
SI LE VOYANT ROUGE CLIGNOTE SUR LE LAMPE DE BUREAU, DEBRANCHEZ-
LE DU MUR, ET BRANCHEZ LA LUMIÈRE DE RETOUR EN. LA LUMIÈRE DOIT
RESTERA ALORS ALLUMÉ POUR LA RECHARGER.
• Ne couvrez pas la lumière tâche tout en exploitation ou en cours de charge.
• Ne pas charger une batterie chaude. Laisser la lumière pour refroidir avant de
charger
Bayco Products, Inc. • 640 South Sanden Blvd. • Wylie, TX 75098 • 1-800-233-2155 • 1-469-326-9400 • www.mybayco.com
INS-2236-2266-18
• Débranchez la lumière des tâches de la source d’alimentation lorsque la charge est
terminée
• La lumière tâche deviendra chaude pendant la charge
La lumière tâche a un interrupteur à bascule à 2 positions pour activer soit le feu des
projecteurs ou des projecteurs. La position centrale désactive la lumière. Le crochet
permet pendent mains-libres d’éclairage
PRÉCAUTIONS
AVERTISSEMENT D’ÉBLOUISSEMENT : ÉVITEZ DE REGARDER DIRECTEMENT
LES AMPOULES. CECI EST UN PRODUIT DEL DE CLASSE 2 SELON IEC 60825-1
EDITION 1.2.2001.
• N’utilisez pas cette baladeuse dans un environnement explosif ou dangereux.
• Ne tentez pas d’assembler ou de désassembler la baladeuse ou le chargeur.
• Utilisez seulement le chargeur AC inclus.
TRUCS POUR PROLONGER LA DURÉE DE VIE DE LA PILE.
La pile NiMH interne n’a pas d’effet de mémoire. Charger souvent la pile aide à prolonger
sa durée de vie utile.
• Il est possible qu’une baladeuse neuve ou qui n’a pas été utilisée depuis longtemps
ne puisse pas être chargée à bloc. Cela est normal et n’est pas signe d’un problème.
Déchargez puis chargez la pile plusieurs fois an de conditionner la pile à accepter
une pleine charge. La durée de charge raccourcira à mesure que la capacité de la
pile augmentera.
• Rechargez la baladeuse après chaque utilisation, peu importe si la pile est à plat
ou non.
• Rangez la baladeuse à la température de la pièce.
GARANTIE
GARANTIE LIMITÉE DE 1 AN
Bayco Products, Inc. garantit que ce produit est exempt de défauts de matériaux et de
fabrication à l’acheteur original pour une période d’un (1) an à partir de la date d’achat, et
inclut les DEL, les boîtiers, les lentilles, les électroniques, les interrupteurs, les batteries
rechargeables et les chargeurs. Les ampoules (autres que les DEL) sont couvertes pour
une période de 90 jours à partir de la date d’achat.
Ce produit sera réparé ou remplacé si nous déterminons qu’il est défectueux. Ceci est
la seule garantie explicite ou implicite, y compris toute garantie de qualité marchande ou
d’adéquation à un usage particulier.
Pour une copie détaillée de la garantie, vous rendre sur le site www.baycoproducts.com/
bayco-product-support/warranties. Gardez ce reçu comme preuve d’achat.
Manual de Instrucción
Modelo 2236 / 2266
LED Proyector - Lampara de Area Recargable
PRECAUCIÓN: NO USE éste carrete de cuerda en atmósferas explosivas, cerca
de líquidos amables, o donde se requiere el uso de lámparas a pruebas de
explosivos. No lo sumerja en el agua.
PRECAUCIÓN: Para trabajo liviano únicamente.
Gracias por comprar la lámpara de trabajo hecha por Bayco.
Mantenga estas instrucciones a la mano. Favor de leer las instrucciones antes de usar
su lámpara de trabajo. Asegúrece de cargar completamente la lámpara antes de usarla.
FUNCIONAMIENTO
Uso inicial:
Cargue la lámpara antes de usarla. Si la batería es nueva o no ha sido usada por varios
meses, puede ser que necesite cargarla y descargarla hasta que alcanze la capacidad
completa de la batería. Para alcanzar el máximo funcionamiento, deje funcionar la
lámpara hasta que descargue y luego recarguela. Cada ciclo de carga extenderá el
tiempo de la operación hasta que la capacidad sea alcanzada. El tiempo para alcanzar
la máxima capacidad es de aproximadamente 4 - 6 horas.
Uso regular:
Use solamente el cargador AC provehido
• Para mejor funcionamiento carge la lámpara de trabajo cuando la radiación de la
luz empieze a opacarse.
• Conecte el AC adaptable a la lámpara. El indicador rojo encendera.
• La luz roja le indicara que la lámpara se está cargando. La luz roja permanecera
encendida hasta que la batería esté cargada. Cuando esté cargada, el indicador rojo
se apagara. El tiempo total de carga varia dependiendo de la carga restante en la
batería.
• Mantenga la lámpara conectada al cargador para mantenerla cargada.
SI EL INDICADOR LUMINOSO ROJO PARPADEA EN LA TAREA LIVIANA,
DESENCHÚFELO DE LA PARED Y CONECTE LA LUZ DE FONDO IN. LA LUZ
DEBE PERMANECER ENCENDIDA PARA LA CARGA.
• No cubra la luz, mientras que la tarea de operación o durante la carga.
• No cargue una batería caliente. Permitir que la luz que se enfríe antes de cargarla
• Desconecte la luz de la tarea de la fuente de alimentación cuando la carga está
completa.
• La luz de la tarea se calentará durante la carga.
La luz de la tarea tiene un interruptor de la posición 2 del eje de balancín que se active
el centro de atención o proyector. La posición central apaga la luz.
El gancho de colgar permite manos libres de iluminación
MEDIDAS DE SEGURIDAD
EVITE LA RADIACIÓN DE LA LUZ DIRECTAMENTE A SUS OJOS EXPOSICIÓN:
LA LÁMPARA NOCTURNA ES UN PRODUCTO DE CLASE 2 (LED) POR IEC
60825-1 EDICIÓN1.2.2001.
No use o cargue está lámpara de trabajo en area explosivas o peligrosas.
• No intente reparar o desamblar la lámpara del cargador.
• Use solamente el AC provehido
SUJERENCIAS PARA EL MANTENIMIENTO DE SU BATERÍA
La lámpara de trabajo NIMH (Níquel-Hidruro Metálico) no retiene la información de
carga. Cargar su lámpara frecuentemente le ayudara al mejor funcionamiento de la
batería.
• Una lámpara nueva o una que no ha sido usada por un largo periodo de tiempo
puede ser que no necesite cargarla por completo. Esto no quiere decir que haya
algun tipo de mal funcionamiento o problema con la lámpara. Cargue y descarge la
unidad varias veces hasta que la capacidad del paquete de la batería aumente y el
tiempo de carga se acorte.
• Carge la unidad después de cada uso, esté o no esté cargada su lámpara
• Guarde su lámpara a una temperatura adecuada.
GARANTÍA
GARANTÍA LIMITADA DE 1 AÑO
Bayco Products, Inc. garantiza que este producto está libre de defectos de mano de
obra y materiales para el comprador original durante un año a partir de la fecha de
compra e incluye los LED, la carcasa, los lentes, la electrónica, los interruptores, las
pilas recargables y los cargadores. Las bombillas (excepto los LED) están cubiertas
durante 90 días a partir de la fecha de compra.
Repararemos o reemplazaremos este producto si lo determinamos como defectuoso.
Esta es la única garantía, expresa o implícita, incluyendo cualquier garantía de
comerciabilidad o idoneidad para un propósito particular.
Para obtener una copia completa de la garantía, visite www.baycoproducts.com/bayco-
product-support/warranties. Conserve su recibo para comprobar la compra.

This manual suits for next models

1

Other Bayco Flashlight manuals

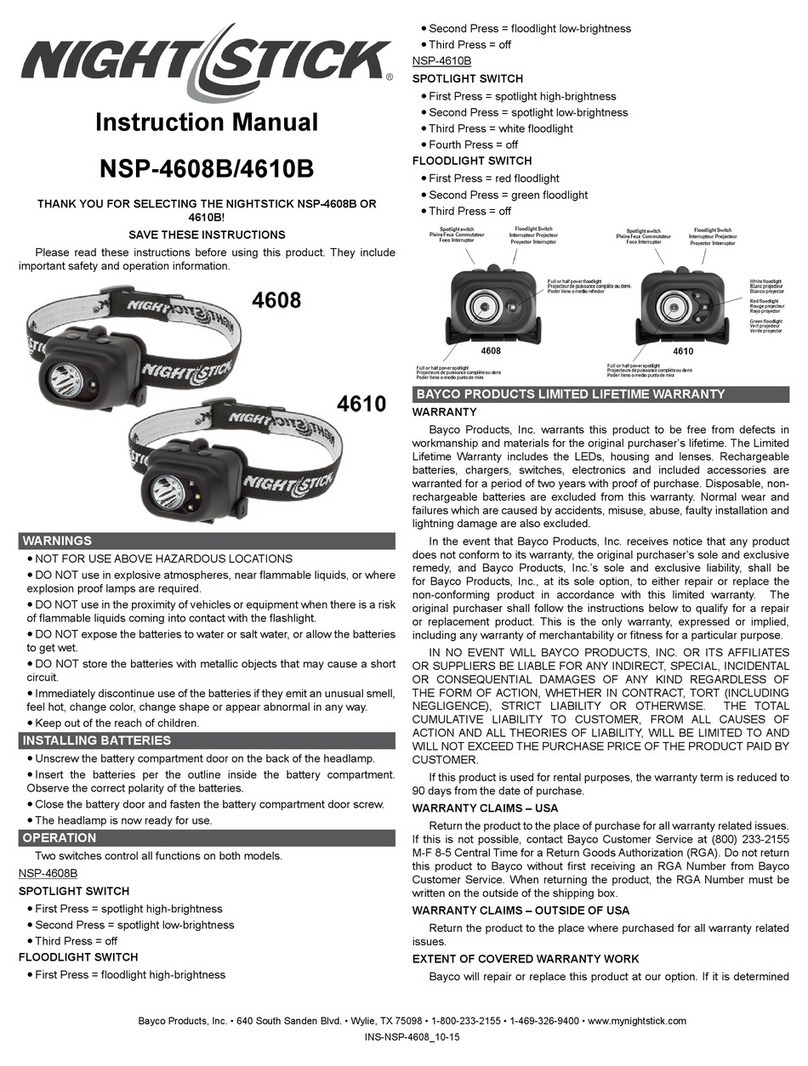
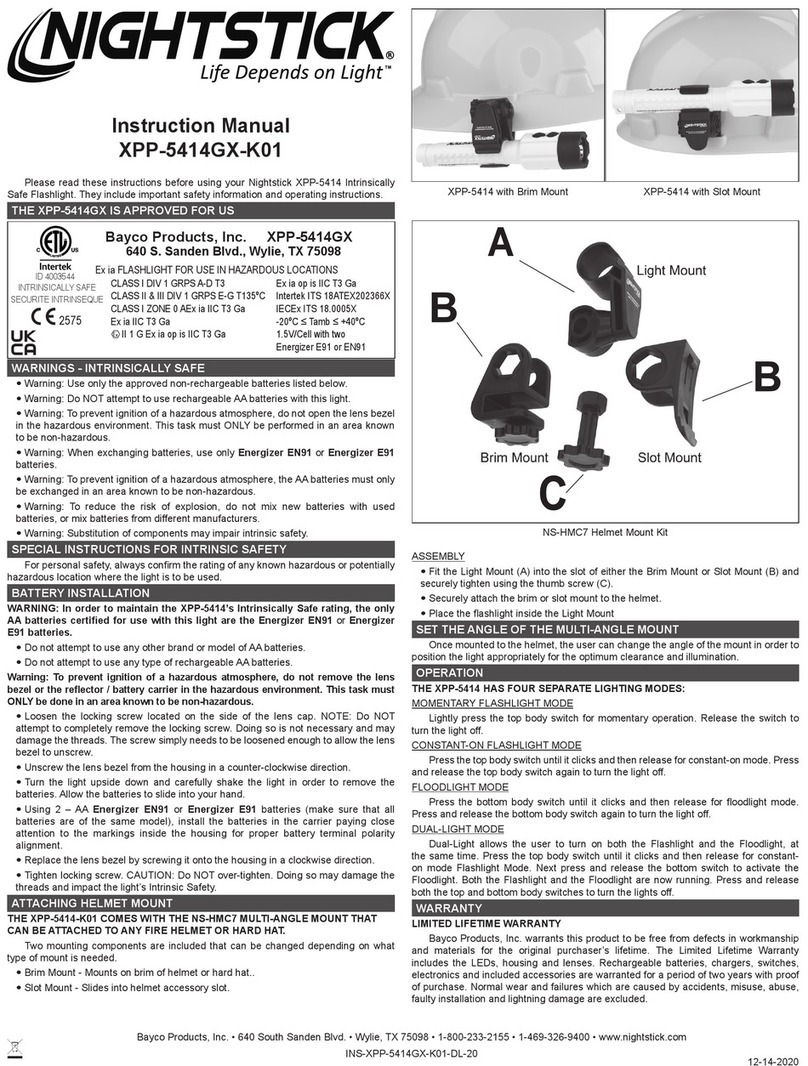
Bayco NightStick XPP-5414GX User manual

Bayco

Bayco NightStick XPP-5414GX User manual

Bayco NIGHTSTICK XPR-5561GC User manual

Bayco

Bayco NIGHTSTICK XPR-5561GC User manual

Bayco NightStick NSP-4608B User manual

Bayco

Bayco NightStick NSP-4608B User manual

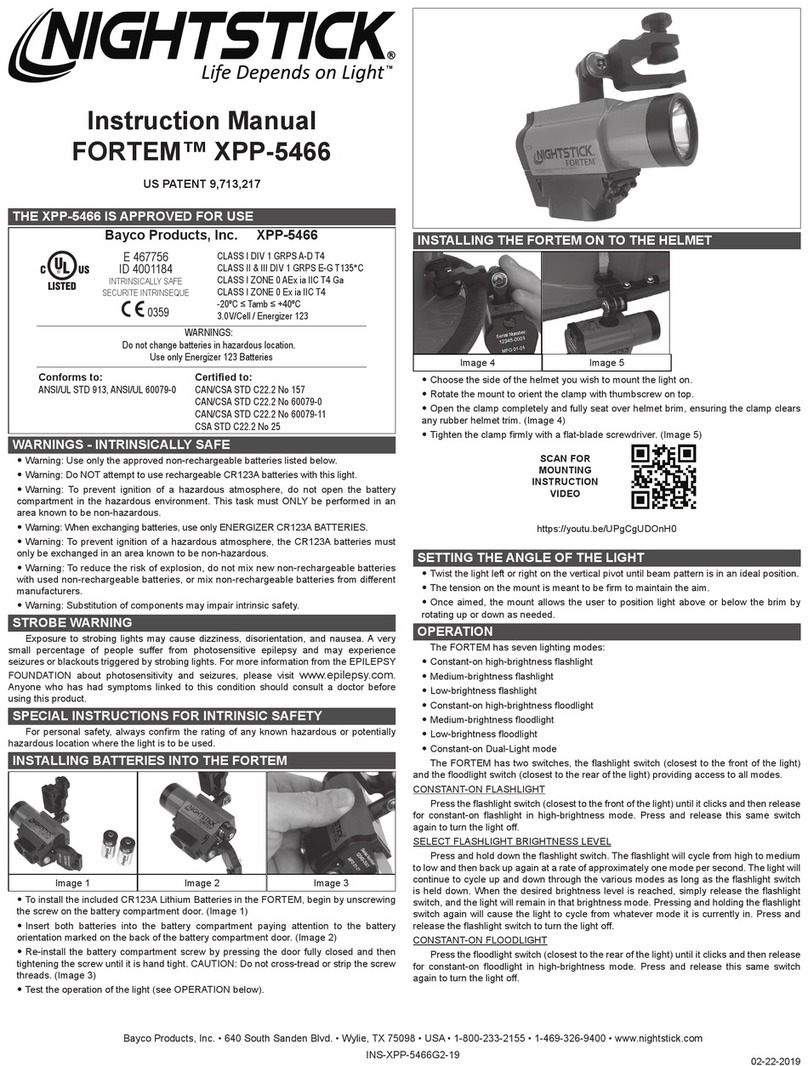
Bayco NIGHTSTICK FORTEM XPP-5466 User manual

Bayco

Bayco NIGHTSTICK FORTEM XPP-5466 User manual

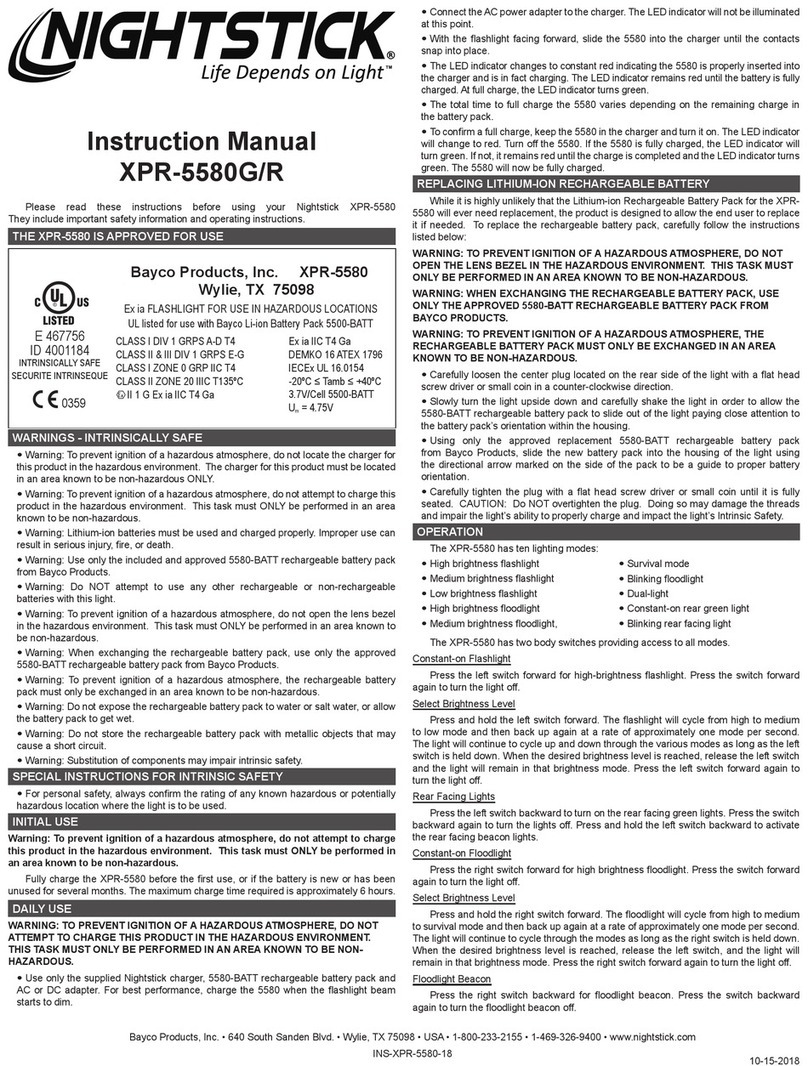
Bayco Nightstick XPR-5580G User manual

Bayco

Bayco Nightstick XPR-5580G User manual

Bayco NightStick XPP-5454G User manual

Bayco

Bayco NightStick XPP-5454G User manual

Bayco NightStick TAC-500 User manual

Bayco

Bayco NightStick TAC-500 User manual

Popular Flashlight manuals by other brands

Avacom AVACOM Ain user manual

Avacom

Avacom AVACOM Ain user manual

Berner 341709 instruction manual

Berner

Berner 341709 instruction manual

Makita ML180 Parts Breakdown

Makita

Makita ML180 Parts Breakdown

IST Proline Dolphin Tech T110 manual

IST Proline

IST Proline Dolphin Tech T110 manual

Pro-4 Tactical Tactical Survival Set instruction manual

Pro-4 Tactical

Pro-4 Tactical Tactical Survival Set instruction manual

StreamLight PROTAC 2AA quick start guide

StreamLight

StreamLight PROTAC 2AA quick start guide

RovyVon Aurora A29 user manual

RovyVon

RovyVon Aurora A29 user manual

Surefire STILETTO PRO instructions

Surefire

Surefire STILETTO PRO instructions

Fenix E05R quick start guide

Fenix

Fenix E05R quick start guide

Bosch GLI 18V-300 Original instructions

Bosch

Bosch GLI 18V-300 Original instructions

steamlight LiteBox operating instructions

steamlight

steamlight LiteBox operating instructions

Planet Bike DUAL BLAZE 1500 quick start guide

Planet Bike

Planet Bike DUAL BLAZE 1500 quick start guide

Miller WP Series owner's manual

Miller

Miller WP Series owner's manual

Superfire 2211 WRISTLIGHT user manual

Superfire

Superfire 2211 WRISTLIGHT user manual

PARFORCE DGL8 Operating Instructions & Technical Details

PARFORCE

PARFORCE DGL8 Operating Instructions & Technical Details

ESAB W-17 instructions

ESAB

ESAB W-17 instructions

Pelican StealthLite 2450 user manual

Pelican

Pelican StealthLite 2450 user manual

EUFAB 13495 operating instructions

EUFAB

EUFAB 13495 operating instructions

manuals.online logo
manuals.online logoBrands
  • About & Mission
  • Contact us
  • Privacy Policy
  • Terms and Conditions

Copyright 2025 Manuals.Online. All Rights Reserved.