Bayco NIGHTSTICK FORTEM XPP-5466 User manual

Bayco Products, Inc. • 640 South Sanden Blvd. • Wylie, TX 75098 • USA • 1-800-233-2155 • 1-469-326-9400 • www.nightstick.com
INS-XPP-5466G2-19 02-22-2019
INSTALLING THE FORTEM ON TO THE HELMET
Image 4 Image 5
yChoose the side of the helmet you wish to mount the light on.
yRotate the mount to orient the clamp with thumbscrew on top.
yOpen the clamp completely and fully seat over helmet brim, ensuring the clamp clears
any rubber helmet trim. (Image 4)
yTightentheclamprmlywithaat-bladescrewdriver.(Image5)
SCAN FOR
MOUNTING
INSTRUCTION
VIDEO
https://youtu.be/UPgCgUDOnH0
SETTING THE ANGLE OF THE LIGHT
yTwist the light left or right on the vertical pivot until beam pattern is in an ideal position.
yThetensiononthemountismeanttobermtomaintaintheaim.
yOnce aimed, the mount allows the user to position light above or below the brim by
rotating up or down as needed.
OPERATION
The FORTEM has seven lighting modes:
yConstant-onhigh-brightnessashlight
yMedium-brightnessashlight
yLow-brightnessashlight
yConstant-onhigh-brightnessoodlight
yMedium-brightnessoodlight
yLow-brightnessoodlight
yConstant-on Dual-Light mode
TheFORTEMhastwoswitches,theashlightswitch(closesttothefrontofthelight)
andtheoodlightswitch(closesttotherearofthelight)providingaccesstoallmodes.
CONSTANT-ON FLASHLIGHT
Presstheashlightswitch(closesttothefrontofthelight)untilitclicksandthenrelease
for constant-on ashlight in high-brightness mode. Press and release this same switch
again to turn the light off.
SELECT FLASHLIGHT BRIGHTNESS LEVEL
Pressandholddowntheashlightswitch.Theashlightwillcyclefromhightomedium
to low and then back up again at a rate of approximately one mode per second. The light will
continuetocycleupanddownthroughthevariousmodesaslongastheashlightswitch
ishelddown.Whenthedesiredbrightnesslevelisreached,simplyrelease theashlight
switch,andthelightwillremaininthatbrightnessmode.Pressingandholdingtheashlight
switch again will cause the light to cycle from whatever mode it is currently in. Press and
releasetheashlightswitchtoturnthelightoff.
CONSTANT-ON FLOODLIGHT
Presstheoodlightswitch(closesttotherearofthelight)untilitclicksandthenrelease
for constant-on oodlight in high-brightness mode. Press and release this same switch
again to turn the light off.
Instruction Manual
FORTEM™ XPP-5466
US PATENT 9,713,217
THE XPP-5466 IS APPROVED FOR USE
CLASS I DIV 1 GRPS A-D T4
CLASS II & III DIV 1 GRPS E-G T135°C
CLASS I ZONE 0 AEx ia IIC T4 Ga
CLASS I ZONE 0 Ex ia IIC T4
-20ºC ≤ Tamb ≤ +40ºC
3.0V/Cell / Energizer 123
0359
E 467756
INTRINSICALLY SAFE
SECURITE INTRINSEQUE
Conforms to:
ANSI/UL STD 913, ANSI/UL 60079-0
Certified to:
CAN/CSA STD C22.2 No 157
CAN/CSA STD C22.2 No 60079-0
CAN/CSA STD C22.2 No 60079-11
CSA STD C22.2 No 25
Bayco Products, Inc. XPP-5466
WARNINGS:
Do not change batteries in hazardous location.
Use only Energizer 123 Batteries
ID 4001184
WARNINGS - INTRINSICALLY SAFE
yWarning: Use only the approved non-rechargeable batteries listed below.
yWarning: Do NOT attempt to use rechargeable CR123A batteries with this light.
yWarning: To prevent ignition of a hazardous atmosphere, do not open the battery
compartment in the hazardous environment. This task must ONLY be performed in an
area known to be non-hazardous.
yWarning: When exchanging batteries, use only ENERGIZER CR123A BATTERIES.
yWarning: To prevent ignition of a hazardous atmosphere, the CR123A batteries must
only be exchanged in an area known to be non-hazardous.
yWarning: To reduce the risk of explosion, do not mix new non-rechargeable batteries
with used non-rechargeable batteries, or mix non-rechargeable batteries from different
manufacturers.
yWarning: Substitution of components may impair intrinsic safety.
STROBE WARNING
Exposure to strobing lights may cause dizziness, disorientation, and nausea. A very
small percentage of people suffer from photosensitive epilepsy and may experience
seizures or blackouts triggered by strobing lights. For more information from the EPILEPSY
FOUNDATION about photosensitivity and seizures, please visit www.epilepsy.com.
Anyone who has had symptoms linked to this condition should consult a doctor before
using this product.
SPECIAL INSTRUCTIONS FOR INTRINSIC SAFETY
Forpersonalsafety,always conrmtheratingofanyknownhazardous orpotentially
hazardous location where the light is to be used.
INSTALLING BATTERIES INTO THE FORTEM
Image 1 Image 2 Image 3
yTo install the included CR123A Lithium Batteries in the FORTEM, begin by unscrewing
the screw on the battery compartment door. (Image 1)
yInsert both batteries into the battery compartment paying attention to the battery
orientation marked on the back of the battery compartment door. (Image 2)
yRe-install the battery compartment screw by pressing the door fully closed and then
tightening the screw until it is hand tight. CAUTION: Do not cross-tread or strip the screw
threads. (Image 3)
yTest the operation of the light (see OPERATION below).

Bayco Products, Inc. • 640 South Sanden Blvd. • Wylie, TX 75098 • USA • 1-800-233-2155 • 1-469-326-9400 • www.nightstick.com
INS-XPP-5466G2-19 02-22-2019
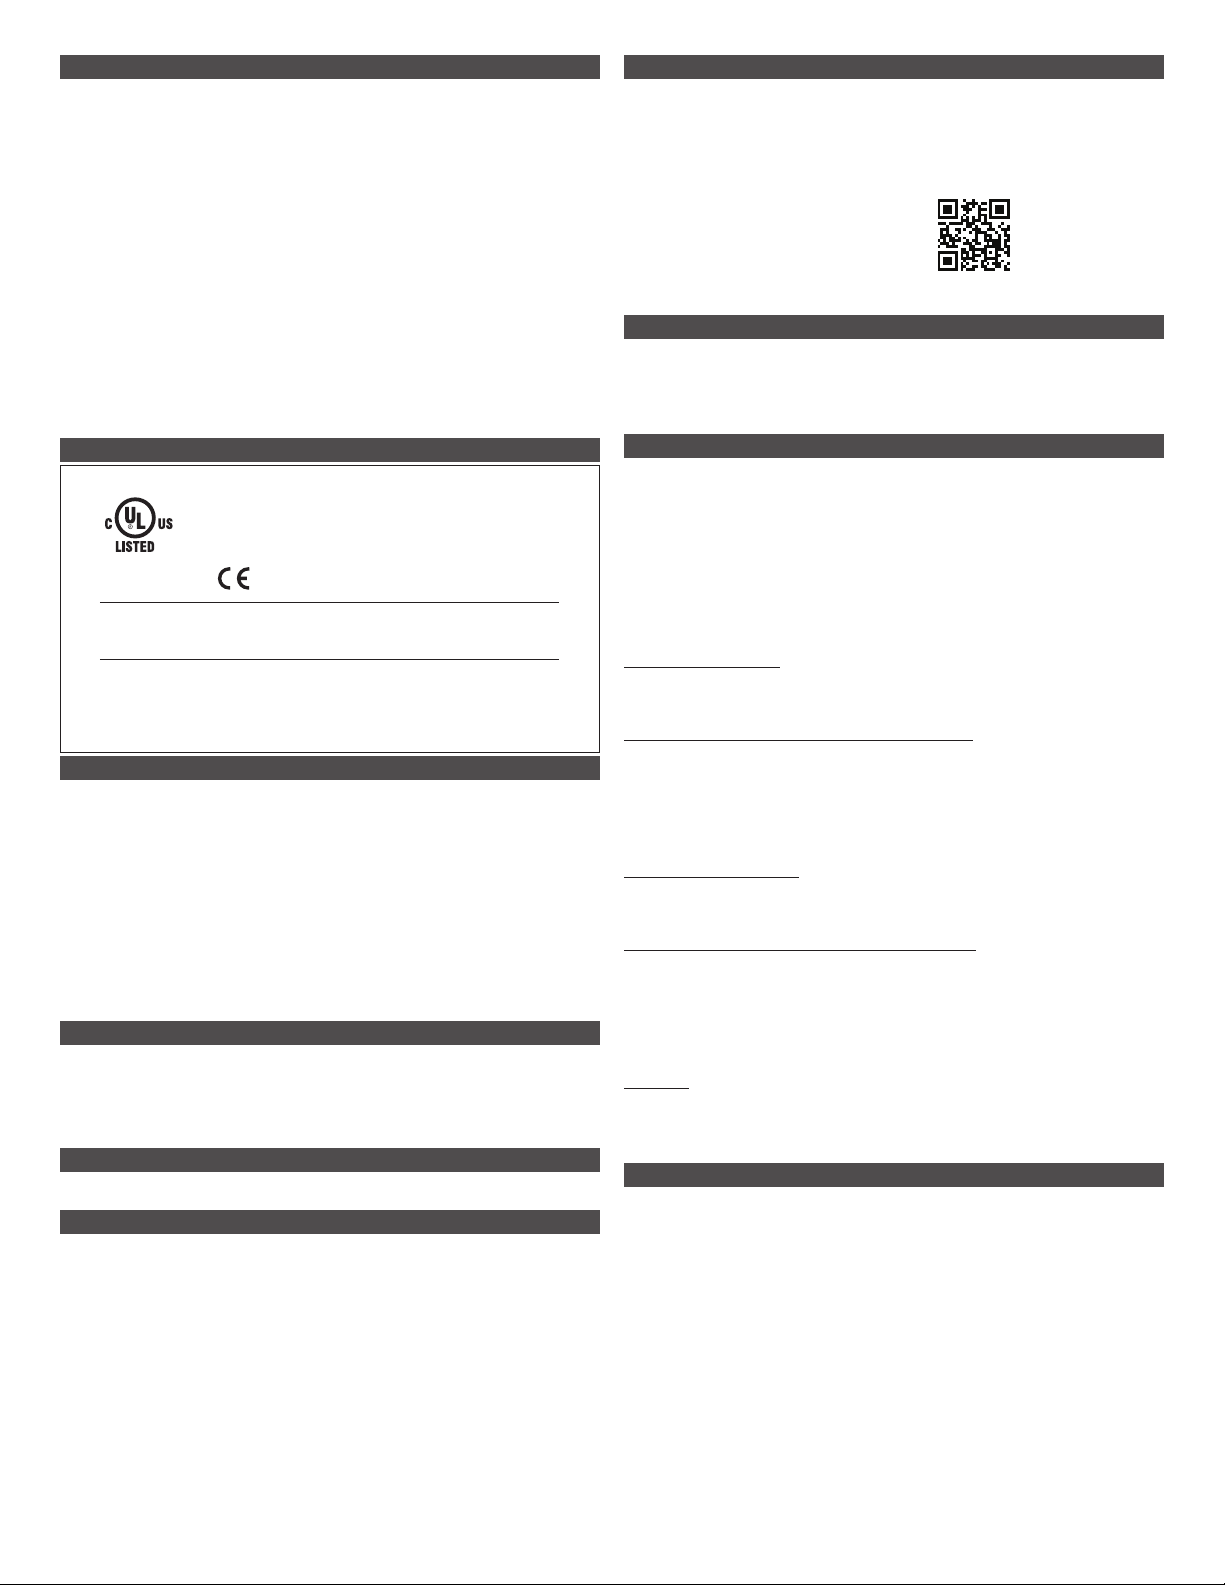
NSTALLATION DES PILES DANS LA LAMPE FORTEM
yPour installer les piles au lithium CR123A dans la lampe FORTEM, commencer par
dévisser la vis de la porte du compartiment à piles. (Image 1)
yInsérer les deux piles dans le compartiment à piles en vous assurant de porter
une attention particulière à l’orientation des bornes inscrites au verso de la porte du
compartiment à piles. (Image 2)
yInstaller de nouveau la vis du compartiment à piles en appuyant sur la porte
complètement fermée puis en serrant la vis jusqu’à ce qu’elle soit serrée à la main.
AVERTISSEMENT:Nepasfausserleletageoubriserlesletsdelavis.(Image3)
yTester par la suite le fonctionnement de votre lampe de poche (Voir FONCTIONNEMENT
ci-dessous)
INSTALLATION DE LA LAMPE FORTEM SUR LE CASQUE
yChoisissezlecôtéducasquesurlequelvoussouhaitezxerlalampe.
yFaites pivoter le support pour que la vis de serrage de la pince soit vers le haut
yOuvrez complètement la pince et placez-la bien à plat sur le bord du casque en veillant
à ce qu’elle dépasse complètement le bord en caoutchouc du casque, le cas échéant.
(Image 4)
ySerrez fermement la pince avec un tournevis plat. (Image 5)
SCANNER
POUR LA VIDÉO
D’INSTRUCTION DE
MONTAGE
https://youtu.be/UPgCgUDOnH0
RÉGLAGE DE L’ANGLE DE LA LAMPE
yTournez la lampe vers la gauche ou la droite sur le pivot vertical jusqu’à ce que le
faisceau soit dans la position idéale.
yLepivotdusupportestplutôtfermeandemaintenirl’angledelalampe.
yUne fois l’angle de la lampe ajusté, le support permet à l’utilisateur de positionner la
lampe au-dessus ou au-dessous du bord du casque en la faisant pivoter vers le haut ou
le bas, au besoin.
FONCTIONNEMENT
La lampe FORTEM comporte sept modes d’éclairage :
yLampe de poche à haute luminosité et éclairage constant
yLampe de poche à luminosité moyenne et éclairage constant
yLampe de poche à luminosité basse et éclairage constant
yLampe projecteur à haute luminosité et éclairage constant
yLampe projecteur à luminosité moyenne et éclairage constant
yLampe projecteur à basse luminosité et éclairage constant
yMode d’éclairage double et constant
La lampe FORTEM comporte deux interrupteurs, l’interrupteur pour la lampe de poche
(situé près de l’avant de la lampe) et l’interrupteur pour la lampe projecteur (situé près de
l’arrière de la lampe) qui donnent accès à tous les modes d’éclairage.
LAMPE DE POCHE À LUMINOSITÉ CONSTANTE
Appuyer sur l’interrupteur lampe de poche (situé près de l’avant de la lampe) jusqu’au
déclic et puis relâcher pour un éclairage constant et à haute luminosité. Relâcher le bouton
interrupteur pour éteindre la lumière.
CHOISIR LES NIVEAUX DE LUMINOSITÉ DU MODE LAMPE DE POCHE
Appuyer et maintenir vers le bas l’interrupteur du mode lampe de poche. La lampe
de poche a un cycle allant du mode haute luminosité à moyenne luminosité et à basse
luminosité pour recommencer de nouveau à un taux d’approximativement un mode par
seconde. La lampe continuera son cycle à travers les différents modes aussi longtemps que
l’interrupteur du mode lampe de poche est maintenu vers le bas. Lorsque vous avez atteint
le niveau de luminosité désiré, relâcher simplement l’interrupteur du mode lampe de poche
et l’éclairage restera dans ce mode. Si vous appuyez et maintenez l’interrupteur lampe de
poche le cycle commencera de nouveau à partir du mode d’éclairage présent. Relâcher le
bouton interrupteur pour éteindre la lumière.
LAMPE PROJECTEUR À LUMINOSITÉ CONSTANTE
Appuyer sur l’interrupteur lampe projecteur (situé près de l’arrière de la lampe) jusqu’au
déclic et puis relâcher pour un éclairage constant et à haute luminosité. Relâcher le même
bouton interrupteur pour éteindre la lumière.
CHOISIR LES NIVEAUX DE LUMINOSITÉ DU MODE LAMPE PROJECTEUR
Appuyer et maintenir vers le bas l’interrupteur du mode lampe projecteur. La lampe
de poche a un cycle allant du mode haute luminosité à moyenne luminosité et à basse
luminosité pour recommencer de nouveau à un taux d’approximativement un mode par
seconde. La lampe continuera son cycle à travers les différents modes aussi longtemps
que l’interrupteur du mode lampe de poche est maintenu vers le bas. Lorsque vous avez
atteint le niveau de luminosité désiré, relâcher simplement l’interrupteur du mode lampe
projecteur et l’éclairage restera dans ce mode. Si vous appuyez et maintenez l’interrupteur
lampe projecteur le cycle commencera de nouveau à partir du mode d’éclairage présent.
Relâcher le même bouton interrupteur pour éteindre la lumière.
ÉCLAIRAGE DOUBLE
L’éclairage double permet à l’utilisateur d’allumer la lampe de poche et la lampe projecteur
simultanément. Appuyer simplement chaque interrupteur pour la mise en marche de chaque
mode d’éclairage. Les deux modes; lampe de poche et lampe projecteur sont maintenant en
fonction. Relâcher le bouton interrupteur pour éteindre la lumière.
SELECT FLOODLIGHT BRIGHTNESS LEVEL
Pressandholddowntheoodlightswitch.Theoodlightwillcyclefromhightomedium
to low and then back up again at a rate of approximately one mode per second. The light will
continuetocycleupanddownthroughthevariousmodesaslongastheoodlightswitch
ishelddown.Whenthedesiredbrightnesslevelisreached,simplyreleasetheoodlight
switch,andthelightwillremaininthatbrightnessmode.Pressingandholdingtheoodlight
switch again will cause the light to cycle from whatever mode it is currently in. Press and
releasetheoodlightswitchtoturnthelightoff.
DUAL-LIGHT
Dual-Light allows the user to turn on both the Flashlight and the Floodlight, at the same
time. Simply press each switch to turn on each lighting mode. Both the Flashlight and the
Floodlight are now running. Press and release each switch to turn the light off.
WARRANTY
LIMITED LIFETIME WARRANTY
Bayco Products, Inc. warrants this product to be free from defects in workmanship and
materials for the original purchaser’s lifetime. The Limited Lifetime Warranty includes the
LEDs, housing and lenses. Rechargeable batteries, chargers, switches, electronics and
included accessories are warranted for a period of two years with proof of purchase. Normal
wear and failures which are caused by accidents, misuse, abuse, faulty installation and
lightning damage are excluded.
We will repair or replace this product should we determine it to be defective. This is the
onlywarranty,expressedorimplied,includinganywarrantyofmerchantabilityortnessfor
a particular purpose.
For a complete copy of the warranty, go to www.nightstick.com/nightstick-product-
support/warranties. Retain your receipt for proof of purchase.
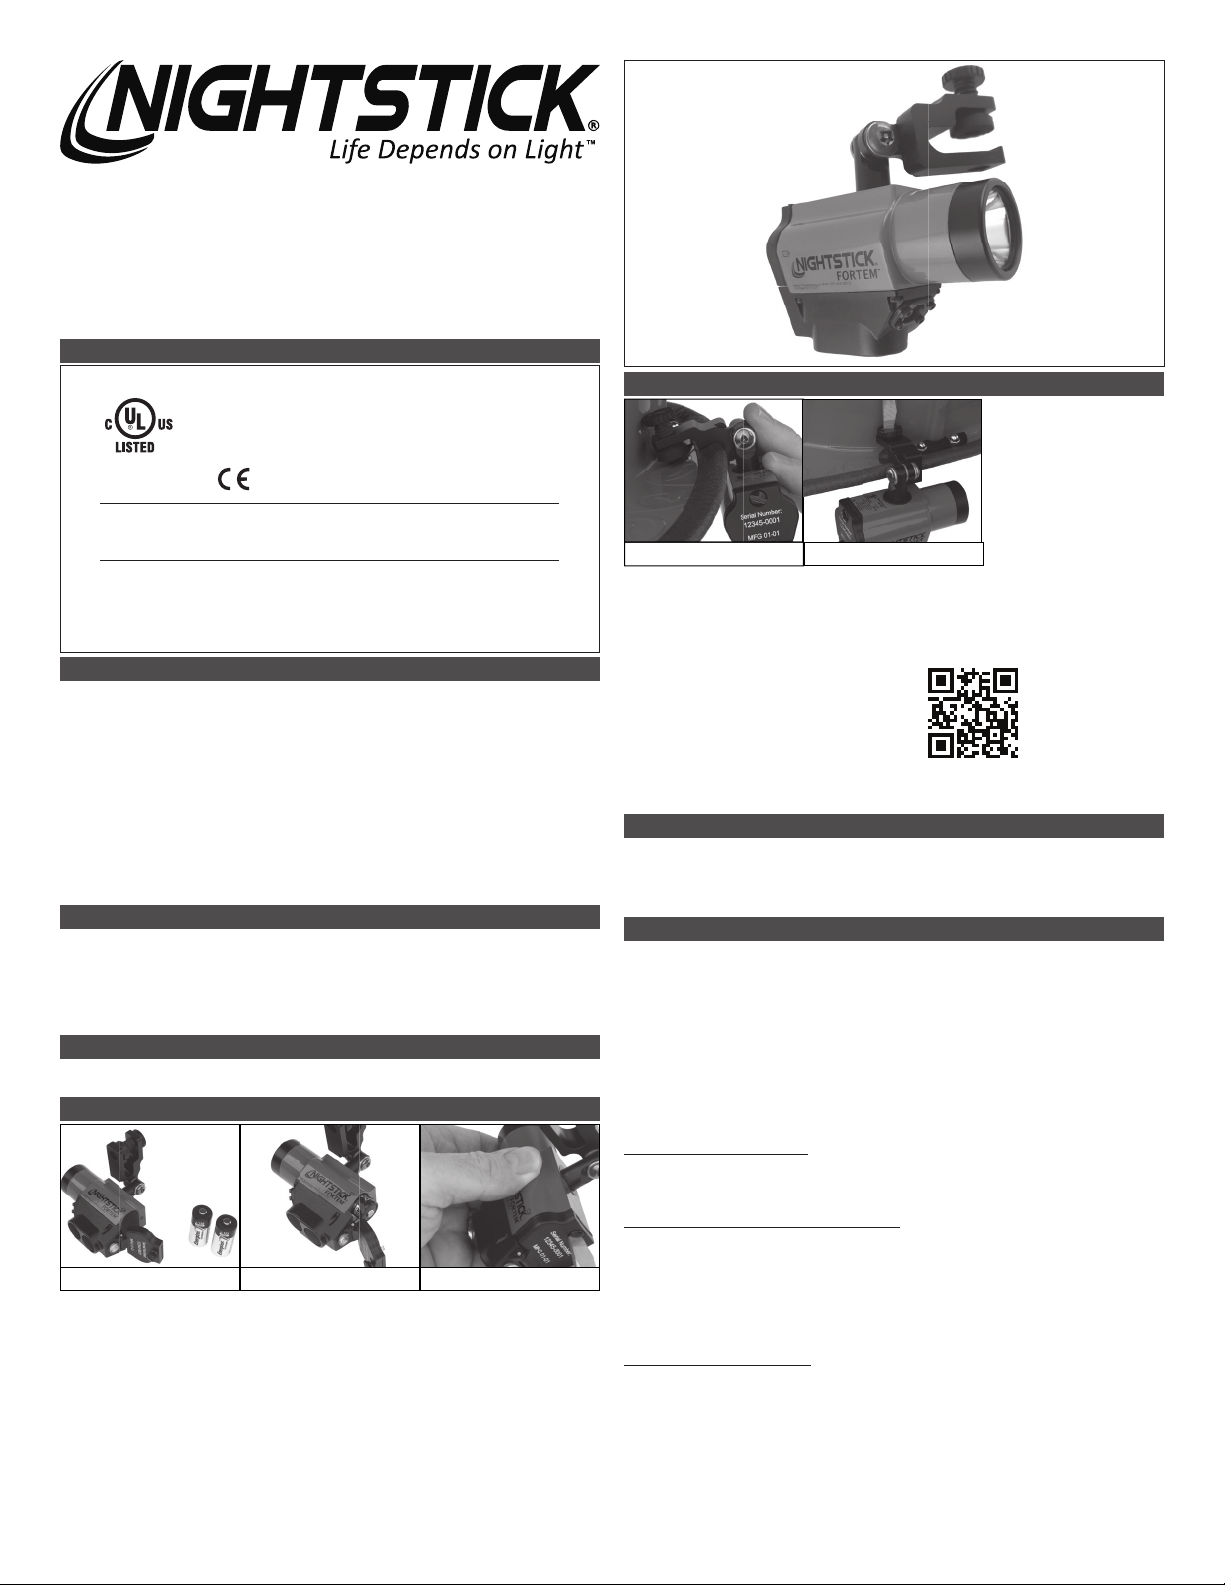
Mode d’emploi
FORTEM™ XPP-5466
LE XPP-5466 EST APPROUVÉE POUR UTILISATION
CLASS I DIV 1 GRPS A-D T4
CLASS II & III DIV 1 GRPS E-G T135°C
CLASS I ZONE 0 AEx ia IIC T4 Ga
CLASS I ZONE 0 Ex ia IIC T4
-20ºC ≤ Tamb ≤ +40ºC
3.0V/Cell / Energizer 123
0359
E 467756
INTRINSICALLY SAFE
SECURITE INTRINSEQUE
Conforms to:
ANSI/UL STD 913, ANSI/UL 60079-0
Certified to:
CAN/CSA STD C22.2 No 157
CAN/CSA STD C22.2 No 60079-0
CAN/CSA STD C22.2 No 60079-11
CSA STD C22.2 No 25
Bayco Products, Inc. XPP-5466
WARNINGS:
Do not change batteries in hazardous location.
Use only Energizer 123 Batteries
ID 4001184
AVERTISSEMENTS: SÉCURITÉ INTRINSÈQUE
yAvertissement : Utiliser seulement les piles non rechargeables approuvées et
énumérées ci-dessous.
yAvertissement : NE PAS essayer d’utiliser des piles rechargeables CR123A avec cette
lampe de poche.
yAvertissement : Pour éviter l’inammation d’atmosphère dangereuse, ne pas ouvrir
le compartiment de pile dans un endroit dangereux. Cette tâche doit être effectuée
UNIQUEMENT dans une zone non dangereuse.
yAvertissement : Lorsque vous remplacer les piles, utiliser uniquement les PILES
ENERGIZER CR123A.
yAvertissement:Pouréviterl’inammationd’atmosphèredangereuse,lespilesCR123A
doivent être remplacées dans une zone non dangereuse.
yAvertissement : Pour réduire les risques d’explosion, ne pas mélanger les piles neuves
non rechargeables avec des piles non rechargeables utilisées, ou mélanger les piles non
rechargeables de différents fabricants.
yAvertissement : la substitution de composants peut compromettre la sécurité
intrinsèque.
AVERTISSEMENT STROBOSCOPIQUE
L’exposition à des lumières stroboscopiques peut causer des étourdissements, une
désorientation et des nausées. Un très faible pourcentage de personnes souffrent d’épilepsie
photosensible et peuvent avoir des convulsions ou des évanouissements déclenchés par des
lumières stroboscopiques. Pour plus d’informations sur la photosensibilité et les saisies de la
FONDATION EPILEPSY, rendez-vous sur www.epilepsy.com. Toute personne qui a eu
des symptômes liés à cette condition devrait consulter un médecin avant d’utiliser ce produit.
DIRECTIVES PARTICULIÈRES POUR UNE SÉCURITÉ INTRINSÈQUE
yPour votre propre sécurité, toujours conrmer la charge d’une zone dangereuse ou
potentiellement dangereuse quand la lampe de poche est utilisée.

Bayco Products, Inc. • 640 South Sanden Blvd. • Wylie, TX 75098 • USA • 1-800-233-2155 • 1-469-326-9400 • www.nightstick.com
INS-XPP-5466G2-19 02-22-2019
GARANTIE
GARANTIE À VIE LIMITÉE
Bayco Products, Inc. garantit que ce produit est exempt de défauts de matériaux et de
fabrication à l’acheteur original durant toute sa vie. La garantie à vie limitée inclut les DEL,
les boîtiers et les lentilles. Les batteries rechargeables, les chargeurs, les interrupteurs, les
électroniques et les accessoires compris sont garantis pour une période de deux ans avec
une preuve d’achat. L’usure normal et les défaillances qui sont causés par des accidents,
une mauvaise utilisation, un abus, une installation défectueuse et un système d’éclairage
endommagé sont exclus.
Ce produit sera réparé ou remplacé si nous déterminons qu’il est défectueux. Ceci est
la seule garantie explicite ou implicite, y compris toute garantie de qualité marchande ou
d’adéquation à un usage particulier.
Pour une copie détaillée de la garantie, vous rendre sur le site www.nightstick.com/
nightstick-product-support/warranties. Gardez ce reçu comme preuve d’achat.
Manual de Instrucción
FORTEM™ XPP-5466
LA XPP-5466 ESTÁ APROBADA PARA SU USO
CLASS I DIV 1 GRPS A-D T4
CLASS II & III DIV 1 GRPS E-G T135°C
CLASS I ZONE 0 AEx ia IIC T4 Ga
CLASS I ZONE 0 Ex ia IIC T4
-20ºC ≤ Tamb ≤ +40ºC
3.0V/Cell / Energizer 123
0359
E 467756
INTRINSICALLY SAFE
SECURITE INTRINSEQUE
Conforms to:
ANSI/UL STD 913, ANSI/UL 60079-0
Certified to:
CAN/CSA STD C22.2 No 157
CAN/CSA STD C22.2 No 60079-0
CAN/CSA STD C22.2 No 60079-11
CSA STD C22.2 No 25
Bayco Products, Inc. XPP-5466
WARNINGS:
Do not change batteries in hazardous location.
Use only Energizer 123 Batteries
ID 4001184
ADVERTENCIAS - INTRÍNSICAMENTE SEGURAS
yAdvertencia: Utilice únicamente las baterías no recargables aprobadas que se
enumeran a continuación.
yAdvertencia: NO intente utilizar pilas CR123A recargables con esta luz.
yAdvertencia: Para evitar la ignición de una atmósfera peligrosa, no abra el bisel del
lente en un ambiente peligroso. Esta tarea SOLO debe realizarse en un área considerada
no peligrosa.
yAdvertencia: Al cambiar las pilas, utilice sólo ENERGIZER CR123A.
yAdvertencia: Para evitar la ignición de una atmósfera peligrosa, las pilas CR123A sólo
deben cambiarse en un área considerada no peligrosa.
yAdvertencia: Para reducir el riesgo de explosión, no mezcle pilas nuevas no recargables
con baterías no recargables usadas, y no mezcle pilas no recargables de diferentes
fabricantes.
yAdvertencia: La sustitución de componentes puede afectar la seguridad intrínseca.
ADVERTENCIA DE LUZ ESTROBOSCÓPICA
La exposición a luces estroboscópicas puede causar mareos, desorientación y
náuseas. Un porcentaje muy pequeño de personas sufre de epilepsia fotosensible y
pueden experimentar convulsiones o desmayos provocados por luces estroboscópicas.
Para obtener más información de la FUNDACIÓN EPILEPSY sobre fotosensibilidad y
ataques, visite www.epilepsy.com. Cualquier persona que haya tenido síntomas
relacionados con esta afección debe consultar a un médico antes de usar este producto.
INSTRUCCIONES ESPECIALES PARA LA SEGURIDAD INTRÍNSECA
yPorsuseguridadpersonal,siempreconrmelacalicacióndecualquierubicaciónpeligrosa
o potencialmente peligrosa conocida donde la luz se va a utilizar.
NSTALACIÓN DE LAS BATERIAS EN EL FORTEM
yPara instalar las Baterías de Litio ya incluidas CR123A en el FORTEM, comience
aojandoeltornillodelatapadelcompartimentodelabatería.(Imagen1)
yInserte las dos baterías en el compartimiento de la batería prestando atención
a la orientación de la misma que está marcado en la parte posterior de la puerta del
compartimiento de la batería. (Imagen 2)
yVuelva a instalar el tornillo del compartimiento de la batería presionando la puerta
completamente cerrada y luego dándole vuelta al tornillo hasta que quede apretado.
PRECAUCIÓN: No cruce la banda de rodadura o dañe las roscas de los tornillos.
(Imagen 3)
yPrueba del funcionamiento de la luz (ver FUNCIONAMIENTO abajo).
INSTALAR EL FORTEM EN EL CASCO
yElija el lado del casco en el que desea montar el bastón de luz.
yGire el soporte para orientar la abrazadera con el tornillo de mariposa en la parte
superior.
yAbra la abrazadera por completo y colóquela sobre el borde del casco, asegurándose
de que la abrazadera no toque ningún borde de goma (Imagen 4).
yAprietermementelaabrazaderaconundestornilladordepuntaplana(Imagen5).
ESCANEE PARA
VER EL VIDEO DE
INSTRUCCIONES
DE MONTAJE
https://youtu.be/UPgCgUDOnH0
AJUSTAR EL ÁNGULO DE LA LUZ
yGire la luz hacia la izquierda o hacia la derecha en el pivote vertical hasta que el patrón
del haz de luz esté en una posición ideal.
yLatensiónenelsoportedebeserrmeparamantenerelobjetivo.
yUna vez apuntado, el soporte permite al usuario colocar la luz por encima o por debajo
del borde girando hacia arriba o hacia abajo según sea necesari.
FUNCIONAMIENTO
La FORTEM tiene siete modos de iluminación:
yLinterna Constante en alto brillo
yLinterna de medio brillo, linterna de bajo brillo
yConstantedealtobrilloenelreector
yReectordemedianobrillo
yReectordebajobrillo
yLinterna Dual en modo constante
La FORTEM tiene dos interruptores, el interruptor de la linterna (la más cercana a la
partefrontaldelaluz)yelinterruptordelreector(lamáscercanaalapartetraseradela
luz) que proporciona acceso a todos los modos.
LINTERNA CONSTANTE
Pulse el interruptor de la linterna (la más cercana a la parte delantera de la luz) hasta
que haga clic y suelte para el modo constante de la linterna de alto brillo. Presione y suelte
este mismo interruptor de nuevo para apagar la luz.
SELECCIONAR EL NIVEL DE BRILLO DE LA LINTERNA
Pulse y mantenga pulsado el interruptor de la linterna. La linterna cambiará de ciclo de
alto a medio a bajo y luego volverá a subir a un ritmo de aproximadamente un modo por
segundo. La luz continuará en ciclo de arriba a abajo a través de los distintos modos mientras
el interruptor de la linterna se mantiene pulsado. Cuando se alcanza el nivel de brillo deseado,
simplemente suelte el interruptor de la linterna y la luz permanecerá en ese modo de brillo.
Si mantiene pulsado el interruptor de la linterna hará que la luz vaya a un ciclo diferente al
que se encuentra actualmente. Pulse y suelte el interruptor de la linterna para apagar la luz.
PROYECTOR CONSTANTE
Pulseelinterruptordelreector(elmáscercanoalapartetraseradelalinterna)hasta
que haga clic y suelte para un modo de alto brillo constante del proyector. Presione y suelte
este mismo interruptor de nuevo para apagar la luz.
SELECCIONAR EL NIVEL DE BRILLO DEL PROYECTOR
Pulsey mantengapulsadoel interruptordel reector.Elreector irade uncicloalto a
medio a bajo y luego volverá a subir a un ritmo de aproximadamente un modo por segundo.
La luz continuará en ciclos de arriba a abajo a través de los distintos modos mientras el
interruptordereectorsemantienepulsado.Cuandosealcanzaelniveldebrillodeseado,
simplementesuelteelinterruptordereector,ylaluzpermaneceráen esemododebrillo.
Si mantiene pulsado el interruptor del proyector hará que la luz vaya a un ciclo diferente al
que se encuentra actualmente. Pulse y suelte el interruptor del proyector para apagar la luz.
LUZ DUAL
La Luz Dual permite al usuario activar tanto la linterna como el Reector, al mismo
tiempo. Basta con pulsar cada interruptor para encender cada modo de iluminación. Tanto
laLinternacomoelReectorseencuentranencendidos.Presioneysueltecadainterruptor
para apagar la luz.
GARANTÍA
GARANTIA LIMITADA DE POR VIDA
Bayco Products, Inc. garantiza que este producto está libre de defectos de mano de obra
y materiales durante la vida del comprador original. La garantía de por vida limitada incluye
los LED, la carcasa y los lentes. Las pilas recargables, los cargadores, los interruptores, la
electrónica y los accesorios incluidos están garantizados por un período de dos años con un
comprobante de compra. Se excluyen el desgaste y los fallos normales, que son causados por
accidentes, mal uso, abuso, instalación defectuosa y daños por rayos.
Repararemos o reemplazaremos este producto si lo determinamos como defectuoso. Esta
es la única garantía, expresa o implícita, incluyendo cualquier garantía de comerciabilidad o
idoneidad para un propósito particular.
Para obtener una copia completa de la garantía, visite www.nightstick.com/nightstick-
product-support/warranties. Conserve su recibo para comprobar la compra.
Table of contents
Languages:
Other Bayco Flashlight manuals