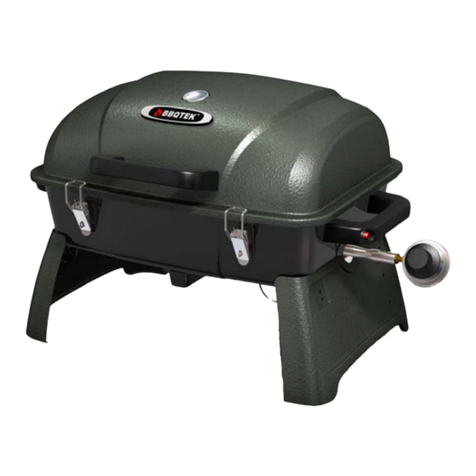
BBQ 640-03946564-6 User manual

Use and Care Guide
Tab|e Top Gas Gri||
Kmart item No, 640=03946564=6
This Grill is for Outdoor Use Only
SAVE THESE |NSTRUCT|ONS!
, Read and follow all Safety, Assembly,
and Use and Care instructions in this
Guide before assembling and cooking
with this gri&
,Failure to follow all instructions in this
Use and Care Guide may lead to fire or
explosion, which could result in property
damage, personal injury or death.
•Safety
•Parts
•Use and Care
• Assembly
Assembly Questions?
Call 1-877-998-1697
Tools needed for assembly:
Screwdriver (not provided)
Open end wrench (not provided)
Sears, Roebuck and Co., Hoffman Estates, IL 60179 U.S.A.
See our extensive assortment of outdoor living products on-line at
www.sears.com and www. kmart.com

TABLE OF CONTENTS
Safety Guidelines ................................ 1
Safety Instructions .............................. 2-3
Assembly Instructions ...................... 4-7
Lighting Instructions .......................... 8
Care and Maintenance ......................... 9
Read this Use and Care Guide carefully
and completely before using your grill to
reduce the risk of fire, burn hazard or
other injury.
DANGER
If you smell gas:
1.Shut off gas to the appliance.
2.Extinguish any open flame.
3.Open lid.
4.If odor continues, keep away from the appliance and immediately
call your gas supplier or your fire department.
Failure to follow these instructions could result in fire or explosion which could cause
property damage, personal injury or death.
WARNING
For Your Safety
1. Do not store or use gasoline or other flammable vapors and liquids
in the vicinity of this or any other appliance.
2. An LP cylinder not connected for use shall not be stored in the
vicinity of this or any other appliance.
Failure to follow these instructions could result in fire or explosion which could cause
property damage, personal injury or death.
DANGER
1. Never operate this appliance unattended.
2. Do not store spare LP cylinder within 10 feet (3.05m) of this
appliance.
3. Do not store or use gasoline or other flammable liquids or vapors
within 25 feet (7.62m) or this appliance.
Failure to follow these instructions could result in fire or explosion which could cause
property damage, personal injury or death.
WARNING: This product contains chemicals, including lead, known to the State of California
to cause birth defects or other reproductive harm. Wash hands after handling°
This unit is not intended for commercial use.

1. This Gas Grill is intended for OUTDOOR USE ONLY. Do not attempt to use this grill in
enclosed areas.
2. Place your Gas Grill outside on a firm, level surface away from wooden fences, overhanging
trees, or other flammable objects before igniting the gas burner.
3. When installing the gas regulator, completely tighten the regulator to the burner system.
The unit is installed properly when the threads of the brass fitting on the regulator are tight
against the burner and no threads are visible.
4. DO NOT USE OR STORE ANY FLAMMABLE LIQL_D OR GAS 1N THE VICINITY WHILE
USING YOUR GAS GRILL.
5. DO NOT USE GASOLINE OR CHARCOAL IN GRILL. Use only commercially approved
Propane gas canisters. Attach, use and store the propane gas canister according to the
product's instructions.
6. After lighting the Gas Grill, do not leave the grill unattended.
7. Remember to keep children and pets away from a lit grill at all times.
8. To avoid harm to people, pets or property do not move the grill once the gas burner has been lit.
9. After gas burner is lit, the grill and surrounding surfaces become very hot. Use proper outdoor
cooking mitts, utensils and avoid skin contact with all hot metal surfaces on the grill.
10. To extinguish burner after cooking, push down on the dial and turn dial past the off position
until the dial pops out. UNTIL THE DIAL ON THE GAS REGULATOR POPS OUT, THE GAS
IS STILL ON. MAKE SURE YOU TURN THE GAS OFF COMPLETELY AND REMOVE THE
GAS CANISTER BEFORE TRANSPORTING OR STORING THE UNIT.
11. After your Gas Grill has cooled, disconnect gas canister, cover, and store the unit in a safe
place away from children while not in use.

READTHEFOLLOWINGINSTRUCTIONSCAREFULLYAND BE SUREYOURGRILLIS
PROPERLYINSTALLED,ASSEMBLEDAND MAINTAINED.FAILURETOFOLLOWTHESE
INSTRUCTIONSMAY RESULTIN SERIOUSBODILYINJURYAND/ORPROPERTYDAMAGE.
NOTE TO INSTALLER:
LEAVETHESEINSTRUCTIONSWITHTHECONSUMERAFTERINSTALLATION.
NOTE TO THE CONSUMER:
RETAINTHESEINSTRUCTIONSFORFUTUREREFERENCE.
THISOUTDOORCOOKINGGASAPPLIANCEISNOTINTENDEDTOBEINSTALLEDIN OR
ONRECREATIONALVEHICLESAND/ORBOATS.
a)Theuseof alcohol,prescriptionornon-prescriptiondrugsmayimpairtheconsumer'sabilitytoproperly
assembleorsafelyoperatetheappliance.
b)Whencooking,theappliancemustbeonalevel,stablesurfacein anareaclearofcombustiblematerial.
An asphaltsurface(blacktop)maynotbeacceptablefor thispurpose.
c)Donotleavetheapplianceunattended.Keepchildrenandpetsawayfromtheapplianceatall times.
d)Donotmovetheappliancewheninuse.Allow thecookingvesseltocoolbeforemovingor storing.
e)Thisapplianceisnotintendedforandshouldneverbeusedasaheater.
Do not store aspare LP-gas cylinder under or near this appliance.
Read this Use and Care Guide carefully before assembling and operatingyourgas grill.
INSTALLATION
The installation must conform with local codes or, in the absence of local codes, with the National Fuel
Gas Code, ANSI Z223.1/NFPA 54, Storage and Handling of Liquefied Petroleum Gases, ANSI/NFPA 58
or CSA B149.1, Natural Gas and Propane Installation Code.
THE LOCATION FOR YOUR GRILL
Do not use your gas grill in garages, porches, breezeways, sheds or other enclosed areas. Your gas
grill is to be used outdoors only, with the back and sides of the grill at least 3 feet away from any
combustible wall or surface. The grill should not be placed under overhead unprotected combustible
construction.Do not obstruct the flow of combustion and ventilation air around the grill housing.
This outdoor cooking gas appliance is not intended to be installed in or on recreational vehicles and!or boats.
The Fuel System
Gas grills are used safely by millions of people when following simple safety precautions.
The items in the fuel system are designed for operation with the BBQ PRO grill. They must not be replaced
with parts from any other brand. (See parts list for replacement items. )
Check burner air inlet openings for insect nests or blockages.
2

The regulator must be tightly connected to the propane cylinder.
Grill Regulator Operation
OFF. Turn knob clockwise to OFF to stop gas flow to burner.
PUSH TO TURN ON. You must push"IN"on the knob to release the knob to release
the knob from the locked"OFF"position. Turn knob counterclockwise for gas flow.
HIGH.This position provides the highest gas flow and hottest cooking temperatures.
MED.This position provides cooking temperatures between HIGH and LOW.
LOW.This position provides the lowest cooking temperatures.
ONLY A FACTORY SUPPLIED GAS VALVE/REGULATOR SHOULD BE USED.
See parts list for replacement items, x_-)
Turn on Turn off
LP GAS REGULATOR CAUTION
The gas pressure regulator provided with this appliance must be used. This regulator is equipped with the
required orifice and is set for the required outlet pressure for this appliance. This combination of orifice size
and pressure regulation specifications provides the cooking performance intended by BBQ PRO Table
Top Grill. Replacement pressure regulator must be that specified in this manual.
LP GAS REGULATOR
The gas pressure regulator is shipped loose and must be installed prior to operation your grill.
PROPANE FUEL: WARNING:Propane is a flammable gas. Improper handling may result in an explosion
and!or fire and serious accident or injury. Your grill is designed to operate with propane (LP) gas only and is
equipped with the proper orifice for propane gas.
CAUTION: Only cylinders marked "propane" are to be used with this grill. Propane gas is heavier than air and
settles in lower areas. Make certain adequate ventilation is available when using your grill. The gas cylinder
may be stored outside in a well-ventilated area out of the reach of children when the grill is not in use.
LP GAS CYLINDER: This grill is designed and intended to be used with a disposable propane cylinder with
a nominal fuel weight of 1 lb. Such a cylinder is approximately 4" in diameter and 7"long. The BBQ
PRO Table Top Grill does not include an LP gas cylinder. This must be purchased separately and be
supplied at most hardware stores. The cylinder used must be constructed and marked in accordance with the
specifications for LP cylinders of the U.S. Department of Transportation (DOT) or the National standard of
Canada of dangerous goods. CAN/CSA - B339, Cylinders, Spheres and tubes for Transportation.
The LP gas cylinder shall be used only outdoors in a well-ventilated space and not in a building, garage, or
any other enclosed area. The BBQ PRO Table Top Grill may be stored indoors if the LP gas cylinder is
removed and stored outdoors. The LP gas cylinder (not included) is threaded for connection direcdy to the
gas regulator supplied with this appliance.
Care should be taken when threading the cylinder to the regulator to engage threads correctly to achieve
the proper and intended connection. When disconnecting or connecting the gas cylinder, be careful that the
regulator does not strike the grill, the ground, or any other surface. Replace the protective cap over the
threaded cylinder connection when removed from grill. If any difficulty at all occurs when connecting or
disconnecting the cylinder to the regulator assembly, contact your local gas supplier for assisstance.
When connecting the LP gas cylinder to the regulator, be sure to hand-tighten until snug. This connection
should be inspected for damage and leak tested after connecting. Leak test by brushing a mild soapy
solution over regulator connection points and onto seams of LP cylinder. Presence of bubbles indicates
a leak. If leaks appear, do not use grill and have regulator and cylinder checked by a qualified gas technician.
The threaded cylinder connection should be kept clean and free of dust, dirt, sand or any foreign materials.
Clean both regulator and LP cylinder threaded areas prior to connecting cylinder with regulator.
Keep any electrical supply cord or fuel supply hose away from any heated surfaces.
3

Asse b yInstructions
Table To Gas Grill
Verify that all parts are included with your Grill BEFORE beginning assembly by checking the Parts
List. For your convenience, some parts may be pre-assembled or attached to grill components.
If all parts are not included, do not attempt to assemble grill. Return grill to Kmart with receipt
for replacement unit. If any parts are missing, call 1-877-998-1697 for assistance.
USE DIAGRAM PROVIDED FOR ASSEMBLY. Leave nuts half-tightened on the grill during
assembly until unit is completely assembled, then finish tightening nuts.
Parts List
A. Lid (1)
200463N
E Side Handle (2)
%.
300561N
K. Brace (2)
B. Bottom Bowl (1)
210344N
G. Lid Vent (1)
300562N
L. Heat Shield (1)
C. Cooking Grid (1
300558N
H. Burner (1)
300563N
M. Washer (1)
I). Heatinv Plate (1)
300559N
I. Grill Leg (2)
E.Gas Regulator (1)
300560N
J. Lid Handle (1)
300564N
300574N
3. (1pc)
5/32" x 3/8"
300590N
4' (4pcs)
3/16" x 1-3/4"
300586N
@
5. (1pc)
5/32" nut
1' (lpc)
1/4" x3/4"
6' (6pcs)
3/16" nut
300565N
0,-,,
2' (2pcs)
3/16" x 3/8"
F
D
B
_E
L
jI
/
/
4

Asse b y Instructions
Table Top Gas Grill
Remove all the parts from the carton
and lay them out on a smooth, clean
surface. Verify the presence of all
parts by comparing to Hardware
and Parts Lists on previous pages.
Do not throw away any of the packaging
until you locate all the parts.
STEP 1: Attach lid vent (G)
by inserting damper bolt (3)
through lid vent (G), and lid (A).
Inside of lid, place 1 nut (5)
onto damper bolt (3) and tighten.
G
_J
/
/
Attach lid handle (J) by inserting 2
handle bolts (2) through lid
handle (J), lid (A) and into nut (6).
STEP 2: Attach side handle (F) to bottom bowl (B) by inserting 2 handle
bolts (4) through handle (E), brace (K) and into bottom bowl (B). Secure bolts (4)
with 2 nuts (6). Repeat same procedure for the other handle (E).

Asse b y Instructions
Table Top Gas Grill
STEP 3: Attach grill leg (I) to bottom
bowl (B) by inserting the end of the
grill leg (I) through side handle
(F) and into the bottom bowl (B).
/
,/
/
/
B I.........
/
Y
/
STEP 4: Insert bolt (1) through heat shield (L),washer (M), bottom bowl (B)
and into the burner (H). Connect the valve stem of the regulator (E) into the
end of the burner (H).
WARNING: Failure to securely insert valve stem into burner will result in gas
leaking and possible fire and serious personal injury.
E
\L
6

Asse b y Instructions
Table Top Gas Grill
STEP 5: Place heating plate (D) into
bottom bowl (B), then place cooking
grid (C) into bottom bowl (B).
Place lid assembly onto bottom
bowl (B).
/
/
/
D
STEP 6: Fully tighten all nuts &
screws at this time. \aaaa\x
ORDER PARTS #
A 1 LID 200463N
B ! BOTTOM BOWL 210344N
C 1 COOKING GRID 300558N
D 1 HEATING PLATE 300559N
E ! GAS REGULATOR 300560N
F 2 SIDE HANDLE 300561N
G 1 LID VENT 300562N
H 1 BURNER 300563N
I 2 GRILL LEG 300564N
J t LID HANDLE 300565N
K 2 BRACE 300574N
L 1 HEAT SHIELD 300590N
M 1 WASHER 300586N
1 6 1 HARDWARE PACK
7

1. Make sure all hardware is tightened completely before attaching propane gas canister onto
Gas Regulator. When assembled properly, all connections will be securely fastened.
2. Attach the propane gas cylinder onto the gas regulator as described in the safety instructions
section of this Use and Care Guide.
3. Open lid. Always open lid when lighting.
4. For safety, use a commercial accessory butane lighter, such as a 12 (minimum) trigger style
Butane lighter, to light your grill. DO NOT USE CIGARETTES, CIGARS, ROLLED UP
PAPER, OR ANY OTHER HIGHLY FLAMMABLE OBJECTS TO LIGHT YOUR GAS GRILL.
5. To light your Gas Grill burner, push down on the gas regulator dial and turn counterclockwise
gradually while touching the Butane lighter flame to the burner.
CAUTION: IF IGNITION DOES NOT OCCUR IN 3-5 SECONDS, TURN BURNER OFF.
WAIT 5 MINUTES FOR GAS TO CLEAR AWAY AND REPEAT THE LIGHTING PROCEDURE.
IF THE BURNER SHOULD GO OUT FOR ANY REASON, TURN CONTROL
KNOB TO OFF POSITION. WAIT 5 MINUTES BEFORE ATTEMPTING TO
RE-LIGHT.
If the grill fails to light after the second attempt, call 1-877-998-1697 for assistance.
6. With the burner lit, gently close lid and allow grill to warm up for 20-30 minutes prior to use.
7. Adjust dial on gas regulator to Low, Med or High for your cooking needs.

This unit should be kept in an area clear and tree from combustible materials, gasoline and other
flammable vapors and liquids.
Check to be sure all openings into grill body are free of blockages or debris. Make sure there are no objects
or materials blocking the flow of combustion or ventilation.
When grill is not use, turn regulator knob to "OFF", and remove propane cylinder from regulator.
The propane cylinder must be disconnected when the appliance is not in use.
For outdoor use only, if stored indoors, detach cylinder and leave it outdoors. Cylinders must be stored out
of reach of children.
Important
First-time use: It is important that the grill be lit and allowed to operate at least 30 minutes before any
food is placed on the grill grid. Some smoke may appear during the initial operation of the grill. This is
normal burn-off of materials used during manufacturing. After initial heating, grill is ready for use. After
burning off the grill, spray the cooking grid, and inside of the lid, so food does not stick to the grid
and the inside is easier to clean.
THIS COOKING APPLIANCE IS FOR OUTDOOR USE ONLY AND SHALL NOT BE USED IN A
BUILDING, GARAGE OR ANY OTHER ENCLOSED AREA.
MOVING INSTRUCTIONS
CAUTION: Never move the grill with burner lit.
Transporting grill: Make sure gas control is oft: Disconnect propane cylinder from regulator. Remove
regulator from grill. Be sure grill has completely cooled for at least 30 minutes.
Setting up for use: Find a fiat surface. Grill must be on a level surface to operate properly.
WARNING: To ensure that it is safe to eat, food must be cooked
to the minimum internal temperatures listed in the table below.
USDA* Recommended Safe Minimum internal Temperatures
Beef, Veal_ Lamb and Pork: Whole Cuts** 145 ° F
Fish 145 ° F
Beef, Veal, Lamb and Pork: Ground 160 ° F
Egg Dishes 160°F
Turkey, Chicken & Duck: Whole, Pieces & Ground 165 ° F
*United States Department of Agriculture.
**Allow meat to rest three minutes before carving or consuming.
90 Day Limited Warranty
if this BBQ-Pro product fails due to a defect in material or workmanship within 90 days from
the date of purchase, return it to any Kmart store or other BBQ-Pro outlet in the
United States with your proof of purchase for free replacement.
This warranty gives you specific legal rights, and you may also have other rights which vary from
state to state.
Sears, Roebuck and Co., Hoffman Estates, IL 60179
For further information, contact the manufacturer, toll Dee at 1-877-998-1697
Table of contents
Other BBQ Grill manuals

BBQ
BBQ 680-02701244-2 User manual

BBQ
BBQ SSS3416TCS User manual

BBQ
BBQ 146.23770310 User manual

BBQ
BBQ GPT1813G User manual

BBQ
BBQ 0-04647725-3 User manual

BBQ
BBQ BQ04023-2 User manual

BBQ
BBQ BQ04023-2 User manual

BBQ
BBQ GSF3016A User manual

BBQ
BBQ 17760011-1 User manual

BBQ
BBQ Fun on the Run 0-03946586-9 User manual
Popular Grill manuals by other brands

Nexgrill
Nexgrill 720-0864 user manual

Melchioni
Melchioni BURGER user manual

Giani
Giani Cucina GCAN-101 instruction manual

Kenmore
Kenmore 415.162020 Assembly instructions/use and care manual

Integrity Fabricators
Integrity Fabricators Kamado Grill Table for Large Big Green Egg or Kamado... owner's manual

George Foreman
George Foreman Grill Instructions for the use & care