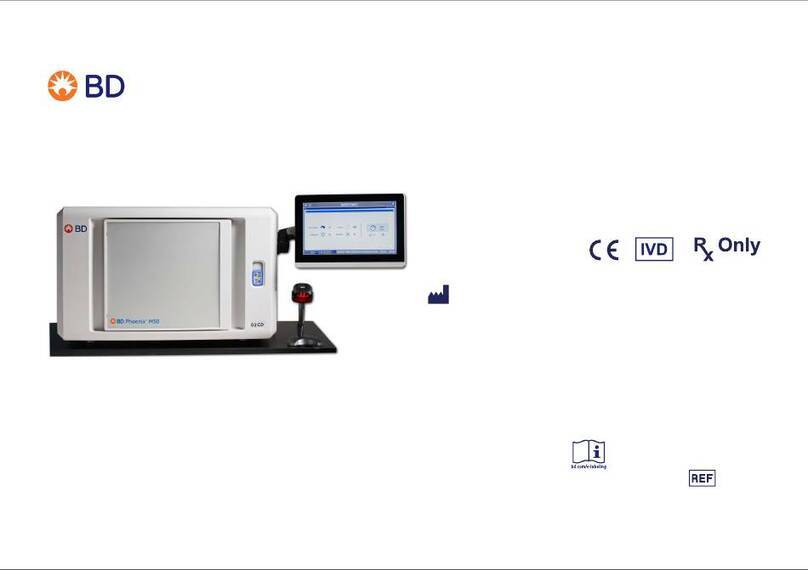
BD BACTEC MGIT 960 User manual

MA0120(11) (2022-04) • English 1
Icons Reference
Daily QC/Maintenance
Routine Operations
Error Codes
Error Station Resolution
Before using this Guide, it is important that
all users review the BD BACTEC™ MGIT™
Instrument User’s Manual for comprehensive
operating instructions, including important
warnings relating to operator safety.
Becton, Dickinson and Company
7 Loveton Circle
Sparks, Maryland 21152 USA
Becton Dickinson Ireland Ltd.
Donore Road, Drogheda
Co. Louth, A92 YW26
Ireland
BD Switzerland Sàrl
Terre Bonne Park – A4
Route de Crassier 17
1262 Eysins, Switzerland
Australian and New Zealand Sponsors:
Becton Dickinson Pty Ltd.
66 Waterloo Road
Macquarie Park NSW 2113, Australia
Becton Dickinson Limited
14B George Bourke Drive
Mt. Wellington Auckland 1060, New Zealand
BACTEC™ MGIT™
Instrument
Quick Reference Guide
(BD BACTEC™ MGIT™ 960 and BD BACTEC™ MGIT™ 320)
BD, the BD Logo, BACTEC, EpiCenter, and MGIT are trademarks of Becton, Dickinson and Company or its
affiliates. © 2022 BD. All rights reserved.
441743
445870

MA0120(11) (2022-04) • English 2
Station Statuses Drawer Statuses Configuration Instrument Statuses
Positive Drawer (A, B, C)
loading software
Set audible alert
volume Current date
Negative Drawer (A, B, C)
normal
Set instrument
number (960) Current time
Available Drawer (A, B, C)
offline
Set instrument
number (320) Main Status Screen
Ongoing Drawer (A, B, C)
testing Set report language Configuration
Anonymous Configuration Accession barcoding
enable/disable Maintenance
Error Set protocol length AST set (2 tubes, 3, 4,
etc.) System alerts
Blocked Set time Make default AST set Print reports
AST Ongoing set Set date AST Set Position 1 Temperature readings
AST Complete set Set time/date format AST Set Position 2,
etc.
Icons

MA0120(11) (2022-04) • English 3
Maintenance Alerts / Notification Actions / Navigation
Block / Unblock
stations System alert
Ok; confirm selection
or operation; activity
complete
Scan barcode
Block station Activity error or
instrument full
Cancel selection or
operation
Force station
available
Unblock station
Problem with
storage media or
no storage media
is inserted
Increase value or
scroll up
Force set
available
Copy data to
storage media
Insert storage
media
Decrease value or
scroll down Disable
Update software
Power was
removed at this
time
Move to other field Enable
Replace calibrators;
replace single
calibrator
Power was
restored at this
time
Perform action Value can be
adjusted up/down
Replace all
calibrators Exit
(Other maintenance icons on p. 5)

MA0120(11) (2022-04) • English 4
Operations Operations Reports Reports
Remove ongoing
tubes Isolate number Unloaded Positive
Tubes
Confirm that Unloaded
Tube Report did not
print correctly
Identify anonymous
tubes
Remove completed
AST set
Unloaded Negative
Tubes
Resolve station
errors
(Other operations icons shown on
p. 6 – 7)
Unloaded Ongoing
Tubes
AST operations Unloaded AST Sets
AST set entry 1 From Main Status screen, select
the print reports soft key.
2 Select the desired report
soft key.
For Unloaded Tubes reports, you
must select a soft key to confirm
that the report did or
did not print okay.
For Instrument Inventory Report,
select a soft key for the
desired drawer.
Instrument Inventory (+
AST Set Inventory if
enabled)
Error/Alert
Default AST set is
shown Quality Control Negative Tube
Change AST set
definition
Confirm that Unloaded
Tube Report printed
correctly
Positive Tube /
Completed AST Set
Printing Reports Drawer Indicators

MA0120(11) (2022-04) • English 5
Maintenance
Check indictor lamps
1Make sure all drawers are closed. Select the maintenance soft key.
2Select the test indicators soft key.
3Select the test drawer indicators soft key. All three external lamps on all drawers should light, as well as the
instrument alarm indicator.
4Open drawer A. Soft key definitions now change to allow testing station status LEDs.
5Select the test green LEDs soft key. All the green LEDs at all the stations should light. If any does not, block those
station(s). Select the test green LEDs soft key again to extinguish the green LEDs.
6Select the test red LEDs soft key. All the red LEDs at all the stations should light. If any does not, block those
station(s). Select the test red LEDs soft key again to extinguish the red LEDs.
7Repeat the tests of red and green station status LEDs for drawers B and C (MGIT 960 only).
Check printer paper
• Add paper if needed.
Check temperatures
• Check the thermometer reading of the Temperature QC tube. If your manual readings are within +1.0/-2.0 °C of
37 °C, the controller and heaters are operating within the expected range. From the main status screen, select the
temperature soft key to access drawer temperature readings. Verify that the temperature is currently within 1.5 °C of
the manual reading for each of the drawers.
Print QC Report
• Select the print reports soft key, then select the QC Report soft key.
Monthly: Clean / Replace air filters (refer to User’s Manual Section 6.2.2.1)
Maintenance

MA0120(11) (2022-04) • English 6
Entering new MGIT tubes
1Take the new MGIT tubes to the instrument. Open the desired drawer. Select the tube entry
soft key (left).
2Scan the tube’s barcode label.
If Accession Barcoding is enabled, first the leftmost icon at left appears. Scan the tube barcode sequence
number. Next, the middle icon at left appears. Scan the accession barcode. If an accession barcode is not
available, select the accession barcode not available soft key (rightmost icon at left).
3The assigned station is shown in the main body of the display. In addition, the station LEDs of the
assigned station illuminates GREEN. Carefully insert the tube into the station.
4Repeat Steps 2–3 for each of the new cultures you want to enter.
Entering new AST tubes
1Take the AST tube sets to the instrument using the AST tube rack. Open the desired drawer. Select the
tube entry soft key.
2Scan the AST carrier’s barcode label.
If Accession Barcoding is enabled, the system expects an accession barcode to be scanned after the
AST carrier barcode. Scan the accession barcode if it is available. If it is not available, select the
accession barcode not available soft key.
3To change the AST set definition, select the change AST set definition soft key. Use the ▲ or ▼ key to
scroll through the available definitions for the scanned carrier size. (As you scroll, the default set is
indicated by a check mark in the main body of the display.)
4To change the isolate number, select the isolate number soft key. Use the ▲ key to increase or the ▼
key to decrease the isolate number.
5The assigned stations of the set are shown in the main body of the display. In addition, the station LEDs
of all the assigned stations for the set illuminate GREEN. Carefully insert the tube set into the indicated
stations. Make sure the Growth Control tube is leftmost of the tube set.
6Repeat Steps 2–5 for each of the AST sets you want to enter.
Entering new MGIT / AST tubes

MA0120(11) (2022-04) • English 7
Removing Tubes
To remove positive tubes:
1Open the desired drawer. Select the remove positive tubes soft key (left).
2All the positive stations illuminate with FLASHING GREEN, FLASHING RED indicators. Remove one of the positive
tubes and scan its barcode label. The LEDs at this station extinguish. Repeat to remove additional positive tubes.
To remove negative tubes:
1Open the desired drawer. Select the remove negative tubes soft key (left).
2All the final negative stations illuminate with FLASHING GREEN indicators.
3 To remove all negative tubes (batch removal), select the remove negatives – batch soft key (left). Remove all the
tubes in the indicated stations. The barcode scanner turns off, so you cannot scan any of the tube barcode labels. Do
not close the drawer until you have removed all the tubes in the FLASHING GREEN stations. When all negative tubes
are removed, select the OK soft key.
To remove negative tubes one at a time, remove the desired tubes and scan their barcode labels. Continue to remove
and scan all the desired individual negative tubes.
To remove completed AST sets:
1Open the desired drawer. Select the remove completed AST sets soft key.
2The first completed AST set stations illuminate with FLASHING GREEN indicators. Remove the carrier and scan its
barcode label. The LEDs at this station extinguish. Repeat to remove additional AST sets.
Removing +/–/AST Tubes

MA0120(11) (2022-04) • English 8
Code Meaning Corrective Action
(If the recommended actions do not correct the situation, refer to the User’s Manual or contact BD)
E01 Positivity Algorithms Reset Error occurs as a result of another error condition that went uncorrected.
E02 Temperature alarm Check current incubator temperature, room temperature, and thermometer tube. Keep drawers closed. Clean/
replace air filters. Remove instrument from direct sunlight/heat source.
E04 Flash cache error System encountered a software error. Save data to storage media and call BD.
E05 Calibration error A calibrator reading is out of tolerance. Check for debris/spilled media in instrument. If error recurs, replace
calibrator.
E06 Detector error Check for/remove object impeding motion of detector assembly. Reboot instrument and call BD.
E07 Power supplies high/low Contact your local BD representative for assistance. Do not reboot the instrument.
E08 Drawer voltage high/low Check line voltage. Clean/replace air filters. Reboot instrument. If error recurs, note any error sub-codes.
E09 No tests in over 4 hours Determine why tests have not occurred (e.g., power off, drawer openings interrupted testing, etc.). If none of the
above events happened, save data to storage media and call BD.
E10 Database corruption Database checksum test failed. Save data to storage media and call BD.
E11 Printer error Check printer paper (jammed or out), cable connections, power on, and online indicator.
E12 Station error Check that tubes are seated in stations. Determine why tube is missing from station. If the tube cannot be
located, select the force station available soft key.
E13 Power Failure Note power failure and restore times in instrument log (or print screen).
E30 Unexpected tube was scanned Locate the missing tube or press “force station available” soft key.
E31 Storage media error Insert blank, formatted storage media.
E32 Drawer full No available stations. Remove final negatives.
E33 Moved tube with no error Refer to User’s Manual.
E34 Update error Repeat software update.
Error Codes E01 – E34

MA0120(11) (2022-04) • English 9
E35 Incorrect drawer Tube just scanned belongs in another drawer. Open next drawer and scan tube barcode. Repeat until error
does not recur.
E37 Barcode scan order incorrect System expected a barcode sequence number and an accession barcode was scanned (or vice versa). Be sure
to scan the type of barcode the system expects.
E38 No storage media in drive Insert blank, formatted, write-enabled storage media in the storage media drive to save data to storage media.
E39 Storage media full, insert another Insert blank, formatted, write-enabled storage media in the storage media drive to complete the save data to
storage media function.
E40 Network error Start BD EpiCenter™ system.
E43 LIS parameter changed:
instrument must be restarted. Select OK soft key to implement changes or select not OK soft key to cancel changes.
E45 Drawer error A drawer is not fully closed. Close drawer.
E50 Internal software error System encountered a software error. Save data to storage media and call BD.
E92 AST Set Error Main error code for any station error in an AST set. Refer to User’s Manual for additional information.
Code Meaning Corrective Action
(If the recommended actions do not correct the situation, refer to the User’s Manual or contact BD)
Error Codes E35 – E92

MA0120(11) (2022-04) • English 10
Resolving Errors
This manual suits for next models
3
Table of contents
Other BD Laboratory Equipment manuals
Popular Laboratory Equipment manuals by other brands

Bio-Optica
Bio-Optica BEC150 Instructions for use

Parker Balston
Parker Balston NitroFlow60 Installation, operation and maintenance manual

Tianlong
Tianlong 96E user manual

GE
GE Frac-920 operating instructions

MELAG
MELAG Vacuklav 40 B+ Evolution user manual

VITAL SCIENTIFIC
VITAL SCIENTIFIC Vitalab Micro Service manual