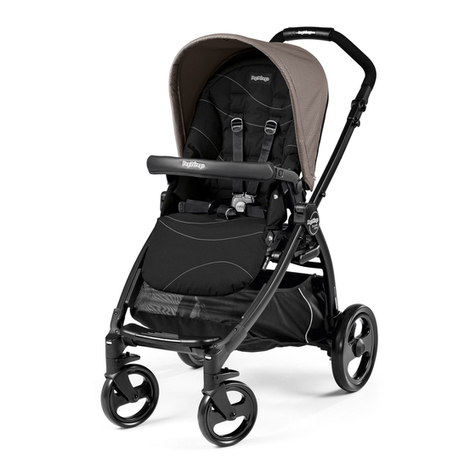
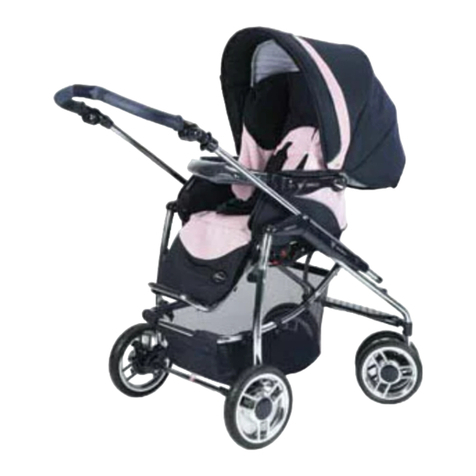
Bebecar IP-OP EL User manual

www.bebecar.com
instructions
instrucciones
instruções
instructions
gebruiksaanwijzing
istruzione
инструкции
pokyny
instrukcja obsługi
інструкція
használati utasítás
תוארוה
el
el el AT

MINIBOB EL LF EL EASYMAXI EL
el
el AT

s
g
y
n
s
i
t
l
e
l
m
o
r
EN 1888:2003
Conforms to Standards
Normas de Seguridad
Normas de Segurança
Exigences Sécurité
Conform
A Termék a Fenti
Szabványnak Megfelel
made in europe
system
www.bebecar.com
Style / Stylo / Multipla
Vector
Icon / M3
Rversus C / Rversus
RV3 / RC3
Prime / Ip-Op
Vector Duo
Act
Stylo Evolution
One & Two
Ip-Op Evolution / Ip-Op EL
TS • LF • LF CT
TS • LF • LF CT
TS • LF • LF CT
FS
FS (07)
LF • FS • LF CT
FS CT
FS EL
LF EL
FS CT EL • FS CTS EL
LF EL
MAXIBOBNEST • BOBCOT
BOBNEST • MINIBOB • MAXIBOBNEST • BOBCOT
BOBNEST • MINIBOB
BOBNEST • MINIBOB
BOBNEST • MINIBOB
BOBNEST • MINIBOB
MINIBOB
MINIBOB EL
BOBCOT EL
MINIBOB EL
MINIBOB EL
SEAT UNIT • ASIENTO • ASSENTO • בשומ תדיחי
SIEGE • ZITJE • AMACA • SEDACKA
ПРОГУЛОЧНЫЙ БЛОК •
SIEDZISKO SPACERÓWKI • СИДІННЯ
SPORT ÜLŐRÉSZ
CARRYCOT • CAPAZO • ALCOFA • היטבמא
NACELLE • DRAAGWIEG • NAVICELLA
ЛЮЛЬКА • GONDOLA •
HLUBOKÁ VANA • ПЕРЕНОСНЕ ЛІЖКО
MÓZESKOSÁR
COMPATIBILITY • COMPATIBILIDADE • COMPATIBILITÉ • COMPATIBILITEIT • COMPATIBILITA •
СОВМЕСТИМОСТЬ • KOMPATYBILNOŚĆ • KOMPATIBILITA • СУМІСНІСТЬ • ÖSSZEEGYEZTETHETŐSÉG
.
CHASSIS • CHASIS • הדלש
ONDERSTEL • TELAIO
ШАССИ • PODVOZEK •
PODWOZIE WÓZKA • ШАСІ
VÁZ
תומיאת
80 cm
76 cm 37 cm
el

1
23

7
4
5
6
8
NOTA
N.B.
NOTE
FIGYELEM

9
10
NOTA
N.B.
NOTE
FIGYELEM
11

12 13

15
14
NOTE
NOTA
ВНИМАНИЕ
UWAGA
POZOR
УВАГА
FIGYELEM
16

17

City
18
AT
City
Wheels
Ruedas
Rodas
Roues
Wielen
Колеса
Kółka
Kerekek
AT
(Z)
The AT wheel is not available in the UK
םילגלג
ריע
חטש
ריע
חטש

NOTE:
NOTA:
NOTA:
NOTE:
NOTA:
NOTA:
ВНИМАНИЕ:
UWAGA:
POZOR !
УВАГА:
The buttons on the swivel wheel forks should be facing outwards.
Los botones que están en las horquillas de la ruedas giratorias
deben de estar mirando hacía fuera.
Os botões das forquetas devem ficar virados para fora.
Les boutons sur les fourches des roues pivotantes doivent
être tournés vers l’extérieur.
De knoppen op de vorken van de zwenkwielen moeten naar
buiten gekeerd zijn.
I bottoni sulle forcelle delle ruote girevoli devono essere rivolti
all'esterno.
Красные кнопки на вилках вращающегося колеса должны
быть с внешней стороны.
Czerwone przyciski umieszczone się na na widelcach kół
obrotowych powinny znajdować się na zewnętrznej stronie.
Cervena tlaitka aretace prednich piruetnich kol musi smerovat
ven, nikoliv dovnitr konstrukce.
Червона кнопка на розвилці обертаючогося колеса повинна
знаходитися назовні.
ןקתהה לע תינוציח בכרומ תויהל ךירצ לגלגה ןקתה לעש םודאה רותפכה
FIGYELEM: A piros gombok a bolygósítható kerék villákon kifelé kell hogy
nézzenek.
GB
ES
PT
FR
NL
IT
RUS
CZ
PL
UKR
HUN
ISR

GB
ES
PT
FR
NL
IT
RUS
CZ
PL
UKR
ISR
Infant Car Seat
Silla de Auto
Assento Auto
Siége Auto
Autozitje
Seggiolino auto
Автокресло для младенца
Dziecięcy fotelik
Samochodowy
Autosedacku
Автосидіння для малюка
Hordozó
The Infant Car Seat should be facing rearwards when used on chassis.
La silla de auto debe ser colocada mirando hacia atrás, cuando se usa en
el chasis.
O Assento Auto deve ser colocado virado para trás, quando utilizado no
chassis.
Le siège doit toujours être placé vers la maman si employé sur le chassis.
Het autozitje moet altijd naar de moeder gekeerd zijn bij gebruik op het
onderstel.
Il Seggiolino auto, quando è posto sul telaio, deve stare fronte-mamma.
При использовании автокресла для малышей на шасси, сидение должно
быть установлено против хода движения коляски.
W przypadku instalacji na tym podwoziu, dz ęcy fotelik samochodowy ieci
powinien być ustawiony odwrotnie do kierunku jazdy.
Autosedacku umistete na podvozku kocarku vzdy smerem k vam !
При використанні автосидіння для малюків на шасі, сидіння повинно
бути встановлене проти ходу руху коляски.
הלגעה תדלש לע אסכה תא םיחינמ רשאכ אמאה יפלכ םינפה םע הנפומ תויהל ךירצ תוחיטבה אסכ
A hordozót menetiránnyal ellentétesen helyezze a vázra.
HUN
בכרל קוניתל יתוחיטב אסכ

•
•
•
•
•
•
•
•
•
•
•
seat
asiento
assento
siège
zitje
passeggino
прогулочный блок
siedzisko spacerówki
sedacka
сидіння
sport rész
GB
ES
PT
FR
NL
IT
RUS
CZ
PL
UKR
ISR
Before folding IP-OP chassis with LF EL Seat, please return the footrest to
the horizontal position.
Antes de plegar el chasis Ip-op con la hamaca puesta, levante el reposapies
hacía arriba.
Antes de fechar o chassis Ip-Op com o assento LF EL, levante o pousa-pés
para a posição horizontal.
Avant de replier le chassis Ip-Op avec le siège LF EL, il faut mettre le
repose-pieds droit.
Alvorens het Ip-Op onderstel te plooien met het LF EL zitje, moet u eerst de
voetsteun rechtop plaatsen.
Prima di chiudere il telaio IP-OP con il passeggino di tipo LF EL, ricordarsi di
alzare il poggiapiedi.
Перед тем, как сложить шасси IP-OP сначала поднимите подставку для
ног кверху.
Przed złożeniem podwozia IP-OP z siedziskiem LF EL należy najpierw
ustawić podnóżek w położeniu do przodu.
Drive nez zacnete skladat podvozek se sedackou LF EL, je nutne zvednout
operku nohou dle vyobrazeni, aby se zabranilo poskozeni sedacky.
Rive nez zacnete skladat podvozek se sedackou LF EL, je nutne zvednout
operku nohou dle vyobrazeni, aby se zabranilo poskozeni sedacky.
LF ELMielőtt összecsukná az IP-OP vázat az (egyenesre fektethető) sport
résszel kérjük állítsa vissza a lábtartót vízszintes helyzetbe.
.הלעמל םיילגרה תנעשמ תא םירהל שי תלגע לופיק ינפל
IP-OP
HUN
LF EL

AT wheels are similar to bicycle wheels in that they are fitted with inner tubes. Use a car foot operated pump or
visit your nearest service station to inflate the tyres. Replacement or
repair can be made through any reputable cycle outlet. Care must be taken when the AT wheels are used on
certain types of floor surfaces such as vinyl, polished wood or any light coloured floor covering or carpet. The
tyres could leave marks that may be difficult to remove. After using the AT wheels on the beach, ensure all sand
is cleaned from between the wheels and axles. It may cause undue wear. Normal tire wear and tear is not
covered under guaranty.
Las ruedas del modelo AT son similares a las ruedas de bicicleta en que llevan cámara de aire. Para inflar la
cámara de esta rueda, utilice un bombin de moto o llevar la rueda a una gasolinera (para inflarla).
Repuestos o reparaciones se pueden conseguir en cualquier tienda o
almacén de bicicletas. Hay de tener cuidado cuando utilice las ruedas AT en ciertos tipos de superficies como
vinilo, parquet de madera o cualquer tipo de suelo o moqueta de color claro. Las ruedas pueden dejar marcas
que a veces son muy difíciles de quitar. Después de utilizar las ruedas en la playa, asegúrese limpiar bien los
ejes y entre las ruedas todo el arena acumulado. El arena puede causar un desgaste más rápido. Desgaste
normal de los neumáticos no está cubierto por la garantia.
As rodas do modelo AT são idênticas às rodas de bicicleta que usam câmara-de-ar. Para insuflar as mesmas,
utilize uma bomba de pedal para automóveis ou uma estação de serviço mais próxima.
Substituições e reparações podem ser efectuadas em qualquer
loja de bicicletas. Será necessário um cuidado especial quando utilizar a cadeira AT em certos tipos de
superfícies, tais como vinil, madeira envernizada ou qualquer tipo de piso e carpete de côr clara. As rodas
podem deixar marcas difíceis de remover. Depois de utilizar a cadeira na praia, limpe toda a areia acumulada
entre as rodas e o eixo. A areia pode causar um maior desgaste. A garantia não cobre o desgaste normal dos
pneus.
Les roues AT sont semblables aux roues de vélo, car elles sont équipées de chambre à air. Pour gonfler les
pneus, utiliser une pompe à vélo avec valve Européenne ou adressez-vous à la station service ou le marchand
de vélos le plus proche. Les réparations et les
remplacements des pièces peuvent être faits dans les magasins spécialisés dans le cycle. Des précautions
doivent être prises pour l´utilisation des roues AT sur certaines surfaces fragiles (ex: le vinyl, le parquet, la
moquette...). Les pneus peuvent laisser des marques difficiles à enlever. Après un passage à la plage,
veuillez vous assurer que les roues et l´essieu soient bien nettoyés, sinon cela pourrait entrainer une usure
rapide des roues. Une utilisation non conforme aux instructions n´est pas assurée par la garantie.
AT wielen zijn dezelfde als fietswielen: er zit een binnenband in. Gebruik een voetpomp (auto) of ga naar uw
benzinestation om de banden op te pompen. Pomp ze niet te hard op.
Voorzichtigheid is geboden bij het gebruik op
bepaalde ondergronden zoals vinyl, gepolijst hout of lichtgekleurde vloerbekleding of tapijt. De banden
kunnen strepen nalaten die moeilijk te verwijderen zijn. Na gebruik in het zand moeten de AT wielen goed
gereinigd worden: vergewis U ervan dat het zand tussen de wielen en de assen verwijderd is. Dit kan onnodige
slijtage veroorzaken. Normale bandenslijtage is niet onder waarborg.
Do not over-inflate. (22psi / 1,5bar).
No infle la
rueda demasiado. (22psi / 1,5bar).
Não insuflar demasiado. (22psi / 1,5bar).
Attention de ne pas trop gonfler. (22psi / 1,5bar).
Vervanging of herstelling kan
gebeuren bij een goede fietsenmaker. (22psi / 1,5bar).
W H E E L S • R U E D A S • R O D A S • R O U E S • W I E L E N
AT
AT
AT
AT
GB
ES
PT
FR
NL

Le Ruote AT sono simili alle ruote di bicicletta in quanto sono dotati di camere d'aria. Si può utilizzare una
pompa d’auto o visitare la stazione di servizio più vicina per gonfiare le gomme.
Sostituzione o riparazione può essere effettuata tramite qualsiasi negozio di biciclette. Si
deve prestare attenzione quando le ruote sono utilizzati su alcuni tipi di pavimenti come il vinile, legno lucidato
o di qualsiasi pavimenti o moquette leggermente colorati. Le gomme potrebbero lasciare segni che possono
essere difficili da rimuovere. Dopo aver usato le ruote AT sulla spiaggia, assicurarsi che tutta la sabbia
incastrata nelle ruote e gli assi è stata portata via. La sabbia incastrata può causare usura eccessiva. La
normale usura dei pneumatici non sono coperti da garanzia.
Колеса АТ очень похожи на колеса велосипеда тем, что они снабжены камерами. Для того, чтобы
надуть эти шины, используйте автомобильный ножной насос или посетите ближайший автосервис.
Замена или ремонт шин осуществляются в сервис-центре.
Необходимо соблюдать осторожность, когда колеса АТ используются на некоторых типах
поверхностей пола, таких как винил, полированное дерево или на любом светлом половом покрыртии
или ковре. Шины могут оставлять следы, которые будет сложно удалить. После использования колес
АТ на пляже, удостоверьтесь, что весь песок вычищен между колес и полуосей. Это может привести к
чрезмерному износу. При правильном использовании в течение гарантийного срока износ шины не
можут превысить норму.
Kółka AT są podobne do kół rowerowych z tym, że wyposażone zostały one w wewnętrzne dętki. W celu
napompowania należy posłużyć się pompką rowerową.
Wymianę lub naprawę wykonuje się analogicznie jak przy dętkach rowerowych. W przypadku jeżdżenia po
podłogach z PCV, drewnianych i pastowanych, podłogach o jasnych kolorach, a także dywanach należy
zachować ostrożność, gdyż opony mogą pozostawiać trudne do usunięcia ślady. Po jeździe po plaży, drogach
piaszczystych należy zwrócić uwagę, aby piasek nie dostał się pomiędzy osie a piasty. Może on doprowadzić
do przedwczesnego zużycia. Gwarancja nie obejmuje normalnego zużycia opon, a także uszkodzeń
wynikających z przebicia lub przecięcia.
Колеса АТ як і колеса велосипеду мають внутрішні камери. Для того щоб накачати колеса
використовуйте ніжний автомобільний насос, або зверніться у найближчу сервісну станцію.
Заміна або ремонт може бути зроблено у будь-якому центрі з продажу.
Необхідно бути обережними при використанні коляски оснащеної колесами АТ на деяких поверхнях,
таких, наприклад, як: вініл, полірована деревина, або будь яких інших світлих поверхнях та килимах.
Шини можуть залишити сліди, які важко видалити. Після використання коляски, оснащеної колесами
АТ, на пляжі, переконайтесь, що між колесами та віссю не залишився пісок. Це може спричинити
пошкодження. Нормальне зношення шин, або їх розрив не покриті гарантією.
Az AT kerekek hasonlóan a kerékpár kerekekhez belső csővel rendelkeznek. Vagy autós lábpumpával vagy a
legközelebbi benzinkúton található kerék nyomás ellenőrzővel tudja felfújni ezeket a kerekeket. Soha ne fújja
túl a kerekeket. . Cserealkatrészt illetve javítást bármely
elismert kerékpár üzlet is végezhet a terméken. Néhány padlózatokon az AT kerekek nehezen eltávolítható
nyomot hagynak ezért kérjük a polírozott fa, a világos színű vagy szőnyeggel takart padlózaton óvatosan
használja ezeket a kerekeket. Homokos tengerparton történt használat után kérjük bizonyosodjon meg arról,
hogy eltávolította-e az összes homokot a kerekek és a tengelyek közül. Ellenkező esetben hamarabb
elhasználódik a babakocsi. A normál gumikopásra és elhasználódásra nem érvényes a garancia.
Non gonfiare troppo le ruote
(22psi / 1,5 bar).
Не
перекачивайте (22psi / 1,5 bar).
Nie pompować ich zbyt mocno (22psi/1,5 bar).
Не
перекачуйте колеса! (1,5бара )
A nyomás ne legyen több mint: (22psi / 1,5bar)
R U O T E • К О Л Е С А • K Ó Ł K A • К О Л Е С А • K E R E K E K
IT
RUS
POL
UKR
HUN

PORTUGAL
BÉBÉCAR - UTILIDADES PARA CRIANÇA, S.A.
RUA DOMINGOS OLIVEIRA SANTOS, 62
APARTADO 8
4509-903 CALDAS DE S.JORGE (PORTUGAL)
TELEF: 256 910400
FAX: 256 911346
E-mail: info@bebecar.com
www.bebecar.com
FABRICADO EM PORTUGAL
GREAT BRITAIN
BÉBÉCAR UK LTD.
ROBERTSON HOUSE, NORTH WALSHAM.
NORFOLK, NR28 0BX
TELE: SALES 01692 408801
SERVICE 01692 408807
FAX: 01692 500176
E-mail: sales@bebecar.co.uk
www.bebecar.co.uk
MADE IN PORTUGAL
ESPAÑA
BÉBÉCAR ESPAÑOLA, S.L.
C/ MARCHES, S/N PARCELA 74
APARTADO DE CORREOS Nº 1115
POLIGONO INDUSTRIAL
45007 TOLEDO (ESPAÑA)
TELEF: (925) 241474
FAX: (925) 241633
E-mail: [email protected]
FABRICADO EN PORTUGAL
FRANCE
BÉBÉCAR FRANCE, S.A.R.L..
ZA LES PORTES DE LA FORÊT
3, ALLÉE DES PORTES DE LA FORÊT
77090 COLLEGIEN (FRANCE)
TELEF: (01) 64628400
FAX: (01) 60376998
E-mail: service.france@bebecar.com
FABRIQUÉ AU PORTUGAL
made in europe
ITX000000425 - 09/2011 - DDH 0055/00
el

GB
READ THESE INSTRUCTIONS CAREFULLY BEFORE
USE AND KEEP THEM FOR FUTURE REFERENCE
YOUR CHILD’S SAFETY MAY BE AFFECTED IF YOU DO NOT FOLLOW THESE INSTRUCTIONS
WARNING: This pushchair has been designed to be operated as shown in the instructions supplied.
Not to do so may cause damage and render your guarantee void.
1 - TO UNFOLD: When opening the pushchair with the adjustable handle, ensure that the handle is in line with the main
handle.
2 - Pull gently on handle of pushchair, and press down on metal tube of pushchair with your foot as indicated by the
figure, until primary locks engage with a click. The secondary lock will automatically engage.
3 - STEERING - NON-STEERING: The front wheels can be used in either mode.
Slide lever (on both sides of chassis) to the upwards position for steering, as indicated in the figure.
For non-steering wheels press red button and lever will slide in a downward position.
NB: When using your pushchair on rough ground we recommend non-steering mode.
4 - BRAKE OPERATION: To apply brake, press down on pedal.
5 - To release brake, pull up the pedal.
6 - TO REMOVE THE REAR WHEEL: Press lever rearwards and at the same time pull the wheel away from the axel
housing.
7 - TO FIT THE REAR WHEELS: Place axel in axel housing and press inwards.
Check by pulling wheel to confirm latching of the axel.
8 - TO REMOVE THE FRONT WHEEL: N.B. The front wheels of this chassis can only be removed if the steering button
is in a upwards position.
Press red button and at the same time pull the wheel away from the front leg.
9 - TO FIT THE FRONT WHEELS: N.B. The front wheels of this chassis can only fitted if the steering button is in a
upwards position.
Press red button and at the same time push wheel housing into front leg, until it locks into position.
Check by pulling wheel to confirm latching of the wheel housing.
10 - ADJUSTABLE HANDLE HIGHT: Press the two buttons simultaneously and rise or lower the handle bar as required.
11 - TO FIT CARRYCOT: Place carrycot base on chassis attachment device “easylock”. Lock will automatically engage.
Warning: Check that the pram body attachment devices are correctly engaged before use.
TO REMOVE CARRYCOT: Push in button on base of the carrycot and simultaneously lift carrycot away from chassis
frame.
12 - TO FIT SEAT: Seat may be forward or rear facing. Place seat on chassis attachment devise “easylock”. Lock will
automatically engage. Warning: Check that the seat unit attachment devices are correctly engaged before use.
TO REMOVE SEAT: Push in button on both side of seat unit and lift seat away from chassis frame.
13 - TO FIT AUTO SEAT: Place auto seat on chassis attachment devise “easylock”. Lock will automatically engage.
Warning: Check that the auto seat attachment devices are correctly engaged before use.
TO REMOVE AUTO SEAT: Push in button on front of seat unit and lift auto seat away from chassis frame.
14 - FOLD PUSHCHAIR: N.B: Please remember to lock the swivel wheels in the non-steering mode before folding chair.
When folding the pushchair ensure that the adjustable handle is in line with the main handle.
To fold, firstly press the red button and simultaneously, turn the handle collar in the direction of the "FOLD" and the
chair will begin to close.
15 - Operate secondary safety device by pulling the plastic tab.
Tilt the chair forward and continue the folding action until the chassis is fully closed.
16 - TO STORE PUSHCHAIR: Fold adjustable handle as shown in the figure.
17- BASKET: To attach the basket, pass the webbing and press-stud through the frame as shown.
Attach the back edge of the basket around the rear cross member.

GB
18 - SPECIAL FEATURE OPTIONAL:
Positioning of the axle for the AT variant: (The AT wheel is not available in the UK)
Press metal pins (Z) on rear legs of chassis and simultaneously slide suspension housing of wheels until the metal pins (Z)
fit into the bottom holes of each suspension housing. Check by pulling suspension to confirm latching.
Positioning of the axle for City variant:
Press metal pins (Z) on rear legs of chassis and simultaneously slide suspension housing of wheels until the metal pins (Z)
fit into the top / middle holes of each suspension housing.
Check by pulling suspension to confirm latching.
WARNING - A CHILD´S SAFETY IS YOUR RESPONSIBILITY
Conform to EN 1888:2003
This vehicle is intended for children from 0 months of age and up to maximum weight 15kg.
WARNING It may be dangerous to leave your child unattended.
WARNING: Ensure that all locking devices are engaged before use.
WARNING: Do not add a mattress thicker than 20 mm.
WARNING: Use a harness as soon as your child can sit unaided.
Never carry more children in the pushchair than it was design for.
It may be unsafe to use accessories, e.g. child seats, bag hooks, rain cover etc. other than those approved by BÉBÉCAR.
It may be unsafe to use replacement parts, other than those supplied or approved by BÉBÉCAR.
WARNING: Any load attached to the handle affects the stability of the pushchair.
Always apply brakes when loading or unloading child.
WARNING: Always use the crotch strap in combination with the waist belt.
Additional attachment points called ‘D’ rings are provided on the seat lap strap and in the centre of the carrycot for the
attachment of a separate safety harness.
WARNING: Check that the pram body or seat unit attachment devices are correctly engaged before use.
WARNING: This product is not suitable for running or skating.
The child should be clear of moving parts while making adjustments.
This vehicle requires regular maintenance by the user.
Overloading, incorrect folding and the use of non-approved accessories may damage or break this vehicle.
If a shopping basket is supplied, the maximum permissible load is 5kg, evenly distributed.
Never allow a child to attempt to operate this vehicle. Remember, it is not a toy.
It is not advisable to have sources of heat (open electric or gas fires etc) near this product.
This vehicle should be regularly checked for wear.
Wheels, swivel units and other moving parts of the chassis should be kept free of accumulated dirt and should be regularly
lubricated with a silicon spray. Do not use oil.
Please remember that this vehicle is not waterproof. You must use a BÉBÉCAR PVC raincover, and that raincover must
be raised or removed when inside to give adequate ventilation. After use in wet weather, ensure both the vehicle and PVC
raincover are thoroughly dried and aired before storage or further use. Dry metal and plastic parts with a soft cloth.
Read and keep the instructions supplied.
Note: For washing instructions and Service Agents Network see separate list.
GUARANTEE
All BÉBÉCAR products have a period of guaranteed subject to the local law of the country in which it is being sold, from the
date of purchase, against mechanical defects which will be repaired, or parts replaced free of charge within this period. This
is conditional upon the product having been used for the purpose for which it was designed and no liability is accepted for
defects arising out of fair wear and tear, undue force, neglect or accident.
In furtherance of their policy of continuous product development BÉBÉCAR
reserve the right to make specification and design changes.

ES
IMPORTANTE - LEER ATENTAMENTE Y
GUARDAR PARA FUTURO USO
RECUERDE QUE LA SEGURIDAD DE SU HIJO ES DE SU ENTERA RESPONSABILIDAD
ADVERTENCIA: Esta silla ha sido diseñada para el uso según las instrucciones proporcionadas, si no la usa según las
instrucciones, puede causar daños y hacer su garantía nula.
1 - PARA ABRIR: Cuando abre una silla con manillar ajustable, asegúrese que el manillar esté en línea con el resto del
chasis (posición de regulación central).
2 - Tire suavemente del manillar de la silla y empuje el tubo metálico hacía abajo con el pie como indica el dibujo hasta
que encaje el sistema de seguridad con un clic; cuando la silla esté completamente abierta, el sistema de seguridad
secundario se encajará automáticamente.
3 - GIRATORIO - NO GIRATORIO: Las ruedas delanteras se pueden usar en cualquiera de los dos modos.
Deslice las palancas (localizado en ambos lados) hacía arriba para modo giratorio como indica el dibujo.
Para modo no giratorio, apriete el botón rojo y la palanca deslizará hacia la posición baja.
Nota: cuando use su silla en suelo áspero, recomendamos el modo no giratorio.
4 - OPERACIÓN DEL FRENO: Para poner los frenos de las ruedas traseras, apretar hacia abajo los pedales.
5 - Para quitar, levantar los pedales.
6 - PARA DESMONTAR LA RUEDA TRASERA: Apriete la palanca al mismo tiempo que tire de la rueda hacía atrás y
fuera del enganche de eje.
7 - PARA MONTAR LAS RUEDAS TRASERAS: Ponga el eje en su enganche y empuje hacía dentro.
Para asegurarse que este bien enganchada, tire de la rueda hacía fuera.
8 - PARA EXTRAER LAS RUEDAS DELANTERAS: Nota: Las ruedas delanteras de este chasis solo se pueden
desmontar si el botón está en posición superior-modo no giratorio.
Presione el botón rojo y al mismo tiempo separe la rueda de la pata delantera.
9 - PARA ENCAJAR LAS RUEDAS DELANTERAS: Nota: Las ruedas delanteras de este chasis solo se pueden montar
si el botón está en posición superior-modo no giratorio.
Presione el botón rojo y al mismo tiempo introduzca el alojamiento de la rueda en el perno de la pata delantera, hasta
que esta encaje en su posición.
Verifique tirando de la rueda para confirmar que ha enganchado el perno en el alojamiento de la rueda.
10 - ADJUSTE DE ALTURA DE MANILLAR:
Apriete los dos botones simultáneamente y levantar o bajar el manillar como requiera.
11 - PARA ACOPLAR EL CAPAZO Ponga los enganches de la base del capazo sobre el sistema “Easylock”.
El enganche se encajará automáticamente. Advertencia: Asegúrese que todos los enganches del capazo estén
completamente anclados antes de su uso.
PARA QUITAR EL CAPAZO: Pulse el botón en la base del capazo a la vez que levanta el capazo del chasis.
12 - PARA ACOPLAR LA HAMACA: La hamaca puede estar mirando hacía adelante o atrás.
Ponga los enganches de la hamaca sobre el sistema “Easylock” y se enganchará automáticamente
Advertencia: Asegúrese que todos los enganches del asiento estén completamente anclados antes de su uso.
PARA QUITAR LA HAMACA: Pulse los botones en ambos lados de la hamaca a la vez que levanta la hamaca del
chasis.
13 - PARA ACOPLAR LA SILLA DE AUTO: Ponga los enganches de la silla de auto sobre el sistema “Easylock” y se
enganchará automáticamente.
Advertencia: Asegúrese que todos los enganches de la silla estén completamente anclados antes de su uso.
PARA QUITAR LA SILLA DE AUTO: Pulse el botón en la parte delantera de la silla a la vez que levanta la silla del
chasis.
14 - PARA PLEGAR Y CERRAR LA SILLA:
NOTA: Por favor, recuerde poner las ruedas giratorias en posición fija antes de plegar la silla.
Cuando pliegue la silla, asegúrese que el manillar ajustable esté en línea con el resto del chasis (posición de
regulación central).
Primero, apriete el botón rojo y luego, simultáneamente, gira la empuñadura en la dirección de la flecha “FOLD” y la
silla empezará cerrar.
15 - Opere el sistema de seguridad secundario tirando del pomo plástico. Incline la silla hacia adelante y continué la
acción de plegar hasta que el chasis este completamente cerrado.
16 - PARA GUARDAR LA SILLA: Plegar el manillar ajustable como demostrado en el dibujo.
17 - CESTO: Para colocar el cesto, pasar la red y el automático por el chasis como demostrado y enganchar por debajo
del borde delantero del tapizado de la silla como indicado.
Enganchar el borde trasero del cesto por la cruzeta trasera de la silla.

ES
18 - Opción Especial de Ruedas:
Para posicionar el eje para la rueda AT:
Presione los pernos metálicos (Z) localizados en las patas traseras y simultáneamente deslice el alojamiento de la
suspensión hasta que los pernos (Z) encajen en los agujeros inferiores de cada alojamiento.
Verifique tirando de la suspensión para asegurarse que haya encajado correctamente.
Para posicionar el eje para la rueda City:
Presione los pernos metálicos (Z) localizados en las patas traseras y simultáneamente deslice el alojamiento de la
suspensión hasta que los pernos (Z) encajen en los agujeros superiores / medios de cada alojamiento.
Verifique tirando de la suspensión para asegurarse que haya encajado correctamente.
ADVERTENCIA - LA SEGURIDAD DE SU HIJO ES SU RESPONSABILIDAD
Conforme con la norma EN 1888:2003
Este coche ha sido diseñado para niños desde los 0 meses de edad hasta que pese unos 15kg.
ADVERTENCIA: Puede ser peligroso dejar al niño sin vigilancia.
ADVERTENCIA: Asegurarse de que todos los dispositivos de cierre están engranados antes del uso.
ADVERTENCIA: No usar un colchón más grueso de 20 mm.
ADVERTENCIA: Usar un arnês tan pronto como el niño se pueda sentar por sí mismo.
Jamás lleve más niños en esta silla que los para que ha sido diseñada.
Puede ser peligroso usar algunos accesorios por ejemplo sillas de niño, coberturas de lluvia, etc. menos los aprobados por
BÉBÉCAR.
Puede ser peligroso usar piezas de repuestos que no sean las proporcionadas ó aprobadas por BÉBÉCAR.
ADVERTÊNCIA: Cualquier carga sujeta al manillar afecta a la estabilidad del cochecito / silla.
Siempre ponga los frenos cuando introduzca o cuando saque el niño de la silla.
ADVERTENCIA: No utilice nunca la tira entrepiernas sin el cinturón abdominal.
ADVERTENCIA: Este coche debe de ser inspeccionado a menudo, también compruebe que todos los cierres, cintas,
puntos de ajuste y partes móviles están seguras y funcionan bien.
ADVERTENCIA: Comprobar que los dispositivos de sujeción del capazo y del asiento están correctamente activados antes
de su uso.
ADVERTENCIA: Este producto no es adecuado para correr o patinar.
El niño no debe acercarse a las piezas movibles cuando haga los ajustes.
Este coche requiere mantenimiento regular por el consumidor.
Sobrecargar, plegar incorrectamente y uso de accesorios no aprobados pueden causar daños ó roturas de este coche.
Si está colocado un cesto el peso máximo permitido es 5kg de carga distribuidos igualmente.
Jamás deje a un niño intentar operar este coche. Recuerde, no es un juguete.
Mantenga este producto lejos llamas y lumbres.
Las ruedas y ejes deben de estar libres de tierra y lubricados con spray de silicona, no use aceite.
Recuerde que este coche por si solo no protege contra la lluvia, utilice una cobertura de lluvia BÉBÉCAR, recuerde levantar
o desmontar dicha cobertura en interiores para proporcionar una ventilación adecuada.
Después de usar en tiempo lluvioso, asegúrese que el coche y la cobertura de lluvia estén secos y ventilados
completamente antes de guardar o usar de nuevo.
Seque las piezas metálicas y plásticas con un paño suave.
Leer y guardar las instrucciones proporcionadas.
Nota: Para instrucciones de lavado, ver instrucciones aparte.
GARANTIA
Todos los productos BÉBÉCAR están garantizados por el período establecido en la normativa vigente contra defectos de
fabricación. Los mismos serán reparados o sustituidas las piezas averiadas durante ese periodo. BÉBÉCAR no aceptará
reclamaciones por daños causados por resultado de una utilización contraria a las instrucciones, bien como negligencias o
accidentes. En continuación de su política de desarrollo constante de sus productos,
BÉBÉCAR se reserva el derecho de modificar dibujos o especificaciones de sus productos.
This manual suits for next models
1
Table of contents
Languages:
Other Bebecar Stroller manuals
Bebecar
Bebecar ACT EasyLock User manual
Bebecar
Bebecar Spot User manual

Bebecar
Bebecar Raider AT+ User manual
Bebecar
Bebecar MINIBOB EasyLock User manual
Bebecar
Bebecar Style AT User manual
Bebecar
Bebecar one&two User manual
Bebecar
Bebecar Icon User manual
Bebecar
Bebecar i-TOP User manual
Bebecar
Bebecar NOVO User manual
Bebecar
Bebecar MCity User manual

