Bego VarseoWax User manual
Partners in Progress
* This symbol is a commercial designation/registered trademark of a company which is not part of the BEGO company group.
3D Printing Guide
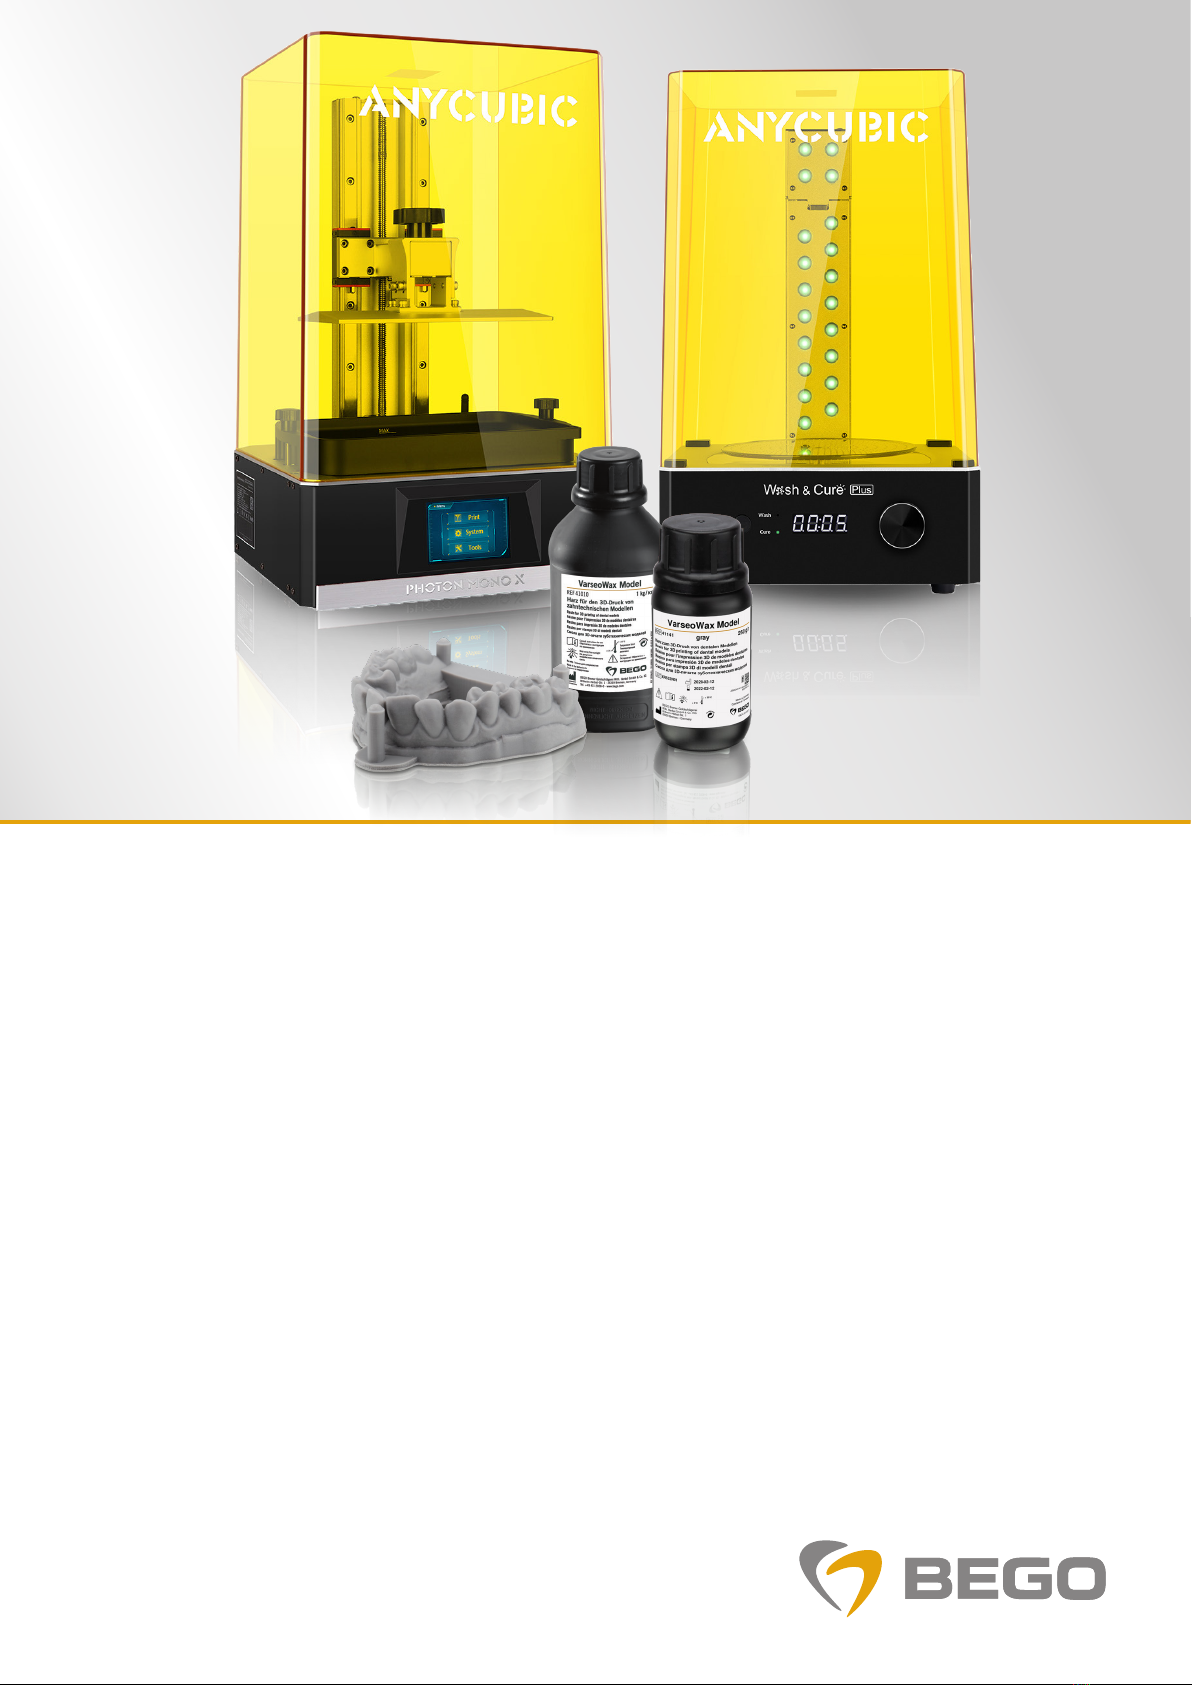
VarseoWax Model &
Anycubic* Photon Mono X
2
Contents
1
Installation of the 3D Printer 3
2
Installation Nesting Software “Photon Workshop” 4
3
Creating 3D Printing Parameters for VarseoWax Model 5
4
Creating the Support Structure Parameters for VarseoWax Model 7
5
Nesting 8
6
3D Printing 9
7
Post-Processing 10
Pictures and illustrations are exemplary. Colors, symbols, design, and information on the labels and/or packaging shown may differ from reality.

3
1. Installation of the 3D Printer
Please install the Anycubic* Photon Mono X 3D printer according to
the manufacturer‘s instructions (see instructions for use).
Recommendations:
•Place the 3D printer in an area protected from direct sunlight and
dust
•Set the light intensity on the printer to 100%:
Menu Tool Settings (cog at the top right of the image)
Enter 100 % Enter
• Calibrate the stamp: follow the steps in the instruction manual
• Make sure that the protective foil of the resin tray is
is removed
• Tighten the screws of the stamp evenly in diagonally opposite
order
* This symbol is a commercial designation/registered trademark of a company which is not part of the BEGO company group.
Pictures and illustrations are exemplary. Colors, symbols, design, and information on the labels and/or packaging shown may differ from reality.
4
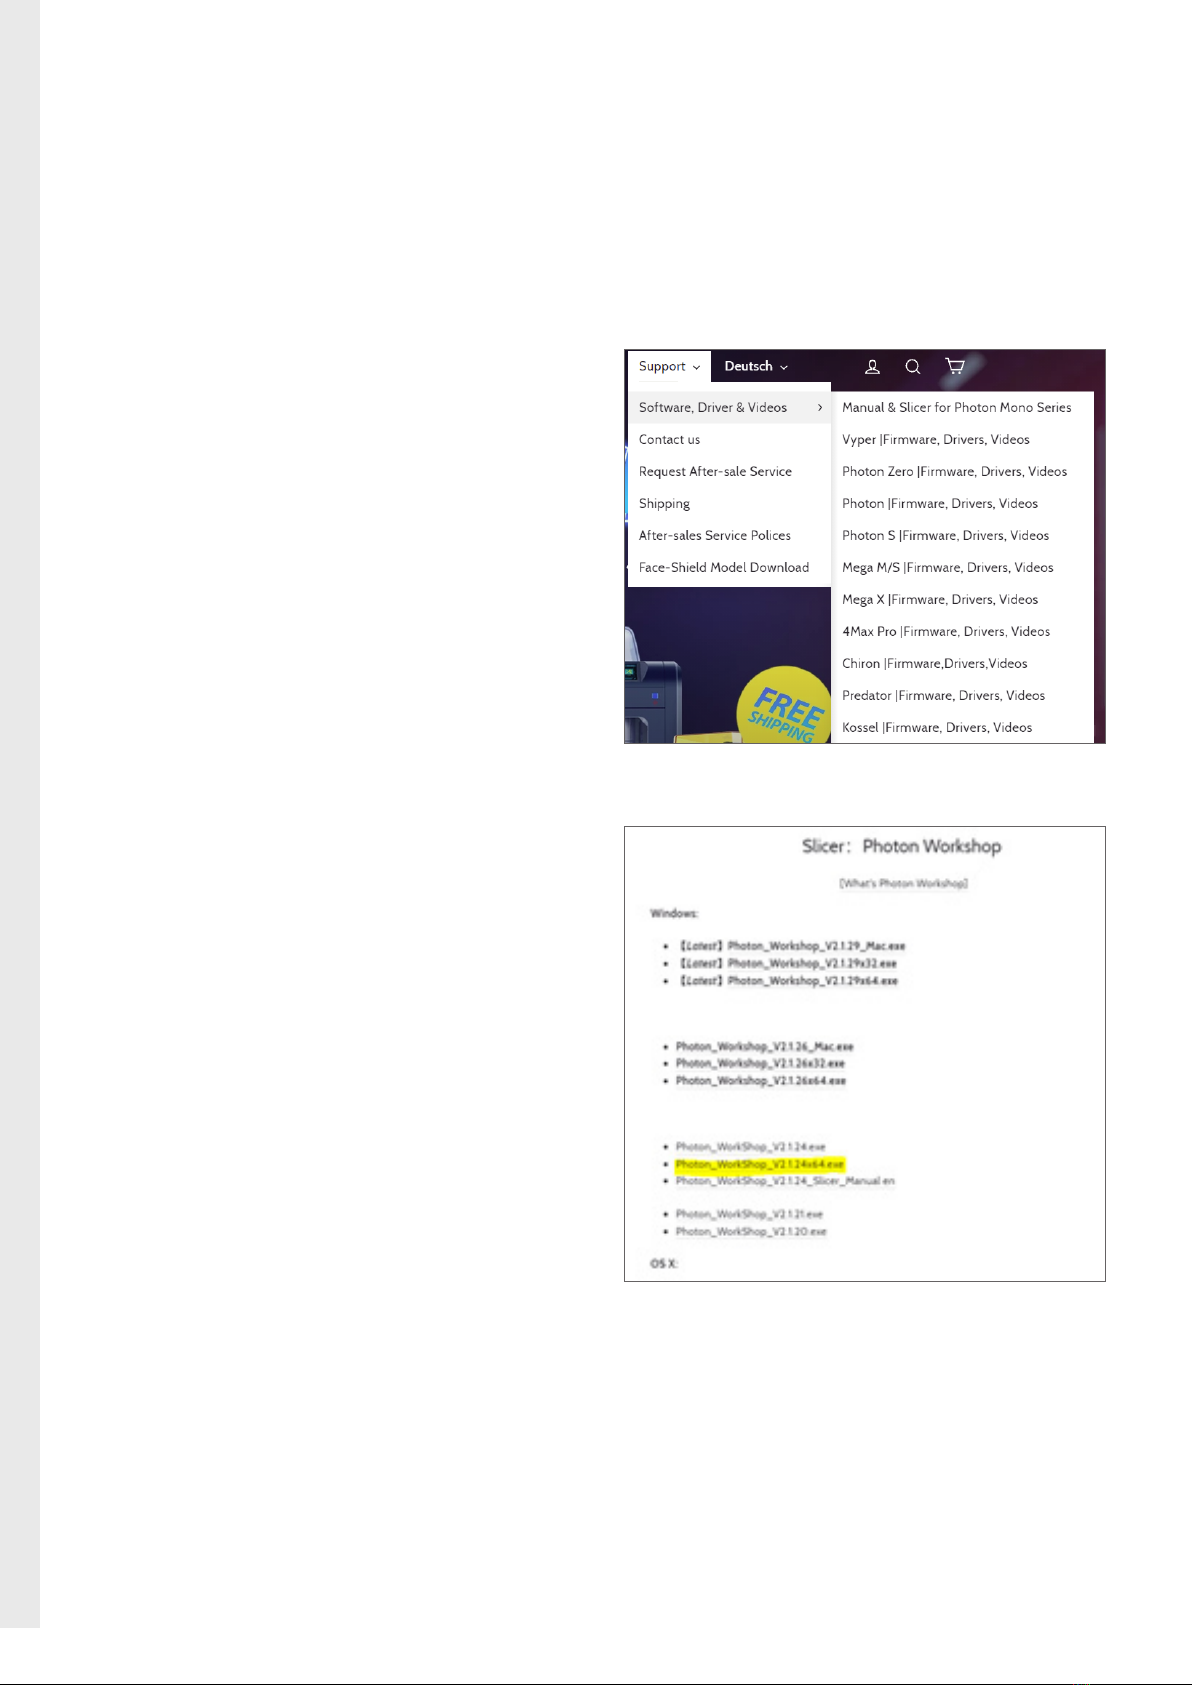
Download Photon Workshop according to the manufacturer‘s
instructions: see the instructions for use.
To download the required Photon Workshop nesting software, please
visit www.anycubic.com
Under the Support tab, go to the Software, Driver & Videos tab in the
drop-down menu and then to Manual & Slicer for Photon Mono Series.
In the download overview, select the version V2.1.24 of the
Photon Workshop nesting software and start the download.
ATTENTION:
Please download only the version V2.1.24 checked by BEGO!
Perform the installation of Photon Workshop.
2. Installation Nesting Software “Photon Workshop”
Go directly to the video tutorial at:
www.bego.com/3d-printing/compatibility-overview/#anycubic

5
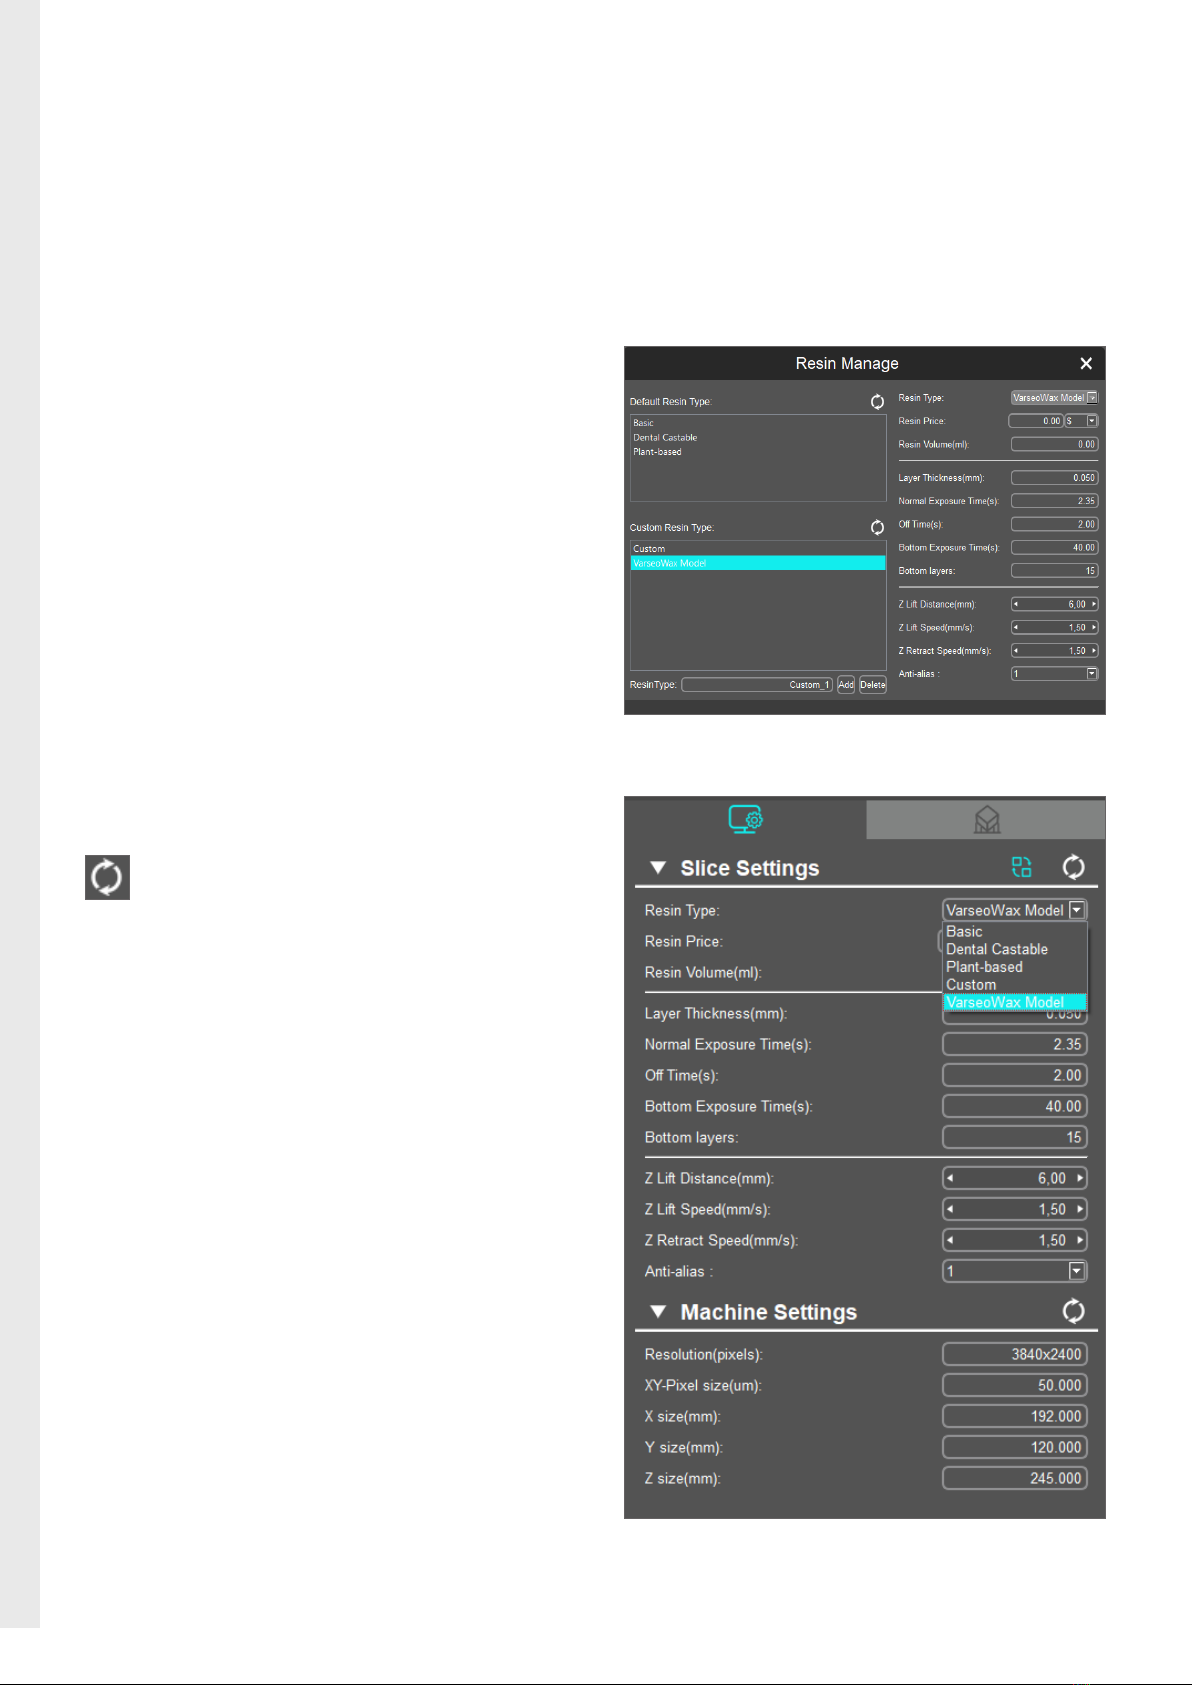
Now create the 3D printing parameters for VarseoWax Model (see
video tutorial).
Double-click to open the Photon Workshop nesting software. Go to
Configure in the menu bar and select the Photon Mono X* printer
under the Machine Type option to obtain the correct basic settings.
To create a material file for VarseoWax Model, go to the Configure
tab in the menu bar and select the Resin Manage option.
3. Creating 3D Printing Parameters
for VarseoWax Model
Go directly to the video tutorial at:
www.bego.com/3d-printing/compatibility-overview/#anycubic
2. Installation Nesting Software “Photon Workshop”
6
In the Resin Manage interface, you now have the option to create a
material file. Enter the material name VarseoWax Model in the
Resin Type field and click on the Add button.
Now overwrite the 3D printing parameters required for this material
(see picture) and close the Resin Manager.
Now select the newly created material file VarseoWax Model under
Resin Type and then click on the update icon:
Go directly to the video tutorial at:
www.bego.com/3d-printing/compatibility-overview/#anycubic
7
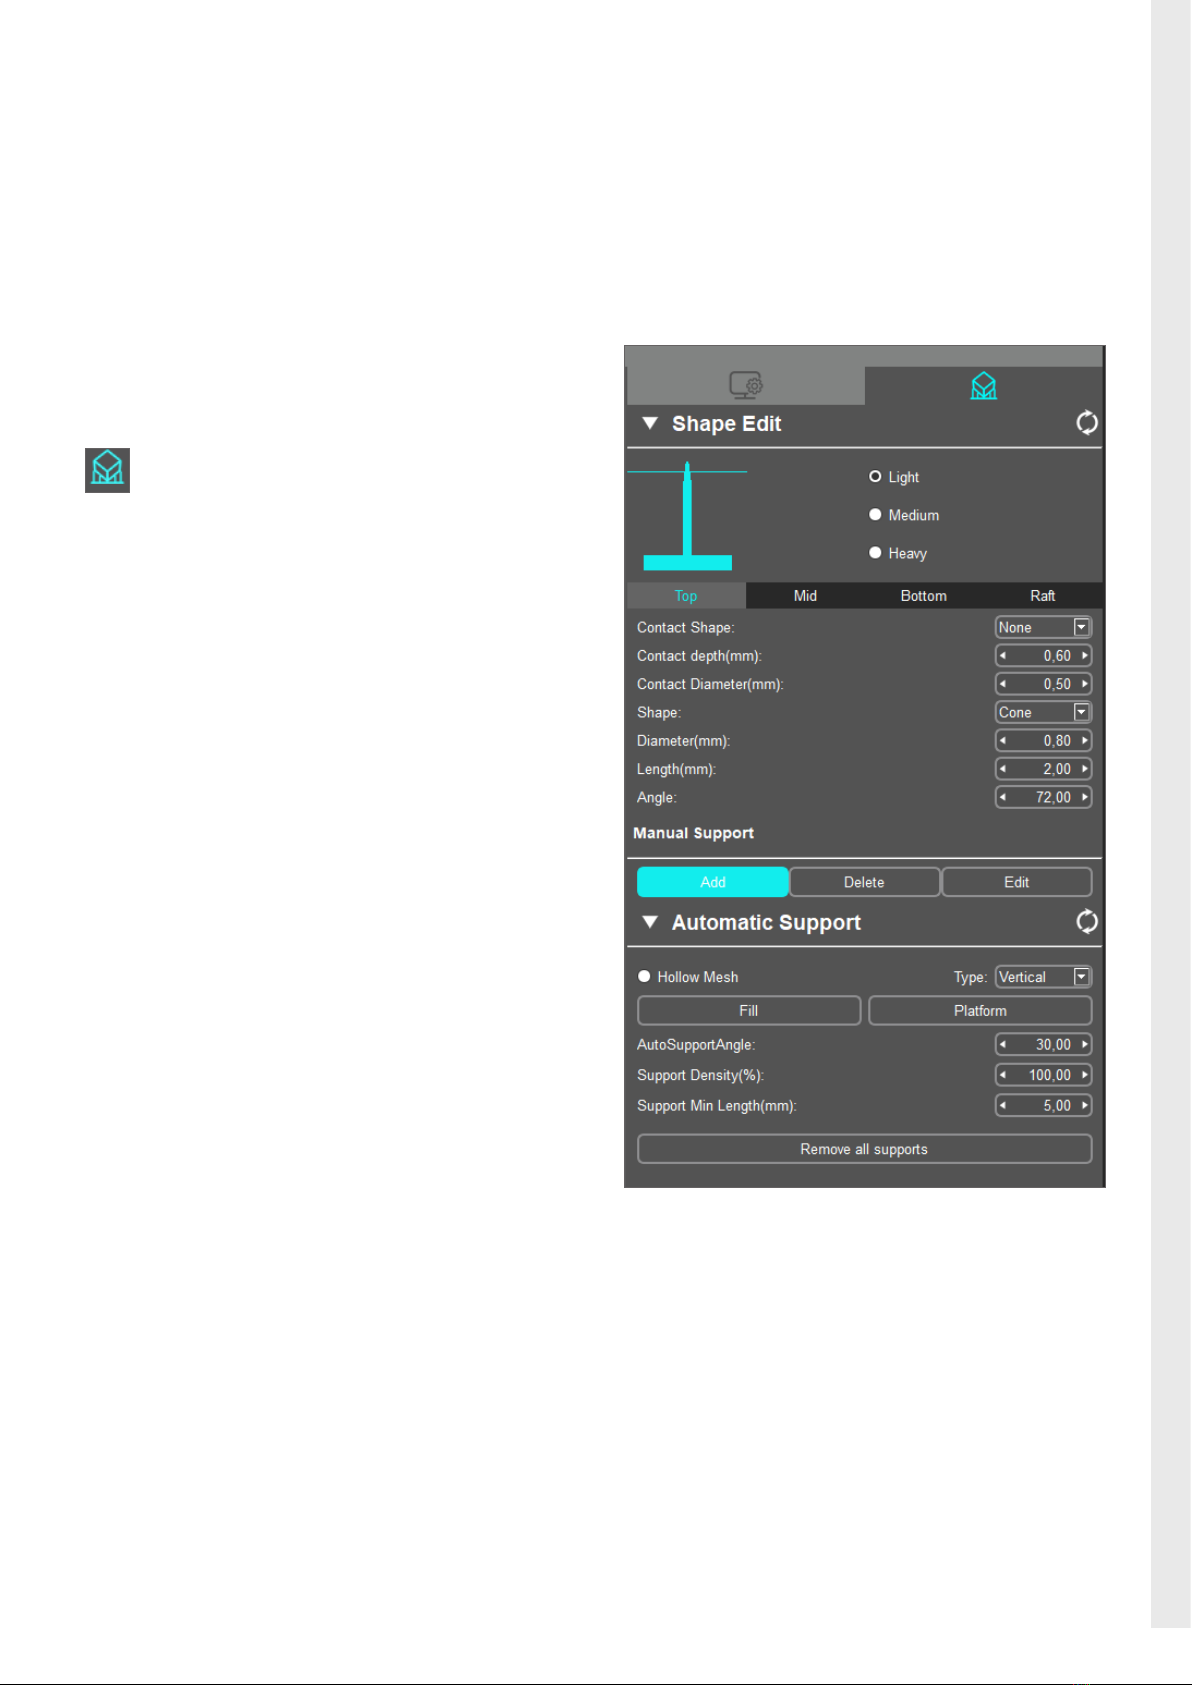
Now create the support structures for the print objects from
VarseoWax Model (see also video tutorial).
To access the support settings, click on the following icon:
Different indications require adapted support structures to obtain a
successful print.
For the indication “Model”(VarseoWax Model), we therefore
recommend the following adjustments:
1. Supports: Light
2. Contact depth (mm): 0.60
3. Support Density (%): 100.00
4. Creating the Support Structure Parameters
for VarseoWax Model
Go directly to the video tutorial at:
www.bego.com/3d-printing/compatibility-overview/#anycubic
8
Now perform the nesting of the objects to be printed from
VarseoWaxModel (see also video tutorial).
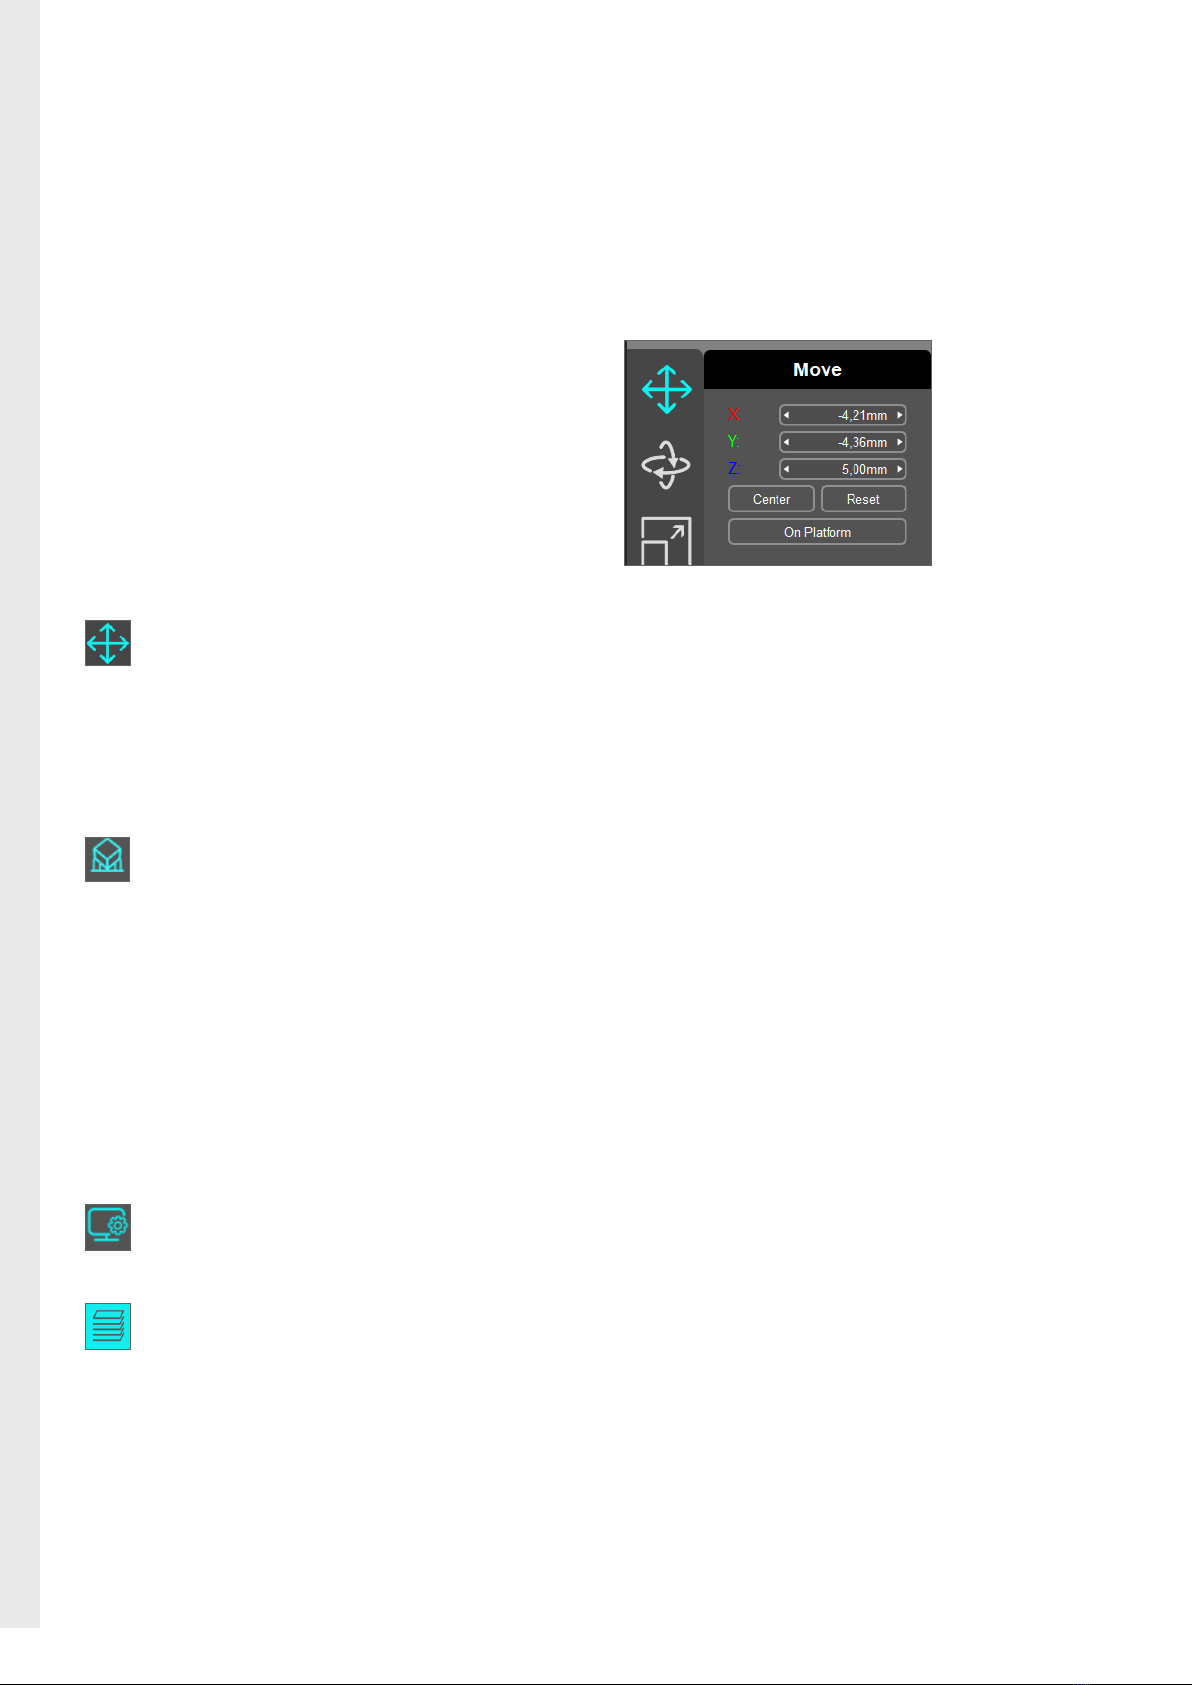
Load your .STL file into the nesting program using drag and drop.
Select the loaded object so that it is highlighted. You now have the
option of positioning the object manually on the construction field
using the left mouse button.
To move the object in a defined way in the respective axes by
changing the X/Y/Z values, click on the following symbol:
For hollow models and tooth stumps, we recommend printing with
support structures. To do this, position the object manually or by
adjusting the Z axis to at least 5 mm.
To set the supports for the objects to be printed, go to the menu item
Supports with the following button:
Then click Fill to generate supports automatically. By selecting the
Add or Delete button, you can manually add or remove supports.
5. Nesting
Generate print file:
To return to the main menu, click on the following icon:
Now generate the print file by clicking the following button:
Save the file to the supplied USB stick and wait for the print file to be
created successfully.
You will be given the opportunity to check the print process
by clicking Preview after the creation of the print file has been
completed.
Please note that using special characters in the print file name could
cause complications.
Go directly to the video tutorial at:
www.bego.com/3d-printing/compatibility-overview/#anycubic
9
* This symbol is a commercial designation/registered trademark of a company which is not part of the BEGO company group.
Pictures and illustrations are exemplary. Colors, symbols, design, and information on the labels and/or packaging shown may differ from reality.
6. 3D Printing
•Make sure that the resin tray is filled with sufficient resin and that
the stamp is firmly fixed in the 3D printer
•Insert the USB flash drive into the Anycubic Photon Mono X* USB
slot and select the Print button from the menu
•Select the file to be printed and start the 3D printing by pressing
the Play icon
•3D printing will now start automatically

10
* This symbol is a commercial designation/registered trademark of a company which is not part of the BEGO company group.
Pictures and illustrations are exemplary. Colors, symbols, design, and information on the labels and/or packaging shown may differ from reality.
7. Post-Processing
Install the Anycubic* Wash&Cure according to the manufacturer's
instructions (see instructions for use).
•Cleaning: 8 minutes in ethanol bath
Activate the washing function of the device and set a washing time
of 8 minutes. After the cleaning cycle, any possible resin residues
on the object can be removed using an ethanol-filled spray bottle
or a brush.
•Post exposure: 2 × 20 minutes
Optional: If you do not have an Anycubic Wash&Cure, cleaning
and post-exposure of 3D-printed models from VarseoWax Model is
also possible with other devices validated by BEGO. An overview of
compatible 3D printing system components can be found on the
BEGO website:
BEGO 3D Printing – Compatibility Overview
www.bego.com/3d-printing/compatibility-overview/
This manual suits for next models
1
Table of contents
Other Bego 3D Printer manuals


