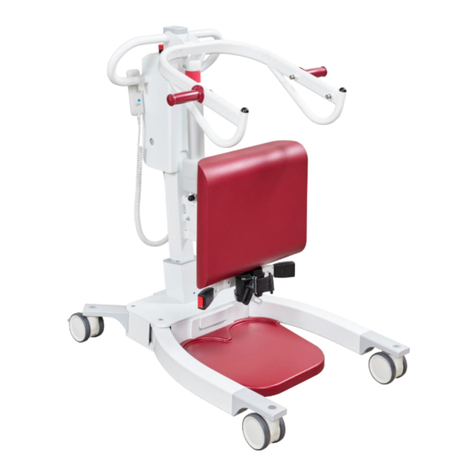
Beka Hospitec NORA Alu User manual

BEKA Hospitec GmbH
User Manual
for
NORA Alu
Version V 2.10 E
Subject to technical modifications
2018.04.18

Table of contents
Operating manual NORA Alu V2.10 E Page 2of 56

BEKA Hospitec GmbH
Dear Customer,
Thank you for purchasing this BEKA Hospitec GmbH product. Our products are
manufactured and tested according to stringent quality criteria. A correct use of the
device is imperatively in order to ensure its proper and safe functioning. Please read the
content of this operating manual before starting to use the product.
Please observe the safety instructions in particular!
Please note that there might be minor differences between the images shown in this
manual and the actually supplied device. Subject to technical modifications and error.
Should you have any questions or require more information about your device, please
contact us by phone either by fax.
Our collaborators will be glad to help you.
BEKA Hospitec GmbH is certified according to DIN EN ISO 13485 by TÜV
SÜD Product Service GmbH.
Therefore, the development, manufacturing, quality assurance and service of
our entire product range is subject to high quality standards.

Table of contents
Operating manual NORA Alu Page 4of 56
Contents
1. Introduction ..........................................................................................................................6
2. Designations.........................................................................................................................7
2.1 Symbols and pictograms used in this manual ........................................................................7
2.2 Type plate ..............................................................................................................................8
3. Unpacking and Assembling ................................................................................................9
3.1 Required Tools.......................................................................................................................9
3.2 Removing the Cardboard .......................................................................................................9
3.3Releasing the NORA Alu from the Pallet..............................................................................10
4. Installation ..........................................................................................................................10
4.1 Electrical Connection of the NORA Alu...............................................................................11
4.2 Start-up and Operation (electrical motor/battery unit)...........................................................11
5. Operating the NORA Alu....................................................................................................12
5.1 Fields of application.............................................................................................................12
5.2 Duration of Treatment ..........................................................................................................12
5.3Contra-indications ................................................................................................................12
6. Safety instructions.............................................................................................................13
7. Operating Elements of NORA Alu.....................................................................................16
7.1 Handset................................................................................................................................17
7.2 Explanation of the LED-indications on the Handset .............................................................17
7.3 Connections and Functions of the Control Unit....................................................................18
7.3.1 European Control Unit......................................................................................................18
7.3.2 Canadian Control Unit ......................................................................................................19
7.4 24V-Battery Unit..................................................................................................................20
7.5 External Charging Unit/Wall Charging Unit .........................................................................20
8. Sling Operating Manual .....................................................................................................21
8.1 Prior to use...........................................................................................................................21
8.2 During Use ...........................................................................................................................21
8.3 After Use..............................................................................................................................22
9. Handset...............................................................................................................................23
10. Operating the NORA Alu....................................................................................................24
10.1 Sling bow..............................................................................................................................25
10.2 Kneepads.............................................................................................................................26
10.3 Raising the patient from a chair or the bed (sitting position).................................................27
10.4 Raising the patient from a wheelchair ..................................................................................28

Table of contents
Operating manual NORA Alu V2.10 E Page 5of 56
10.5 Manual Emergency Lowering System..................................................................................29
10.6 Electrical Emergency Lowering System...............................................................................30
10.7 Emergency stop switch ........................................................................................................31
10.8 Motor Safety Measures........................................................................................................31
10.9 Impact and Jamming Protection (hoist motor)......................................................................32
10.10 Contact Persons for Technical Information.......................................................................32
11. Cleaning/Disinfection.........................................................................................................33
11.1 Cleaning...............................................................................................................................33
11.2 Disinfection...........................................................................................................................34
11.3 Sterilization...........................................................................................................................34
12. Waste Disposal...................................................................................................................34
12.1 Disposal of the packaging material.......................................................................................34
12.2 Disposal of the Product........................................................................................................34
13. Prescribed Inspections & Checks.....................................................................................35
13.1 Prior to each use..................................................................................................................35
13.2 Maintenance and Care of the 24-Volt Battery ......................................................................36
14. Troubleshooting and After-sales Service ........................................................................37
14.1 Help for Troubleshooting......................................................................................................37
14.2 After-sales Service...............................................................................................................38
15. Appendix.............................................................................................................................39
15.1 Technical Data .....................................................................................................................39
15.2 Versions of the NORA NORA Alu.........................................................................................41
15.3 Dimensions of the NORA Alu...............................................................................................42
15.4 Declaration of Conformity.....................................................................................................43
15.5 Accessories of the NORA Alu NORA Alu.............................................................................44
15.6 Electromagnetic Compatibility..............................................................................................46
16. Mounting instructions........................................................................................................50
16.1 Replacement of the rear Castors..........................................................................................50
16.2 Replacement of the front Castors.........................................................................................51
16.3 Replacing the Handle..........................................................................................................52
16.4 Replacing the Handset........................................................................................................53
16.5 Replacing the Battery..........................................................................................................53
16.6 Replacing the control unit with holder for the battery unit.....................................................54

BEKA Hospitec GmbH
Operating manual NORA Alu V2.10 E Page 6of 56
1. Introduction
Dear Customer,
Please observe the following:
1. Please read the provided operating manuals carefully and thoroughly.
2. Use the device only for the intended application.
3. The device may only be operated by trained staff.
4. Electrical installations are to be carried out by specialist companies only, in accordance with the
currently applicable VDE-regulations (German association of electricians).
5. Servicing, maintenance operations and safety checks may only be performed by either BEKA
Hospitec or by specialist companies authorized to this effect by BEKA Hospitec.
6. Assembly operations, extensions, modifications, or repairs may only be performed by either
BEKA Hospitec or by specialist companies authorized by BEKA Hospitec.
In case of technical interventions, such as extensions and fittings to our devices, which are not
carried out by BEKA Hospitec either by specialist companies authorized by BEKA Hospitec, all
warranty rights on the modifications as well as on the device or on the device functions, which
are related to the modification, shall expire.
Liability and warranty
The manufacturer of the device is only responsible for the safety and the reliability of the device, if:
a. the installation has been carried out by authorized staff
b. the space concerned complies with the current VDE-regulations
and if the following conditions are met:
c. the device is only used as per the intended purpose
d. the functional tests are performed periodically
Manufacturer contact details:
BEKA Hospitec GmbH
Am Rübenmorgen 3 ● 35582 Wetzlar
Phone: +49(0)641-9 22 20 - 0
Fax: +49(0)641-9 22 20 - 20
www.beka-hospitec.de

BEKA Hospitec GmbH
Operating manual NORA Alu V2.10 E Page 7of 56
2. Designations
In this operating manual, the name for the stand-up and raising aid “NORA Alu” is “NORA Alu”.
2.1Symbols and pictograms used in this manual
Please observe the accompanying documents/operating
manual.
Warning Hazardous Area.
Applied part “Type B” to DIN EN 60601-1.
Do not push/pull the motor.
Do not push/pull the sling bow.
Special waste, not household waste.
The device and the packaging materials never must be
disposed of in the domestic waste stream.
CE-label in accordance with the EC-Directive on Medical
Devices.
Solely intended for indoor use.
Protection class II.
Washing temperature max. 60 °C.
Normal cycle.
Do not bleach.
Line dry
Do not tumble dry.

BEKA Hospitec GmbH
Operating manual NORA Alu V2.10 E Page 8of 56
Do not iron.
Professional wet clean.
Gentle cycle.
2.2Type plate
This image shows the type plate.
The type plate is located at the column
support of the stand-up and raising aid
The shown serial number (SN) 2816124357
is just an example.
In case of queries, please mention the serial
number printed on the type plate of your Nora
Alu.
Note: Because of legal regulations, it might
be required that the article number and the
serial number should be computer-readable
as well and therefore they might be printed on
the type plate as well in the form of a
barcode.

BEKA Hospitec GmbH
Operating manual NORA Alu V2.10 E Page 9of 56
3. Unpacking and Assembling
3.1Required Tools
To remove the packaging materials, you will need:
Cutter knife
3.2Removing the Cardboard
Cut the strap with the cutter knife and remove
the strap.
Note: Do not cut in the cardboard, as this
could damage the surface of the NORA
Alu!
Lift the cardboard up to remove it and put it
aside.

BEKA Hospitec GmbH
Operating manual NORA Alu V2.10 E Page 10 of 56
3.3Releasing the NORA Alu from the Pallet
Both sides of the NORA Alu are strapped to the
pallet.
Remove the screws and the straps.
Please take care not to damage the NORA Alu
when unscrewing the screws.
Please make sure that the parking brakes of the
castors are disengaged.
Parking brake
After removal of all fixations and disengagement of the parking brakes of the castors, you can ride
the NORA Alu from the pallet.
Remove the foil bag Please take care not to damage the surface of the NORA Alu with the tools.
The accessories for your NORA Alu are included in the supplied cardboard box.
4. Installation
Dear Customer,
Before you start to use our products, your electrical installation must be checked in accordance
with the relevant VDE-regulations 0100 and 0100-710.
This requirement is only applicable in Germany.
In other countries, other requirements might be applicable.
Ask a qualified electrician to install the wall charging unit in accordance with the regulations
applicable in your country.
Electrical Connection for Power Cable and Wall Charging Unit
The socket must meet the requirements of VDE 0100 and 0100-710.
Installation
The NORA Alu is supplied ready for use.

BEKA Hospitec GmbH
Operating manual NORA Alu V2.10 E Page 11 of 56
4.1 Electrical Connection of the NORA Alu
The NORA Alu is equipped with a 24V-battery system. A power connection, which is compliant to
the VDE regulations, is required for the charger cable as well as the wall charging unit. In
operation, the NORA Alu is mains-independent.
4.2Start-up and Operation (electrical motor/battery unit)
The NORA Alu is equipped with a 24V-electrical motor. This motor is self-locking and therefore
protected against lowering of the sling bow in case of malfunction or failure. The battery of the
NORA Alu must be completely charged before starting to use the device.
Please check that the emergency stop switch is released (unlatched). To unlatch, turn the
emergency stop switch clockwise until it has released.
NOTE:
The battery must be completely charged prior to
the first use of the NORA Alu
(charging time approx. 4 hours).
Please check that the emergency stop switch is
released prior to moving the sling bow.
The emergency stop switch is released by turning the button to the right (i.e. clockwise).

BEKA Hospitec GmbH
Operating manual NORA Alu V2.10 E Page 12 of 56
5. Operating the NORA Alu
5.1 Fields of application
The NORA Alu has been designed for raising and transferring patients and residents. The patient
is raised from a sitting position. The NORA Alu is to be used exclusively for the indoor transport of
residents on level floorings.
5.2Duration of Treatment
The NORA Alu is designed for a short-term use and any contact with injured skin must be avoided.
Note
No side effects associated to the treatments are known.
Please observe the contra-indications mentioned in Paragraph 5.3.
5.3Contra-indications
TheNORA Alu must not be used for the following persons:
Double-sided leg amputees; the patient must be able to stand stable on one leg
Stroke patients
Epilepsy patients
WARNING:
Residents suffering from:
•Osteoporosis
•Spine disorders/spinal damage
•Osteogenesis imperfecta
•Mental confusion
•epileptic attacks
may only be treated with the NORA Alu in consultation with the
attending physician.
Please observe also the safety instructions listed in the following paragraph.

BEKA Hospitec GmbH
Operating manual NORA Alu V2.10 E Page 13 of 56
6. Safety instructions
Please read the following safety instructions prior to using the NORA Alu. All notes, specifications
and warnings mentioned on the device as well as in the present operating manual must be
imperatively respected and observed.
The manufacturer BEKA Hospitec GmbH shall not accept any liability for any damages, failures or
faults caused by improper operation or handling.
Operating Manual
Please read the operating manual and the safety instructions before starting to use the NORA
Alu. Keep the operating manual near the device for future reference.
The NORA Alu may only be used for the specified purpose.
In case of unusual noises, damages or malfunctions, the NORA Alu no longer must be used.
The product may only be used and operated by trained staff.
Check prior to each use that all visible parts are intact. The NORA Alu must not be used if any
parts are damaged.
The product must be disinfected after each use.
Avoid slippery surfaces and thresholds.
Do not move the NORA Alu over sloping or uneven floors.
The NORA Alu is exclusively fit for indoor use.
Prior to each use of the device and its accessories, the user must check the functional safety
and the good condition of the device and its accessories (e.g. visual check, functioning, etc.).
Supervision of the caregiver is required throughout the treatment.
Make sure that the sling form and size match the resident’s body.
Check prior to lifting that all clips are correctly and properly attached.
Only trained staff is authorized to use slings.
Please respect and observe the weight specifications for each sling.
Check prior to each lifting operation whether the help of a second assistant is required.
Each lifting or transport procedure must be adequately planned in order to ensure an optimal
protection for the caregiver and the resident.
Please check before and during the height adjustment procedure that your feet are not located
in the area of the castors neither in the resident’s area.
Do not stand between the NORA Alu and an obstacle during the transport procedure.
During the movement of NORA Alu, the carrier frame must be closed.
Please check that no one grabs in the hazardous areas (bow, carrier frame) especially during
the adjustment procedure - risk of crushing.
Please make sure that the patient seizes the handles provided to that effect with both hands
during the transfer or transport.
Do not lift the resident higher than is necessary.
Engage the parking brakes of the wheelchair’s castors etc. to ensure a safe lifting and
positioning of the resident. Make sure that the parking brakes of the NORA Alu are engaged
when lifting and positioning the patient.

BEKA Hospitec GmbH
Operating manual NORA Alu V2.10 E Page 14 of 56
Keep the transport of the patient as short as possible
Do not push/pull the motor to operate the NORA Alu and do not expose the NORA Alu to lateral
forces in any way whatsoever
Never leave the patient standing in the NORA Alu without supervision
Make sure that the patient cannot tilt forward or sideward when he/she is being lifted.
The NORA Alu is not authorized for use in potentially explosive atmospheres.
Never exceed the duty cycle or the maximum load.
Make sure that the battery is charged in a well-ventilated room.
When the battery is charging, the NORA Alu must not be used.
Please use the safety belt to fix the patient’s legs prior to lifting.
Check the applied sling for visual damages prior to using it.
Ventilation
Never cover up, oversticker or change the slots and holes of the device.
Maintenance
Make sure that the maintenance/inspection of the product is regularly executed in combination
with a safety check. The intervals for the prescribed safety check are fixed in section 13.
After-sales Service
Should the NORA Alu be defect and the problem cannot be resolved by means of one of the
measures described in section 14, please contact the after-sales service of your BEKA dealer
either the manufacturer:
Cleaning
Do not use any aerosol cleaner to clean the NORA Alu.
The caregivers must protect their skin and eyes against concentrated disinfecting and cleaning
products.
The instruction manual of the applied disinfecting product must be observed.
Instructions for cleaning and disinfection can be found in section 11.
BEKA Hospitec GmbH
Am Rübenmorgen 3 ● 35582 Wetzlar
Phone: +49(0)641-9 22 20 - 0
Fax: +49(0)641-9 22 20 - 20
info@beka-hospitec.de
www.beka-hospitec.de

BEKA Hospitec GmbH
Operating manual NORA Alu V2.10 E Page 15 of 56
Repairs
Repairs to components of the NORA Alu are only authorized by trained expert personnel.
Please contact the after-sales service.
Opening the device or other accessories by persons, who are not authorized to this effect by
BEKA Hospitec GmbH, will lead to the expiration of all guarantee, warranty and liability claims.
Safety checks
The NORA Alu is subject to a 12-month “safety check” (SC). The intervals are fixed in section
13.
In order to preserve the value of the device, we recommend an annual maintenance of the
NORA Alu.
Duty of care
Please check the proper state and the functional safety of the system prior to use. Never insert
foreign bodies in the device.
Accessories
Use only original accessories for the NORA Alu.
WARNING:
Any unauthorized repairs, reconstructions and
modifications/alterations are not permitted for safety reasons and
shall exclude all liability of the manufacturer for the resulting
damages.
For damages resulting from the use of spare parts or accessories,
which are not authorized by the manufacturer, any further liability of
the manufacturer shall be excluded.
Applied part
The NORA Alu are equipped with “B”-Type applied parts.
All exposed, touchable, conductive parts are thereby considered as applied part.

BEKA Hospitec GmbH
Operating manual NORA Alu V2.10 E Page 16 of 56
7. Operating Elements of NORA Alu
No.
description
No.
description
1
Height adjustment of the knee pads
8
Sling bow
2
Rear castors
9
Handles
3
Parking brake
10
Sling attachment points
4
Emergency lowering system
11
Knee pads
5
Control unit with battery
12
Safety belt for the legs
6
Bow
13
Footplate
7
Handset
14
Front castors

BEKA Hospitec GmbH
Operating manual NORA Alu V2.10 E Page 17 of 56
7.1Handset
(Also refer to chapter 9)
No.
description
No.
description
1
Service/SC due
5
Closing the carrier frame
2
max. weight reached
6
Spreading the carrier frame
3
Up command
7
Battery charge status
4
Down command
7.2Explanation of the LED-indications on the Handset
Green LED: battery full, no charging required (100-50%)
Yellow LED: battery requires charging (50-25%)
Red LED: battery requires charging (less than 25%)
When you push a button, an audible signal will be emitted.
Service indication (orange LED flashes).
Please have your NORA Alu checked!
Orange LED, overload, max. weight of 200/187 kg exceeded

BEKA Hospitec GmbH
Operating manual NORA Alu V2.10 E Page 18 of 56
7.3Connections and Functions of the Control Unit
7.3.1 European Control Unit
No.
description
No.
description
1
Emergency stop switch
3
Handset connection
2
Electrical emergency lowering system in
case of failure of the handset
4
Lifting motor connection
5
Spreading motor connection

BEKA Hospitec GmbH
Operating manual NORA Alu V2.10 E Page 19 of 56
7.3.2 Canadian Control Unit
No.
description
No.
description
1
Emergency stop switch
5
Handset connection
2
Electrical emergency lowering system in
case of failure of the handset
6
Lifting motor connection
3
Adjustment of the spreading in case of
failure of the handset
7
Spreading motor connection
4
Power and charging indicator
8
Charger cable connection
Explanation of the LED-indications
Green LED
The LED is on when the control unit is supplied with voltage
through the power cable.
Yellow LED
The LED is on when the battery is charging.
Note: The battery can only be charged if the emergency stop switch is not actuated!

BEKA Hospitec GmbH
Operating manual NORA Alu V2.10 E Page 20 of 56
7.4 24V-Battery Unit
The NORA Alu is equipped with a 24V-battery.
Please proceed as described in section 16.5 to remove the battery.
7.5 External Charging Unit/Wall Charging Unit
The external charging unit (wall charging unit) is a switch-mode charger and is supplied ready
assembled (on a mounting rail). It can be installed on any suitable wall. The required power cable
is included in the delivery.
The charging time for the battery units is approx. 4 hours.
No.
description
No.
description
1
Charger cable connection
3
Charging LED
2
Power LED
4
Cable Holder (option)
Explanation of the LED-indications
Green LED
The LED is on when the control unit is supplied with voltage
through the power cable.
Yellow LED
The LED is on when the battery is charging.
Other manuals for NORA Alu
1
Table of contents
Other Beka Hospitec Medical Equipment manuals
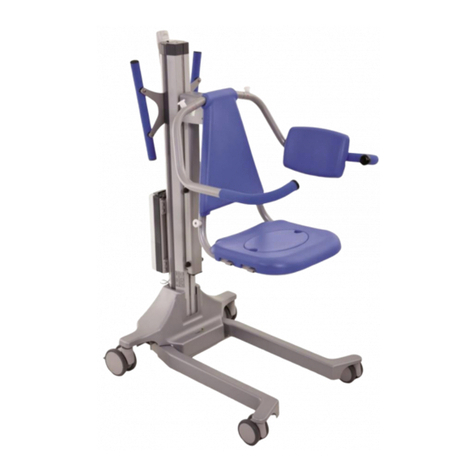
Beka Hospitec
Beka Hospitec SENTA PUR L Installation instructions
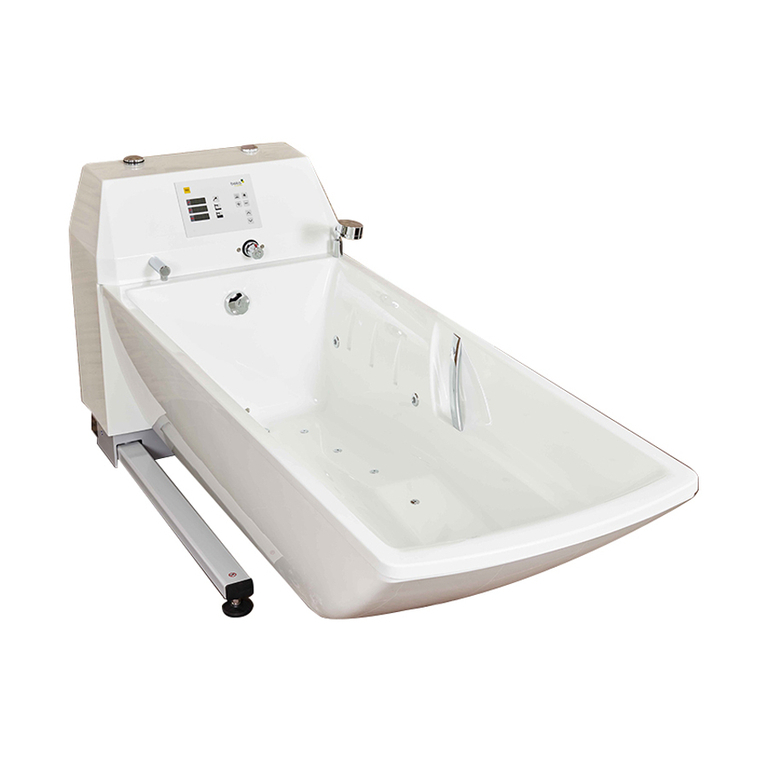
Beka Hospitec
Beka Hospitec AVERO Premium Plus User manual
Beka Hospitec
Beka Hospitec EVE! User manual
Beka Hospitec
Beka Hospitec CARLO Alu Classic 230 User manual
Beka Hospitec
Beka Hospitec NORA Alu User manual

Beka Hospitec
Beka Hospitec AVERO Premium tub 190 User manual
Beka Hospitec
Beka Hospitec AVERO Phoenix User manual
Beka Hospitec
Beka Hospitec NORA Pro Operation instructions
