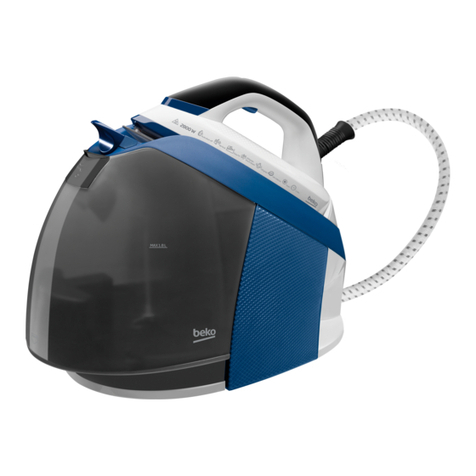
Beko ActiPress MasterPro BKU 8130 User manual

Please read this manual first!
Dear Customer,
Thank you for preferring this Beko product. We hope that you get the best results from your product
which has been manufactured with high quality and state-of-the-art technology. Therefore, please read
this user manual and all other accompanying documents carefully before using the product and keep
it as a reference for future use. If you handover the product to someone else, give the user manual as
well. Follow all warnings and information in the user manual.
Meanings of the symbols
Following symbols are used in the various sections of this manual:
CImportant information and useful hints
about usage.
AWARNING: Warnings against danger-
ous situations concerning the security
of life and property.
WARNING: Warning for hot surfaces.
WARNING: Do not immerse the appli-
ance, power cord or power plug in wa-
ter or in other liquids.
WARNING: Risk of burning and scald-
ing due to steam.
WARNING: Risk of burning and scald-
ing due to steam.

Steam Generator / User Manual 29 / EN
This section contains safety in-
structions that will help protect
from risk of personal injury or
material damage.
Failure to follow these instructions
invalidates the granted warranty.
1.1 General safety
Please pay attention to the
cleaning and maintenance for
the product in following instruc-
tion
•This appliance complies with
the international standards.
•This appliance is intended to be
used in household and similar
applications such as:
– Staff kitchen areas in shops,
offices and other working en-
vironments;
– Farm houses
– By clients in hotels, and other
residential type environ-
ments;
– Bed and Breakfast type envi-
ronments.
•The appliance is not suitable for
•outdoor use.
•This appliance can be used the
children who are at the age of 8
and above and by people who
have limited physical, sensory
or mental capacity or who do
not have knowledge and expe-
rience, provided that they are
supervised or they understand
the instructions with regard to
safe use of the product and po-
tential dangers. Children should
not play with the appliance.
Cleaning and user maintenance
procedures should not be per-
formed by children unless they
are supervised by an older per-
son.
•When the appliance is in use or
left to cool down, keep the ap-
pliance and power cable out of
reach of children under 8 years
old.
•Do not leave the appliance un-
attended while it is plugged in.
•Unplug the appliance before
filling the water reservoir with
water.
•Do not open the water refill hole
during usage.
1 Important safety and environmental
instructions

30 / EN Steam Generator / User Manual
•The iron must be used and
rested on a flat, stable surface.
•When the appliance is placed
on its base plate, ensure that
the surface beneath the plate is
level.
•Keep your device in a vertical
position or place on the iron
dock when you are not using or
having a pause during ironing.
•If the appliance is dropped or
leaks water or has other failures,
contact the authorised service.
Do not use the appliance until it
is repaired.
•Only use the original parts or
parts recommended by the
manufacturer.
•Before you start calc cleaning,-
make sure the calc box on the
backside of the steam iron sta-
tion is empty.
•Do not dismantle the appliance.
•Your mains power supply should
comply with the information
supplied on the rating plate of
the appliance.
•The mains supply of the appli-
ance should be secured with a
16 A fuse minimum.
•Use the appliance with a
grounded outlet.
•Do not use the appliance with
an extension cable.
•Do not pull the power cable
when unplugging the appliance.
•If the power cable is damaged,
it should be repaired or replaced
by the dealer, service center, or
a specialised and authorised
service with similar qualifica-
tions.
•Unplug the appliance before
cleaning.
•Do not wrap the cable around
the appliance.
•Do not touch the appliance or
its plug with damp or wet hands
when the appliance is plugged
in.
•The soleplate and the steam
station surface may get over-
heated. Contact with hot sur-
faces may cause burns.
1 Important safety and environmental
instructions

Steam Generator / User Manual 31 / EN
•Do not use the appliance in or
near the areas where combus-
tible or inflammable places and
materials exist.
•If you keep the packaging mate-
rials, store them out of the reach
of children.
•Do not remove calc box from
its place during the transfer of
water to the container or until
you hear an audible warning.
•The filling, or decalcifying, or
rinsing, or inspection apertures
that are under pressure, shall
not be opened during use.
1.2 Compliance with WEEE
Directive and Disposing of the
Waste Product
This product complies with EU WEEE Directive
(2012/19/EU). This product bears a classification
symbol for waste electrical and electronic equip-
ment (WEEE).
This symbol indicates that this product
shall not be disposed with other
household wastes at the end of its ser-
vice life. Used device must be returned
to offical collection point for recycling
of electrical and electronic devices. To find these
collection systems please contact to your local au-
thorities or retailer where the product was pu-
chased. Each household performs important role
in recovering and recycling of old appliance.
Appropriate disposal of used appliance helps pre-
1 Important safety and environmental
instructions
vent potential negative consequences for the envi-
ronment and human health.
1.3 Compliance with RoHS
Directive
The product you have purchased complies with EU
RoHS Directive (2011/65/EU). It does not contain
harmful and prohibited materials specified in the
Directive.
1.4 Package information
Packaging materials of the product are
manufactured from recyclable materials
in accordance with our National
Environment Regulations. Do not dispose of the
packaging materials together with the domestic or
other wastes. Take them to the packaging material
collection points designated by the local authori-
ties.

32 / EN Steam Generator / User Manual
2 Your steam generator
2.1 Overview
1
2
3
17
18
19
4
5
6
7
1011
12
13
1514 16
9 8

Steam Generator / User Manual 33 / EN
2 Your steam generator
Controls and parts
1. LED Display
2. Automatic steam button
3. Level adjustment button
4. Steam trigger
5. Calc cleaning button
6. On/Off switch
7. Calc box lid
8. Calc box
9. Steam cable clip
10. Iron dock
11. Detachable water tank
12. Water filling hole
13. Tank detach handle
14. Carrying lock unlock button
15. Carrying lock
16. Soleplate
17. Cord wrapping slot
18. Steam release hole
19. LED light
2.2 Technical data
Power source 220-240V~ 50-60Hz
Power consumption 2520-3000 W
Steam pressure 8 bar
Continuous steam amount (up to g/min) 165 g/min
Intense steam (up to g) 600 g*
C*Measured by pulling and releasing the steam trigger (4) in
3 second intervals for 30 minute usage, in maximum heat
level and turbo steam mode. Iron mode was switched to
turbo steam mode in every 12th minute. (see 3.11)
The rights to make technical and design changes
are reserved.

34 / EN Steam Generator / User Manual
2 Your steam generator
LED display and buttons
LED Display Symbols Descriptions
Temperature settings
Steam
Turbo steam mode
Smart-Hygiene mode
Automatic steam sensor indicator
Auto-Off indicator
Water tank empty indicator
Buttons
Level adjustment button Each time you press on level adjustment but-
ton (3), you can switch between iron setting
modes “Smart-Hygiene, Temperature 1, Tem-
perature 2, Temperature 3, and Max”. Press-
ing and holding the button for 3 seconds will
activate Turbo steam mode
Automatic steam sensor button Use it to activate and disable automatic steam
sensor.
To activate, press automatic steam sensor
button (2). Steam sensor indicator will be dis-
played on the LED display.
To disable, press automatic steam sensor
button (2). Steam sensor indicator on the LED
display will fade.
Calc cleaning button You can perform descaling with this button.
On/Off switch You can turn on/off your appliance with this
switch.

Steam Generator / User Manual 35 / EN
3 Operation
3.1 Intended use
The appliance is intended for home use and ironing only, it is not suitable for professional use.
3.2 First operation
Remove the protecting film on the LED display (1). On initial operation, fill the water tank (11) and gen-
erate steam for 10-15 minutes to remove any production residue (see. 3.4).
CThere may be a light odour on the initial use of the appliance. This will return to normal
after a few uses.
3.3 Ironing tips
•The appliance will heat up in short; use low temperature settings when ironing synthetic, silk or similar
fabrics.
•Reverse iron flammable fabrics (silk, etc.) or use the appliance in “Smart+Hygiene” mode.
•When ironing fabrics like velvet, use little pressure and iron in one direction.
•In coloured silk fabrics, steaming may cause stains. Do not use steam.
•100% pure wool fabrics may be ironed using steam.
•Ironing woolen clothes may cause flaming. Iron on the reverse side.
AWARNING: Do not contact metal parts like zippers, pins or buttons with the iron. This will
damage the iron’s soleplate.
3.4 Filling the water tank
A
WARNINGS:
•If you are going to fill water while the water tank is still on the steam generator, make
sure the appliance is unplugged.
•Do not put perfume, vinegar, soda, descaling agents, ironing aids and other chemicals
into the water tank.
C•Water tank empty “ ” sign will illuminate when the tank is empty. Appliance will not
produce steam when the steam trigger is pulled.
•Your appliance is designed for using tap water. If the tap water in your region is ex-
tremely calcareous, use the tap water mixed with drinking water.

36 / EN Steam Generator / User Manual
3 Operation
Remove the water tank (11) by
holding it from the tank detach-
ing handle (13) and pulling.
Fill the water tank (11) up to
Max line.
Place back the water tank (11).
Make sure the water tank is
properly seated.
3.5 Carrying lock locking/unlocking
This function is designed to allow easy carriage of iron with the dock.
To detach the iron from the
dock, push on the carrying lock
unlock button (14).
The lock will be unlocked and
you will be able to lift the iron
from the dock.
To lock the iron to the dock,
push on the carrying lock (15).
3.6 Temperature setting
CYou can safely iron every fabric type that can withstand ironing, using “Smart-Hygiene”
mode. You can perform steam ironing by using the steam trigger (4) at this stage.
A
WARNINGS:
•You can perform steam ironing in every temperature setting except “•” Pull the steam
trigger (4) for steam ironing.
•For ironing, follow the ironing instructions on the fabric label.

Steam Generator / User Manual 37 / EN
Type of Fabric Settings Steam Setting
Synthetic • No Steam
Silk goods •• Steam/Turbo Steam
Cotton ••• Steam/Turbo Steam
Linens-Jeans Max Steam/Turbo Steam
The appliance starts on the “Smart-Hygiene” mode. This level provides a safe temperature and steam
amount for every fabric that are suitable for ironing.
1
2
Plug in the power cord and
press the on/off switch.
– The light on the on/off but-
ton will illuminate and you will
hear a beep sound.
LED display (1) will blink until
the appliance is ready.
– LED display (1) will remain
on when ready, and you will
hear a beep sound.
You can set the fabric-appropri-
ate temperature using the level
adjustment button (3) and start
ironing.
3.7 Dry ironing
C•Unless you pull the steam trigger (4) or push on the automatic steam sensor button (2),
your appliance will not generate steam.
•Pulling the steam trigger (4) will not generate steam when the temperature setting is
in “•” mode.
3.8 Steam ironing
C
•Pull the steam trigger (4) for steam ironing. If you keep pulling the steam trigger (4)
continuously for 1 minute, the appliance will stop generating steam.
•Pump operation may cause noise during water intake, this is normal.
•To activate automatic steam generation function, you can push on the automatic steam
button (2).
•Automatic steam may only be activated when the iron is moving horizontally.
3 Operation

38 / EN Steam Generator / User Manual
You can use level adjustment button (3) to adjust temperature setting. (see 3.6).
Set the fabric-appropriate tem-
perature and steam using the
level adjustment button (3).
(See 3.6)
LED display (1) will blink until
the appliance is ready.
LED display (1) will remain on
when ready, and you will hear a
beep sound indicating that your
appliance is ready for ironing.
A
WARNINGS:
•Your selection shall comply with the type of the cloth to be ironed.
•Blinking temperature setting symbols on the LED display (1) indicates that the soleplate
is being prepared to reach the selected temperature. Constant illuminating setting sym-
bols on the LED display (1) indicates that the soleplate has reached the set temperature.
CWhen the appliance is ready for ironing, move the iron horizontally on the cloth to be ironed
and press the steam trigger (4). As long as you pull the steam trigger, your appliance will
provide steam through the soleplate (16).
WARNINGS:
•Never direct the steam at people or animals.
•Never touch the hot soleplate (16).
3 Operation

Steam Generator / User Manual 39 / EN
3.9 Automatic steam function
Steam sensor detects your irons motion and provides right amount of steam without using the steam
trigger (4) according to the mode you selected.
Set the fabric-appropriate tem-
perature and steam using the
level adjustment button (3).
(See 3.6)
Push the automatic steam but-
ton (2) to activate automatic
steam function.
– Sensor will be activated and
the LED display will display “
”.
– At the same time, led light
(19) in front of the iron will il-
luminate.
Push the automatic steam but-
ton (2) to disable automatic
steam function.
– Sensor will be disabled and
the “ ” on the LED display
will fade.
– Led light (19) will disappear.
CLed light in front of the iron will only illuminate when the automatic steam function is
activated.
3.10 Intense steam
Pulling and releasing the steam trigger (4) once will provide intense steam.
C•Repeatedly pulling the steam trigger (4) may decrease intense steam’s effect.
•Intense steam’s effect may decrease after using continuous steam by pulling and hold-
ing the steam trigger (4) or using the automatic steam function.
WARNING: Never direct the steam at people or animals.
3 Operation

40 / EN Steam Generator / User Manual
3.11 Turbo mode
C
•Use the turbo steam feature when you want more steam and for quick ironing perfor-
mance on thicker clothes.
•After 12 minutes of operation on turbo steam level, the appliance automatically disables
turbo steam function.
•You may use the turbo steam function in every mode except “•.
Push the level adjustment but-
ton (3) and hold for 3 seconds.
– Turbo steam symbol “ ” will
appear on the display.
LED display (1) will blink until
the appliance is ready.
– LED display (1) will remain
on when ready, and you will
hear a beep sound indicating
that your appliance is ready
for ironing.
To exit turbo steam mode, push
the level adjustment button (3).
– Turbo steam symbol “ ”
will disappear from the dis-
play.
3.12 Vertical steam
You can use the steam feature also while the iron is in vertical position (see 3.8). Using the vertical
steam function, you can iron your curtains or hanged clothes. Keep the appliance 15-30 cm away from
clothing and curtains.
CYou may also use the turbo steam feature (see 3.11).
1. Push the on/off button (6) and hold for 3 seconds when you complete ironing.
– Lights on the LED display (1) will fade.
2. Unplug the appliance and let it cool.
3 Operation

Steam Generator / User Manual 41 / EN
3.13 Automatic shut off
Auto-Off
30 sn
Auto-Off
8 dk
Iron will automatically turn off if
it does not move horizontally for
30 seconds or any buttons are
pressed.
– Auto shut off “ ” indicator
will continuously illuminate on
the LED display (1).
Iron will automatically turn off if
it does not move vertically for
8 minutes or any buttons are
pressed.
– Auto shut off “ ” indicator
will continuously illuminate
on the LED display (1).
Auto shut off “ ” indicator will
turn off after you move the iron
or push any button. LED dis-
play (1) will blink until the iron
is ready again.
– LED display (1) will remain
on when ready, and you will
hear a beep sound indicating
that your appliance is ready
for ironing.
CIt may take about 60 seconds for the soleplate (16) temperature to reach its previous level.
AWARNING: The appliance will turn off automatically if no buttons are pushed or the ap-
pliance is not moved in 10 minutes. On/Off switch (6) will start blinking. Press the on/off
button (6) to re-operate the appliance.
3 Operation

42 / EN Steam Generator / User Manual
4 Cleaning and maintenance
4.1 Calc cleaning
C
•You may start calc cleaning operation when the calc cleaning button (5) “ is lit by
pushing on the button.
•Before starting calc cleaning, make sure that the calc box (8) is empty.
•When the calc cleaning time is reached, the calc cleaning button (5) will remain lit for 20
seconds and a “beep” sound will be heard on intervals. If you do not start calc cleaning,
the calc cleaning button (5) will turn off and the cleaning will start automatically next
time you start ironing.
•If the appliance is unplugged or power outage occurs during calc cleaning, the operation
will continue on the next time the appliance starts.
•Each time you turn on the appliance, the calc cleaning button (5) will illuminate for 10
seconds if the tank is available for cleaning. If you push on the calc cleaning button (5)
within this period, cleaning operation will begin. If you do not push, the calc cleaning
button (5) will turn off and the appliance will continue regular operation.
CYou will hear a “beep” sound if the calc box (8) is filled with water during cleaning. First,
empty the calc box (8) and then replace properly.
WARNING: During calc cleaning, do not reach for the steam release hole (18) that is
located on the calc box (8).

Steam Generator / User Manual 43 / EN
When the “ ” sign is lit, you may start your irons calc cleaning operation.
Bip
Bip Bip
The calc cleaning button “ ”
(5) will remain lit for 20 seconds
and alerts with a “beep” sound.
This indicates the time for calc
cleaning.
Push the calc cleaning button
(5).
– A beep sound will be heard
and calc cleaning will start.
– During operation, calc clean-
ing button “ ” (5) will blink.
– Do not reach for the steam
relief hole (18) while the op-
eration continues.
Once the calc cleaning is com-
pleted, the calc cleaning but-
ton “ ” (5) will turn off and a
long “beep” sound alert will be
heard.
To empty the calc box (8), open
the lid (7) and empty. Then,
make sure the calc box (8) is
properly seated.
– Iron will be ready for ironing in
a few minutes.
4 Cleaning and maintenance

44 / EN Steam Generator / User Manual
A
WARNINGS:
•During calc cleaning operation (before the beep alert) do not remove the calc box (8)
from its place.
•If you remove the calc box (8) from its place during calc cleaning, the operation will stop
and an audible warning will be given. There may be water leakage at this point. When
the calc box (8) is placed back into its place, calc cleaning will continue.
•If the calc box is (8) pulled during ironing, a long “beep” alert will be heard and calc
cleaning button (5) will start blinking.
•Do not turn off or unplug your appliance before the “ ” light is completely turned off.
4.2 Cleaning
A
WARNINGS:
•Do not immerse the iron dock (10) in water or other liquids. Never put vinegar, descaler,
soda, perfume or other ironing aids into the appliance.
•Do not use benzene, solvents, abrasive cleaners or hard brushes to clean the appliance.
•Do not wash your appliance under running water or immerse it in water or other liquids.
•Do not use abrasive cleaning agents to clean the baseplate (16).
1 saat
2
1
Turn off and unplug the appli-
ance before cleaning.
Wait for the appliance to com-
pletely cool down. Drain the
remaining water from the wa-
ter tank (11).
Use a damp cloth to clean the
outer part of the appliance.
Then wait for it to dry com-
pletely. Wipe the sediments and
residues on the soleplate (16)
with a lightly dampened cloth.
4 Cleaning and maintenance

Steam Generator / User Manual 45 / EN
4.3 Carrying lock and cable rewinding
This function is designed to allow easy carriage of iron with the dock.
Place the iron on the dock (10)
and push on the carrying lock
(15) to lock the iron.
Pull the steam cable clip (9)
and place the cable.
Pull and release the power
cord. Cable will be wrapped
into the wrapping slot (17).
CYou may carry the appliance by holding it from the handle.
4.4 Storage
•If you do not intend to use the steam generator for a long time, store it carefully.
•Unplug the appliance and wait for it to cool down before storing.
•Drain the water tank (11).
•Lock the handling lock (10) of the appliance (see 4.3).
•Store the appliance in a cool and dry environment.
•Ensure that the appliance is kept out of reach of children.
4.5 Transport and shipping
•During transport and shipping, carry the appliance with its original packaging. The packaging of the
appliance will protect the appliance against physical damage.
•Do not place heavy objects on the appliance or the package. The appliance may get damaged.
•If the appliance is dropped, the appliance may not operate or permanent damage may occur.
4 Cleaning and maintenance

46 / EN Steam Generator / User Manual
5 Troubleshooting
Problem Possible cause Solution
The base does not heat (16) al-
though the appliance is plugged.
There may be a problem with
the connection.
Check the plug and the power
cord of the appliance
Press the on/off button (6). Contact the authorized service if
the appliance does not operate
although the appliance is plugged
and you have pressed the on/off
(6) button.
The appliance does not produce
steam.
The amount of water in the
water tank (11) may be insuf-
ficient.
Fill water into the water tank up to
the MAX line (see 3.4).
Check if the water reservoir
(11) is installed in its housing.
The appliance does not provide
steam if the temperature is set to
“•” position. Adjust the temper-
ature setting as “Smart-Hygiene
mode, ••, ••• or MAX” (see 3.6).
Water drips onto the fabric. Water may come out when
you press the steam trig-
ger (4) before the appliance
reaches the set temperature.
The appliance is ready for iron-
ing the adjusted temperature is
shown on the LED display (1).
Sediments and residues fall of
from the base (16) while ironing.
Such sediments may occur if
the water you use in your ap-
pliance is too calcareous.
Fill the water reservoir of the ap-
pliance by mixing the tap water
and drinking water for your next
ironing operations.
There are stains on the base (16). Wet clothes are ironed / scale
stains have occurred on the
base (16).
Wipe the sediments and residues
with a lightly dampened cloth af-
ter the appliance is cooled down
adequately.
The on/off button (6) of the appli-
ance blinks.
The appliance may have
switched to automatic power
off mode.
Press the on/off button (7)
(see 3.12).
Calc cleaning button (5) is
blinking.
It is time for calc cleaning. Perform the calc cleaning opera-
tion (see 4.1).
Icons on the LED display (1) are
not clear.
The protecting film on the LED
display (1) may be still on.
Remove the protecting film on the
LED display (1).
Table of contents
Other Beko Iron manuals

Beko
Beko BKK 21233 User manual

Beko
Beko BKK 2174 User manual

Beko
Beko 01M-8816423200-0619-01 User manual

Beko
Beko SGA8328B User manual

Beko
Beko BKK 2174 User manual

Beko
Beko 01M-8834133200-0317-06 User manual

Beko
Beko DIM 4504 P User manual

Beko
Beko SIM 3126 R User manual

Beko
Beko BKK 2304 User manual

Beko
Beko SPA7131P User manual

Beko
Beko BKK 2132 K User manual

Beko
Beko SIM7124B User manual

Beko
Beko SIM3117 User manual

Beko
Beko BKK 2420 User manual

Beko
Beko BKK 2130 User manual

Beko
Beko SGA 8328 B User manual

Beko
Beko BKK 2134 B User manual

Beko
Beko SIM4126B User manual

Beko
Beko 01M-8832733200-4015-01 User manual

Beko
Beko SIM4123T User manual