manuals.online logo
Brands
  1. Home
  2. •
  3. Brands
  4. •
  5. Belize Bicycle
  6. •
  7. Bicycle
  8. •
  9. Belize Bicycle TRI-RIDER User manual

Belize Bicycle TRI-RIDER User manual

BELIZE BICYCLE
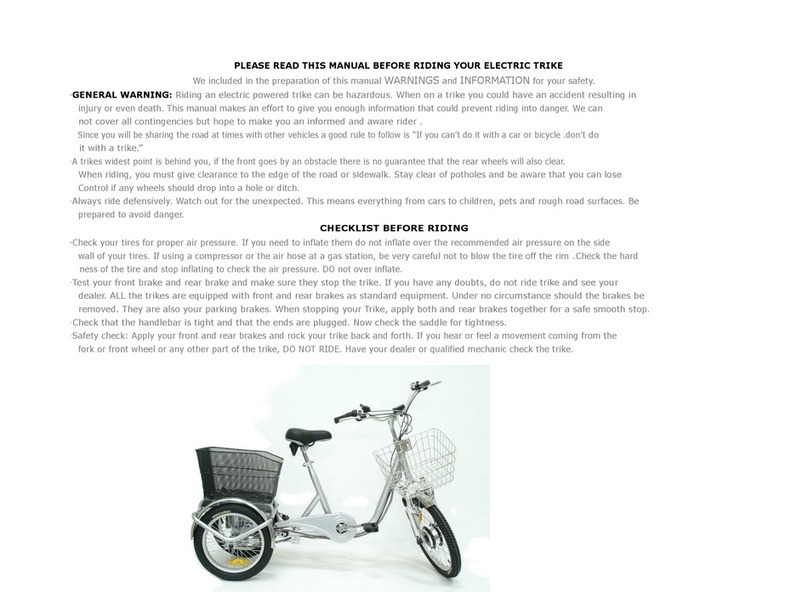
TRI-RIDER Fat Trike Assembly Guide
Page 1 of 4
PREPARATION
1. Read this assembly manual BEFORE commencing assembly.
2. Carefully remove all the components and packaged hardware from the shipping box.
3. Check the contents of the box and confirm that you have received a complete
package. The contents should include:
(1) A main frame assembly
(2) Handlebars and quill stem with brake levers and grips
(3) Rear frame assembly with final drive cog and band brake
(4) A sprung saddle
(5) Two 20-inch rear wheels, one 20-inch front wheel
(6) Rear basket assembly
(7) A plastic bag with assembly hardware
ASSEMBLY
1. Open the plastic bag containing mounting hardware. Group all similar nuts and bolts in
preparation for assembly.
To assemble the main components the included parts bag must have all the hardware and
items identified in the table below
ITEM
QUANTITY
INSTALLATION
36T square taper crank
1 (R)
Install on square taper bottom bracket
Grease threads and tighten to 30 foot-pounds (40Nm)
Square taper crank arm
1 (L)
5/8in pedals
Pair (L/R)
Install in crank arms
Grease threads and tighten to 30 foot-pounds (40Nm)
Plastic axle caps
2
Install over bottom bracket hardware (press fit)
BELIZE BICYCLE
TRI-RIDER Fat Trike Assembly Guide
Page 2 of 4
ITEM
QUANTITY
INSTALLATION
Seat post 28.6mm dia
1
Install in seat tube after attaching seat
Hone and grease seat tube
Chain (single speed)
1
Install over front crank and rear drive cog
Attach with included chain link
Tension chain before tightening frame mounting
hardware to 30 foot-pounds (40Nm)
Brake rotor (160mm)
1
Install on front wheel
Torque to 4-5 pound-foot (6-8Nm)
M5 x 10mm hex bolts
6
Mechanical brake caliper
1
Install on front fork
Torque to 4-5 pound-foot (6-8Nm)
M6 x 18.7mm bolts
2
Inner brake cable
2
Install front brake cable and housing
Adjust brake and torque pinch bolt to 6-8Nm
Trim cable and install crimp
Install rear brake cable and housing with return spring
over inner cable and between adjuster screw and
brake return arm
Adjust brake and torque pinch bolt to 4-5 pound-foot
(6-8Nm)
Trim cable and install crimp
Front brake housing
950mm
1
Rear brake housing
1760mm
1
Spring for rear band brake
1
Cable crimp
2
M5 x 35mm Phillips round
pan head
4
Install basket frame to rear trike triangle using 4 longer
M5 x 35mm Phillips round pan head screws. Install
washers behind locknuts.
BELIZE BICYCLE
TRI-RIDER Fat Trike Assembly Guide
Page 3 of 4
ITEM
QUANTITY
INSTALLATION
M5 x 30mm Phillips round
pan head
12
Install wood cross beams to rear basket frame using
12 shorter M5 x 35mm Phillips round pan head screws.
Install washers behind locknuts
M5 flat washer
16
M5 locknut
16
M5 x 10mm washer-head
screw
2
Use to mount chain-guard to trike frame after installing
and tensioning drive chain
2. Prop the front frame assembly vertically and align the rear frame section perpendicular
to it. Slide the rear assembly forward inside the rear frame dropouts on the front frame
assembly aligned with the slots on the rear frame section. Install the first set of bolt
assemblies from the outside. Bolt head / washer on the outside and washer / lock washer /
nut on the inside. Add the second set of anchoring bolts to the dropouts (Bolt head /
washer on the outside and washer / lock washer / nut on the inside.)
3. After installing and tensioning the chain, tighten all four bolts that hold the two frame
sections together making sure that the rear is perpendicular to the front.
4. Unwrap and separate the wheels. Use caution when unpacking. The front, drive side
and non-drive side wheels are all different.
5. Install the drive side rear wheel (right hand side RHS). This axle nut should be fully
tightened (40Nm) and locked in place with the secondary cap nut. The drive wheel and
non-drive wheels are NOT interchangeable. The drive side hub has a keyway and no
bearings.
6. Install the non-drive side wheel. DO NOT OVERTIGHTEN!! Be sure that the left axle
nut is loose enough that the inside spacer is just barely free to spin by hand.
Overtightening will side-load the bearings and cause premature wear and bearing failure.
A clicking noise from the left wheel bearing while driving is a symptom of overtightening.
Lock the axle nut in place with the secondary cap nut.
BELIZE BICYCLE
TRI-RIDER Fat Trike Assembly Guide
Page 4 of 4
7. Install the front wheel assembly making sure that the tabs on the safety washers fit into
the holes on the fork and that the rim is centered in the fork arch before tightening the axle
nuts.
8. Install the gooseneck and handlebar assembly past the minimum depth marked on the
gooseneck. Secure by tightening the stem expander bolt. Be sure to center the stem with
the front wheel so it tracks in a straight line. Brake levers and grips are pre-installed on the
handlebar.
9. Complete the rear band-brake cable installation by passing the cable through the rear
cable adjustment assembly, over the brake return spring and finally under the washer
below the anchoring nut. Adjust cable tension so that parking brake is fully engaged when
brake lever is parallel to the handlebar.
10. Complete the front disc brake adjustment. The inner pad must be advanced so that the
caliper just touches it when the rotor is centered in the caliper. Lock down the caliper bolts
in this position, anchor the brake cable with the cable fixing screw and make final
adjustments by slightly backing off the rear pad adjustment and fine tuning the cable
adjustment
11. Install the seat on the seat post but do not tighten completely. Leveling is best done on
the trike.
12. Lightly grease inside the seat tube and install the seat and seat post assembly. The
seat position can be adjusted slightly by sliding the seat backwards or forwards on the
seat rails.
•A smaller rider can be better accommodated by reversing the gooseneck than
by advancing the seat to an extreme forward position. A larger rider can be better
accommodated by installing a gooseneck with a longer stem than by installing the seat
in its extreme backwards position.
13. Install the pedals (L on the left side with a counter clockwise thread, R on the right with
a regular clockwise thread).
14. Install the chain guard using the two washer head mounting screws provided.
15. Install cable crimps after adjusting and trimming the brake cables.
16. Inflate the tires. The recommended tire pressure in marked on the tire sidewall. Adjust
the handlebar angle and the seat height.

Other Belize Bicycle Bicycle manuals

Belize Bicycle PUNTA User manual

Belize Bicycle

Belize Bicycle PUNTA User manual

Belize Bicycle 98304 User manual

Belize Bicycle

Belize Bicycle 98304 User manual

Belize Bicycle TRI-RIDER R-3 User manual

Belize Bicycle

Belize Bicycle TRI-RIDER R-3 User manual

Belize Bicycle BUDDY TRIKE Instruction Manual

Belize Bicycle

Belize Bicycle BUDDY TRIKE Instruction Manual

Belize Bicycle Comfort Tri-Rider User manual

Belize Bicycle

Belize Bicycle Comfort Tri-Rider User manual

Belize Bicycle Super SOCO User manual

Belize Bicycle

Belize Bicycle Super SOCO User manual

Belize Bicycle Twin Tri-Rider Tandem User manual

Belize Bicycle

Belize Bicycle Twin Tri-Rider Tandem User manual

Belize Bicycle TRI-RIDER R-2 User manual

Belize Bicycle

Belize Bicycle TRI-RIDER R-2 User manual

Popular Bicycle manuals by other brands

Grace ONE manual

Grace

Grace ONE manual

Woosh Gran Camino manual

Woosh

Woosh Gran Camino manual

Razor FLASHRIDER 360 user manual

Razor

Razor FLASHRIDER 360 user manual

TAUBIK SOHO 2.0 user manual

TAUBIK

TAUBIK SOHO 2.0 user manual

Oxybul FREEbul 331067 manual

Oxybul

Oxybul FREEbul 331067 manual

Cycle Force Group BICYCLE BABY TRAILER & JOGGER Assembly instructions

Cycle Force Group

Cycle Force Group BICYCLE BABY TRAILER & JOGGER Assembly instructions

Giant TWIST FREEDOM DX datasheet

Giant

Giant TWIST FREEDOM DX datasheet

RAMBO R1000X2M-FF-BFD manual

RAMBO

RAMBO R1000X2M-FF-BFD manual

Vermeiren SAFARI Maintenance manual

Vermeiren

Vermeiren SAFARI Maintenance manual

Velec A2/36V owner's manual

Velec

Velec A2/36V owner's manual

Cervélo S3 2019 Assembly manual

Cervélo

Cervélo S3 2019 Assembly manual

Festo EGSC-BS-KF Instructions & Operating

Festo

Festo EGSC-BS-KF Instructions & Operating

Gio Electric H1 Volt owner's manual

Gio Electric

Gio Electric H1 Volt owner's manual

Huka orthros manual

Huka

Huka orthros manual

DAHON CIAO - 2009 manual

DAHON

DAHON CIAO - 2009 manual

Aprimatic ONDA 500 Installation, use and maintenance instructions

Aprimatic

Aprimatic ONDA 500 Installation, use and maintenance instructions

Greyp G6 Series user manual

Greyp

Greyp G6 Series user manual

Babboe Carve-E user manual

Babboe

Babboe Carve-E user manual

manuals.online logo
manuals.online logoBrands
  • About & Mission
  • Contact us
  • Privacy Policy
  • Terms and Conditions

Copyright 2025 Manuals.Online. All Rights Reserved.