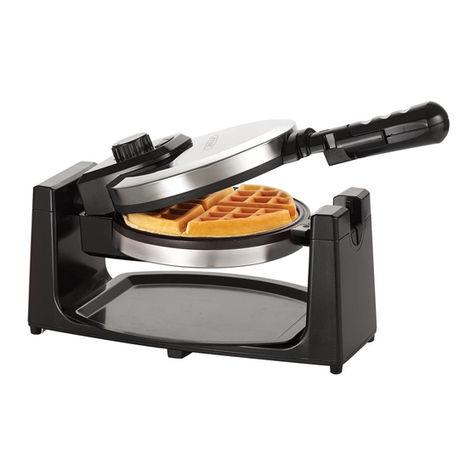
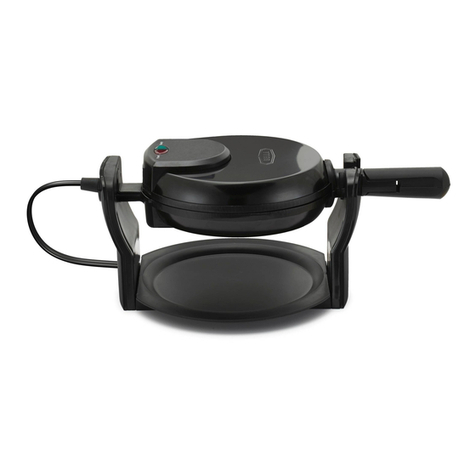
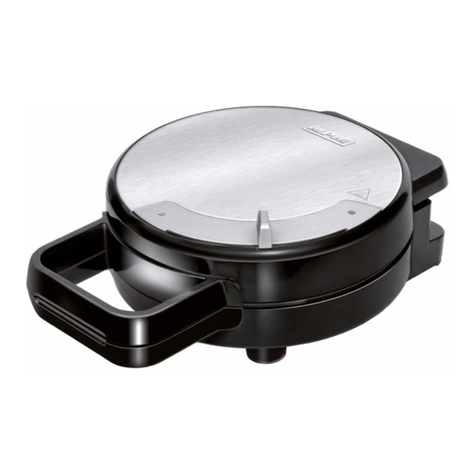
Bella 14690 User manual

CERAMIC ROTATING BELGIAN WAFFLE MAKER
CERÁMICA ROTATIF WAFLERA GIRATORIA
BELGA REVESTIDA
Instruction Manual (Recipe Guide)
Manual de instrucciones (Guía de recetas)
Register your product and get support at:
Para registrar y obtener asistencia de su producto ir:
www.bellahousewares.com
SO-315537_14690_BELLA_4sl Square Rotating Waffle Maker_WM_IM_R4.indd 1 2018-06-29 11:56 AM

THANK YOU
For Your Purchase
BellaLifestyle BellaLife
@
bellahousewares.com
#get inspired
Register& sign up for special
announcements and trendy
recipes!
Tell us what you think!
Rate, review or ask us a question.
Table Of Contents
Important Safeguards....................................................................................................................................... 2
Additional Important Safeguards.................................................................................................................... 3
Notes On The Plug.............................................................................................................................................3
Notes On The Cord............................................................................................................................................ 3
Plasticizer Warning............................................................................................................................................ 3
Electric Power.....................................................................................................................................................3
Getting To Know Your Wafe Maker ..............................................................................................................4
Before Using For The First Time .....................................................................................................................4
Operating instructions...................................................................................................................................4-5
Locking And Unlocking Your Wafe Maker ...................................................................................................5
Tips For Perfectly Baked Wafes ....................................................................................................................5
Cleaning And Maintenance .............................................................................................................................. 5
Cleaning and Maintenance............................................................................................................................... 6
User maintenance instructions ................................................................................................................6
Storing Instructions ................................................................................................................................... 6
Recipes........................................................................................................................................................... 7-10
Warranty ........................................................................................................................................................... 11
Índice
Medidas De Seguridad Importantes............................................................................................................. 12
Otras Medidas De Seguridad Importantes .................................................................................................. 13
Notas Sobre El Enchufe.................................................................................................................................. 13
Notas Sobre El Cable ...................................................................................................................................... 13
Advertencia Sobre El Plasticante................................................................................................................ 13
Energía Eléctrica .............................................................................................................................................. 13
Conozca su waera ......................................................................................................................................... 14
Antes Del Primer Uso...................................................................................................................................... 14
Instrucciones de uso ..................................................................................................................................14-15
Para Colocar Y Quitar El Seguro De La Waera.......................................................................................... 15
Consejos Para Obtener Waes Perfectamente Cocidos .......................................................................15-16
Limpieza Y Mantenimiento............................................................................................................................. 16
Instrucciones de mantenimiento............................................................................................................ 16
Instrucciones de almacenamiento......................................................................................................... 16
Recetas.........................................................................................................................................................17-20
Garantía............................................................................................................................................................. 21
SO-315537_14690_BELLA_4sl Square Rotating Waffle Maker_WM_IM_R4.indd 1 2018-06-29 11:56 AM

32
IMPORTANT SAFEGUARDS
WARNING: When using electrical appliances, basic safety precautions should
always be followed, including the following:
1. READ ALL INSTRUCTIONS BEFORE USING APPLIANCE.
2. Do not touch hot surfaces. Use handles or knobs.
3. To protect against risk of electric shock, do not immerse or partially immerse
the cord, plugs, or the entire unit in water or any other liquid.
4. This appliance is not intended for use by persons (including children) with
reduced physical, sensory or mental capabilities, or lack of experience and
knowledge, unless they have been given supervision or instruction concerning
use of the appliance by a person responsible for their safety.
5. Close supervision is necessary when any appliance is used by or near children.
6. Unplug from wall outlet when not in use and before cleaning. Allow to cool
before cleaning or storing this appliance.
7. Never yank the cord to disconnect the appliance from the outlet. Instead, grasp
the plug and pull to disconnect.
8. Do not operate any appliance with a damaged cord or plug or after the appliance
malfunctions or is dropped or damaged in any manner. Bring the appliance
to a qualied service agent for examination, repair or electrical/mechanical
adjustment to avoid hazard.
9. The use of accessories attachments not recommended by the appliance
manufacturer may cause re, electrical shock or injuries.
10. Do not use outdoors. This is for household only.
11. Do not use for commercial purposes.
12. Do not let the electrical cord hang over the edge of the table or counter,
or touch hot surfaces.
13. Do not allow appliance to come into contact with any materials that are
ammable such as draperies, walls, etc.
14. Do not place on or near a hot gas or electric burner or in a heated oven.
15. Use on a heat-resistant, at level surface only.
16. Extreme caution must be used when moving an appliance containing hot food,
hot water, hot oil or other hot liquids.
17. The cord to this appliance should be plugged into a 120V AC electrical
outlet only.
18. A short power-supply cord is to be provided to reduce the risk resulting
from becoming entangled in or tripping over a longer cord.
19. To disconnect, remove plug from outlet.
20. Always unplug after use. The appliance will remain ON unless unplugged.
21. CAUTION HOT SURFACES: This appliance generates heat during use.
Proper precautions must be taken to prevent the risk of burns, re or other
damage to persons or property.
22. When using this appliance, provide adequate ventilation above and on all sides
for air circulation. Do not allow this appliance to touch curtains, wall coverings,
clothing, dish towels or other ammable materials during use.
23. Do not use appliance for other than intended use. Use with wall receptacle only.
FOR HOUSEHOLD USE ONLY
SAVE THESE INSTRUCTIONS
ADDITIONAL IMPORTANT
SAFEGUARDS
CAUTION: This appliance is hot during operation and retains heat for some time after
turning OFF. Always use oven mitts when handling hot materials and allow metal
parts to cool before cleaning. Do not place anything on top of the appliance while it
is operating or while it is hot.
1. All users of this appliance must read and understand this Instruction Manual
before operating or cleaning this appliance.
2. Do not leave this appliance unattended during use.
Notes on the Plug
This appliance has a polarized plug (one blade is wider than the other). To reduce
the risk of electric shock, this plug will t in a polarized outlet only one way. If the
plug does not t fully into the outlet, reverse the plug. If it still does not t, contact
aqualied electrician. Do not modify the plug in any way.
Notes on the Cord
A. A short power-supply cord (or detachable power-supply cord) is to be provided
to reduce the risk resulting from becoming entangled in or tripping over a longer
cord.
B. Longer detachable power-supply cords or extension cords are available and may
be used if care is exercised in their use.
C. If a long detachable power-supply cord or extension cord is used :
1. The marked electrical rating of the cord or extension cord should be at least
asgreat as the electrical rating of the appliance;
2. If the appliance is of the grounded type, the extension cord should be a
grounding-type3-wire cord; and
3. The longer cord should be arranged so that it does not drape over
thecountertop or table top where it can be pulled on by children or
trippedover unintentionally.
Plasticizer Warning
CAUTION: To prevent Plasticizers from migrating to the nish of the counter top or
table top or other furniture, place NON-PLASTIC coasters or place mats between
theappliance and the nish of the counter top or table top. Failure to do so may
cause the nish to darken; permanent blemishes may occur or stains can appear.
Electric Power
If the electrical circuit is overloaded with other appliances, your appliance may
notoperate properly. It should be operated on a separate electrical circuit from
otherappliances.
SO-315537_14690_BELLA_4sl Square Rotating Waffle Maker_WM_IM_R4.indd 2-3 2018-06-29 11:56 AM

54
12. Lift the top cooking plate gently. If it pulls, continue cooking for 30 seconds and test again for doneness.
NOTE: Wafes should be baked according to the temperature control setting chosen. If the wafes need to
bake to a darker nish, turn the temperature control dial to increase the setting, close the lid and continue to
bake for 30 additional seconds, checking until the desired color is achieved.
13. Remove wafes from the cooking plates using a using a rubber spatula or any non- metallic utensil.
CAUTION HOT SURFACES:Wafe Maker cooking plates are very hot during use. Use oven mitts when
removing baked wafes to prevent the risk of burns.
NOTE: If additional wafes are to be baked, keep the lid closed to retain heat. Always be sure the Blue READY
light is illuminated before baking more wafes.
NOTE: Wafes made later will bake faster because extra heat has been retained.
14. When baking is complete, unplug the power cord from electric outlet. Make sure the Rotating Square Wafe
Maker’s bottom cooking plate is positioned at and locked into a stable position. Lift top cooking plate and
allow to cool.
WARNING: Always unplug after use. The Wafe Maker will remain ON until unplugged.
15. Do not clean until Wafe Maker has fully cooled.
Locking And Unlocking Your Wafe Maker
Your Wafe Maker is unlocked only when the Control Knob is facing up. You can only open the Wafe Maker
in the unlocked position.
Tips For Perfectly Baked Wafes
1. Sift all dry ingredients together. It is not necessary to beat egg yolks and milk separately.
2. Beat egg whites until they form stiff peaks. Stir 1/4 of the beaten whites into the batter to lighten it, and then gently
fold in the rest.There should be white streaks in the batter. Do not over-mix batter when adding egg whites.
3. Some recipes may be doubled. Do not make large batches of batter when whipped egg whites have been used to
lighten the wafe.
4. Do not open the Rotating Square Wafe Maker during the rst minute of baking or the wafe will separate.
Completely bake wafes before removing.
5. When preparing wafe batter with gluten our, do not over-mix or wafes will be tough. Stir batter only until large
lumps of dry ingredients disappear.
6. The optimal amount of batter to produce a full-shaped wafe, without overowing, will vary with different wafe
batters. Pouring batter from a measuring cup will help to gauge how much batter to use each time. Fill bottom
cooking plate of Rotating Square Wafe Maker with enough batter to cover peak areas. Begin with 1 scant cup.
Add more if needed.
7. For more evenly shaped wafes, spread thick batters to the outer edge of the cooking plate using a heat-proof
rubber spatula or other non-metallic utensil before closing the lid.
8. To retain crispness, move baked wafes to a wire cooling rack.To keep wafes warm, place on an ovenproof dish
on an oven rack and warm at about 200-250°F (90-120°C). Wafes will keep for about 20 minutes before they begin
to dry out.
9. Baked wafes freeze well. Cool completely on a wire rack. Store in a plastic freezer bag or in a covered container,
separating wafes with wax paper.
10. Reheat frozen wafes in a toaster oven, convection oven, conventional oven or toaster until hot and crisp.
For gluten-free wafes:
Use gluten-free baking mixes.
Use gluten-free our.
Replace our in recipes with combinations of: coconut our, rice our, almond our, oat our, corn meal.
For lower fat, lower cholesterol wafes:
• Use skim milk.
• Replace full fat milk with nut or seed milks: almond, cashew, soy, ax, or hemp seed milk.
• Use whites only, eliminate the egg yolk.
• Always use liquid vegetable oils such as canola, coconut, corn or sunower, instead of butter.
• Replace 1 egg with 3 tablespoons cold water + 1 tablespoon ground ax seed.*
• Replace 1 egg with 3 tablespoons cold water + 1/2 tablespoon ground chia seed.*
For higher ber wafes:
• Substitute 1/2 cup or more of white our with whole-wheat our.
• Substitute 1/4 cup of white our with wheat or oat bran.
• Replace 1 egg with 3 tablespoons cold water + 1 tablespoon ground ax seed.*
• Replace 1 egg with 3 tablespoons cold water + 1/2 tablespoon ground chia seed.*
*When creating eggs using ground ax or chia seeds, allow the mixture to rest
for 5 minutes until thickened. Mix well before adding to wafe batter recipe.
Getting To Know Your Wafe Maker
Product may vary slightly from illustration
Temperature control dial
Top Cooking Plate
Handle
Bottom Cooking Plate
Base
Red POWER Light
Blue READY Light
* Drip tray included
tocollect overow
ofbatter and crumbs.
Drip tray*
Before Using For The First Time
• Carefully unpack the Rotating Square Wafe Maker and remove all packaging and materials.
• Wipe the cooking plates with a damp cloth to remove all dust, and then dry. Wipe the base and outer
surfaces with a slightly damp, soft cloth or sponge.
CAUTION: Take care to prevent water from running into the appliance.
NEVER IMMERSE THE ROTATING WAFFLE MAKER BODY IN WATER OR ANY OTHER LIQUIDS!
• Set the appliance on a dry, clean and at surface. Keep the Wafe Maker closed until use
Operating instructions
1. Lift the top cooking plate.
2. Make sure the Rotating Square Wafe Maker’s bottom cooking plate is positioned at and locked into a stable
position. Before baking the rst wafes of the day, use a pastry brush to lightly coat the top and bottom wafe
plates with butter or vegetable oil.
3. PlugWafe Maker into a 120V AC electrical outlet.The red POWER light will illuminate and remain lit during use.
NOTE: When your Rotating Square Wafe Maker is heated for the rst time, it may emit slight odor or smoke.
This is normal and should disappear after one or two uses. This does not affect the safety of the appliance.
However, as it may affect the avor of the rst wafes prepared in the Wafe Maker, it is recommended that
these be discarded.
4. Turn the temperature control dial to MAX to preheat.
5. While preheating, prepare wafe batter.
6. After approximately 3 minutes, the Blue READY light will illuminate, indicating the unit is preheated and ready
for use.
7. Turn the temperature control dial to MID, MED, or MAX. Most wafes baked at the MEDIUM will produce
a lighter to nicely browned wafe, while wafes baked at a higher setting (MEDIUM-DARK) are darker and
crispier. When preparing a recipe for the rst time, turn the temperature control dial to MEDIUM; then adjust
according to preference. Recipes will vary in cook time and brownness; batters with more sugar will brown
quicker. Thicker batters may require a longer cooking time. Note the perfect temperature and time setting for
each batter recipe for future use.
8. Lift the top cooking plate.
9. Pour or ladle 1 scant cup of wafe batter onto the bottom cooking plate. Add just enough batter to ll bottom
cooking plate so that the peak area is covered. Use a heat-proof spatula to spread the batter in to the corners
of the plate. Do not overll; batter will expand when cooked.
10. Lower the top cooking plate to close the Rotating Square Wafe Maker and rotate unit 180° to the bottom side.
11. As the Rotating Square Wafe Maker cooks, the Blue READY light (on the bottom side of the Wafe Maker) will
be off. When the Blue READY light illuminates steadily, rotate the Wafe Maker 180° to the top side, until it is
at and locked into a stable position.
SO-315537_14690_BELLA_4sl Square Rotating Waffle Maker_WM_IM_R4.indd 4-5 2018-06-29 11:56 AM

Recipes
76
Recipes
Wafe Base Mix
This easy to make wafe mix can be made in so many ways with only a few ingredients from your
pantry. Try both savory and sweet recipes for a unique way to serve this classic breakfast favorite
at anytime of the day!
• 3 cups all-purpose our
• 2 tbsp. baking powder
• 1 tsp. salt
• 1⁄2 cup sugar
Mix all ingredients together and store in an airtight container until ready to use.
Classic Buttermilk Wafes
Makes 4 wafes
• 1 1⁄2 cups Mix Wafe Base
• 2 eggs
• 4 tbsp. melted butter
• 1⁄2 cup buttermilk
1. In a mixing bowl, combine all ingredients and whisk until mixture is smooth and contains
no lumps.
2. In preheated wafe iron, ladle in about 1⁄3 cup for each wafe and cook until wafes are
golden brown (about 2-4 minutes).
TIPS:
Add 1⁄4 cup of your favorite jam avor to batter before cooking.
Layer wafes with fresh fruit, toasted nuts, honey, avored syrups or yogurt for a delicious
breakfast or treat.
Chocolate Chip Wafes
Makes 4 wafes
• 1 1⁄2 cups Mix Wafe Base
• 4 tbsp. melted butter
• 2 eggs
• 1⁄2 cup buttermilk
• 1⁄4 cup chocolate chips
1. In a mixing bowl, combine all ingredients and whisk until mixture is smooth and contains
nolumps.
2. In preheated wafe iron, ladle in about 1⁄3 cup for each wafe and cook until wafes are golden
brown (about 2-4 minutes).
Cleaning and Maintenance
User maintenance instructions
1. This appliance requires little maintenance. It contains no user-serviceable parts. Any servicing requiring
disassembly other than cleaning must be performed by a qualied appliance repair technician.
WARNING: To protect the premium quality non-stick surfaces, use only plastic, nylon or wooden
utensils to remove wafes.
CAUTION: Unplug from electrical outlet and allow to cool thoroughly before cleaning.
2. The Rotating Square Wafe Maker does not disassemble for cleaning.
3. Never immerse appliance in water or other liquids. Never place Rotating Square Wafe Maker in a
dishwasher.
4. The wafe cooking plates should be cleaned and conditioned before each heating.
A moist paper towel can be used to wipe down and remove cooked-on batter from the plates.
A dry, clean, soft pastry brush or cloth can be used to clean the cooking plates.
5. To condition cooking plates, lightly coat the cooking surfaces with solid vegetable shortening or
vegetable oil. After a time, if wafes show signs of sticking, recondition as needed.
WARNING: To protect the premium quality non-stick surfaces, use only plastic, nylon or
woodenutensils.
6. To remove any batter baked onto the cooking plates, pour a small amount of cooking oil onto the
hardened batter. Allow to set for 5 minutes, then wipe softened batter off with a paper towel or soft
cloth. Remove stubborn stains with a plastic mesh puff or pad. For best results, use only products with
directions stating that it is safe for cleaning non-stick cooking surfaces. Do not use steel wool or coarse
scouring pads.
7. Use a soft kitchen brush and water to remove baked-on batter from the base and the exterior of the
Wafe Maker. The exterior nish should be cleaned using a non-abrasive cleanser and a soft, damp
cloth. Dry thoroughly.
Storing Instructions
1. Make sure unit is unplugged and fully cooled before storing.
2. Never wrap cord tightly around appliance. Do not put any stress on cord where it enters unit,
as this could cause cord to fray and break.
3. After cleaning, store the Wafe Maker closed in a clean, dry area for future use
SO-315537_14690_BELLA_4sl Square Rotating Waffle Maker_WM_IM_R4.indd 6-7 2018-06-29 11:56 AM

Recipes Recipes
98
RECIPE GUIDE
Enriched with magnesium, potassium and iron, garbanzo beans (or chickpeas) fuel the body, provide
muscle-building protein, and are an excellent source of dietary ber. These avorful Falafel Wafes
make a light and uffy base for the luscious and lling Avocado Herb Spread. These Falafel Wafes
are perfect for any meal. Replace the all-purpose our with rice our for a gluten-free alternative.
Falafel Wafe with Avocado Herb Spread
Makes 8 wafe squares
• 1 (15 oz.) can garbanzo beans (chickpeas),
drained and rinsed
• 1 large egg
• 1/2 cup chopped fresh cilantro (may replace
with dill or parsley)
• 3 cloves roasted garlic, or more to taste
• 2 tablespoons all-purpose our
• 2 teaspoons Kosher salt
• 1 tablespoon ground cumin
• 2 teaspoons ground coriander
• 1/4 teaspoon black pepper
• 1/4 teaspoon cayenne pepper
• 1-2 tablespoons water, as needed
• zest of 1 lemon, optional
• Preheat Wafe Maker.
1. Use a food processor to blend wafe batter. Place all ingredients into the chopping bowl.
Addegg, cilantro, roasted garlic, our, and seasoning to garbanzo beans. Pulse, scraping down
the sides of the bowl occasionally, until falafel batter resembles a coarse meal. Pour batter into
a bowl and stir with a fork. Use a tablespoon of water at a time to thin batter if needed.
2. Use a measuring cup to add about 1/4 cup falafel batter onto each section of the preheated
wafe iron.
3. Lower the top cooking plate to close the Rotating Square Wafe Maker and rotate unit
180°tothe bottom side.
4. As the Rotating Square Wafe Maker cooks, the Blue READY light (on the bottom side of
theWafe Maker) will be off. When the Blue READY light illuminates steadily, rotate theWafe
Maker 180° to the top side, until it is at and locked into a stable position.
5. Lift the top cooking plate gently. If it pulls, continue cooking for 30 seconds and test again
fordoneness. Cook until evenly browned. Repeat with remaining batter.
PB & J Drizzled Cookie Wafes
Makes 8 wafe squares
• 1 package Peanut Butter Cookie Mix (17.5 oz.)
• vegetable oil, according to package
• eggs, according to package
• 1 additional egg
• 2 tablespoons milk
• 1 teaspoon baking powder
• 1/4 - 1/2 cup add-ins:
• (dried cranberries, raisins, chopped peanuts,
chocolate chips, peanut butter chips, or white
chocolate chips)
• Preheat Wafe Maker.
1. Add all ingredients into a large bowl. Mix well.
2. Use a measuring cup to add about 1 cup peanut butter wafe mixture onto the center of the
preheated wafe iron.
3. Lower the top cooking plate to close the Rotating Square Wafe Maker and rotate unit 180° to
the bottom side.
4. As the Rotating Square Wafe Maker cooks, the Blue READY light (on the bottom side of the
Wafe Maker) will be off. When the Blue READY light illuminates steadily, rotate the Wafe
Maker 180° to the top side, until it is at and locked into a stable position.
5. Repeat with remaining batter.
Blueberry Wafes
Makes 4 wafes
• 1 1⁄2 cups Mix Wafe Base
• 4 tbsp. melted butter
• 2 eggs
• 1⁄2 cup buttermilk
• 1⁄4 cup blueberries
1. In a mixing bowl, combine all ingredients and whisk until mixture is smooth
and contains no lumps.
2. In preheated wafe iron, ladle in about 1⁄3 cup for each wafe and cook until wafes are
golden brown (about 3-4 minutes).
TIP:
Top with sliced strawberries for a berry-delicious breakfast!
S’more Brownie Wafe Sandwich
Makes 12 wafe squares
• 1 box Brownie Mix
(13 x 9” Family Size, 18.3 oz.)
• vegetable oil, according to package
• eggs, according to package
• 1 additional egg
• 4 graham crackers (8 halves)
• 1/2 – 1 cup milk chocolate chunks
(may substitute milk chocolate, white
chocolate or dark chocolate chips)
• 1 bag marshmallows, large or small,
ormarshmallow cream
1. Preheat Wafe Maker.
2. Break graham crackers into 1-inch pieces.
3. Add all ingredients into a large bowl. Mix well.
4. Use a measuring cup to add about 1 cup brown wafe mixture onto the center
of the preheated wafe iron.
5. Lower the top cooking plate to close the Rotating Square Wafe Maker and rotate unit
180°tothe bottom side.
6. As the Rotating Square Wafe Maker cooks, the Blue READY light (on the bottom
side of the Wafe Maker) will be off. When the Blue READY light illuminates steadily,
rotatetheWafeMaker 180° to the top side, until it is at and locked into a stable position.
7. Repeat with remaining batter.
8. Sandwich marshmallows (toasted or raw) between hot brownie wafes.
SO-315537_14690_BELLA_4sl Square Rotating Waffle Maker_WM_IM_R4.indd 8-9 2018-06-29 11:56 AM

Limited TWO-YEAR Warranty
SENSIO Inc. hereby warrants that for a period of TWO YEARS from the date
of purchase, this product will be free from mechanical defects in material and
workmanship, and for 90 days in respect to non-mechanical parts. At its sole
discretion, SENSIO Inc. will either repair or replace the product found to be defective,
or issue a refund on the product during the warranty period.
The warranty is only valid for the original retail purchaser from the date of initial
retail purchase and is not transferable. Keep the original sales receipt, as proof of
purchase is required to obtain warranty validation. Retail stores selling this product
do not have the right to alter, modify, or in any way revise the terms and conditions of
the warranty.
EXCLUSIONS:
The warranty does not cover normal wear of parts or damage resulting from
any of the following: negligent use of the product, use of improper voltage or
current, improper routine maintenance, use contrary to the operating instructions,
disassembly, repair, or alteration by anyone other than qualied SENSIO Inc.
personnel. Also, the warranty does not cover Acts of God such as re, oods,
hurricanes, or tornadoes.
SENSIO Inc. shall not be liable for any incidental or consequential damages caused
by the breach of any express or implied warranty. Apart from the extent prohibited
by applicable law, any implied warranty of merchantability or tness for a particular
purpose is limited in time to the duration of the warranty. Some states, provinces or
jurisdictions do not allow the exclusion or limitation of incidental or consequential
damages, or limitations on how long an implied warranty lasts, and therefore, the
above exclusions or limitations may not apply to you. The warranty covers specic
legal rights which may vary by state, province and/or jurisdiction.
HOW TO OBTAIN WARRANTY SERVICE:
You must contact Customer Service at our toll-free number: 1-866-832-4843.
A Customer Service Representative will attempt to resolve warranty issues over
the phone. If the Customer Service Representative is unable to resolve the problem,
you will be provided with a case number and asked to return the product to SENSIO
Inc. Attach a tag to the product that includes: your name, address, daytime contact
telephone number, case number, and description of the problem. Also, include a
copy of the original sales receipt. Carefully package the tagged product with the sales
receipt, and send it (with shipping and insurance prepaid) to SENSIO Inc.’s address.
SENSIO Inc. shall bear no responsibility or liability for the returned product while in
transit to SENSIO Inc.’s Customer Service Center.
11
Recipes
10
Jelly Drizzle
• 4 tablespoons water
• 2 teaspoons lemon or orange juice
• 4 teaspoons jelly
or jam of your choice
1. Place ingredients into a small microwave-safe bowl.
2. Heat on high power in 30 seconds intervals, stirring until mixture is loosened and pourable.
3. Place in a spouted gravy boat or squeeze bottle and serve with PB Wafes.
4. Top with fresh sliced bananas or berries, if desired.
Avocado Herb Spread
• 2 ripe avocados, cut into chunks
• 2 tablespoons extra virgin olive oil or
avocado oil
• 1 cup chopped fresh cilantro
(may replace with dill or parsley)
• 2 tablespoons plain Greek yogurt
(or more, to thin)
• 4 teaspoons ground cumin
• 2 teaspoons ground coriander
• 1/2 teaspoon black pepper
• 1/2 t teaspoon cayenne pepper
• 1 lemon, zested and juiced
• sweet Hungarian paprika to garnish
1. Use a food processor to blend Avocado Herb Spread. Place all ingredients into the chopping bowl.
2. Pulse rst to break down the avocado; scrape down the sides of the bowl. Process at full power
until spread is smooth. If desired, add water to thin out mixture.
Spiralized Blue Zucchini Wafes topped with Prosciutto(Gluten-
Free, Low Carb, Keto friendly)
Makes 8 wafe squares
• 2 cups zucchini, spiralized or shredded
• 1/2 cup onion grated
• 2 eggs
• 1/2 cup shredded mozzarella cheese
• 1/2 cup grated parmesan cheese
• 16 slices prosciutto
1. Spiralize or shred Zucchi ni by hand or in a food processor tted with a shredding blade.
2. Wrap the spiralized (or shredded) zucchini in a clean kitchen towel or a paper towels and wring
out as much water as possible. Change to a dry towel and wring again.
In a large mixing bowl, beat eggs with a fork. Tear 4 slices of prosciutto into large pieces. Add
cheese and zucchini mixture. Mix well.
Use a measuring cup to add about 1 cup zucchini wafe mixture onto the center of the preheated
wafe iron.
Lower the top cooking plate to close the Rotating Square Wafe Maker and rotate unit 180° to the
bottom side.
As the Rotating Square Wafe Maker cooks, the Blue READY light (on the bottom side of the Wafe
Maker) will be off. When the Blue READY light illuminates steadily, rotate the Wafe Maker 180° to
the top side, until it is at and locked into a stable position.
Lift the top cooking plate gently. Add 1 piece of prosciutto to each wafe square, continue cooking
for 2 minutes and test again for doneness. Cook until evenly browned. Repeat with remaining
batter.
SO-315537_14690_BELLA_4sl Square Rotating Waffle Maker_WM_IM_R4.indd 10-11 2018-06-29 11:56 AM

1312
MEDIDAS DE SEGURIDAD
IMPORTANTES
ADVERTENCIA: Cuando se utilizan aparatos eléctricos, se deben seguir precauciones
de seguridad básicas, entre ellas:
1. LEATODAS LAS INSTRUCCIONES ANTES DE UTILIZAR EL APARATO.
2. No toque las supercies calientes. Use las manijas o perillas.
3. Para protegerse contra riesgos de descarga eléctrica, no sumerja, ni total ni parcialmente,
el cable, el enchufe ni la unidad completa en agua u otroslíquidos.
4. Este dispositivo no está diseñado para ser utilizado por personas (incluidos niños)
con capacidades físicas, sensoriales o mentales reducidas, o falta de experiencia y
conocimiento, a menos que una persona responsable de su seguridad los supervise o
instruya en el uso del aparato.
5. Es necesario supervisar atentamente a los niños si usan aparatos o están cerca de ellos.
6. Desenchufe el aparato del tomacorriente de la pared cuando no lo utilice o antes de
limpiarlo. Deje que se enfríe el aparato antes de limpiarlo o guardarlo.
7. Nunca tire del cable para desconectar el aparato del tomacorriente. En cambio, tome
el enchufe y tire de él para desconectarlo.
8. No utilice ningún electrodoméstico que tenga un cable o enchufe dañado, que
muestre un funcionamiento defectuoso o que se haya dañado de cualquier manera.
Lleve el electrodoméstico a un agente de servicio técnico calicado para que lo
examine, lo repare o le haga ajustes eléctricos o mecánicos a n de evitar accidentes.
9. El uso de accesorios no recomendados por el fabricante del artefacto puede ocasionar
incendios, descargas eléctricas o lesiones.
10. No lo utilice en el exterior. Este aparato es para uso doméstico únicamente.
11. No lo utilice para nes comerciales.
12. No permita que el cable eléctrico cuelgue del borde de la mesa o mesada ni que
toque supercies calientes.
13. No deje que el aparato entre en contacto con ningún material que sea inamable
como colgaduras, paredes, etc.
14. No lo coloque encima ni cerca de un quemador eléctrico o de gas calientes, ni de un
horno caliente.
15. Solo utilice el aparato sobre una supercie plana y resistente al calor.
16. Se debe tener sumo cuidado cuando se traslada un aparato con alimento caliente,
oagua, aceite u otros líquidos calientes.
17. El cable del aparato se debe enchufar únicamente a un tomacorriente eléctrico de
120V de CA.
18. Se suministrará un cable de alimentación corto para reducir el riesgo de enredarse o
tropezarse con un cable más largo.
19. Para desconectar la unidad, desenchúfela del tomacorriente.
20. Siempre desenchufe el aparato después de usarlo. El aparato permanecerá encendido
a menos que se desenchufe.
21. PRECAUCIÓN CON LAS SUPERFICIES CALIENTES: Este aparato genera calor durante
el uso. Se deben tomar las medidas necesarias para evitar riesgos de quemaduras,
incendios u otros daños a personas o a la propiedad.
22. Cuando utilice este aparato, deje suciente ventilación por encima y alrededor de él
para la circulación del aire. No permita que este aparato esté en contacto con cortinas,
revestimientos de paredes, ropas, repasadores u otros materiales inamables durante
su uso.
23. No le dé al aparato otro uso que no sea el indicado. Utilizar con enchufe de pared única.
GUARDE ESTAS INSTRUCCIONES
PARA USO DOMÉSTICO
ÚNICAMENTE
OTRAS MEDIDAS DE SEGURIDAD
IMPORTANTES
PRECAUCIÓN: Este electrodoméstico se calienta durante el funcionamiento y
mantiene el calor un tiempo después de apagado. Siempre use manoplas al manipular
materiales calientes y deje que las piezas metálicas se enfríen antes de limpiarlas. No
coloque nada sobre el electrodoméstico mientras esté en funcionamiento o mientras
esté caliente.Todos los usuarios de este electrodoméstico deben leer y comprender
este manual de instrucciones antes de ponerlo en funcionamiento o limpiarlo. No
descuide el electrodoméstico mientras esté en funcionamiento.
NOTAS SOBRE EL ENCHUFE
El producto tiene un enchufe polarizado (una pata es más ancha que la otra).
Para reducir el riesgo de electrocución, este enchufe viene para entrar en tomas de
corriente polarizadas de una sola forma. Si el enchufe no entra completamente en
la toma, invierta la posición del enchufe. Si sigue sin entrar, contacte un electricista
calicado. No intente modicar el enchufe de ninguna manera.
NOTAS SOBRE EL CABLE
A. El aparato cuenta con un cable de alimentación corto para evitar que se enrede
oque sea un obstáculo.
B. Es posible utilizar una extensión eléctrica con vigilancia.
C. Si utiliza una extensión:
1. Asegúrese de que el calibre indicado en el cordón sea como mínimo tan
altocomo las características eléctricas indicadas en el aparato;
2. La extensión debe contar con un cordón de 3 conductores con puesta a tierra, si
el aparato contara con el conductor de puesta a tierra.
3. El cordón y la extensión se deben colocar de modo que no cuelguen de una
supercie plana o una mesa para evitar que estén al alcance de los niños o que
representen un obstáculo para ellos.
ADVERTENCIA SOBRE EL PLASTIFICANTE
PRECAUCIÓN: Para evitar que el plasticante se transera sobre el acabado de la
encimera, la supercie de trabajo u otro mueble, coloque posavasos o manteles
individuales NO PLÁSTICOS entre el electrodoméstico y el acabado de la encimera o la
supercie. De lo contrario, el acabado puede oscurecerse o pueden aparecer manchas
o marcas permanentes.
ENERGÍA ELÉCTRICA
Si el circuito eléctrico está sobrecargado con otros artefactos, su electrodoméstico
puede dejar de funcionar correctamente. El electrodoméstico debe funcionar en un
circuito eléctrico separado de otros artefactos.
SO-315537_14690_BELLA_4sl Square Rotating Waffle Maker_WM_IM_R4.indd 12-13 2018-06-29 11:56 AM

1514
Conozca su waera
El producto puede diferir levemente de la ilustración
Dial de control de temperatura
Place de cocinar
(superior)
Manija
Placa de cocinar
(inferior)
Base
Luz roja de encendido
Luz azul de estado listo
* Bandeja de goteo
incluida para recolectar
elbatido que se
desborda ylas migas.
Bandeja de goteo*
Antes del primer uso
• Quite la Waera giratoria de forma cuadrada del embalaje y saque todos los materiales de embalaje.
• Limpie las placas con un trapo húmedo para eliminar todo el polvo y seque. Limpie la base y las
supercies externas con un trapo suave ligeramente húmedo o una esponja.
CAUTION: Tenga cuidado para evitar que entre agua en el electrodoméstico.
¡NUNCA SUMERJA EL CUERPO DE LA WAFLERA GIRATORIA EN AGUA O NINGUN OTRO LÍQUIDO!
• Coloque el electrodoméstico sobre una supercie seca, limpia y plana. Mantenga la waera cerrada
hasta el uso.
Instrucciones de uso
1. Abra la placa de cocinar superior.
2. Asegúrese de que la placa de cocinar inferior de la Waera giratoria esté plana y bien bloqueada en una
posición estable. Antes de cocinar los primeros waes por el día, use un pincel para cubrir las placas con
mantequilla o aceite vegetal.
3. Enchufe la waera en un tomacorriente de 120V de CA. La luz roja de ENCENDIDO (POWER) iluminará y
permanecerá encendida durante el uso. NOTA: Cuando su waera calienta por primera vez, puede emitir
un ligero olor o humo. Esto es normal y debería desaparecer después de uno o dos usos. Esto no afecta la
seguridad del aparato. Sin embargo, como puede afectar el sabor de los primeros waes preparados en la
Waera se recomienda descartarlos.
4. Gire el dial de control de temperatura a MAX para precalentar.
5. Mientras precalienta, prepare la mezcla de waes.
6. Después de aproximadamente 3 minutos, la luz azul de PREPARADO (READY) iluminará, indicando que la
unidad está precalentada y lista para usar.
7. Gire el dial de control de temperatura a MIN, MED o MAX. La mayoría de los waes cocidos en el MEDIO
(MEDIUM) hacen un waes más claro o un poco dorado, mientras que los waes cocidos en un ajusto más alto
(MEDIO-OSCURO/MEDIUM-DARK) son más oscuros y crujientes. Al preparar una receta por primera vez, gire
el dial de control de temperatura a MEDIO; luego ajuste de acuerdo con sus preferencias. Las recetas varían
en tiempo de cocción y color; las mezclas con más azúcar doran más rápido. Las mezclas más densas pueden
necesitar más un tiempo para cocinar.Tenga en cuenta la conguración perfecta de temperatura y tiempo para
cada receta como referencia en el futuro.
8. Abra la placa de cocinar superior.
9. Con una cucharon, vierte 1 taza de la mezcla en la placa de cocinar inferior. Agregue solo la cantidad suciente
para llenar la placa inferior. Use una espátula resistente a calor para untar la mezcla en las esquinas de la placa.
No llene demasiado; la mezcla se espesa cuando esté cocida.
10. Baje la placa superior para cerrar la Waera giratoria y gírela 180° hacia abajo.
11. A medida que la Waera giratoria este cocinado, la luz azul de PREPARADO (READY) (en la parte inferior de la
Waera) estará apagada. Cuando la luz azul de PREPARADO (READY) se ilumina, gire la waera 180° hacia el
lado superior, hasta que quede plana y bloqueada en una posición estable.
12. Levante suavemente la placa superior. Si se tira, sigue cocinando durante 30 segundos y vuelva a probar el
punto de cocción. NOTA: Los waes deben hornear de acuerdo de la temperatura seleccionada. Si los waes
necesitan hornear un poco más, gire el dial de control de temperatura para aumentar la temperatura, cierre la
tapa y sigue horneando durante 30 segundos adicionales, vericando hasta que se logre el color deseado.
13. Retire los waes de las placas utilizando una espátula de goma o cualquier utensilio no metálico.
PRECAUCIÓN SUPERFICIES CALIENTES: Las placas de la waera están muy calientes durante el uso. Use
guantes para horno al sacar waes cocidos para evitar el riesgo de quemaduras.
NOTA: Si va a hornear waes adicionales, mantenga la tapa cerrada para retener el calor. Siempre asegúrese
de que la luz azul READY esté encendida antes de hornear más waes.
NOTA: Los waes cocidos después hornearán más rápido porque la waera ha retenido el calor.
14. Cuando haya terminado de hornear, desenchufe el cable de la toma de corriente. Asegúrese de que la placa
inferior de la waera esta plana y bloqueada en una posición estable. Levante la placa superior y déjela enfriar.
ADVERTENCIA: Desconecte siempre después de su uso. La Waera permanece ENCENDIDO hasta que este
desenchufada.
15. No limpie hasta que la waera se haya enfriado completamente.
Para colocar y quitar el seguro de la waera
La waera está sin seguro únicamente cuando la perilla de control está frente a usted. Usted sólo puede abrir
la waera en la posición sin seguro.
Consejos para obtener waes perfectamente cocidos
1. Mezcle todos los ingredientes secos juntos. No es necesario batir las yemas de huevo y la leche por separado.
2. Bate las claras de huevo hasta que se pongan rígidas. Mezcle 1/4 de las claras batidas en la masa para aclararla,
y luego doble suavemente el resto. Debería haber rayas blancas en la masa. No mezcle demasiado la mezcla
cuando agregue claras de huevo.
3. Algunas recetas pueden ser duplicadas. No haga grandes cantidades de masa cuando las claras de huevo batidas
se hayan usado para aclarar los waes.
4. No abra la waera durante el primer minuto de cocción o el wae se separará. Hornee bien los waes antes de
quitarlos.
5. Al preparar mezclas de waes con harina de gluten, no mezcle demasiado o los waes serán duros. Revuelva la
mezcla solo hasta que desaparezcan grandes piezas de ingredientes secos.
6. La cantidad óptima de mezcla para hacer un wae de forma completa, sin desbordamiento, varia entres diferentes
mezclas de waes. Verter la mezcla de una taza de medir ayuda a medir la cantidad de la mezcla que se usa cada
vez. Llene la placa inferior de la Waera con suciente mezclada para cubrir la placa. Comience con 1 taza. Agrega
más como sea necesario.
7. Para obtener waes de forma más uniforme, unta las masas gruesas en el borde exterior de la placa con una
espátula de goma resistente al calor u otro utensilio no metálico antes de cerrar la tapa.
8. To retain crispness, move baked wafes to a wire cooling rack. To keep wafes warm, place on an ovenproof dish
on an oven rack and warm at about 200-250°F (90-120°C). Waes will keep for about 20 minutes before they begin
to dry out. Para conservar la textura crujiente, mueva waes horneados a una rejilla de alambre para enfriar. Para
mantener los waes calientes, colóquelos en un plato resistente al horno en una rejilla del horno y caliente a unos
200-250 °F (90-120°C). Los waes se mantienen el calor durante unos 20 minutos antes de que comiencen a secarse.
9. Los waes cocidos congelan bien. Dejar enfriar completamente sobre una rejilla. Almacene en una bolsa de
plástico para congelar o en un recipiente cubierto, separando los waes con papel encerado.
10. Vuelva a calentar waes congelados en un horno tostador, horno de convección, horno convencional o tostador
hasta que estén calientes y crujientes.
Para waes sin gluten:
Use mezclas para hornear sin gluten. Use harina sin gluten.
Reemplace la harina en las recetas con combinaciones de: harina de coco, harina de arroz, harina de
almendras, harina de avena, harina de maíz.
Para gofres con menos grasa y menos colesterol:
Para waes con menos grasa y menos colesterol:
• Use leche descremada.
• Reemplace la leche entera con leche de nueces o semillas: leche de almendras, anacardos, soya, lino o
cáñamo.
• Use solo las claras, elimine la yema de huevo.
• Siempre use aceites vegetales líquidos como canola, coco, maíz o girasol, en lugar de mantequilla r.
• Reemplace 1 huevo con 3 cucharadas de agua fría + 1 cucharada de semillas de lino molidas. *
• Reemplace 1 huevo con 3 cucharadas de agua fría + 1/2 cucharada de semillas de chia molidas *
SO-315537_14690_BELLA_4sl Square Rotating Waffle Maker_WM_IM_R4.indd 14-15 2018-06-29 11:56 AM
Recetas
1716
Para waes rica en bras:
• Sustituye 1/2 taza o más de harina blanca con harina de salvado.
• Sustituye 1/4 taza de harina blanca con salvado de trigo o avena.
• Reemplace 1 huevo con 3 cucharadas de agua fría + 1 cucharada de semillas de lino molidas. *
• Reemplace 1 huevo con 3 cucharadas de agua fría + 1/2 cucharada de semillas de chia molidas. *
* Al crear sustitutos de huevos usando semillas de lino o semillas de chia, deje que la mezcla descanse durante 5
minutos hasta que se espese. Mezcle bien antes de agregar a la receta del wae.
Limpieza y mantenimiento
Instrucciones de mantenimiento
1. Este electrodoméstico requiere poco mantenimiento. No tiene piezas que puedan ser reparadas por
el usuario. Any servicing requiring disassembly other than cleaning must be performed by a qualied
appliance repair technician.
ADVERTENCIA: Para proteger la calidad superior de las supercies antiadherentes, use solo utensilios
de plástico, nylon o madera para quitar los waes.
PRECAUCIÓN: Desenchufe del tomacorriente y deje que se enfríe completamente antes de limpiarlo.
2. No puede desmontar la Waera giratoria de forma cuadrada para limpiarla.
3. Nunca sumerja el aparato en agua u otros líquidos. Nunca coloque la Waera giratoria en un lavaplatos.
4. Las placas de cocinar del wae deben ser limpiadas y curadas antes de cada uso.
5. Para curar las placas de cocinar, cubra ligeramente las supercies con manteca vegetal o aceite vegetal.
Después de un tiempo, si los waes están todavía húmedos, cure las placas según sea necesario.
ADVERTENCIA: Para proteger la calidad superior de las supercies antiadherentes, use solo utensilios
de plástico, nylon o madera para quitar los waes.
6. Para eliminar cualquier mezcla cocida y atascada en las placas, ponga un poco de aceite de cocina
sobre la masa atascada. Deje que se asiente durante 5 minutos, luego limpie la masa ablandada con una
toalla de papel o un paño suave. Elimine las manchas difíciles con una almohadilla o una almohadilla de
malla de plástico. Para obtener mejores resultados, use solo productos aptos para limpiar supercies
de cocción antiadherentes. No use lana de acero o estropajos abrasivos.
7. Use un cepillo de cocina suave y agua para eliminar las masas atascadas de la base y el exterior de la
Waera. El acabado exterior debe ser limpiar con un limpiador no abrasivo y un paño suave y húmedo.
Seque completamente
Instrucciones de almacenamiento
1. Asegúrese de que la unidad esté desenchufada y bien enfriada antes de almacenar.
2. Nunca enrolle el cable con fuerza alrededor del aparato. No ponga tensión en el cable donde se entra la
máquina, ya que esto podría dañarla y romperla.
3. Después de la limpieza, guarde la Waera cerrada en un área limpia y seca.
Mezcla básica para wae
Esta mezcla para wae fácil de hacer se puede preparar de tantas maneras con apenas unos
cuantos ingredientes de su despensa. ¡Pruebe recetas sabrosas y dulces en una forma excepcional
de servir este desayuno clásico favorito a cualquier día!
• 3 tazas de harina todo uso
• 2 Cucharadas de polvo de hornear
• 1 cucharadita de sal
• 1⁄2 taza de azúcar
Mezcle todos los ingredientes juntos y guárdelos en un recipiente estanco hasta que esté listo
parausarlos.
Waes con suero de leche
Hace 4 waes
• 1 1⁄2 tazas de Base para wae
• 4 Cucharadas de mantequilla derretida
• 2 huevos
• 1⁄2 taza de suero de leche
1. En una taza de mezclar, combine todos los ingredientes y bata hasta que la mezcla quede lisa
yquede sin grumos.
2. En una waera precalentada, vierta aproximadamente 1⁄3 taza para cada wae y cueza hasta
que los waes queden dorados (cerca de 2-4 minutos).
CONSEJOS:
Agregue 1⁄4 taza de su sabor favorito de mermelada a la masa antes de cocer.
Coloque sobre los waes capas de frutas frescas, nueces tostadas, miel, lmíbares con sabores o
yogurt para un delicioso desayuno o un bocado.
Waes con chips de chocolate
Hace 4 waes
• 1 1⁄2 tazas de Base para wae
• 4 Cucharadas de mantequilla derretida
• 2 huevos
• 1⁄2 taza de suero de leche
• 1⁄4 taza de chips de chocolate
1. En una taza de mezclar, combine todos los ingredientes y bata hasta que la mezcla quede lisa y
quede sin grumos.
2. En una waera precalentada, vierta aproximadamente 1⁄3 taza para cada wae y cueza hasta
que los waes queden dorados (cerca de 2-4 minutos).
Waes con arándano
Hace 4 waes
• 1 1⁄2 tazas de Base para wae
• 4 Cucharadas de mantequilla derretida
• 2 huevos
• 1⁄2 taza de suero de leche
• 1⁄4 de taza de arándano
1. En una taza de mezclar, combine todos los ingredientes y bata hasta que la mezcla quede lisa y
quede sin grumos.
2. En una waera precalentada, vierta aproximadamente 1⁄3 taza para cada wae y cueza hasta
que los waes queden dorados (cerca de 3-4 minutos).
CONSEJOS: ¡Cubra con fresas en rebanadas para un delicioso desayuno con bayas!
Recetas
SO-315537_14690_BELLA_4sl Square Rotating Waffle Maker_WM_IM_R4.indd 16-17 2018-06-29 11:56 AM

RecetasRecetas
1918
GUÍA DE RECETAS
Enriquecidos con magnesio, potasio y hierro, los garbanzos alimentan el cuerpo, proporcionan
proteínas que fortalecen los músculos y son una excelente fuente de bra dietética. Estos Falafel
waes sabrosos son una base ligera y esponjosa para la deliciosa y abundante Untable de hierbas y
aguacate. Estos Falafel waes son perfectos para cualquier comida. Reemplace la harina con harina
de arroz por una alternativa sin gluten.
Falafel Waes con untable de hierbas y aguacate
Para cocinar 8 cuadrados de wae
• 1 (15 oz.) garbanzos, drenados y enjuagados
• 1 huevo grande
• 1/2 taza de cilantro picado (puede reemplazar
con eneldo o perejil)
• 3 dientes de ajo asado, o más al gusto
• 2 cucharadas de harina
• 2 cucharaditas de sal Kosher
• 1 cucharada de comino molido
• 2 cucharaditas de cilantro molido
• 1/4 cucharadita de pimiento negro
• 1/4 cucharadita de pimiento de cayena
• 1-2 cucharadas de agua, según sea necesario
• ralladura de 1 limón, opcional
• Waera precalentada
1. Use un procesador de alimentos para mezclar la mezcla de waes. Coloque todos los
ingredientes en el tazón de cortar. Agregue el huevo, el cilantro, el ajo asado, la harina y el
condimento a los garbanzos. Pulse, raspando los lados del tazón de vez en cuando, hasta que la
masa de falafel se ve como una comida gruesa. Vierta la mezcla en un recipiente y revuelva con
un tenedor. Use una cucharada de agua a la vez para diluir la pasta si es necesario.
2. Use una taza de medir para agregar aproximadamente 1/4 taza de pasta de falafel en cada
sección de la waera precalentada.
3. Baje la placa superior para cerrar la waera giratoria y gire el aparato 180° hacia el lado inferior.
4. Como la waera giratoria se cocina, la luz azul PREPARADO (READY) (en la parte inferior de la
waera) estará apagada. Cuando la luz azul PREPARADO se ilumina, gire la waera 180° hacia el
lado superior, hasta que quede plana y bloqueada en una posición estable.
5. Levante suavemente la placa superior. Si se tira, continúe cocinando durante 30 segundos y
vuelva a cocinar. Cocine hasta que esté dorado uniformemente. Repita con la mezcla restante.
Waes de galletas con manteca de maní y mermelada
Para cocinar 8 cuadrados de wae
• 1 paquete de mezcla de galletas de manteca
de maní (17.5 oz)
• aceite vegetal, según el paquete
• huevos, según el paquete
• 1 huevo adicional
• 2 cucharadas de leche
• 1 Agregue todos los ingredientes
en un tazón grande. Mezcle bien.
• 1 cucharadita de polvo de hornear
• 1/4 - 1/2 taza de complementos:
• arándanos secos, pasas, cacahuetes picados,
pepitas de chocolate, pepitas de mantequilla
de maní o pepitas de chocolate blanco)
• Waera precalentada
1. Agregue todos los ingredientes en un tazón grande. Mezcle bien.
2. Use una taza medidora para agregar aproximadamente 1 taza de mezcla de waes de
mantequilla de maní en el centro de la waera precalentada.
3. Baje la placa superior para cerrar la waera giratoria y gire el aparato 180° hacia el lado inferior.
4. Como la waera giratoria se cocina, la luz azul PREPARADO (READY) (en la parte inferior de la
waera) estará apagada. Cuando la luz azul PREPARADO se ilumina, gire la waera 180° hacia el
lado superior, hasta que quede plana y bloqueada en una posición estable.
5. Repita con la mezcla restante.
S’more Brownie Wafe Sandwich
Para cocinar 12 cuadrados de wae
• 1 caja de mezcla de Brownies
• (13 x 9” tamano familial, 18.3 oz.)
• Ôaceite de vegetal, según el paquete
• Ôhuevos, según el paquete
• 1 huevo adicional
• 1 Waera precalentada
• 4 galletas graham (8 mitades)
• 1/2 – 1 taza de pepitas de chocolate con
leche (puede reemplazar el chocolate con
leche, el chocolate blanco o las pepitas de
chocolate negro)
• 1 bolsa de malvaviscos, grande o pequeña, o
crema de malvavisco
1. Rompe galletas Graham en piezas de 1 pulgada.
2. 3.Agregue todos los ingredientes en un tazón grande. Mezcle bien.
3. 4.Utilice una taza de medir para agregar aproximadamente 1 taza de mezcla de waes en el
centro de la waera precalentada .
4. 5.Baje la placa superior para cerrar la waera giratoria y gire el aparato 180° hacia el lado
inferior.
5. 6.Como la waera giratoria se cocina, la luz azul PREPARADO (READY) (en la parte inferior de la
waera) estará apagada. Cuando la luz azul PREPARADO se ilumina, gire la waera 180° hacia el
lado superior, hasta que quede plana y bloqueada en una posición estable.
6. Repita con la masa restante.
7. Emparede los malvaviscos (tostados o crudos) entre waes calientes de brownie.
SO-315537_14690_BELLA_4sl Square Rotating Waffle Maker_WM_IM_R4.indd 18-19 2018-06-29 11:56 AM

Garantía limitada de DOS AÑOS
Mediante la presente, SENSIO Inc. garantiza que, durante el plazo de DOS AÑOS a
partir de la fecha de compra, este producto no presentará defectos mecánicos en el
material ni en la mano de obra, y durante 90 días, no los presentará en las piezas no
mecánicas. A su entera discreción, SENSIO Inc. reparará o reemplazará el producto
que resulte defectuoso, o emitirá un reembolso por el producto durante el plazo de
garantía.
Esta garantía es válida únicamente para el comprador minorista original a partir de la
fecha de compra minorista inicial y no es transferible. Conserve el recibo de compra
original, ya que se exige una prueba de compra para obtener la validación de la
garantía. Las tiendas minoristas no tienen derecho a alterar, modicar ni corregir de
ninguna manera los términos y condiciones de la garantía.
EXCLUSIONES:
La garantía no cubre el desgaste normal de las piezas ni el daño ocasionado por
cualquiera de las siguientes causas: uso negligente del producto, uso de un voltaje
o corriente incorrectos, mantenimiento de rutina inadecuado, uso contrario al de
las instrucciones de funcionamiento, desarmado, reparación o alteración a cargo de
personas que no sean miembros del personal calicado de SENSIO Inc. Asimismo, la
garantía no cubre actos de la naturaleza, como incendios, inundaciones, huracanes o
tornados.
SENSIO Inc. no asumirá responsabilidad por daños incidentales o resultantes
ocasionados por la violación de cualquier garantía expresa o implícita. Salvo en
la medida en que lo prohíban las leyes aplicables, cualquier garantía implícita de
comerciabilidad o aptitud para un propósito particular se limita temporalmente a la
duración de la garantía. Algunos estados, provincias o jurisdicciones no permiten la
exclusión ni la limitación de daños incidentales o resultantes, o limitaciones sobre
la duración de una garantía implícita y, por lo tanto, es posible que las exclusiones o
limitaciones mencionadas no le correspondan. La garantía cubre derechos legales
especícos que pueden variar de un estado, una provincia o una jurisdicción a otros.
CÓMO OBTENER EL SERVICIO DE GARANTÍA:
Debe comunicarse con el Servicio de atención al cliente a nuestro número telefónico
gratuito: 1-866-832-4843. Un representante del Servicio de atención al cliente
intentará resolver los problemas referidos a la garantía por teléfono. Si este no puede
resolver el problema, le proporcionarán un número de caso y le solicitarán que
devuelva el producto a SENSIO Inc. Adhiera una etiqueta al producto que incluya: su
nombre, dirección, número telefónico de contacto durante el día, número de caso y
descripción del problema. Además, incluya una copia del recibo de compra original.
Envuelva cuidadosamente el producto etiquetado con el recibo de compra, y envíelo
(con el envío y el seguro prepagados) a la dirección de SENSIO Inc. SENSIO Inc. no
asumirá obligación ni responsabilidad alguna por el producto devuelto que esté en el
trayecto hacia el Centro de servicio al cliente de SENSIO Inc.
21
Recetas
20
Cobertura de mermelada
• 4 cucharadas de agua
• 2 cucharaditas de jugo de limón o naranja
• 4 cucharaditas de mermelada
de su elecció
1. Coloque los ingredientes en un bol pequeño apto para microondas.
2. Caliente a alta potencia en lapsos de 30 segundos, revolviendo hasta que la mezcla se aoje y
se pueda verter.
3. Colóquelo en un bol de salsa o en una botella apretada y sirva con los waes.
4. Cubra con bananas o bayas frescas, si lo desea.
Untable de hierbas y aguacate
• 2 aguacates maduros, cortados en pedazos
• 2 cucharadas de aceite de oliva virgen o
aceite de aguacate
• 1 t aza de cilantro fresco picado (puede
reemplazarlo con eneldo o perejil)
• 2 cucharadas de yogurt griego normal (o
más, para aderezar)
• 4 cucharaditas de comino molido
• 2 cucharaditas de cilantro molido
• 1/2 cucharadita de pimiento negro
• 1/2 cucharadita de pimienta de cayena
• 1 limón, pelado y jugo
• paprika húngara para aderezar
1. Use un procesador de alimentos para mezclar el untable de aguacate y hierbas. Coloque todos los
ingredientes en el tazón de cortar.
2. Mezcle en pulsos para ablandar el aguacate; Raspe los lados del tazón. Mezcle hasta que el untable
sea uniforme. Si lo desea, agregue agua para diluir la mezcla.
Waes con calabacín en espirales y jamón
(Sin gluten, bajo en carbohidratos, apto con las dietas Keto)
Para cocinar 8 cuadrados de wae
• 2 tazas de calabacín, en pedazos
de espirales o rallado
• 1/2 taza de cebolla rallada
• 2 huevos
• 1/2 taza de queso mozzarella rallado
• 1/2 taza de queso parmesano rallado
• 16 16 rebanadas de jamón
1. Corte en espirales o ralle el calabacín a mano o en un procesador de alimentos equipado con una
cuchilla de rallar.
2. Envuelva el calabacín rallado en una toalla de cocina limpia o toallas de papel y escúrrala lo mejor
posible. Cambie a una toalla seca y escurra nuevamente.
En un tazón grande para mezclar, bata los huevos con un tenedor. Corte 4 rebanadas de jamón en
pedazos grandes. Agregue la mezcla de queso y calabacín. Mezcle bien.
Use una taza de medir para agregar aproximadamente 1 taza de mezcla de waes de calabacín en
el centro de la waera precalentada.
Baje la placa superior para cerrar la waera giratoria y gire el aparato 180° hacia el lado inferior.
Como la waera giratoria se cocina, la luz azul PREPARADO (READY) (en la parte inferior de la
waera) estará apagada. Cuando la luz azul PREPARADO se ilumina, gire la waera 180° hacia el
lado superior, hasta que quede plana y bloqueada en una posición estable.
Levante suavemente la placa superior. Agregue un pedazo de jamón a cada cuadrado de wae, sigue
cocinando durante 2 minutos y vuelva a cocinar. Cocine hasta que esté dorado uniformemente.
Repita con la mezcla restante
SO-315537_14690_BELLA_4sl Square Rotating Waffle Maker_WM_IM_R4.indd 20-21 2018-06-29 11:56 AM

GRACIAS
Para su compra
BellaLifestyle BellaLife
@
bellahousewares.com
inspírate
Registrarsey rmar para arriba para
anuncios especiales y los ingresos
de la moda!
Cuéntanos lo que piensas!
Evaluar, revisar o hacernos una
pregunta.
!
SO-315537_14690_BELLA_4sl Square Rotating Waffle Maker_WM_IM_R4.indd 22-23 2018-06-29 11:56 AM

SO-315537_14690_BELLA_4sl Square Rotating Waffle Maker_WM_IM_R4.indd 24-25 2018-06-29 11:56 AM
SO-315537 Rev. 4
For customer service questions or comments
Dudas o comentarios contactar el departamento de servicio al cliente
BELLA is a registered trademark of Sensio Inc., Montréal, Canada H3B 3X9.
All rights reserved.
BELLA es una marca registrada de Sensio Inc., Montréal, Canada H3B 3X9.
Todos los derechos reservados.
SO-315537_14690_BELLA_4sl Square Rotating Waffle Maker_WM_IM_R4.indd 26 2018-06-29 11:56 AM
Table of contents
Languages:
Other Bella Waffle Maker manuals

Bella
Bella 14449 User manual

Bella
Bella Rotating Belgian Waffle Maker User manual

Bella
Bella Waffle Stick Maker User manual

Bella
Bella 14528 Technical specifications

Bella
Bella INTERIOR User manual

Bella
Bella Non-Stick Rotating Belgian Waffle Maker User manual

Bella
Bella Rotating Waffle Maker User manual

Bella
Bella Rotating waffle make Technical specifications

Bella
Bella 14452 Technical specifications

Bella
Bella 17175 Technical specifications