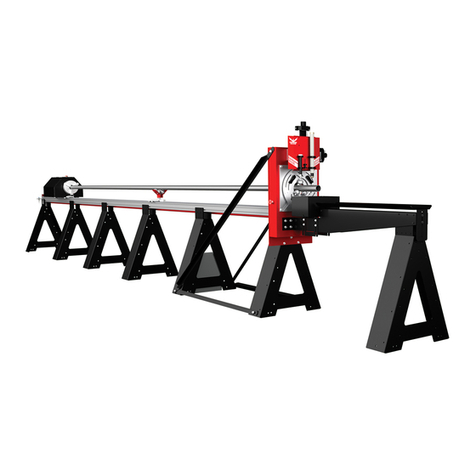
Bend-Tech Dragon mAchines User manual

Part 1 of 1
Dragon Troubleshooting Guide
Revision 002 | English ©2021 Bend-Tech LLC
Dragon CAM v1.0
Dragon mAchines

ii Bend-Tech Dragon
Troubleshooting Guide
©2021 Bend-Tech LLC
All rights reserved. The information in this manual is subject to change without notice.
Bend-Tech LLC strives to produce the most complete and accurate information regarding
its products. We are constantly working to improve and advance our products to increase
performance, user satisfaction and experience. Bend-Tech LLC assumes no responsibility for
errors or omissions regarding this manual. Bend-Tech LLC assumes no liability for damages
resulting from the use of the information contained in this publication.

Troubleshooting Guide iiiBend-Tech Dragon
Dragon Machines
Dragon Troubleshooting Guide
Revision 002
English
Original Instructions
October 2021
Bend-Tech LLC
729 Prospect Ave.
Osceola, WI 54020 USA
(651) 257-8715
www.bend-tech.com

iv Bend-Tech Dragon
Troubleshooting Guide
Contents
Contents
Contents..........................iv
Limited Warranty .................. viii
Customer Satisfaction Commitment. . . . . ix
Customer Service. . . . . . . . . . . . . . . . . . . ix
Alerts ............................x
Glossary..........................xii
Machine Capabilities ............... xiv
01
Troubleshooting .................... 15
1.1 How to Send a Support Session ... 15
02
Gate Troubleshooting ............ 16
2.1 Dragon Gate Troubleshooting ..... 16
2.1.1 Eccentric bearing on the Gate is
sticking ....................... 16
2.1.2 Gate is Binding ............ 16
2.1.3 Gate is Loose. . . . . . . . . . . . . . 16
2.1.4 Gate is not Operating Smoothly 17
2.1.5 Play in the Gate ............ 17
2.1.6 Gate Jaws are not Operating
Smoothly...................... 17
2.2 Adjusting the Gate Eccentric Bearing 18
2.2.1 Before Beginning ........... 18
2.2.2 Remove Safety Guards (Powered
Gate Only) .................... 18
2.2.3 Remove the Drive Gear (Powered
Gate Only) .................... 19
2.2.4 Remove the Gate. . . . . . . . . . . 19
2.2.5 Adjust the Eccentric Bearing .. 19
2.2.6 Re-install the Gate.......... 20
2.2.8 Position Drive Gear (Powered Gate
Only) ......................... 20
2.2.9 Re-attach the Safety Guards
(Powered Gate Only) ............ 20
2.3 Adjusting the C-Axis Backlash ..... 20
2.4 Calibrating Coordinated Rotation... 21
3.4.1 Open the Wizard ........... 21
3.4.2 Dragon Calibration Wizard. . . . 21
2.4.3 Begin Calibration ........... 22
2.4.4 Computer Setup. . . . . . . . . . . . 22
2.4.5 Ready the Trolley........... 22
2.4.6 Begin Homing Process ...... 23
2.4.7 Toolhead Level............. 23
2.4.8 Chuck. . . . . . . . . . . . . . . . . . . . 23
2.4.9 Powered Gate ............. 23
03
Laser Light & Engraver
Troubleshooting ..................... 24
3.1 Laser Light Troubleshooting....... 24
3.1.1 Laser Light does not Align with the
End of the Material .............. 24
3.1.2 Laser Light Failure.......... 24
3.2 Engraver Troubleshooting ........ 25
3.2.1 Engraver is Marking too Heavy or too
Light ......................... 25
3.2.2 Engraver is not Turning On ... 25
3.3 Setting Engraver Air Pressure ..... 25
3.3.1 Engraver Bleeder Valve ...... 25
04
Torch & Cutting
Troubleshooting ..................... 26

Troubleshooting Guide vBend-Tech Dragon
Contents
4.1 Cutting and Torch Troubleshooting . 26
4.1.1 Copes are Not the Same
Rotation ...................... 26
4.1.2 Poor Cut Quality or Accuracy. . 27
4.1.3 Round Holes are Cutting as
Ovals......................... 27
4.1.4 Machine Cuts and then Returns to
Previous Action................. 27
Square Material ................ 27
4.1.5 Jagged Cuts. . . . . . . . . . . . . . . 28
4.1.6 Torch Not Firing ............ 28
4.1.7 Torch is set too High ........ 28
4.1.8 Torch is Colliding with the
Material....................... 28
4.2 Grounding the Torch............. 29
4.3 Support Beam and Rail Alignment .. 30
4.3.1 Checking the Straightness and Level
of the Support Beam............. 30
4.3.2 Truing the Dragon Support Beam31
4.3.3 Rail Splices ............... 31
05
Material Support Lift
Troubleshooting ..................... 32
5.1 Material Support Lift Troubleshooting 32
5.1.1 Material Support Lift is Colliding with
the Rail ....................... 32
5.1.2 Material Support Lift is Not
Homing ....................... 32
5.1.3 Material Support Lift is Pausing at
the Wrong Time ................ 32
5.1.4 Material Support Lift is too High 32
5.1.5 Material Support Lift is Bottoming
Out .......................... 33
5.2 Material Support Lift Settings In Bend-
Tech 7x.......................... 33
5.2.1 Change the Support Lifter Gap 33
5.2.2 Adjusting Lifter Trigger Pause . 33
5.2.3 Material Support Lift Support
Retraction Settings .............. 33
5.2.5 Disabling the Material Support
Lift........................... 33
5.3 Material Support Lift Retraction
Adjustment ....................... 34
06
Trolley & Chuck
Troubleshooting ..................... 35
6.1 X-Axis Motor Troubleshooting ..... 35
6.1.1 X-Axis Will Not Jog ......... 35
6.1.2 Trolley is Binding while Jogging at
Full Speed. . . . . . . . . . . . . . . . . . . . . 36
6.1.3 X-Axis Motor is Skipping Steps 36
6.2 Adjusting Trolley Eccentric Bearings 36
6.3 X-Axis Backlash Adjustment ...... 38
6.4 Chuck Troubleshooting .......... 38
6.4.1 Chuck is Skipping Steps ..... 38
6.4.2 Chuck is not level when in the Load
Position....................... 38
6.5 Removing and Cleaning Chuck Jaws 39
6.6 Removing The Chuck............ 39
6.7 Cleaning The Chuck............. 40
6.8 Y-Axis Backlash Adjustment....... 40
07
Control Box Troubleshooting 42
7.1 Control Box Troubleshooting ...... 42
7.1.1 Motor is not Responding ..... 42
7.1.2 Machine is not Powering On .. 42

vi Bend-Tech Dragon
Troubleshooting Guide
Contents
7.1.3 Smooth-stepper is not Connecting to
the Computer .................. 42
7.1.4 Axis is not Responding or is
Responding Incorrectly........... 42
7.1.5 No Power to the Control Box .. 43
7.1.6 Unknown Failure within the Control
Box .......................... 43
7.1.7 Control Box is Outdated. . . . . . 43
7.2 Replace the Motor Driver ......... 43
7.3 Replacing the Control Box Power
Switch. . . . . . . . . . . . . . . . . . . . . . . . . . . 44
7.4 Replacing the Smooth-stepper. . . . . 45
7.5 Replacing Control Box Fuses. . . . . . 45
7.6 Re-seating the Breakout Board .... 46
7.7 Replacing the Control Box ........ 46
08
Sensors Troubleshooting ...... 49
8.1 Sensor Overview ............... 49
8.2 Checking a Sensor.............. 49
8.3 Inspecting Sensor Cables ........ 50
8.4 Setting a Proximity Sensor........ 50
8.5 A-Axis and Z-Axis sensors ........ 51
09
Connections............................ 52
9.1 Troubleshooting ESS Connections . 52
9.1.1 ESS Failure to Connect ...... 52
9.2 Connection Lost While Machine is
Running ......................... 53
9.3 Ethernet Connections. . . . . . . . . . . . 54
10
Troubleshooting Mach3 ......... 56
10.1 Diagnostics in Mach3........... 56
10.1.1 Mach3 License Data ....... 56
10.1.2 Coordinating Dragon Designations
With Mach3.................... 56
10.1.3 Dragon Axis vs. Mach3
...................... 57
10.1.4 Testing Homing Sensors in
Mach3........................ 57
10.1.5 Jogging With Mach3 ....... 57
10.2 Mach3 Troubleshooting ......... 58
11.2.1 Limits 3, 4, and 5 triggered
in Mach3 and Emergency Mode
Activated...................... 58
11.2.2 “Emergency” Box is Flashing Red
and Machine is Unable to Home. . . . 58
10.3 Reviewing G-Code in Mach3 ..... 58
10.4 Prioritizing Mach3 on the Computer 58
10.5 Opening Mach3 ............... 59
10.6 Jogging in Mach3 ............. 60
10.6.1 Jogging During Calibration .. 60
10.6.2 Jogging Between Projects ... 61
10.7 Determining Machine Status in
Mach3 .......................... 61
10.8 MDI (Alt-2) Tab................ 62
10.8.1 Input Text Box ............ 62
10.9 Diagnostics (Alt-7) ............. 62
10.9.1 External Signals .......... 62
10.10 Ports and Pins ............... 63
10.11 Limit Switch is Triggered in Mach3 64
10.12 Leaving Mach3 Open.......... 64
10.13 Diagnosing an E-Stop in Mach3. . 65

Troubleshooting Guide viiBend-Tech Dragon
Contents
10.14 Calculating Run Time in Mach3 .. 65
10.15 Restarting a Job in Mach3 after Torch
Failure .......................... 66
10.15.1 Editing the Macro......... 66
10.15.2 Restarting the Job ........ 67
10.16 Diagnosing Sensor, Cable, and Control
Box Problems..................... 68
10.16.1 Diagnosing a Sensor Issue . 68
10.16.2 Checking the Control Box .. 68
10.16.3 Checking Sensors ........ 68
10.16.4 Reading ESS LED Status
Codes ........................ 69
10.16.5 Ethernet Jack LED Lights .. 70
10.17 Running Warp 9 Utility ......... 71
10.18 Mach3 Lost Communications while
Operating ........................ 71
10.19 Other Mach3 Errors ........... 72
10.19.1 Invalid Bootloader Signature 72
10.19.2 CryptoMemory Error ...... 72

viii Bend-Tech Dragon
Troubleshooting Guide
Limited Warranty
Limited Warranty
Covering Bend-Tech Dragon
Bend-Tech LLC provides a limited warranty on all new Dragon machines that are manufactured
directly or under license by Bend-Tech LLC, and sold by Bend-Tech LLC or its approved
distributors.
Warranty Coverage
Each Bend-Tech Dragon machine is warrantied by the manufacturer against defects in material
workmanship for 12-months. The warranty period commences upon delivery of the Dragon
machine to the customer’s facility.
Repair or Replacement Only
The Manufacturer’s sole liability, and the Customer’s exclusive remedy under this warranty
shall be limited to repairing or replacing the defective part. Repair or replacement of parts
is at the sole discretion of the manufacturer. The Customer is responsible for warranty parts
installation. Bend-Tech does not provide warranty service labor.
Limits
This warranty does not cover components subject to wear due to normal use of the machine
such as belts, lights, tooling etc. This warranty is void if Bend-Tech LLC has determined any
failure is the result of mishandling, abuse, misuse, improper installation, improper storage,
become void or limited in the event that hardware changes or adaptations are made to the
machine.
Software
The standard 2-year software maintenance plan is included with the purchase of a Dragon.
Before the 2-year maintenance plan has expired, the customer may purchase an extended
maintenance plan. The maintenance plan and extended maintenance plans will ensure the
customer always has the newest version of Dragon Software. The maintenance plan is critical
to keeping Dragon software updated with the newest capabilities possible, and is critical to the
servicing of the machine. Bend-Tech LLC will contact the Customer regarding updates to the
maintenance plan within 1-month of expiration. Contact Bend-Tech Support to ensure software

Troubleshooting Guide ixBend-Tech Dragon
Customer Service & Satisfaction
Customer Satisfaction Commitment
Congratulations on your purchase of the world’s best CNC plasma tube and pipe cutting
machine, the Bend-Tech Dragon. Bend-Tech LLC places great pride in customer satisfaction
our support is a key factor in your success.
Contact Us
Bend-Tech’s hours of operation are Monday - Friday, 8:00 am - 5:00 pm EST. The Bend-Tech
support team and sales team are always available during our hours of operation.
Phone: 651-257-8715
Email: Sales team: [email protected]
Address: Bend-Tech, 729 Prospect Ave., Osceola, WI 54020, U.S.A..
Customer Service
Comments, questions, or concerns regarding the Dragon Machine, this manual, or the Bend-
Tech Software can be directed to Bend-Tech sales and service representatives at the above
contact information. Check out the following links for more information regarding Dragon
Machines and Bend-Tech Software.
Website, Socials, and Online Resources
• http://www.bend-tech.com
• https://www.facebook.com/2020ssi
• https://www.instagram.com/bend_tech
• https://www.youtube.com/bendtech2020
• http://www.bend-tech.com/wiki7

xBend-Tech Dragon
Troubleshooting Guide
Alerts
Alerts
Denitions & Examples
Danger
! Danger !
Danger indicates a serious condition that could cause severe injury or death to the
operator or bystanders if the instructions are not followed.
Warning
! Warning !
A Warning indicates there is a possibility for minor injury if the instructions are not
followed correctly.
Caution
! Caution !
Caution warns the operator that minor injury or machine damage could occur if
instructions are not followed. It could also mean that not following directions could

Troubleshooting Guide xiBend-Tech Dragon
Alerts
Important Alerts
Important
unique to an operation.
Notes and Tips
Note or Tip
Notes and tips give additional helpful information for operating the Dragon machine or Dragon
software. They are meant for supplemental information and not information that is critical for
operating procedures.

xii Bend-Tech Dragon
Troubleshooting Guide
Glossary
Glossary
Axis
Beak
The front assembly that includes the
Parts Catcher and Parts Bin/Bucket.
The Material Coolant System replaces
most of the Beak when installed.
CAD
Computer Aided Design. Modeling or design
software for creating parts, components, or
whole assemblies. Used for manufacturing or
similar industries. Can be 2D or 3D design.
CAM
Computer Aided Manufacturing or Machining.
Using the computer to assist in operating
machines by converting CAD models into
G-Code that the machine recognizes.
Chuck
Secures and rotates the material. Part of
the Trolley. Also referred to as the Y-Axis.
Control Box
Contains the motor drivers and other electrical
components that allows the Dragon CAM
software to control the Dragon machines.
Deadzone
The space between the Chuck and
the Laser Light position when the
Chuck is all the way forward.
Emergency Stop
Abbreviated E-STOP. A button which shuts down
machine operations. Four are located on the
machine and one is part of Machine Control.
Gate
The adjustable mechanism that holds the
material in place at the Head of the Machine.
Head
The machine assembly that makes
up the front end of the machine.
Limit Switch
The switch that operates as an automatic
control to prevent a mechanism or process
from going beyond a prescribed limit.
Load Position
The position the machine enters after
time after starting a cutting project. This
allows the operator to more easily load the
designated material into the machine.
Mach3
The driving software behind Machine Control.
Required for the machine to operate.
Machine Control
The computer interface that controls
the machine operations. Used by the
operator when running projects.
Material Coolant System
The system that transports coolant through
the material during cutting operations.
Material Support Lift
The mechanism that supports the
material during cutting. Sometimes
referred to as the Lifter.
Parts Catcher
The Parts Catcher is placed at the front of
the machine to catch parts as they are cut.
Support Beam
Forms the backbone of the machine. Comprised
of Aluminum Beams and Steel Rails.
Tail
The machine assembly that makes
up the far end of the machine.

Troubleshooting Guide xiiiBend-Tech Dragon
Glossary
Task Menu
the Dragon Software or the Bend-Tech
software. From this menu various tasks
can be started, such as part designing,
importing, library access, etc.
Toolhead
The machine component that the tools
are attached too. Maneuvers the tools
into position with the A and Z axes.
Trolley
The machine component that
includes the Chuck. Travels along the
Support Beam on the X-Axis.
Beak
Control Box
Toolhead
Chuck
Material
Support Lift
Support Beam
Tail
Trolley
Gate
Head
Dragon A400
Dragon A250

xiv Bend-Tech Dragon
Troubleshooting Guide
Machine Capabilities
Machine Capabilities
Material Types
Steel Stainless Steel Galvanized Steel Aluminum Black Pipe Chrome Alloy
Max Material Weight
Round RectangleSquare Angle/Channel
Max: 6”
(152.4mm)
Min: .75”
(19mm)
Max: 4”
(101.6mm)
Min: 1”
(25.4mm)
Max: 4”
(101.6mm)
Min: 1”
(25.4mm)
Max: 4”
(101.6mm)
Min: 1”
(25.4mm)
400 lbs
(181.4kg)
5/8”
(15.8mm)
1/32”
(0.79mm)
Material Size
Material Thickness
*Can process rectangle tubes up to a
6.375” hypotenuse. (e.g. 2”x6”, 3”x5”)
Material Size
Round RectangleSquare
Max: 6”
(152.4mm)
Min: .75”
(19mm)
Max: 4”
(101.6mm)
Min: 1”
(25.4mm)
Max: 4”
(101.6mm)
Min: 1”
(25.4mm)
Max: 4”
(101.6mm)
Min: 1”
(25.4mm)
400 lbs
(181.4kg)
5/8”
(15.8mm)
1/32”
(0.79mm)
*Can process rectangle tubes up to a
6.375” hypotenuse. (e.g. 2”x6”, 3”x5”)
Max Material Weight
Material Thickness
Material Size
Round
Max Material Weight
Material Thickness
Dragon A400 with Powered Gate
Dragon A250
Dragon A400

15Bend-Tech Dragon
Troubleshooting
01
Troubleshooting Guide
01
Troubleshooting
1.1 How to Send a Support Session
Properly setting up a Support Session with a Bend-Tech Service Technician can be key to
keeping the Dragon up and running.
1. Open the Part Design or Nesting Project
sending a Support Session, then keep the project open after submitting.
2. Open the Support Session
On the Bend-Tech Dragon Home interface, click the Help tab, then click Support Request.
3. Fill in the requested information
Fill in your Name, E-mail, Phone Number, and if you know a Service Technician or have had
4. Provide Details about the Problem
Give a detailed description of the issue in the Description of Problem text box. The more
information given the better our Service Technicians can help.
5. Attach the Files
6. Submit the Session
Click Submit.

16 Bend-Tech Dragon
Gate Troubleshooting
02
Troubleshooting Guide
02
Gate Troubleshooting
2.1 Dragon Gate Troubleshooting
2.1.1 Eccentric bearing on the Gate is sticking
Bearings are Dirty
Clean the bearings with compressed air, brake cleaner, or glass cleaner.
2.1.2 Gate is Binding
Bearings or Bearing Rotation Plate/Gate Ring Gear are Dirty
Clean the Gate using glass cleaner, brake cleaner, or compressed air.
Eccentric Bearing needs Adjustment
Remove the Gate and adjust the eccentric bearing on the Bearing Rotation Plate/Gate Ring
Gear. See Section 2.2 for the full procedure.
C-Axis Backlash needs Adjustment
Check the C-Axis for backlash. If play is observed, see Section 2.3.
2.1.3 Gate is Loose
Eccentric Bearing needs Adjustment
Remove the Gate and adjust the eccentric bearing on the Bearing Rotation Plate/Gate Ring
Gear. See Section 2.2 for the full procedure.

17Bend-Tech Dragon
Gate Troubleshooting
02
Troubleshooting Guide
2.1.4 Gate is not Operating Smoothly
Gate is Dirty
Clean the Gate with compressed air, glass cleaner, or brake cleaner. If the Gate is extremely
dirty use a rag or toothbrush to help clean it.
Eccentric Bearing needs Adjustment
Remove the Gate and adjust eccentric bearing on the Bearing Rotation Plate/Gate Ring Gear.
See Section 2.2 for the full procedure.
2.1.5 Play in the Gate
Eccentric Bearing needs Adjustment
Remove the Gate and adjust eccentric bearing on the Bearing Rotation Plate/Gate Ring Gear.
See Section 2.2 for the full procedure.
2.1.6 Gate Jaws are not Operating Smoothly
Lead Screws are Dirty
Clean Gate Lead Screws, with brake cleaner, glass cleaner, or compressed air. Re-lubricate.
Gate Jaw Rack & Pinion are Dirty
Clean Gate Jaw Rack with brake cleaner, glass cleaner, or compressed air.
Important
Customers with older machines who are having this issue should contact
Bend-Tech regarding updating the Gate Lead Screws.

18 Bend-Tech Dragon
Gate Troubleshooting
02
Troubleshooting Guide
2.2 Adjusting the Gate Eccentric Bearing
Tools Needed
•
•
•
•
Extension
•
•
2.2.1 Before Beginning
Power on the Dragon machine, and move the Toolhead up for easy access to the Gate.
Though the procedure for adjusting the Gate Eccentric Bearing is the same for both the
Powered Gate and Non-Powered Gate, there are a few additional steps when uninstalling and
installing the Powered Gate. For Non-Powered Gates, skip to 2.2.4.
Note
The Parts Catcher, Beak Assembly, and/or Coolant Trays may need to be removed before
uninstalling the Gate from the Dragon
2.2.2 Remove Safety Guards (Powered Gate Only)
The safety guards are only installed on machines
with Powered Gates. Locate the Gate Ring Gear
Safety Guards on the right and left sides of the
Powered Gate.
in. wrench on the nut and remove the screws

19Bend-Tech Dragon
Gate Troubleshooting
02
Troubleshooting Guide
2.2.3 Remove the Drive Gear (Powered Gate Only)
Turn the position of the C-Axis Drive Gear so that the
set screws are visible. Remove each set screw with a
2.2.4 Remove the Gate
Four bolts secure the Gate Assembly to the Dragon.
On a Powered Gate machine. There are four access
holes in the Gate Ring Gear which allows access to
the Gate Mount Bolts. Turn the Gate Ring Gear to
access the Gate Mount Bolts.
Locate the four Gate Mount Bolts and loosen them
enlisting a helper, remove the Gate from the front of
the machine. Place it on the work surface face down.
2.2.5 Adjust the Eccentric Bearing
There are two concentric bearings, which are not
adjustable and one eccentric bearing that is. When the
eccentric gear is properly adjusted, there should be no
play between the gate mount plate and the gate ring.
Use a ratchet and 17mm socket to loosen the eccentric
bearing enough that it can be rotated for adjustment.

20 Bend-Tech Dragon
Gate Troubleshooting
02
Troubleshooting Guide
Place the supplied ¾ in. thin wrench on the eccentric bearing adjustment hex located between
the Gate Mount Plate and the Gate Bearing Rotation Plate or Gate Ring Gear. Turn the
adjustment hex until the Gate Ring Gear bearing surface is fully seated in the eccentric bearing
v-groove.
When properly adjusted, the Gate Ring Gear should spin freely with no side play. Tighten the
v-groove eccentric bearing nut securely, ensuring the bearing stays in adjustment.
2.2.6 Re-install the Gate
Re-install the Gate. Use assistance in placing the gate. Ensure the eccentric bearing is to the
Important
Re-install the Parts Catcher, Beak, and/or Coolant Trays if they were removed to
access the Gate.
2.2.8 Position Drive Gear (Powered Gate Only)
Push the C-Axis Drive Gear onto the C-Axis motor shaft. Ensure it fully meshes at the center of
the Gate Ring Gear. The drive gear must be centered on the Gate Ring Gear.
2.2.9 Re-attach the Safety Guards (Powered Gate Only)
Re-install the Safety Guards.
2.3 Adjusting the C-Axis Backlash
Adjusting the C-Axis Backlash is only necessary on Dragon A400 machines equipped with a
Powered Gate.
1. Remove the Safety Guard
Motor Mount. Set the screws and guard aside.
2. Loosen the C-Axis Motor Mount
Other manuals for Dragon mAchines
1
Table of contents
Other Bend-Tech Industrial Equipment manuals
Bend-Tech
Bend-Tech Dragon A400 Installation guide
Bend-Tech
Bend-Tech DRAGON A150 User manual

Bend-Tech
Bend-Tech Dragon A400 User manual

Bend-Tech
Bend-Tech Dragon A400 User manual
Bend-Tech
Bend-Tech Dragon User manual

Bend-Tech
Bend-Tech Dragon A400 User manual

Bend-Tech
Bend-Tech Dragon A400 Installation guide

Bend-Tech
Bend-Tech Dragon A400 Installation and operation manual

Bend-Tech
Bend-Tech Dragon A400 User manual
Bend-Tech
Bend-Tech Dragon mAchines User manual
