Bend-Tech Dragon A400 User manual

A400
Part 1 of 1
Assembly Manual
Revision 5 | English ©2020 Bend-Tech LLC

ii Bend-Tech Dragon A400
Assembly Manual
©2020 Bend-Tech LLC
All rights reserved. The information in this manual is subject to change without notice.
Bend-Tech LLC strives to produce the most complete and accurate information regarding
its products. We are constantly working to improve and advance our products to increase
performance, user satisfaction and experience. Bend-Tech LLC assumes no responsibility for
errors or omissions regarding this manual. Bend-Tech LLC assumes no liability for damages
resulting from the use of the information contained in this publication.

iiiBend-Tech Dragon A400 Assembly Manual
Dragon A400
Assembly Manual
Revision 5
English
Original Instructions
December 2020
Bend-Tech, LLC
729 Prospect Ave.
Osceola, WI 54020 USA
(651) 257-8715
www.bend-tech.com

iv Bend-Tech Dragon A400
Assembly Manual
Covering Bend-Tech Dragon
Bend-Tech, LLC provides a limited warranty on all new Dragon machines that are
manufactured directly or under license by Bend-Tech, LLC, and sold by Bend-Tech, LLC or its
approved distributors.
Warranty Coverage
Each Bend-Tech Dragon machine is warrantied by the manufacturer against defects in material
workmanship for 12-months. The warranty period commences upon delivery of the Dragon
machine to the customer’s facility.
Repair or Replacement Only
The Manufacturer’s sole liability, and the Customer’s exclusive remedy under this warranty
shall be limited to repairing or replacing the defective part. Repair or replacement of parts
is at the sole discretion of the manufacturer. The Customer is responsible for warranty parts
installation. Bend-Tech does not provide warranty service labor.
Limits
This warranty does not cover components subject to wear due to normal use of the machine
such as belts, lights, tooling etc. This warranty is void if Bend-Tech, LLC has determined any
failure is the result of mishandling, abuse, misuse, improper installation, improper storage,
become void or limited in the event that hardware changes or adaptations are made to the
machine.
Software
Dragon software is covered by a 2-year maintenance plan from the purchase date of the
Dragon machine. After the 2-year maintenance plan is expired, the Customer can purchase
a maintenance plan. A maintenance plan will ensure the customer always has the newest
version of Dragon software. The maintenance plan is critical to keeping Dragon software
updated with the newest capabilities possible, and is critical to the servicing of the machine.
Bend-Tech, LLC will contact the Customer regarding updates to the maintenance plan within
1-month of expiration. Contact Bend-Tech Support to ensure software is up to date: support@
bend-tech.com.
.
Limited Warranty

vBend-Tech Dragon A400 Assembly Manual
Any questions or concerns regarding this manual can be directed to Bend-Tech, LLC
representatives via the Dragon website, www.bend-tech.com. Click Contact in the menu bar for
communication options and send your comments to the Dragon Customer Service department.
Online Resources
• https://www.youtube.com/user/bendtech2020
• http://www.bend-tech.com/wiki7
• http://www.bend-tech.com
• https://www.facebook.com/2020ssi
• https://www.instagram.com/bend_tech
Customer Service
Congratulations on your purchase of the world’s best CNC plasma tube and pipe cutting
machine, the Bend-Tech Dragon. Bend-Tech, LLC places great pride in customer satisfaction
our support is a key factor in your success.
Contact Us
Bend-Tech’s hours of operation are Monday - Friday, 8:00 - 5:00 EST. The Bend-Tech support
team and sales team are always available during our hours of operation.
Phone: 651-257-8715
Email: Sales team: [email protected]
Address: Bend-Tech, 729 Prospect Ave., Osceola, WI 54020, U.S.A..
Customer Satisfaction Commitment

vi Bend-Tech Dragon A400
Assembly Manual
This manual contains important statements that are called out from the regular text with an
associated signal word: “Danger,” “Warning,” “Caution,” or “Note.” Each of these signal words
is accompanied by its own icon. These signal words and icons indicate the severity of the
condition and the warning. The machine operator should familiarize themselves with these
warnings and read the statements before operating the machine.
Denitions & Examples
Danger
Danger indicates a serious condition that could cause severe injury or death to the operator or
bystanders if the instructions are not followed.
Warning
A Warning indicates there is a possibility for minor injury if the instructions are not followed
correctly.
! Danger !
Exceeding the material weight limit of the Dragon A400 can result in serious injury
to the operator and/or bystanders.
! Warning !
Due to the extreme temperatures that result from the plasma cutting process, parts
cooled in water in the parts catcher can still be extremely hot. Always use caution
when handling newly-cut parts.
Warnings
Example
Example

viiBend-Tech Dragon A400 Assembly Manual
Caution
Caution warns the Operator that minor injury or machine damage could occur if instructions
procedure being performed.
Note
! Caution !
the Dragon A400.
The material coolant system greatly reduces smoke and vapor emitted by the
machine. Bend-Tech recommends using the material coolant system with aluminum
and stainless steel material.
Example
Example

viii Bend-Tech Dragon A400
Assembly Manual
Glossary
Glossary
Axis
Bend-Tech 7x
Machine design software - CAD.
BOB
Breakout Board.
Material Support Lift
The Material Support Lift supports
material to reduce sag.
Chuck
Located on the Trolley, the Chuck
holds the material so it can be moved
forward, backward and rotated.
Control Box
Connects Dragon Software Suite
to the Dragon A400.
Coolant Tray
Cools cut parts as they are produced.
E-Stop
Emergency stop.
ESS
Ethernet Smooth Stepper (Control Board).
Ethernet
System for connecting multiple
computers via a Local Area Network.
Gate
The Gate supports the material at the
front of the machine. It consists of two
sets of self-centering roller jaws.
Gate Lead Screw
Controls operation and adjustment of the Gate.
Interface
Any particular screen display generated
by Bend-Tech software.
Mach3
Machine driver software.
Parts Catcher
The parts catcher is placed at the front of
the machine to catch parts as they are cut.
Rack & Pinion
The rack and pinion gear assembly is
the method that drives the horizontal
movement of the Trolley.
Rail & Beam
The Beam is the main structure of the
Dragon A400, the rails are attached to
the beam and guides the Trolley.
Tail
The Tail is located at the opposite end of the
Head of the machine. The Tail arrives pre-
assembled. The X-Axis homing sensor, rear
E-Stop are located at the Tail of the machine.
Toolhead
Operates the Marker, Engraver and Torch.
Trolley
The Trolley rides on the Rail, and carries
the Chuck forward and backward along
the length of the Rail Support Beam.

ixBend-Tech Dragon A400 Assembly Manual
Contents
Contents
Limited Warranty .....................iv
Customer Service.................... v
Customer Satisfaction
Commitment............................. v
Warnings ..................................vi
Glossary ..................................viii
Contents...................................ix
01
Safety....................................... 11
1.1 Introduction ....................11
1.2 Assembly Safety. . . . . . . . . . . . . . . . .11
1.2.1 Safety Equipment .......... 12
02
Tools and Equipment ............. 13
2.1 Tools......................... 13
2.1.1 Tool List .................. 13
2.2 Crate Parts List ................ 14
2.3 Optional Parts ................. 14
03
Assembling the Dragon ......... 15
3.1 Shipping Crate ................. 15
3.1.1 Dragon A400 Shop Position. . . 15
3.2 Crate Disassembly.............. 15
3.3 Getting Started................. 16
3.3.1 Component Boxes .......... 16
3.3.2 Miscellaneous Box.......... 17
3.4 Unpacking the Crate ............ 18
3.5 Moving the Head into Position ..... 18
3.5.1 Place the Head using a Forklift 18
3.6 Installing the Beams............. 19
3.6.1 Install the First Beam........ 19
3.6.2 Slide Support Leg #4 into
Position....................... 20
3.6.3 Install the Second Beam ..... 20
3.6.4 Fasten the Support Legs to the
Beams. . . . . . . . . . . . . . . . . . . . . . . . 21
3.6.5 Slide the Racks into Position .. 21
3.7 Placing the Tail................. 22
3.7.1 Place and Install the Tail ..... 22
3.7.2 Secure the Tail Support Leg
to the Second Beam ............. 22
3.8 Securing the Rail Sections........ 22
3.9 Installing the Racks ............. 23
3.10 Installing the Cable Track Tray.... 23
3.11 Installing the Beak ............. 24
3.12.1 Installing the Beak ......... 24

xBend-Tech Dragon A400
Assembly Manual
Contents
04
Leveling and Alignment ......... 25
4.1 Leveling and Alignment Overview .. 25
4.1.1 Checking Rail Level......... 26
4.1.2 Adjusting Swivel Levelers .... 26
4.2 Straightening the Dragon A400 .... 26
4.2.1 Checking the Straightness.... 27
4.2.2 Rail Splices ............... 27
05
Mounting to the Floor............. 29
5.1 Mounting Overview ............. 29
5.2 Concrete Sleeve Anchors. . . . . . . . . 29
5.3 Preparing the Floor Brackets ...... 30
5.4 Install Concrete Sleeve Anchors ... 30
06
Cables and Control Box......... 31
6.1 Cable Pre-Installation............ 31
6.2 Installing the Cable Track......... 31
6.3 Routing Cables. . . . . . . . . . . . . . . . . 32
6.5 Connect to Control Box .......... 32
6.6 Control Box Connections ......... 33
07
Air Line .................................... 35
9.1 Air Line Connection Overview ..... 35
08
Torch........................................ 37
10.1 Torch Cable .................. 37
10.1.1 Torch Ground ............. 37
10.1.2 Torch Lead ............... 38
10.2 Install the Torch Wand .......... 39

11Bend-Tech Dragon A400 Assembly Manual
Safety
01
01
Safety
1.1 Introduction
Before assembling the Dragon A400, read this manual and ensure that all personnel involved
in assembling the machine are properly trained in lifting procedures and tool operation. Ensure
all personnel are aware of the dangers and hazards involved in assembling the machine.
1.2 Assembly Safety
Assembling the Dragon A400 requires a moderate level of mechanical skill and
experience. Assembly should not be undertaken by personnel without experience in
assembling machinery or experience in industrial or machine maintenance.
! Danger !
Certain Dragon A400 parts are heavy. Handling them incorrectly could result in
severe injury or possibly death. Always use caution and follow safety procedures for
moving heavy equipment when assembling the Dragon A400.

12 Bend-Tech Dragon A400
Assembly Manual
Safety
01
1.2.1 Safety Equipment
Bend-Tech recommends using the proper safety equipment when installing the Dragon A400.
Safety equipment standards for each shop should be outlined in Occupational Safety and
Health Administration (OSHA) standards. Also, individual shops may have their own standards.
Always consult safety regulations before beginning work. Basic safety equipment may include:
! Warning !
Altering the installation methods and procedures outlined in this manual could result
in improper installation, machine damage or personal injury.
Safety Precautions
•
• Have the correct tools listed in the Tool List on hand.
• Enlist help of 1-3 additional personnel trained to install industrial machinery.
• Follow the methods and procedures outlined in this manual.
• Do not attempt to lift heavy materials without assistance.
• Before beginning, ensure the workspace is clean and of appropriate size for
Dragon A400 assembly.
Safety Glasses
Safety Shoes
Work Gloves
Hearing Protection

13Bend-Tech Dragon A400 Assembly Manual
Tools and Equipment
02
02
Tools and Equipment
2.1 Tools
The Installer(s) should ensure the proper complement of tools are on hand to assemble the
Dragon A400. Bend-Tech does not recommend attempting to assemble the machine without
the tools listed in this chapter.
2.1.1 Tool List
The following are the recommended tools needed to uncrate the Dragon A400 and perform the
complete assembly procedure.
• Forklift
• Cordless drill/driver
• T25 bit
• Side cutters
• Tin snips
• Utility knife
•
•
•
•
• Level (laser, digital or bubble)
• Ratchet
•
•
• ¾ in. socket
• ¾ in. wrench
• ¾ in. deep well socket
•
•
•
• Rubber mallet or Dead Blow plastic
hammer
• Tape measure
• Zip ties
•
•

14 Bend-Tech Dragon A400
Assembly Manual
Tools and Equipment
02
2.2 Crate Parts List
2.3 Optional Parts
Dragon A400 Assembly
• Machine Head
• Machine Tail
• Rail & Beam Section (2)
• Rail Support Leg (2)
• Rack (3)
• Beak
• Cable Track Support (2)
• Trolley Housing
• Chuck
• Computer
• Monitor
• Powered Gate Driver
Technology Package
• Computer Cabinet
• Battery Backup
•
•
• Feeler Gauge Set (1)
• Vernier Caliper (1)
• Torpedo Level (1)
• 26 Piece Radius Guage Set (1)
• WD40 Gel Lube (1)
• Main Drive Belt 260 XL (1)
• Thomson Sensor (1)
Miscellaneous Box
• Training Packet (1)
• Plasma Cutting Guide (1)
•
• Swivel Levelers (14)
• Wrench (1)
• Magnetic Tool (1)
• ¼ T-Handle Allen Wrench (1)
• Engraver (1)
• Ethernet Cable (1)
• Power Cable (1)
• Torch Cable (1)
• Coiled Wire Harness Tubing (1)
• Hardware Bags (5)
• String
• Bridge Rack
Hypertherm

15Bend-Tech Dragon A400 Assembly Manual
Assembling the Dragon
03
3.1 Shipping Crate
The Dragon A400 is shipped from the Bend-Tech manufacturing facility in a custom-fabricated
the protection of the Dragon A400 during shipping. The Dragon A400 machine is completely
secured within the crate for shipping purposes. Components may be bolted to the crate,
shrink wrapped or secured with plastic or metal banding. The order in which components
are uncrated is important in executing proper assembly of the machine. For best results in
assembling the Dragon A400, carefully follow the steps outlined in this Assembly Manual.
3.1.1 Dragon A400 Shop Position
Before beginning assembly, ensure there is adequate space to accommodate the machine
material cooling system is installed more room will be needed.
3.2 Crate Disassembly
03
Assembling the Dragon
Tools Needed
• Cordless Driver
• T25 Bit

16 Bend-Tech Dragon A400
Assembly Manual
Assembling the Dragon
03
fastening one of the two larger crate sides, then remove the two smaller crate ends. Remove
the remaining crate side.
3.3 Getting Started
Uncrating the Dragon A400 components properly, and keeping them in order, is critical to
achieving the quickest, most seamless installation possible. As shipped, the components of
together or shrink-wrapped together.
3.3.1 Component Boxes
Remove the various component boxes packed around the Dragon A400 machine. The
Component Boxes are labeled for reference during the assembly process.
! Caution !
Enlist the help of additional personnel when uncrating and assembling the machine.
A dropped crate component could cause injury to bystanders or could damage the
machine. Crate sides are large and heavy and should not be lifted without help.
Do not remove any strapping or shrink wrap from the head of the Dragon A400. It is
important to keep components secure while the Head is being removed from the crate.

17Bend-Tech Dragon A400 Assembly Manual
Assembling the Dragon
03
3.3.2 Miscellaneous Box
Cap Screws. These will be needed to assemble the Rail and Rail Beam, and the Head of the
machine.
The Dragon A400 Rail Support Legs are mounted to the oor of the shipping crate
using the Floor Brackets. When assembling the machine, the Floor Brackets should be
left in place. The Installer will use the Swivel Levelers to true the machine then bolt it
to the oor using the Floor Brackets.
Installing Swivel Levelers
Tools Needed
• ½ in. wrench
•
The Installer will be required to
install two Swivel Levelers in
each Support Leg. Each base
of the Support Leg will have a
bracket with a threaded hole.
Prepare the Swivel Leveler for
installation by positioning the jam
nut approximately one inch above
the adjustment hex at the bottom of the Swivel Leveler.
Thread the Swivel Leveler into the threaded hole in the base of the support leg
until it bottoms out on the adjustment nut. This method will place all of the Swivel
Levelers at approximately the same distance, providing a baseline for levelling the
machine.
in. wrench may be needed to thread the Swivel Levelers into the bottom of the
Rail Support Legs.
Swivel
Leveler
Leg Bracket
Installing the Swivel Levelers may require help.

18 Bend-Tech Dragon A400
Assembly Manual
Assembling the Dragon
03
3.4 Unpacking the Crate
When unpacking the crate, take care to keep
components of the machine organized so they can be
located easily. Remove all of the boxes and machine
components from the crate except for the head of the
machine. This will need to be removed last using a
forklift. Use a ½ in. socket and ratchet to remove the
major components of the machine. Tin snips will be
required to remove the beams. The middle three racks
to remove the racks. Only loosen the racks enough to
slide them out. Take care not to damage the racks when
moving them.
3.5 Moving the Head into Position
The head of the machine is extremely
heavy. As shipped, the head of the
machines contains all the working
mechanics of the machine as well as the
control box. Great care should be taken not
to damage any components on the head of
the machine during moving and installation.
3.5.1 Place the Head using a Forklift
Use a ½ in. socket and ratchet to remove
the lag bolts securing the head of the
Tools Needed
• ½ in. socket and ratchet
• Tin Snips
•
• Forklift
• Wood Blocks
! Danger !
The Head of the machine is heavy. If the Head falls or tips over it could cause
severe injury or death.
Remember
Remove all other contents of the crate before attempting to move the head
of the machine.

19Bend-Tech Dragon A400 Assembly Manual
Assembling the Dragon
03
Using a forklift, approach the head of the
machine from the front. Position the forks
under the head in the indicated position.
It is recommended the installer use fork
extensions and lay blocks of wood across the
forks to support the beam of the machine.
Before placing the head, leave adequate
space for the remaining sections of the
machine to be put into place. The Dragon
A400 requires a minimum of 32 feet of space.
3.6 Installing the Beams
3.6.1 Install the First Beam
Position Forks Here
Head of Machine
Before placing the machine, ensure
the Swivel Levelers are installed in
each of the Rail Support Legs as
outlined in Section 3.3.2.
Important
Due to its size and weight, Bend-Tech
does not recommend placing the head of
the machine manually.
Tools Needed
• Dead blow plastic hammer or rubber mallet
•
• Magnet tool
Support the beam when
moving the Head with a forklift.

20 Bend-Tech Dragon A400
Assembly Manual
Assembling the Dragon
03
one end and 4 at the other. Use the stainless steel locating pins on the beam to align the beam
when installing it.
machine. If necessary, use a rubber mallet or dead blow plastic hammer to seat the beam
sections together.
3.6.2 Slide Support Leg #4 into Position
4. Ensure the swivel levelers are installed onto support leg #4 before proceeding with the
assembly.
3.6.3 Install the Second Beam
Locate the second beam, which will be labeled 4 at one end and 5 at the other end. Again, use
the stainless steel locating pins on the beam to align the beam when installing it.
4. If necessary, use a rubber mallet or dead blow plastic hammer to seat the beam sections
together. The end labeled 5 will need to be supported until the tail of the machine is installed.
43
Important
Do not assemble the Dragon machine alone. Get help for moving and supporting
the machine components during assembly.
Other manuals for Dragon A400
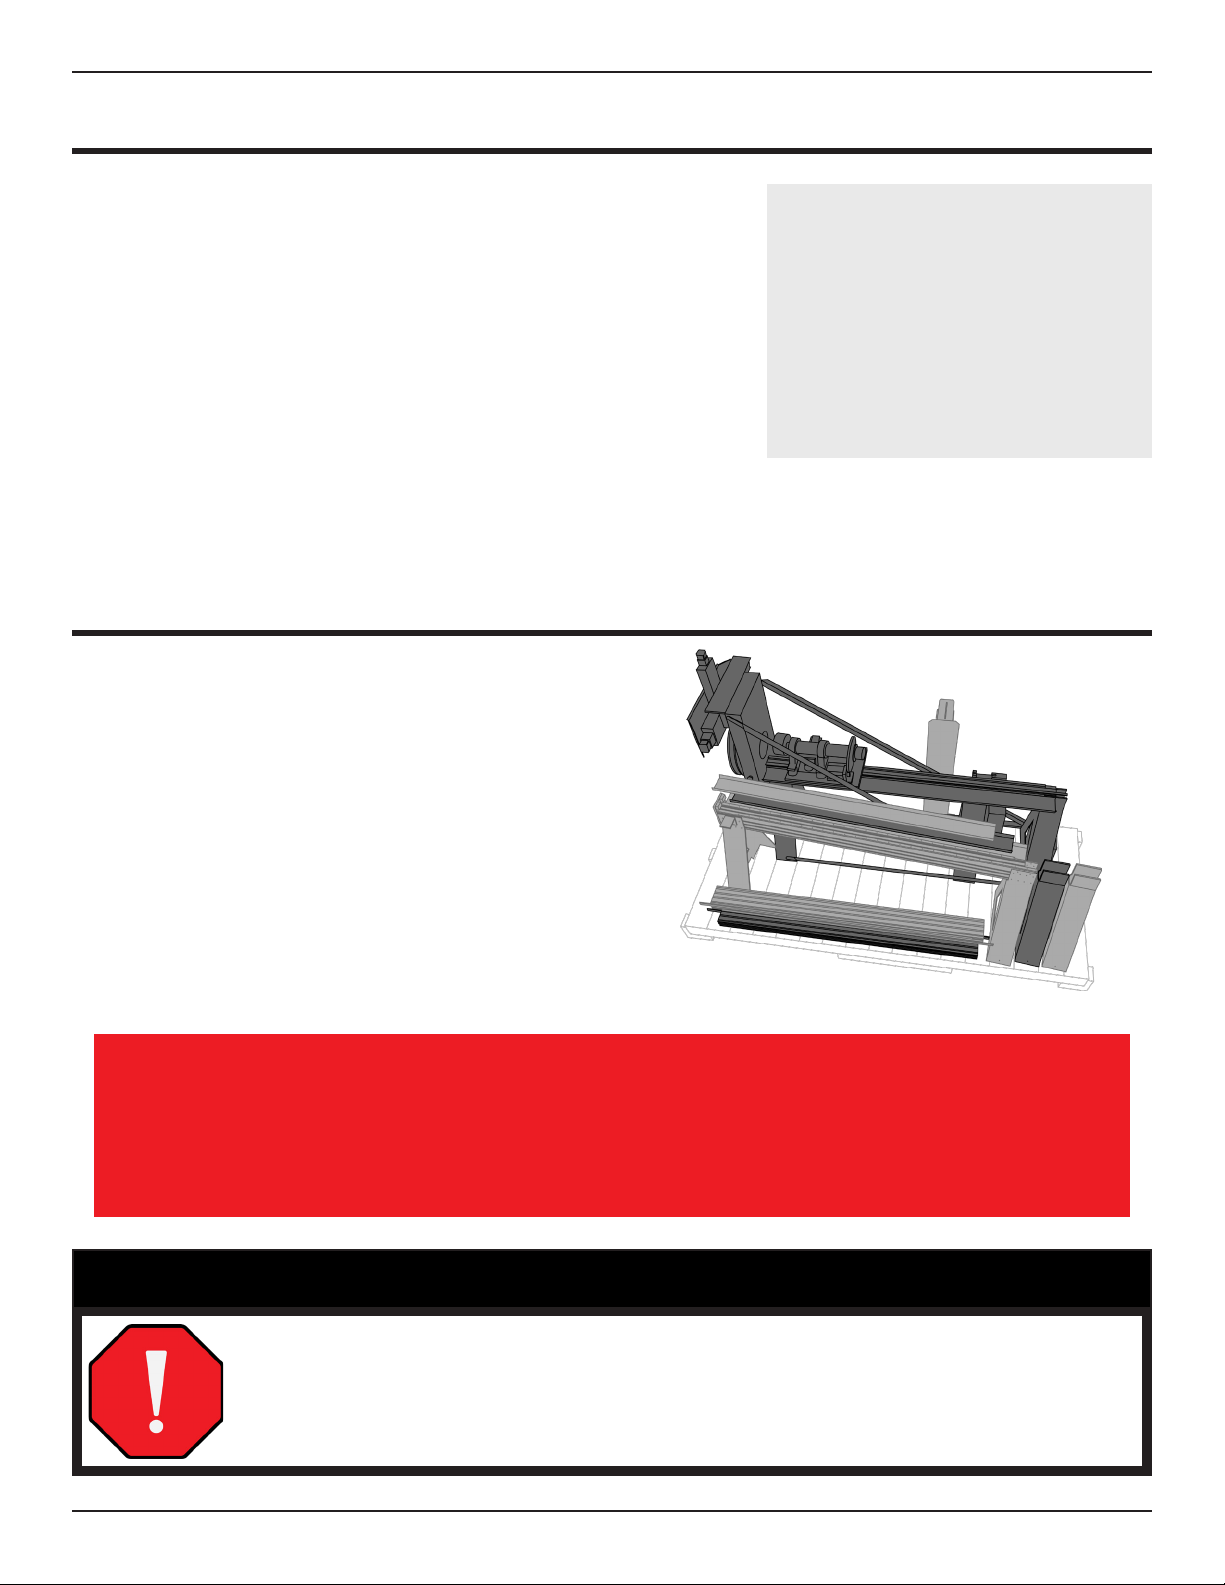
14
Table of contents
Other Bend-Tech Industrial Equipment manuals

Bend-Tech
Bend-Tech Dragon A400 Installation guide

Bend-Tech
Bend-Tech Dragon A400 User manual

Bend-Tech
Bend-Tech Dragon A400 Installation and operation manual

Bend-Tech
Bend-Tech Dragon mAchines User manual

Bend-Tech
Bend-Tech Dragon A400 User manual

Bend-Tech
Bend-Tech Dragon mAchines User manual

Bend-Tech
Bend-Tech Dragon User manual

Bend-Tech
Bend-Tech Dragon A400 User manual

Bend-Tech
Bend-Tech Dragon A400 Installation guide

Bend-Tech
Bend-Tech DRAGON A150 User manual