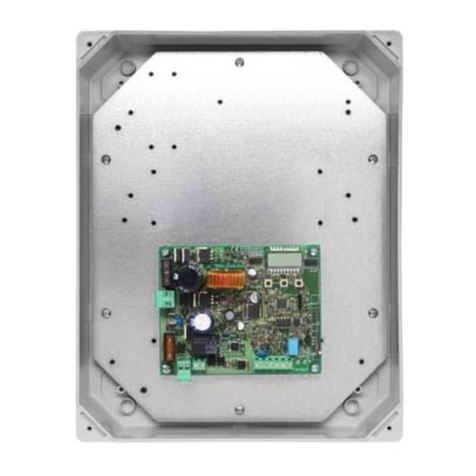
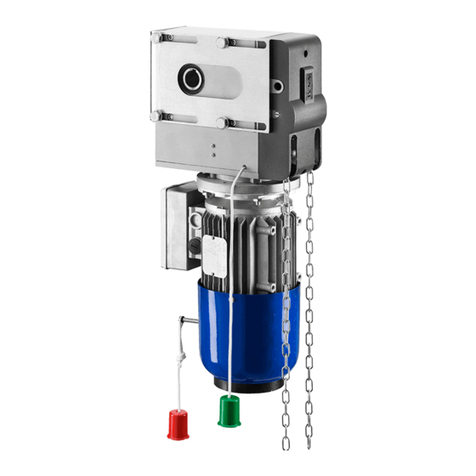
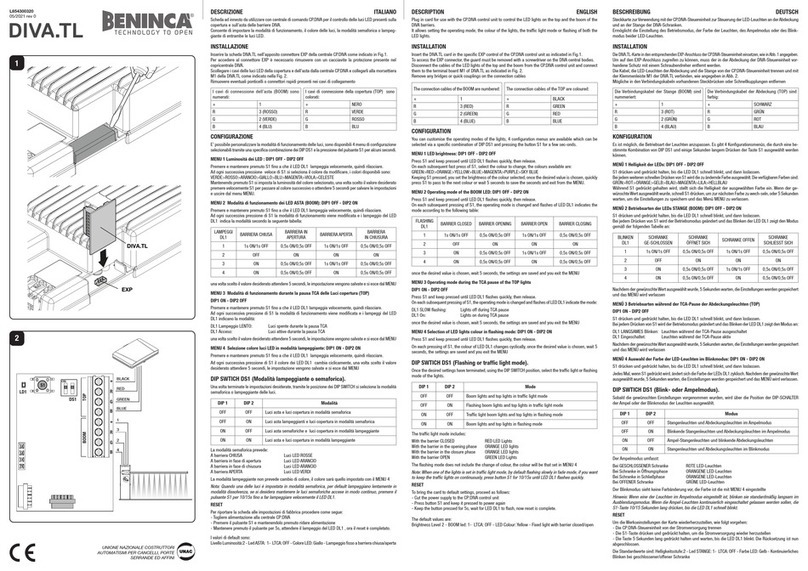
Beninca CP.BULL5 ARC User manual

L854200209
10/2019 rev 0
UNIONE NAZIONALE COSTRUTTORI
AUTOMATISMI PER CANCELLI, PORTE
SERRANDE ED AFFINI
CP.BULL5 ARC

1
M
COM
MOT
MOT
BLINK
N L
SWO
SWC
PHOT
STOP
COM
P.P./OPEN
24 Vac
200mA max
SCA
24 Vac
3W max
C
LAMP 115/230Vac
40W max
TWTCA
SHIELD
ANT
ANT
U3
F2
230Vac: T100mA
115Vac: T200mA
T2
P1P2
S1
ENC1 (ENCODER - MAG-E - OPTIONAL)
16
R16 R17
ON
OFF
STEP-BY-STEP
DL1
DL2
F3
230Vac: F6,3A
115Vac: F10A

3
ITA AVVERTENZE
INFORMAZIONI GENERALI
E’ vietato l’utilizzo del prodotto per scopi o con modalità non previste nel presente manuale. Usi non corretti possono essere
causa di danni al prodotto e mettere in pericolo persone e cose.
Si declina ogni responsabilità dall’inosservanza della buona tecnica nella costruzione dei cancelli,nonché dalle deformazioni
che potrebbero verificarsi durante l’uso.
Conservare questo manuale per futuri utilizzi.
INFORMAZIONI PER L'INSTALLATORE
Questo manuale è destinato esclusivamente a personale qualificato per l’installazione e la manutenzione di aperture au-
tomatiche. L’installazione deve essere effettuaua da personale qualificato (installatore professionale, secondo EN12635),
nell’osservanza della Buona Tecnica e delle norme vigenti. Verificare che la struttura del cancello sia adatta ad essere
automatizzata.
L’installatore deve fornire tutte le informazioni relative al funzionamento automatico, manuale e di emergenza dell’automa-
zione, e consegnare all’utilizzatore dell’impianto le istruzioni d’uso.
AVVERTENZE GENERALI
I materiali dell’imballaggio non devono essere lasciati alla portata dei bambini in quanto fonte di potenziale pericolo. Non
disperdere nell’ambiente i materiali di imballo, ma separare le varie tipologie (es. cartone, polistirolo) e smaltirle secondo
le normative locali. Non permettere ai bambini di giocare con i dispositivi di comando del prodotto. Tenere i telecomandi
lontano dai bambini.
Questo prodotto non è destinato a essere utilizzato da persone (bambini inclusi) con capacità fisiche, sensoriali o mentali
ridotte, o con mancanza di conoscenze adeguate, a meno che non siano sotto supervisione o abbiano ricevuto istruzioni
d’uso da persone responsabili della loro sicurezza.
Applicare tutti i dispositivi di sicurezza (fotocellule, coste sensibili,ecc.) necessari a proteggere l’area da pericoli di impatto,
schiacciamento,convogliamento,cesoiamento.Tenere in considerazione le normative e le direttive in vigore,i criteri della Buo-
naTecnica, l’utilizzo,l’ambiente di installazione,la logica di funzionamento del sistema e le forze sviluppate dall’automazione.
L’installazione deve essere fatta utilizzando dispositivi di sicurezza e di comandi conformi alla EN12978 e EN12453.
Raccomandiamo di utilizzare accessori e parti di ricambio originali, utilizzando ricambi non originali il prodotto non sarà
più coperto da garanzia.
utte le parti meccaniche ed elettroniche che compongono l'automazione soddisfano i requisiti e le norme in vigore e
presentano marcatura CE.
SICUREZZA ELETTRICA
Prevedere sulla rete di alimentazione un interruttore/sezionatore onnipolare con distanza d’apertura dei contatti uguale o
superiore a 3 mm.
Verificare che a monte dell’impianto elettrico vi sia un interruttore differenziale e una protezione di sovracorrente adeguati.
Alcune tipologie di installazione richiedono il collegamento dell’anta ad un impianto di messa a terra rispondente alle vigenti
norme di sicurezza.
Durante gli interventi di installazione, manutenzione e riparazione, togliere l’alimentazione prima di accedere alle parti
elettriche.
Scollegare anche eventuali batterie tampone se presenti. L’installazione elettrica e la logica di funzionamento devono essere
in accordo con le normative vigenti. I conduttori alimentati con tensioni diverse,devono essere fisicamente separati, oppure
devono essere adeguatamente isolati con isolamento supplementare di almeno 1 mm. I conduttori devono essere vincolati
da un fissaggio supplementare in prossimità dei morsetti. Ricontrollare tutti i collegamenti fatti prima di dare tensione. Gli
ingressi N.C. non utilizzati devono essere ponticellati.
SMALTIMENTO
Come indicato dal simbolo a lato, è vietato gettare questo prodotto nei rifiuti domestici in quanto alcune parti che lo com-
pongono potrebbero risultare nocive per l’ambiente e la salute umana, se smaltite scorrettamente.
L’apparecchiatura, pertanto, dovrà essere consegnata in adeguati centri di raccolta differenziata, oppure riconsegnata al
rivenditore al momento dell’acquisto di una nuova apparecchiatura equivalente.
Lo smaltimento abusivo del prodotto da parte dell’utente comporta l’applicazione delle sanzioni amministrative previste
dalla normativa vigente.
Le descrizioni e le illustrazioni presenti in questo manuale non sono impegnative. Lasciando inalterate le caratteristiche essenziali del prodotto il
fabbricante si riserva il diritto di apportare qualsiasi modifica di carattere tecnico, costruttivo o commerciale senza impegnarsi ad aggiornare la
presente pubblicazione.

4
1) CENTRALE DI COMANDO CP.BULL5 ARC
TRASMETTITORI ARC
IMPORTANTE, LEGGERE CON ATTENZIONE:
Il ricevitore radio presente in questo prodotto è compatibile esclusivamente con i trasmettitori ARC (Advanced Rolling Code) i quali,
grazie alla codifica a 128 bit, garantiscono una superiore sicurezza anticopiatura.
1.1) COLLEGAMENTI ELETTRICI
Nella seguente tabella sono descritti i collegamenti elettrici rappresentati in Fig.1:
Morsetti Funzione Descrizione
L-N-GND Alimenta-
zione
Ingresso 230Vac 50/60Hz (CP.BULL5 ARC)
Ingresso 115Vac 50/60Hz (CP.BULL5 ARC 115V)
(1-Fase/2-Neutro/GND-Collegamento di terra)
MOT-COM-
MOT Motore Collegamento al motore: (MOT-marcia/COM-Comune/MOT-marcia)
N-BLINK LAMP
Uscita collegamento Lampeggiante
CP.BULL5 ARC: 230 Vac 40W max.
CP.BULL5 ARC 115V: 115 Vac 40W max.
SWO SWO Ingresso finecorsa APERTURA (contatto N.C.)
SWC SWC Ingresso finecorsa CHIUSURA (contatto N.C.)
PHOT
(CHIUDE) PHOT
Ingresso collegamento dispositivi di sicurezza, contatto N.C. (ad es. fotocellule): comportamento con-
figurabile tramite DIP3). In modalità “Uomo Presente” assume la funzione comando CHIUDE, collegare
in questo caso un pulsante N.O.
STOP STOP Ingresso pulsante STOP (contatto N.C.) Può assumere la funzione Chiude o Pedonale (contatto N.O.)
vedi paragrafo “Programmazione Avanzata”.
COM COM Comune per tutti gli ingressi di comando.
P.P. (APRE) Passo-
Passo
Ingresso pulsante passo-passo (contatto N.O.).
Può assumere la funzione APRE vedi paragrafo “Programmazione Avanzata”.
In modalità “Uomo Presente” assume la funzione comando APRE.
24 VAC 24Vac Uscita alimentazione accessori 24Vac/200mA max.
SCA SCA
Contatto libero da tensione non isolato per collegamento spia cancell o aperto.
Contatto aperto ad anta chiusa, intermittente durante il movimento dell’anta, chiuso ad anta aperta.
ENC1 ENCODER Ingresso collegamento Encoder (opzionale).
Vedi paragrafo 5
SHIELD-ANT Antenna Collegamento antenna scheda radioricevente incorporata (SHIELD-schermo/ANT-segnale).
Nota:La centrale dispone di un pulsante“P2”con la medesima funzionalità del pulsante Passo-Passo,utile per comandare l’automazione
durante la fase di installazione (solo con DIP2:OFF).
2) VERIFICA COLLEGAMENTI
1) Togliere alimentazione.
2) Sbloccare manualmente la porta, portarla a circa metà della corsa e ribloccarla.
3) Ripristinare l’alimentazione.
4) Dare un comando di passo-passo mediante pulsante P2, ingresso P.P. o radiocomando.
5) La porta deve muoversi in apertura. Nel caso ciò non avvenisse, a motore fermo, è sufficiente invertire tra loro i fili di marcia (MOT/
MOT) del motore e dei finecorsa (SWO/SWC).
6) Procedere con le regolazioni descritte nel paragrafo “APPRENDIMENTO CORSA E RALLENTAMENTI”.
3) FUNZIONE DEL TRIMMER
3.1) TW - Se installato il dispositivo Encoder, assume la funzione di regolazione sensibilità anti- schiacciamento. Ruotando in senso
orario aumenta la sensibililtà. In assenza di dispositivo Encoder, regola la durata massima della manovra di apertura e chiusura. Deve
essere impostato circa 4s in più rispetto al tempo di corsa effettiva dell’automatismo. La regolazione varia da un minimo di 3s ad un
massimo di 180s. Se viene effettuato la procedura di apprendimento corsa e rallentamenti la posizione del trimmer non ha effetto
sul tempo di lavoro.
3.2) TCA -
Permette di regolare il tempo di chiusura automatica. La regolazione varia da un minimo di 3s ad un massimo di 180s. Con il trimmer
TCA completamente ruotato in senso orario, il LED DL2 (verde) si spegne, il TCA è disattivato.

5
4) FUNZIONE DIP-SWITCH
DIP1 Programmazione DIP4 P.P. : modalità di funzionamento
Da utilizzare esclusivamente per la programmazione della
coppia e del tempo di prelampeggio e del rallentamento. Una
volta portato il DIP1 in ON:
- con il pulsante P1 si regola la coppia.
- con il pulsante P2 si attiva/disattiva il prelampeggio.
- con l’ingresso Passo/Passo o un telecomando
memorizzato si regola lo spazio di rallentamento.
Vedere i rispettivi paragrafi. Una volta impostati i parametri,
riportare in OFF.
Seleziona la modalità di funzionamento del ”Pulsante P.P.” e del
trasmettitore.
Off: Funzionamento: APRE > STOP > CHIUDE > STOP >
On: Funzionamento: APRE > CHIUDE > APRE >
DIP2 Condominiale DIP5 Chiusura rapida
Abilita o disabilita la funzione condominiale.
Off: Funzione condominiale disabilitata.
On: Funzione condominiale abilitata.
L’impulso P.P. o del trasmettitore non ha effetto durante la
fase di apertura.
Abilita o disabilita la chiusura rapida (solo con TCA attivato)
Off: Chiusura rapida disabilitata
On: Chiusura rapida abilitata. L’intervento della fotocellula,
comporta dopo circa 3s la chiusura della porta.
DIP3 PHOT: modalità di funzionamento DIP6 Programmazione
Seleziona la modalità di funzionamento dell’ingresso PHOT
Off: Ingresso attivo sia in fase di apertura, sia in fase di
chiusura
On: Ingresso attivo solo in fase di chiusura
Si utilizza esclusivamente per la programmazione delle funzioni
avanzate o nel caso di funzionamento ad UOMO PRESENTE.
5) APPRENDIMENTO CORSA E RALLENTAMENTI
L'apprendimento della corsa e l'impostazione dei rallentamenti è possibile anche se il dispositivo Encoder non è installato. La presenza dell'ac-
cessorio Encoder assicura in ogni caso una maggior precisione dei rallentamenti (oltre alla funzione antischiacciamento). Per la regolazione degli
spazi di rallentamento in apertura e chiusura, procedere come segue:
1) chiudere il cancello (assicurandosi che sia premuto il finecorsa di chiusura).
2) mettere a ON il DIP 1 (DIP 2-3-4-5-6=OFF)
3) dare un comando PP (Ingresso Passo-Passo o telecomando memorizzato). Il cancello inizia a muoversi in apertura a velocità
normale.
4) quando il cancello raggiunge il punto di rallentamento desiderato dare un altro comando PP, il cancello inizierà a rallentare e
proseguirà la corsa fino a completa apertura. Successivi comandi PP saranno ignorati.
5) con il cancello fermo e completamente aperto dare un comando PP (tramite Ingresso Passo-Passo o telecomando memorizzato).
Il cancello inizia a muoversi in chiusura a velocita normale.
6) quando il cancello raggiunge il punto di rallentamento desiderato dare il comando PP, il cancello inizierà a rallentare e proseguirà
la corsa fino a completa chiusura. Altri comandi PP saranno ignorati.
7) riposizionare su OFF il DIP1.
NOTE:
Se non si desidera regolare lo spazio di rallentamento in apertura o in chiusura, lasciare che il cancello esegua una manovra di
completa apertura/chiusura senza dare un comando PP di inizio rallentamento. L’intervento di sicurezze come STOP e PHOT blocca
la procedura di regolazione. Ripetere la procedura dall’inizio.
Se è installato il dispositivo Encoder, durante la fase di apprendimento il
sensore antischiacciamento è disabilitato.
6) RESET APPRENDIMENTO CORSA E RALLENTAMENTI
Per riportare la centrale al funzionamento senza rallentamenti (funzionamento a tempo regolato dal trimmer TW), procedere come segue:
1) Portare il cancello in una posizione intermedia, lontano dai finecorsa
2) Portare il DIP 1 su ON (DIP 2-3-4-5-6=OFF)
3) Dare un comando Passo/Passo tramite ingresso PP o telecomando
4) I LED lampeggiano a conferma del reset iniziato
5) Quando i LED si spengono riportare il DIP 1 su OFF
La centrale ha cancellato i dati relativi alla corsa e ai rallentamenti.
7) MODALITÀ UOMO PRESENTE
Portando tutti i DIP in ON la centrale passa in modalità UOMO PRESENTE.
L’ingresso PHOT assume la funzione Pulsante CHIUDE (collegare pulsante con contatto N.O.).

6
L’ingresso PP assume la funzione Pulsante APRE (collegare pulsante con contatto N.O.).
La pressione dei pulsanti APRE/CHIUDE deve essere mantenuta durante tutta la manovra.
L’apertura dell’ingresso STOP arresta il motore. La pressione simultanea di APRE/CHIUDE comporta l’arresto del motore.
8) REGOLAZIONE COPPIA (DIP1:ON)
Appena spostato il DIP1 in ON la scheda segnala la coppia applicata in quel momento tramite un numero di lampeggi (da 1 a 4) del LED
verde DL2 seguiti da una pausa di 3s. La coppia massima viene segnalata con il LED verde DL2 fisso.
Per incrementare la coppia premere il pulsante P1; il LED DL2 cambia il numero di lampeggi ad indicare il valore di coppia selezionato.
Una volta selezionata la coppia desiderata, per apprendere tale impostazione, portare il DIP1 in OFF.
9) PROGRAMMAZIONE AVANZATA
Se necessario è possibile modificare la funzionalità degli ingressi PP e STOP, procedere come segue:
1) mettere tutti i DIP su OFF
2) mettere a ON il DIP1
3) per modificare l'ingresso PP in APRE portare il DIP 2:ON
per modificare l'ingresso STOP in CHIUDE portare il DIP 3:ON e il DIP:4 OFF, o in alternativa
per modificare l'ingresso STOP in Pedonale (apertura parziale) portare il DIP 4:ON il DIP 3:OFF
4) portare il DIP 6 su ON. I LED lampeggiano alterativamente per circa 10s.
5) dopo 10s i LED lampeggiano simultaneamente e viene memorizzata la nuova funzionalità.
6) mettere a OFF tutti i dip
7) riportare i DIP alle impostazioni desiderate
10) ATTIVAZIONE/DISATTIVAZIONE PRELAMPEGGIO (DIP1:ON)
Appena spostato il DIP1 in ON il led DL1 rosso segnala l’attivazione o meno del prelampeggio.
Con il pulsante P2 è possibile attivare o disattivare la funzione prelampeggio.
LED DL1 Acceso: Prelampeggio attivo, il lampeggiante si accende circa 3 secondi prima della partenza del motore.
LED DL1 Spento. Prelampeggio disattivato.
11) APPRENDIMENTO RADIO (DIP1:OFF)
Il ricevitore radio presente in questo prodotto è compatibile ESCLUSIVAMENTE con i nuovi trasmettitori ARC (Advanced Rolling Code) i
quali, grazie alla codifica a 128 bit, garantiscono una superiore sicurezza anticopiatura.
Per utilizzare un telecomando è prima necessario apprenderlo, la procedura di memorizzazione è illustrata di seguito, il dispositivo è
in grado di memorizzare fino a 64 codici diversi.
Premendo P1 la centrale entra in fase di apprendimento radio: il LED rosso DL1 lampeggia 1 volta al secondo in attesa del tasto da
associare alla funzione Passo-Passo; Una volta appreso il tasto si esce dalla programmazione;
Premendo 2 volte P1 il LED rosso DL1 lampeggia 2 volte al secondo ed entro nella fase di apprendimento pedonale (la funzione pedonale
comanda una manovra di apertura di 7s). Una volta appreso il tasto da associare si esce dalla programmazione.
Nel caso in cui sia necessario uscire dalla programmazione senza apprendere nessun radiocomando, premere il tasto il tasto P1 finchè
il led rosso DL1 torna a lampeggiare in modalità “presenza rete“ (vedi diagnostica LED).
11.1) RESET DELLA RICEVENTE
Per resettare la memoria della ricevente premere e mantenere premuti contemporanenamente i tasti P1 e P2 per circa 10 secondi (durante
questo tempo entrambi i LED DL1 e DL2 lampeggiano velocemente).Trascorsi i 10 secondi i due LED restano accesi fissi, rilasciare i pulsanti.
Quando i LED tornano nella configurazione iniziale la centralina ha effettuato il reset della memoria.
NOTA: I trasmettitori vengono memorizzati su un memoria EPROM (U3) che può essere rimossa dalla centrale e reinserita in una nuova
centrale CP.BULL5 ARC in caso di sostituzione.
Per motivi di sicurezza, non è possibile memorizzare trasmettitori durante le fasi apertura/chiusura del motore.
12) APPRENDIMENTO REMOTO TRASMETTITORI
Se si dispone di un trasmettitore già memorizzato nella ricevente è possibile effettuare l’apprendimento radio remoto (senza necessità
di accedere alla centrale).
IMPORTANTE: La procedura deve essere eseguita con ante in apertura durante la pausa TCA. Procedere come segue:
1) Premere il tasto nascosto del trasmettitore già memorizzato.
2) Premere, entro 5s, il tasto del trasmettitore già memorizzato corrispondente al canale da associare al nuovo trasmettitore. Il
lampeggiante si accende.
3) Premere entro 10s il tasto nascosto del nuovo trasmettitore.
4)
Premere, entro 5s, il tasto del nuovo trasmettitore da associare al canale scelto al punto 2. Il lampeggiante si spegne.
5) La ricevente memorizza il nuovo trasmettitore ed esce immediatamente dalla programmazione.

7
13) DIAGNOSTICA LED
Il LED DL1 rosso segnala l’attivazione degli ingressi, secondo
questa legenda: Il LED DL2 verde segnala la direzione del movimento del motore e
lo stato del cancello, secondo questa legenda:
Presenza Rete Lampeggio lento APERTURA 1 lampeggio al secondo
STOP acceso fisso CHIUSURA 2 lampeggi al secondo
PHOT lampeggio veloce Cancello aperto senza
TCA acceso fisso
SWO
1 lampeggio con pausa di 2 sec.
Cancello aperto con TCA lampeggio veloce
SWC
2 lampeggi con pausa di 2 sec.
Cancello chiuso led spento
14) FUSIBILI
CP.BULL5 ARC 230Vac: F2 = T100mA F3= F6,3A
CP.BULL5 ARC 115Vac: F2 = T200mA F3 = F10A

8
ENG WARNING
GENERAL INFORMATIONS
The product shall not be used for purposes or in ways other than those for which the product is intended for and as
described in this manual. Incorrect uses can damage the product and cause injuries and damages.
The company shall not be deemed responsible for the non-compliance with a good manufacture technique of gates as
well as for any deformation, which might occur during use.
Keep this manual for further use.
INSTALLER GUIDE
This manual has been especially written to be use by qualified fitters.Installation must be carried out by qualified personnel
(professional installer, according to EN 12635), in compliance with Good Practice and current code.
Make sure that the structure of the gate is suitable for automation.
The installer must supply all information on the automatic, manual and emergency operation of the automatic system and
supply the end user with instructions for use.
GENERAL WARNINGS
Packaging must be kept out of reach of children, as it can be hazardous.
For disposal, packaging must be divided the various types of waste (e.g. carton board, polystyrene) in compliance with
regulations in force.
Do not allow children to play with the fixed control devices of the product. Keep the remote controls out of reach of children.
This product is not to be used by persons (including children) with reduced physical,sensory or mental capacity,or who are
unfamiliar with such equipment,unless under the supervision of or following training by persons responsible for their safety.
Apply all safety devices (photocells, safety edges, etc.) required to keep the area free of impact, crushing, dragging and
shearing hazard.
Bear in mind the standards and directives in force, Good Practice criteria, intended use, the installation environment, the
operating logic of the system and forces generated by the automated system. Installation must be carried out using safety
devices and controls that meet standards EN 12978 and EN 12453.
Only use original accessories and spare parts, use of non-original spare parts will cause the warranty planned to cover
the products to become null and void.
All the mechanical and electrical parts composing automation must meet the requirements of the standards in force and
outlined by CE marking.
ELECTRICAL SAFETY
An omnipolar switch/section switch with remote contact opening equal to, or higher than 3mm must be provided on the
power supply mains.
Make sure that before wiring an adequate differential switch and an overcurrent protection is provided.
Pursuant to safety regulations in force, some types of installation require that the gate connection be earthed. During
installation, maintenance and repair, cut off power supply before accessing to live parts. Also disconnect buffer batteries,
if any are connected.
The electrical installation and the operating logic must comply with the regulations in force.
The leads fed with different voltages must be physically separate, or they must be suitably insulated with additional
insulation of at least 1 mm.
The leads must be secured with an additional fixture near the terminals.
During installation, maintenance and repair, interrupt the power supply before opening the lid to access the electrical parts
Check all the connections again before switching on the power. The unused N.C. inputs must be bridged.
WASTE DISPOSAL
As indicated by the symbol shown, it is forbidden to dispose this product as normal urban waste as some parts might be
harmful for environment and human health, if they are disposed of incorrectly.
Therefore, the device should be disposed in special collection platforms or given back to the reseller if a new and similar
device is purchased.
An incorrect disposal of the device will result in fines applied to the user, as provided for by regulations in force.
Descriptions and figures in this manual are not binding.While leaving the essential characteristics of the product unchanged, the manufacturer reserves
the right to modify the same under the technical, design or commercial point of view without necessarily update this manual.

9
1) CONTROL PANEL CP.BULL5 ARC
ARC TRANSMITTERS
IMPORTANT, PLEASE READ CAREFULLY:
The radio receiver in this product is compatible only with ARC (Advanced Rolling Code) transmitters which, thanks to 128 bit
coding, guarantee superior anti-copying security.
1.1) WIRE DIAGRAM
Wire connections shown in Fig. 1 are described hereunder:
Terminals Function Description
L-N-GND Power
supply
Input, 230VAC 50Hz (CP.BULL5 ARC)
Input, 115VAC 50/60Hz (CP.BULL5 ARC 115V))
(1-Phase/2-Neutral/GND-Ground connection)
MOT-COM-MOT Motor Connection to motor: (MOT-move/COM-Common/MOT-move)
N-BLINK LAMP
Output, connection to Flashing light
CP.BULL5 ARC: 230 Vac 40W max.
CP.BULL5 ARC 115V: 115 Vac 40W max.
SWO SWO Input, OPENING limit switch (Normally Closed contact)
SWC SWC Input, CLOSING limit switch (Normally Closed contact)
PHOT (CLOSE) PHOT
Input, connection to safety devices, Normally Closed (N.C.) contact (e.g. photocells): configurable through DIP3).
In “Service man” mode, it activates the CLOSE function.
In this case connect a Normally Open (N.O.) key.
STOP STOP Input, STOP key (N.C. contact)
Can assume the Close or Pedestrian function (contact N.O.) see “Advanced Programming” paragraph.
COM COM Common, all control inputs.
P.P. (OPEN) Step
by-Step
Input, step-by-step key (N.O. contact). Can assume the OPEN function see paragraph “Advanced Programming”.
In “Service man” mode, it activates the OPEN control function.
24 VAC 24Vac Output, 24Vac/200mA max accessory power supply.
SCA SCA
Contact free from voltage, not insulated for the connection of open gate indicator lamp. Open contact with
closed door leaf. Flashing light during the door leaf movement. With open door leaf, the contact is closed.
ENC1 ENCODER Input, connection of the encoder (OPTIONAL). See section 5
SHIELD-ANT Antenna Connection of the antenna to the incorporated radio-receiver module (SHIELD-screen/ANT-signal).
Note:The control unit uses a “P2” key with the same functions of the Step-by-Step push-button.This is useful to control the automatic
system during installation (only with DIP2: OFF).
2) CHECKING CONNECTIONS
1) Cut off power supply.
2) Manually release the door, move it at around half stroke and lock it again.
3) Reset power supply.
4) Send the step-by-step (P.P.) control signal through the P2 key, P.P. or remote control.
5) The door leaves should open. If not, with stopped motor, it is sufficient to invert the move wires of the motor (MOT/MOT) of the
motor and the limit switches (SWO/SWC).
6) Proceed with regulations described in “STROKE ACQUISITION & SLOWDOWNS”
3) TRIMMER FUNCTIONS
3.1) TW - If the Encoder device is installed, it assumes the function of regulating anti-crushing sensitivity.When turned in a clockwise
direction, sensitivity is increased.
In the absence of an Encoder device, regulate the maximum duration of opening and closing manoeuvres. It must be preset approx. 4s
more with respect to the actual stroke time of the system. The adjustment ranges from 3s to 180s maximum. If the stroke acquisition
and slowdowns procedure is executed, the position of the trimmer has no effect on the operation time.
3.2) TCA - It allows to adjust the automatic closure time.The adjustment ranges from 3s to 180s maximum.
With TCA trimmer completely turned clockwise, the DL2 LED (green) switches off, TCA is deactivated.

10
4) DIP-SWITCH FUNCTION
DIP1 Set-up DIP4 P.P.: operating mode
To be used only for the setting-up of the torque and the forewar-
ning and braking time. After moving DIP1 to ON:
- with P1 push-button the torque is adjusted.
- with push-button P2 the forewarning light is activated/
deactivated.
- with the Step-by-Step input or a memorised remote control,
braking length is adjusted.
See the related sections. After presetting the parameters,
move to OFF.
The operating mode of the “P.P. push-button” and the transmit-
ter are selected.
Off: Operation: OPEN > STOP > CLOSE > STOP >
On: Operation: OPEN > CLOSE > OPEN >
DIP2 Multi-flat DIP5 Rapid closure
The multi-flat function is enabled or disabled.
Off: disabled multi-flat function.
On: enabled multi-flat function.
The P.P. (Step-by-step) impulse or the impulse of the
transmitter have no effect in the opening phase.
The rapid closure is enabled or disabled with (only with
activated TCA)
Off: disabled rapid closure
On: enabled rapid closure. The triggering of the photocell
involves, after approx. 3s, the closure of the door.
DIP3 PHOT: operating mode DIP6 Programming
The operating mode of the PHOT input is selected
Off: Input, activated in both opening and closing phases
On: Input, activated in the closing phase only
It is used exclusively for programming the advanced functions
or in the case of the SERVICE MAN MODE.
5) STROKE ACQUISITION & SLOWDOWNS
To adjust braking length in both opening and closing phases, proceed as follows:
1) Close or open the gate (make sure that the closing/opening limit switch is pressed).
2) Move DIP 1 to ON (DIP 2-3-4-5-6=OFF)
3)
Send PP control signal (through Step-by-Step Input or memorised remote control). The gate starts opening at normal speed.
4) When the gate reaches the desired braking point, send another PP control signal, the gate will start braking until it is completely
opened. Subsequent PP control signals will be ignored.
5) With totally open and stopped gate, send a PP control signal (through Step-by-Step Input or memorised remote control) The gate
starts closing at normal speed.
6) When the gate reaches the desired braking point, send another PP control signal, the gate will start braking until it is completely
closed. Subsequent PP control signals will be ignored.
7) Move DIP1 to OFF again.
NOTE:
If braking length does not require any adjustment in both opening and closing, leave the gate to totally open/close without sending
a PP control signal to start braking. If safety functions (STOP and PHOT) are activated, the adjustment procedure will be blocked.
Repeat the procedure from the beginning. During this phase, the anti-crash sensor is disabled. if the Encoder device is installed, the
anti-crushing sensor is disabled during the acquisition phase.
6) RESET STROKE ACQUISITION & SLOWDOWNS
To set the control unit to function without slowdowns (timed operation regulated by TW trimmer), proceed as follows:
1) Move the gate to an intermediate position, far from the limit switches
2) Move DIP 1 to ON (DIP 2-3-4-5-6=OFF)
3) Give the Step/Step command through the PP input or remote control
4) The flashing LEDs will confirm the initiated reset
5) When the LEDs turn off, move DIP 1 to OFF
The control unit has deleted data relative to the stroke and slowdowns.
7) SERVICE MAN MODE
With all DIPs on ON, the control unit switches to SERVICE MAN mode.
The PHOT input has the CLOSE push-button function (connect the button with N.O. contact).
The PP input has the OPEN push-button function (connect the button with N.O. contact).
The OPEN/CLOSE push-buttons must be kept pressed during operation. The opening of the STOP input stops the motor. The
contemporary pressure of OPEN/CLOSE stops the motor.

11
8) ADJUSTMENT OF THE TORQUE (DIP1:ON)
When DIP1 is moved to ON, the board indicates that the torque has been applied during a number of flashes (from 1 to 4) of the DL2
green LED, followed by a 3-s interval. The max torque is indicated with DL2 green LED with fixed light. To increase the torque, press
P1. The DL2 LED changes the number of flashes to indicate the selected torque value. Once the desired torque is selected, move DIP
1 to OFF to memorise this presetting.
9) ADVANCED PROGRAMMING
If necessary, it is possible to modify the functions of the PP and STOP inputs to obtain OPEN/CLOSE inputs or alternatively OPEN/
Pedestrian inputs; proceed as follows:
1) Move all DIPs to OFF
2) Move DIP1 to ON
3) to change the Step/Step input to Open, move DIP 2 to ON
4) to change the STOP input to Close, move DIP 3 to ON and DIP 4 to OFF
5) to change the STOP input to Pedestrian, move DIP 4 to ON and DIP 3 to OFF
6) move DIP 6 to ON. The LEDs will flash alternatively for approx. 10 secs.
7) after 10 seconds, the LEDs will flash simultaneously and the new input functions will be stored.
8) move the dips to OFF
9) move the DIPs back to the desired settings
10) PRE-WARNING ACTIVATION/DEACTIVATION (DIP1:ON)
As soon as DIP1 is to ON, the DL1 red LED indicates whether the pre-warning flashing is activated.
The pre-warning function can be activated or deactivated with P2 key.
LED DL1 On: Activated pre-warning, the indicator lamp switches on for approx. 3 seconds before the motor starts.
LED DL1 Off. Pre-warning is deactivated.
11) RADIO SELF-LEARNING (DIP1:OFF)
The radio receiver in this product is EXCLUSIVELY compatible with the new ARC (Advanced Rolling Code) transmitters which, thanks to
128-bit encryption ensure superior copy-security.
To use a remote control, it is first necessary to store its code in memory.The memorisation procedure is described hereunder.The device
is able to store up to 64 different codes in memory.
By pressing P1, the control unit enters the radio learning phase: DL1 red LED flashes 1 time per second,awaiting the key to the matched
to the Step-by-Step function;
When the key is stored in memory, exit from the programming mode;
By pressing P1 twice, the DL1 red LED flashes 2 times per second and the pedestrian learning phase is entered (the pedestrian function
controls an opening operation of 7s). When the key to be matched is memorised, exit from the programming mode.
If the programming mode must be left without storing any remote control signal, press P1 key until DL1 red LED starts to flash in“power
on” mode (see LED diagnostics).
11.1) RECEIVER RESET
To reset the memory of the receiver, press and keep P1 and P2 keys pressed for around 10 seconds (during this period of time, both DL1
and DL2 flash rapidly). After 10 seconds, when the two LEDs are switched on with fixed light, release the push-buttons. When the LEDs
switch back again to the original configuration, the control unit has completed the memory reset.
NOTE: The transmitters are memorised on an EPROM memory (U3), which can be extracted from the control unit and inserted in a new
CP.BULL5 ARC control unit should a replacement is required.
For safety reasons, the transmitters can be stored in memory during the opening/closing of the motor.
12) TRANSMITTER REMOTE LEARNING
If the transmitter code is already stored in the receiver, the remote radio learning can be carried out (without accessing the control unit).
IMPORTANT: The procedure should be carried out with gate in the opening phase, during the TCA dwell time.
Proceed as follows:
1) Press the hidden key of the transmitter, the code of which has already been stored in memory.
2) Within 5 seconds, press the already memorised transmitter key corresponding to the channel to be
matched to the new transmitter.The flashing light switches on.
3) Within 10 seconds, press the hidden key of the new transmitter.
4) Within 5 seconds, press the key of the new transmitter to be matched to the channel selected at item 2.
The flashing light switches off.
5) The receiver stores the new transmitter code and exits from the programming mode immediately.

12
13) LED DIAGNOSTICS
The red LED DL1 indicates the activation of inputs according to
the legend hereunder:
The green LED DL2 indicates the movement direction of the motor
and the status of the gate according to the legend hereunder:
The Unit is Powered flashing slowly OPENING 1 blinking per second
STOP on with fixed light CLOSING
2 more than 1 blinking per sec.
PHOT rapid flashing Open gate without TCA on with fixed light
SWO 1 flash with 2-second interval Open gate with TCA rapid flash
SWC
2 flashes with 2-second interval
Closed gate LED off
14) FUSES
CP.BULL5 ARC 230Vac: F2 = T100mA F3= F6,3A
CP.BULL5 ARC 115Vac: F2 = T200mA F3 = F10A

13
DEU HINWEISE
ALLGEMEINE INFORMATIONEN
Das Produkt darf nicht für andere Zwecke oder auf andere Weise verwendet werden, als in der vorliegenden Anleitung
beschrieben.
Ein ungeeigneter Gebrauch kann das Produkt beschädigen und eine Gefahr für Personen und Sachen darstellen.
Wir übernehmen keinerlei Haftung für Schäden, die sich aus einer unsachgerechten Montage der Tore und aus daraus
folgenden Verformungen ergeben können. Bewahren Sie dieses Handbuch für Nachschlagzwecke auf.
ERRICHTER GUIDE
Dieses Handbuch ist ausschließlich qualifiziertem Personal für die Installation undWartung von automatischen Öffnungsvor-
richtungen bestimmt.
Die Installation muss vonFachpersonal(professioneller Installateur gemäß EN12635) unter Beachtung der Regeln der guten
Technik sowie der geltenden Normen vorgenommen werden.
Prüfen, dass die Struktur des Tors so ist, dass es automatisiert werden kann. Der Installateur hat dem Benutzer alle
Informationen über den automatischen, manuellen Betrieb sowie den Not-Betrieb der Automatik zusammen mit der
Bedienungsanleitung zu liefern.
HINWEISE
Das Verpackungsmaterial fern von Kindern halten, da es eine potentielle Gefahr darstellt. Das Verpackungsmaterial nicht
ins Freie werfen, sondern je nach Sorte (z.B. Pappe, Polystyrol) und laut den örtlich geltenden Vorschriften entsorgen.
Erlauben Sie es Kindern nicht, mit den Steuervorrichtungen dieses Produkts zu spielen. Halten Sie die Fernbedienungen
von Kindern fern.
Dieses Produkt eignet sich nicht für den Gebrauch durch Personen (einschließlich Kindern) mit eingeschränkten körper-
lichen, sensorischen oder geistigen Fähigkeiten oder ohne die nötigen Kenntnisse, es sei denn, sie werden von für ihre
Sicherheit verantwortlichen Personen beaufsichtigt oder angeleitet.
Wenden Sie alle Sicherheitsvorrichtungen (Fotozellen, Sensoren usw.) an, die zum Schutz desGefahrenbereiches gegen
Aufprall, Quetschung, Erfassung und Abtrennung von Gliedmaßen erforderlich sind. Berücksichtigen Sie die geltenden
Normen und Richtlinien, die Regeln der guten Technik, die Einsatzweise, die Installationsumgebung, die Betriebsweise
sowie die vom System entwickelten Kräfte. Die Installation muss unter Verwedung von Sicherheits- und Steuerungsvor-
richtungen vorgenommen werden, die der Norm EN 12978 und EN 12453 entsprechen.
Verwenden Sie ausschließlich Originalzubehör und Originalersatzteile,die Verwendung von nicht originalenTeilen zieht einen
Verfall der vom Garantiezertifikat vorgesehenen Gewährleistungen nach sich.Alle mechanischen und elektrischen Teile der
Automatisierung müssen den Vorgaben der gültigen Normen entsprechen und mit der CE-Kennzeichnung versehen sein.
ELEKTRISCHE SICHERHEIT
Das Stromnetz muss mit einem allpoligen Schalter bzw.Trennschalter ausgestattet sein, dessen Kontakte einen Öffnungsab-
stand gleich oder größer als 3 aufweisen. Kontrollieren,ob der elektrischenAnlage ein geeigneter Differentialschalter und
ein Überspannungsschutzschalter vorgeschaltet sind. Einige Installationstypologien verlangen den Anschluss des Flügels
an eine Erdungsanlage laut den geltenden Sicherheitsnormen. Während der Installation, der Wartung und der Reparatur,
die Anlage stromlos machen bevor an den elektrischen Teilen gearbeitet wird.
Klemmen Sie falls vorhanden auch die eventuellen Pufferbatterien ab. Die elektrische Installation und die Betriebslogik
müssen den geltenden Vorschriften entsprechen. Die Leiter die mit unterschiedlichen Spannungen gespeist werden,
müssen physisch getrennt oder sachgerecht mit einer zusätzlichen Isolierung von mindestens 1 mm isoliert werden.
Die Leiter müssen in der Nähe der Klemmen zusätzlich befestigt werden. Während der Installation, der Wartung und
der Reparatur, die Anlage stromlos machen bevor an den elektrischen Teilen gearbeitet wird. Alle Anschlüsse nochmals
prüfen, bevor die Zentrale mit Strom versorgt wird. Die nicht verwendeten N.C. Eingänge müssen überbrückt werden.
ENTSORGUNG
Das seitlich abgebildete Symbol weißt darauf hin, dass das Produkt nicht als Hausmüll entsorgt werden darf, da einige
Bestandteile für die Umwelt und die menschliche Gesundheit gefährlich sind.
Das Gerät muss daher zu einer zugelassenen Entsorgungsstelle gebracht oder einem Händler beim Kauf eines neuen
Geräts zurückerstattet werden. Eine nicht ordnungsgemäße Entsorgung ist laut Gesetz strafbar.
Die in diesem Handbuch enthaltenen Beschreibungen und Abbildungen sind nicht verbindlich. Ausgenommen der Haupteigenschaften des Produkts,
behält sich der Hersteller das Recht vor eventuelle technische, konstruktive oder kommerzielle Änderungen vorzunehmen ohne dass er vorliegende
Veröffentlichung auf den letzten Stand bringen muss.

14
1) STEUEREINHEIT CP.BULL5 ARC
SENDER ARC
WICHTIG, AUFMERKSAM LESEN:
Der Funkempfänger in diesem Produkt ist nur mit den ARC-Sendern (Advanced Rolling Code) kompatibel, die dank der Kodierung
mit 128 bit einen höheren Kopierschutz gewährleisten.
1.1) ELEKTRISCHE ANSCHLÜSSE
In der nachstehenden Tabelle sind die elektrischen und in Abb. 1 dargestellten Anschlüsse beschrieben:
Klemmen Funktion Beschreibung
L-N-GND Speisung
Eingang 230Vac 50/60Hz (CP.BULL5 ARC)
Eingang 115Vac 50/60Hz (CP.BULL5 ARC 115V)
(1 Phase/2 Nulleiter/GND Erdung)
MOT-COM-MOT Motor Anschluss an den Motor: (MOT Betrieb/COM Gemein/MOT Betrieb)
N-BLINK LAMP
Ausgang Anschluss Blinkleuchte
CP.BULL5 ARC: 230 Vac 40W max.
CP.BULL5 ARC 115V: 115 Vac 40W max.
SWO SWO Eingang Endschalter ÖFFNEN (Kontakt N.C.)
SWC SWC Eingang Endschalter SCHLIESSEN (Kontakt N.C.)
PHOT
(SCHLIESSEN) PHOT
Eingang Anschluss Sicherheitsvorrichtungen, Kontakt N.C. (z.B. Fotozellen): Kann über den Dip-
Schalter DIP3 konfiguriert werden). Im Modus „Mann vorhanden“ übernimmt die Vorrichtung die
Steuerung SCHLIESSEN. In diesem Fall einen Schalter N.O. anschließen.
STOP STOP Eingang Taste STOP (Kontakt N.C.). Die Funktion “Schließen” oder “Halb Schließen” (Kontakt N.O.)
kann übernommen werden. Siehe Abschnitt “Erweiterte Programmierung”.
COM COM Gemein für alle Steuerungseingänge.
P.P. (ÖFFNEN) Schritt-
Schritt
Eingang Taste Schritt-Schritt (Kontakt N.O.). Die Funktion “ÖFFNEN” kann übernommen werden.
Siehe Abschnitt “Erweiterte Programmierung”.
Im Modus „Mann vorhanden“ übernimmt die Vorrichtung die Steuerung ÖFFNEN.
24 VAC 24Vac Ausgang Speisung Zubehör 24Vac/200mA max.
SCA SCA
Stromloser nicht isolierter Kontakt zum Anschluss der Meldeleuchte Tor offen. Offener Kontakt
bei geschlossenem Flügel, aussetzend während der Flügelbewegung, geschlossen bei offenem
Flügel.
ENC1 ENCODER Eingang Encoder-Anschluss (OPTIONAL). Siehe Paragraph 5.
SHIELD-ANT Antenne Anschluss Antenne Platine des eingebauten Funke mpfängers (SHIELD-Bildschirm/ANT-Signal).
Bemerkung:Die Zentrale verfügt über eineTaste „P2“ mit derselben Funktion der Taste Schritt-Schritt, die zur Steuerung derAutomation
während der Installation nützlich ist (nur mit DIP2:OFF).
2) ANSCHLÜSSE ÜBERPRÜFEN
1) Stromversorgung abtrennen.
2) Von Hand die Tür entsichern, auf halben Hub bringen und wieder blockieren.
3) Stromversorgung wieder herstellen.
4) Eine Schritt-Schritt-Steuerung durch die Taste P2 am Eingang P.P. oder an der Fernbedienung geben.
5) Die Tür muss sich öffnen. Falls dies nicht der Fall sein sollte,genügt es die Betriebsleiter (MOT/MOT) des Motors und der Endschalter
(SWO/SWC) bei ausgeschaltetem Motor zu vertauschen.
6) Mit den im Abschnitt “ÜBERNAHME VON LAUF UND VERLANGSAMUNG” beschriebenen Einstellungen fortfahren.
3) TRIMMER-FUNKTIONEN
3.1) TW - Falls das Encoder-Gerät installiert ist, ist die Funktion der Druckempfindlichkeitseinstellung zu übernehmen. Durch das
Drehen im Uhrzeigersinn wird die Empfindlichkeit erhöht. Falls kein Encoder-Gerät vorhanden ist, wird die maximale Dauer des Öff-
nungs- und Schließverfahrens reguliert. Muss um circa 4 sec. länger als die Zeit für den tatsächlichen Hub der Automatik eingestellt
werden. Die Zeit kann zwischen 3 sec. und maximal 180 sec. eingestellt werden. Wenn das Verfahren zur Übernahme von Lauf und
Verlangsamung abgeschlossen ist, hat die Trimmerposition keine Auswirkungen auf die Arbeitszeit.
3.2) TCA - Damit kann die Zeit des automatischen Schließvorgangs eingestellt werden. Die Zeit kann zwischen 3 sec. und maximal
180 sec. eingestellt werden.
Den Trimmer bis zum Anschlag im Uhrzeigersinn drehen. Die LED DL2 (grün) erlischt und TCA wird aktiviert.

15
4) DIP-SCHALTER-FUNKTION
DIP1 Programmierung DIP4 P.P. : Betriebsmodus
Nur zur Programmierung des Drehmoments, der Vorblink-Zeit
und der Geschwindigkeitsabnahme zu verwenden. DIP1 auf ON
schalten und:
- über die Taste P1 das Drehmoment einstellen
- über die Taste P2 das Vorblinken aktivieren/deaktivieren
- über den Eingang Schritt/Schritt oder die gespeicherte
Fernbedienung wird der Raum zur Geschwindigkeitsabnahme
geregelt. Siehe die entsprechenden Paragraphen. Nachdem die
Parameter eingerichtet worden sind, wieder auf OFF schalten.
Wählt die Betriebsweise der “Taste P.P.” und des Sende-
geräts.
Off: Betrieb: ÖFFNEN > STOP > SCHLIESSEN > STOP >
On: Betrieb: ÖFFNEN > SCHLIESSEN > ÖFFNEN
DIP2 Wohngemeinschaft DIP5 Schnelles Schließen
Aktiviert oder deaktiviert die Funktion Wohngemeinschaft.
Off: Funktion Wohngemeinschaft deaktiviert.
On: Funktion Wohngemeinschaft aktiviert.
Auf den Öffnungsvorgang haben weder der Schritt-Schritt-
Impuls noch der Impuls des Sendegeräts Einfluss.
Aktiviert oder deaktiviert den schnellen Schließvorgang.(nur
wenn TCA aktiv)
Off: Schnelles Schließen deaktiviert
On: Schnelles Schließen aktiviert. Das Einschalten der Foto-
zelle hat nach 3s das Schließen der Tür zur Folge.
DIP3 PHOT: Betriebsmodus DIP6 Programmierung
Wählt die Betriebsweise des Eingangs PHOT.
Off: Eingang beim Öffnen und Schließen aktiv
On: Eingang nur beim Schließen aktiv
Ausschließlich für die Programmierung der erweiterten
Funktionen oder bei TOTMANN-Steuerung verwenden.
5) ÜBERNAHME VON LAUF UND VERLANGSAMUNG
Um den Raum für die Geschwindigkeitsabnahme beim Öffnen und Schließen einzustellen, folgendermaßen vorgehen:
1) Das Tor schließen oder öffnen (vergewissern Sie sich, dass der Endschalter für das Schließen/Öffnen gedrückt worden ist)
2) Den DIP 1 auf ON schalten (DIP 2-3-4-5-6=OFF)
3) Eine Schritt-Schritt-Steuerung durch den Eingang Schritt-Schritt oder die Fernbedienung geben. Das Tor öffnet sich bei normaler
Geschwindigkeit.
4) Wenn das Tor den Punkt erreicht, an dem die Geschwindigkeit abnehmen soll, nochmals eine Schritt-Schritt-Steuerung geben.
Das Tor verlangsamt die Geschwindigkeit bis zur vollständigen Öffnung. Weitere Schritt-Schritt-Steuerungen werden danach
nicht mehr berücksichtigt.
5) Bei stillstehendem und vollständig geöffnetem Tor, eine Schritt-Schritt-Steuerung durch den Eingang Schritt-Schritt oder die
Fernbedienung geben. Das Tor schließt sich bei normaler Geschwindigkeit.
6) Wenn das Tor den Punkt erreicht, an dem die Geschwindigkeit abnehmen soll, nochmals eine Schritt-Schritt-Steuerung geben.
Das Tor verlangsamt die Geschwindigkeit bis es vollständig geschlossen ist. Weitere Schritt-Schritt-Steuerungen werden danach
nicht mehr berücksichtigt.
7) Den DIP1 wieder auf OFF schalten.
BEMERKUNGEN:
Falls das Tor beim Öffnen oder Schließen seine Geschwindigkeit nicht verlangsamen soll, lassen Sie die Bewegung durchführen
ohne die Schritt-Schritt-Steuerung zu geben. Das Einschalten der Sicherheiten STOPP und PHOT blockieren die Regelungsproze-
dur. Wiederholen Sie den Vorgang von Anfang an. Während dieser Phase ist der Quetschsicherheitssensor deaktiviert. Wenn das
Encoder-Gerät installiert ist, wird der Anti-Drucksensor während der Übernahmephase deaktiviert.
6) ÜBERNAHME VON LAUF UND VERLANGSAMUNG ZURÜCKSETZEN
Um das Gerät ohne Verzögerungen in Betrieb zu setzen (Laufzeit mittels Trimmer TW einstellbar), ist folgendermaßen vorzugehen:
1) Das Tor ist, weit entfernt vom Grenzschalter, in eine Zwischenposition zu versetzen
2) Den DIP 1 auf AN stellen (DIP 2-3-4-5-6=OFF)
3) Einen Befehl Schritt/Schritt mittels PP-Eingang oder Fernbedienung abgeben
4) Die LED-Lampen blinken zur Bestätigung des eingeleiteten Rücksetzens
5) Sobald die LED-Lampen erlischen, ist der DIP 1 auf AUS zu stellen.
Die Daten hinsichtlich des Laufes und der Verlangsamung sind vom Gerät gelöscht worden.
7) BETRIEB IM MODUS „MANN VORHANDEN“
Wenn alle DIP-Schalter auf ON geschaltet sind, schaltet die Zentrale auf den Modus „Mann vorhanden“.
Der Eingang PHOT übernimmt in diesem Fall die Funktion des Schalters SCHLIESSEN (Schalter mit Kontakt N.O. anschließen).
Der Eingang PP übernimmt in diesem Fall die Funktion ÖFFNEN (Schalter mit Kontakt N.O. anschließen).

16
Die Tasten ÖFFNEN/SCHLIESSEN müssen während der gesamten Dauer der Steuerung gedrückt bleiben. Das Öffnen des Eingangs
STOP hält den Motor an. Das gleichzeitige Drücken der Tasten ÖFFNEN/SCHLIESSEN hält den Motor an.
8) DREHMOMENT EINSTELLEN (DIP1: ON)
Nachdem der Dip-Schalter DIP1 auf ON geschaltet worden ist, wird das verwendete Drehmoment durch die Anzahl der Blinksignale
(1 bis 4) der grünen LED DL2 (mit jeweils einer Pause von 3s) angezeigt. Das maximale Drehmoment wird durch die fest leuchtende
grüne LED DL2 angezeigt. Um das Drehmoment zu erhöhen, die Taste P1 drücken; die LED DL2 wechselt die Anzahl der Blinksignale,
um das gewählte Drehmoment anzuzeigen. Nachdem das gewünschte Drehmoment angezeigt worden ist, DIP1 auf OFF schalten,
um die Lernfunktion zu aktivieren.
Falls erforderlich, lässt sich die Funktionalität der PP und STOP ändern, um Eingänge OFFEN/GESCHLOSSEN oder alternativ OFFEN/
HALB GESCHLOSSEN zu erhalten. Dafür ist folgendermaßen vorzugehen:
1) alle DIP auf AUS schalten
2) DIP1 auf AN stellen
3) zur Änderung des offenen Eingangs Schritt/Schritt ist DIP2 auf AN zu stellen
4) zur Änderung des geschlossenen Eingangs STOP ist DIP3 auf AN und DIP4 auf AUS zu stellen
5) zur Änderung des Eingangs STOP in Gangschaltung ist DIP4 auf AN und DIP3 auf AUS zu stellen
6) Den DIP 6 auf AN stellen Die LED-Lampen blinken abwechselnd für ca. 10 Sek.
7) nach 10 Sek. blinken die LED-Lampen gleichzeitig und die neue Funktionalität der Eingänge wird gespeichert
8) Die DIP auf AUS stellen
9) Die DIP in die gewünschten Einstellungen bringen
10) VORBLINKEN AKTIVIEREN/DEAKTIVIEREN (DIP1: ON)
Nachdem der Dip-Schalter DIP1 auf ON geschaltet worden ist, meldet die rote LED DL1 die Aktivierung oder Deaktivierung des
Vorblinkens. Über die Taste P2 kann das Vorblinken aktiviert oder deaktiviert werden. LED DL1 ein: Das Vorblinken ist aktiv, die
Blinkleuchte schaltet circa 3 Sekunden vor dem Einschalten des Motors ein.LED DL1 aus: Vorblinken deaktiviert.
11) FUNKMODUL UND SELBSTLERNFUNKTION (DIP1:OFF)
Der Funkempfänger in diesem Produkt ist mit den neuen ARC-Sendern (Advanced Rolling Code) AUSSCHLIESSLICH kompatibel, die
dank der Kodierung mit128 Bit einen höheren Kopierschutz gewährleisten.
Um eine Fernbedienung verwenden zu können, muss sie zuerst erlernt werden; die Speicherungsprozedur ist nachstehend
beschrieben; die Vorrichtung kann bis zu 64 verschiedene Codes speichern. Um die Zentrale auf die Lernfunktion zu schalten,
Taste P1 drücken. Die rote LED DL1 blinkt 1 Mal pro Sekunde bis die Taste gedrückt wird, die der Funktion Schritt-Schritt
zugeordnet werden soll. Nachdem die Taste gespeichert worden ist, wird die Programmierung beendet. Um die Zentrale auf die
Fußgängerfunktion zu schalten, die Taste P1 2 Mal drücken. Die rote LED DL1 blinkt 2 Mal pro Sekunde und die Funktion ist
abgerufen (die Fußgängerfunktion steuert einen Öffnungsvorgang, der 7s dauert). Nachdem die Taste gespeichert worden ist, wird
die Programmierung beendet. Falls man die Programmierung beenden möchte, ohne eine Funkbedienung zu speichern, die Taste
P1 drücken bis die rote LED DL1 wieder im Modus „Strom vorhanden“ blinkt (siehe LED-Diagnostik auf Seite 7).
11.1) RESET DES EMPFÄNGERS
Um den Speicher des Empfängers zurückzusetzen, die Tasten P1 und P2 circa 10 Sekunden lang gleichzeitig drücken und gedrückt
halten (dabei blinken beide LEDS DL1 und DL2 schnell).
Nach 10 Sekunden leuchten die beiden LEDS fest auf. Danach die Tasten loslassen. Der Speicher ist zurückgesetzt, wenn die LEDS
wieder auf die ursprüngliche Konfiguration zurückgeschaltet worden sind.
BEMERKUNG: Die Sendegeräte werden in einem Speicher EPROM (U2) gespeichert, der aus der Zentrale genommen und in eine neue
Zentrale CP.BULL5 ARC eingebaut werden kann, wenn diese ausgewechselt werden soll.
Aus Sicherheitsgründen können keine Sendegeräte beim Öffnen/Schließen des Motors gespeichert werden.
12) LERNFUNKTION VON FERN DER SENDEGERÄTE
Wenn man über ein Sendegerät verfügt, das schon im Empfänger gespeichert ist, kann man die Lernfunktion über Funk von Fern
vornehmen (ohne auf die Zentrale verwenden zu müssen). Folgendermaßen vorgehen:
WICHTIG: Der Vorgang muss vorgenommen werden, wenn die Torflügel beim Öffnen auf die TCA Pause geschaltet sind.
1) Versteckte Taste des schon gespeicherten Sendegeräts drücken.
2) nnerhalb von 5s die Taste des schon gespeicherten Sendegeräts drücken, die dem Kanal entspricht, der dem neuen Sendegerät
zugeteilt werden soll. Die Leuchte beginnt zu blinken.
3) Innerhalb von 10s , die versteckte Taste des neuen Sendegeräts drücken.
4) Innerhalb von 5s die Taste des neuen Sendegeräts drücken, die dem Kanal entspricht, der unter Punkt 2 gewählt wurde. Die
Leuchte beginnt zu blinken.
5) Der Empfänger speichert das neue Sendegerät und beendet sofort die Programmierung.

17
13) LED-DIAGNOSTIK
Die rote LED DL1 meldet die Aktivierung der Eingänge
folgendermaßen:
Die grüne LED DL2 meldet folgendermaßen die
Bewegungsrichtung des Motors und den Status des Tors:
Vorhandene
Stromvers.
langsames Blinken ÖFFNEN Blinkt 1 Mal mit einer Pause von 1 Sek.
STOP Leuchtet fest SCHLIESSEN Blinkt 2 Mal mit einer Pause von 1 Sek.
PHOT Blinkt schnell Offenes Tor ohne
TCA
Leuchtet fest
SWO Blinkt 1 Mal mit einer Pause von 2 Sek. Offenes Tor mit
TCA
Blinkt schnell
SWC Blinkt 2 Mal mit einer Pause von 2 Sek. Geschlossenes Tor Led aus
14) SICHERUNGEN
CP.BULL5 ARC 230Vac: F2 = T100mA F3= F6,3A
CP.BULL5 ARC 115Vac: F2 = T200mA F3 = F10A

18
FRA AVERTISSEMENTS
INFORMATIONS GÉNÉRALES
Il est interdit d’utiliser ce produit pour l’utilisation du produit ou avec des finalités ou modalités non prévues par le présent
manuel. Toute autre utilisation pourrait compromettre l’intégrité du produit et présenter un danger pour les personnes
ou pour les biens.
Le fabricant décline toute responsabilité en cas d’utilisation impropre ou d’inobservation de la bonne technique dans la
construction des portails, ainsi que de toute déformation qui pourrait avoir lieu lors de son utilisation.
Toujours conserver la notice pour toute autre consultation future.
GUIDE INSTALLATEUR
Ce manuel est destiné exclusivement au personnel qualifié pour l’installation et la maintenance des ouvertures automatiques.
Le montage doit être accompli par du personnel qualifié (monteur professionnel, conformément à EN12635),dans le respect
del la bonne technique et des normes en vigueur. Vérifier que la structure du portail est adaptée pour être équipée d’un
automatisme. L’installateur doit fournir toutes les informations relatives au fonctionnement automatique, au déverrouillage
d’urgence de l’automatisme, et livrer à l’utilisateur les modes d’emploi.
AVERTISSEMENTS GÉNÉRAUX
Tenir à l’écart des enfants tous les matériaux d’emballage car ils représentent une source potentielle de danger.
Ne pas disperser les matériaux d’emballage dans l’environnement, mais trier selon les différentes typologies (i.e. carton,
polystyrène) et les traiter selon les normes locales.
Ne pas laisser les enfants jouer avec les dispositifs de commande du produit. Conserver les télécommandes hors de la
portée des enfants.
Ce produit n’est pas prévu pour être utilisé par des personnes (dont les enfants) dont les capacités physiques, sensorielles
ou mentales sont limitées, ou ne disposant pas des connaissances adéquates, sauf sous surveillance ou après avoir
reçu les consignes des personnes responsables de leur sécurité. Appliquer tous les dispositifs de sécurité (photocellules,
linteaux sensibles, etc..) nécessaires pour protéger la zone contre les risques de choc, d’écrasement, d’entraînement
ou de cisaillement.
enir compte des réglements et des directives en vigueur, des critéres de bonne technique, de l’utilisation, de l’environ-
nement de l’installation, de la logique de functionnement du système et des forces développées par l’automatisation.
L’installation doit être équipée de dispositifs de sécurité et de commandes conformes aux normes EN 12978 et EN 12453.
Utiliser exclusivement des accessoires et des pièces de rechange originales, l’utilisation de composants non originaux
comporte l’exclusion du produit des couvertures prévues par le certificat de Garantie.
Toutes la parties, mécaniques et électriques, qui composent l'automation doivent correspondre aux conditions requises
des réglementations en vigueur et reporter le marquage CE.
SÉCURITÉ ÉLECTRIQUE
Prévoir sur le réseau de l’alimentation un interrupteur / sectionneur omnipolaire avec distance d’ouverture des contacts
égale ou supérieure à 3 mm. Vérifier la présence en amont de l’installation électrique d’un interrupteur différentiel et d’une
protection de surcourant adéquats.
Certains types d’installation requièrent le branchement du vantail à une installation de mise à terre satisfaisant les normes
de sécurité e vigueur.
Avant toute intervention, d’installation,réparation et maintien, couper l’alimentation avant d’accéder aux parties électriques.
Déconnecter également les batteries tempon éventuellement présentes. L’installation électrique et la logique de fonction-
nement doivent être conformes aux normes en vigueur.
Les conducteurs alimentés à des tensions différentes doivent être séparés physiquement ou bien, ils doivent être isolés en
manière appropriée avec une gaine supplémentaire d’au moins 1 mm.
Les conducteurs doivent être assurés par une fixation supplémentaire à proximité des bornes. Pendant toute intervention
d’installation, maintenance et réparation,couper l’alimentation avant de procéder à toucher les parties électriques. Recontrôler
toutes les connexions faites avant d’alimenter la logique de commande. Les entrées N.F. non utilisées doivent être shuntées
DÉMOLITION
Comme indiqué par le symbole à coté, il est interdit de jeter ce produit dans les ordures ménagères car les parties qui
le composent pourraient nuire à l’environnent et à la santé des hommes, si traitées et évacuées de manière incorrecte.
L’appareillage devra, par conséquent,être livré dans les spéciaux point de collecte et de triage,ou bien remis au revendeur
lorsqu’on décide d’acheter un appareillage équivalent. L’évacuation abusive du produit de la part de l’usager comporte
l’application de sanctions administratives comme prévu par les normes en vigueur.
Les descriptions et les illustrations présentées dans ce manuel ne sont pas contraignantes. En laissant inaltérées les caractéristiques essentielles du
produit, le fabricant se réserve le droit d’apporter toute modification à caractère technique, de construction ou commerciale sans s’engager à revoir
la cette publication.

19
1) CENTRALE DE COMMANDE CP.BULL5 ARC
ÉMETTEURS ARC
IMPORTANT, LIRE AVEC ATTENTION:
Le récepteur radio présent dans ce produit n’est compatible qu’avec les émetteurs ARC (Advanced Rolling Code) lesquels, grâce à
la codification à 128 bits garantissent une sécurité autocopiante supérieure.
1.1) CONDUCTEURS ÉLÉCTRIQUES
Dans le tableau suivant il y a les conducteurs électriques représentés dans la Fig. 1
Bornes Fonctions Description
L-N-GND Alimentation
Entrée 230Vac 50/60Hz (CP.BULL5 ARC)
Entrée 115Vac 50/60Hz (CP.BULL5 ARC 115V)
(1-Phase/2-Neutre/GND-Branchement de terre)
MOT-COM-
MOT Moteur Branchement au moteur: (MOT-marche/COM-Commune/MOT-marche)
N-BLINK LAMP
Sortie branchement Clignotant
CP.BULL5 ARC: 230 Vac 40W max.
CP.BULL5 ARC 115V: 115 Vac 40W max.
SWO SWO Entrée fin de course OUVERTURE (contact N.F.)
SWC SWC Entrée fin de course FERMETURE (contact N.F.)
PHOT (FER-
ME) PHOT
Entrée branchement dispositifs de sécurité contact N.F. (i.e. cellules photo électriques): compor-
tement configurable à l’aide de DIP3). En modalité “Homme Mort” revêt la fonction commande
FERME, dans ce cas brancher une touche fonction N.O.
STOP STOP
Entrée touche fonction STOP (contact N.F.). Peut actionner la fonction FERMER ou PIETON (contact NO)
voir la section «Programmation avancée».
COM COM Commune pour toutes les entrées de commande.
P.P. (OUVRE) Pas-à-Pas
Entrée bouton pressoir Pas-à-Pas (contact N.O.).
Peut actionner la fonction OUVRIR voir la section «Programmation avancée».
En modalité “Homme Mort” revêt la fonction commande OUVRE.
24 VAC 24Vac Sortie alimentation accessoires 24Vac/200mA max.
SCA SCA
Contact libre de tension non isolé pour branchement clignotant portail ouvert.
Contact ouvert à vantail fermé, intermittent durant le mouvement du vantail, fermé, à vantail ouvert.
ENC1 ENCODEUR Entrée branchement encodeur.Voire paragraphe 5.
SHIELD-ANT Antenne Branchement antenne carte radio réceptrice intégrée (SHIELD-écran/ANT-signal).
Note: La centrale dispose d’une touche “P2” avec la même fonction de la touche Pas-à-Pas, utile pour commander l’automation en
phase d’installation (seulement avec DIP2:OFF).
2) VERIFICATION DES BRANCHEMENTS
1) Couper l’alimentation.
2) Débloquer manuellement la porte, la placer à environ mi- course et la bloquer à nouveau.
3) Restaurer le courant.
4) Donner une commande de pas-à-pas en appuyant sur la touche P2, l’entrée P.P. ou la radiocommande.
5) La porte doit avancer en ouverture. Au cas contraire, lorsque le moteur est arrêté, il suffit d’inverser les fils de marche (MOT/MOT)
du moteur et des fins de course (SWO/SWC).
6)
Procéder aux ajustements décrits dans la section «AUTO-APPRENTISSAGE DE COURSE ET RALENTISSEMENT.
3) FONCTION DES TRIMMERS
3.1) TW - Si le dispositif Encoder est installé, il est possible de régler la sensibilité anti-écrasement.
Tourner dans le sens horaire pour augmenter la sensibilité. En absence du dispositif Encoder, celui-ci ajuste la durée maximale de la manœuvre
d’ouverture et de fermeture. Il doit être affiché environ 4s en plus par rapport au temps de course effective de l’automatisme. Le réglage
varie d’un minimum de 3s à un maximum de 180s. Si la procédure d’auto-apprentissage course et ralentissement est effectuée, la position
du trimmer n’influence pas le temps d’exécution.
3.2)
TCA - Permet de régler le temps de fermeture automatique. Le réglage varie d’un minimum de 3s à un maximum de 180s.
Avec le trimmer TCA complètement tourné dans le sens des aiguilles d’une montre, la LED DL2 (vert) s’éteint, le TCA est désactivé.

20
4) FONCTIONS DIP-SWITCH
DIP1 Programmation DIP4 P.P. : modalité de fonctionnement
A’ utiliser exclusivement pour la programmation du
couple ainsi que du temps de pré-clignotement et du
ralentissement.
Une fois le DIP1 sur ON:
- avec la touche P1 on règle le couple.
- avec la touche P2 on active/désactive le pré-clignotement.
-
avec l’entrée Pas-à-Pas ou une télécommande mémorisée
on règle l’espace de ralentissement. Voir les paragraphes
respectifs.
Une fois les paramètres saisis, ramener sur OFF.
Sélectionne la modalité de fonctionnement de la ”Touche P.P.”
et du transmetteur.
Off: Fonctionnement: OUVRE > STOP > FERME > STOP >
On: Fonctionnement: OUVRE > FERME > OUVRE >
DIP2 Fonction Copropriété DIP5 Fermeture rapide
Valide ou invalide la fonction copropriété.
Off: Fonction copropriété invalidée.
On: Fonction copropriété validée.
L’impulsion P.P. ou du transmetteur n’a aucun effet durant la
phase d’ouverture.
Active ou désactive la fermeture rapide (seulement avec TCA
validé)
Off: Fermeture rapide invalidée
On: Fermeture rapide validée. L’intervention de la cellule pho-
toélectrique entraîne après 3s environ, la fermeture de la porte.
DIP3 PHOT: modalité de fonctionnement DIP6 Programmation
Sélectionne la modalité de fonctionnement de l’entrée PHOT
Off: Entrée active soit en phase d’ouverture qu’en phase de
fermeture
On: Entrée active uniquement en phase de fermeture
On utilise exclusivement pour la programmation des fonctions
avancées ou en cas de fonctionnement avec HOMME MORT.
5) AUTO-APPRENTISSAGE DE COURSE ET RALENTISSEMENT
Pour régler les espaces de ralentissement en ouverture et en fermeture, procéder comme suit:
1) fermer ou ouvrir le portail (en s’assurant que le fin de course de fermeture/ouverture est activé).
2) ramener le DIP 1 sur ON (DIP 2-3-4-5-6=OFF)
3) donner une commande PP (à l’aide de l’entrée Pas-à-Pas ou de la télécommande mémorisée). Le portail commence à bouger en
ouverture à vitesse normale.
4)
lorsque le portail arrive au point de ralentissement désiré donner une ultérieure commande PP, le portail va ralentir pour continuer sa
course jusqu’à ce qu’il soit complètement ouvert. Toute commande PP qui suit sera ignorée.
5) avec le portail arrêté donner une commande PP (avec l’entrée Pas-à-Pas ou une télécommande mémorisée).Le portail commence
à bouger à vitesse normale.
6)
lorsque le portail arrive au point de ralentissement désiré donner la commande PP, le portail commence à ralentir et il va continuer sa
course jusqu’à ce qu’il soit complètement fermé. Toute commande PP qui suit sera ignorée.
5) avec le portail arrêté donner une commande PP (à l’aide de l’entrée Pas-à-Pas ou de la télécommande mémorisée). Le portail
commence à bouger en fermeture à vitesse normale
7) ramener le dip1 sur OFF
NOTES:
Si on ne veut pas régler l’espace de ralentissement en ouverture ou en fermeture, laisser le portail exécuter une manœuvre d’ouverture /
fermeture complète sans donner une commande PP de début de ralentissement. L’intervention des systèmes de sécurité comme STOP et
PHOT bloque la procédure de réglage. Répétez la procédure depuis le début.Durant cette phase le capteur anti-écrasement est désactivé.
Si le dispositif Encoder est installé, le capteur anti-écrasement est désactivé durant la phase d’auto-apprentissage.
6) REINITIALISER LE MODE D’AUTO-APPRENTISSAGE DE COURSE ET RALENTISSEMENT
Pour reporter la centrale au mode sans ralentissements (temps d’exécution programmé par le trimmer TW), procédez comme suit:
1) Mettre le portail dans une position intermédiaire, loin de la fin de course
2) Mettre le DIP 1 sur ON (DIP 2-3-4-5-6=OFF)
3) Donner une commande de pas à pas en appuyant sur l’entrée PP de la télécommande
4) Les LED clignotent pour confirmer le début de la réinitialisation
5) Lorsque les voyants cessent de clignoter, remettre le DIP 1 sur OFF
La centrale a supprimé les données concernant la course et les ralentissements.
7) MODALITE’ HOMME MORT
En ramenant tous les DIPS sur ON la centrale passe en modalité HOMME MORT. L’entrée PHOT revêt la fonction de la Touche FERME
Table of contents
Languages:
Other Beninca Controllers manuals
Popular Controllers manuals by other brands

Bosch
Bosch Rexroth IndraDrive HMS02 instruction manual

PPI
PPI neuro 105 user manual

ABB STOTZ-KONTAKT
ABB STOTZ-KONTAKT MS116 installation instructions

AP
AP TC5-1N5FAB user manual

Tidal Engineering Corporation
Tidal Engineering Corporation Synergy Controller Application note

Helios
Helios EDR Installation and operation